
How to Make a Photo Collage on Canvas: A Friendly Step‑by‑Step Guide
Ever looked at a pile of old snapshots and thought, “There’s got to be a prettier way to keep these moments together?” You’re not alone—most of us have a drawer full of photos that never see the light of day.
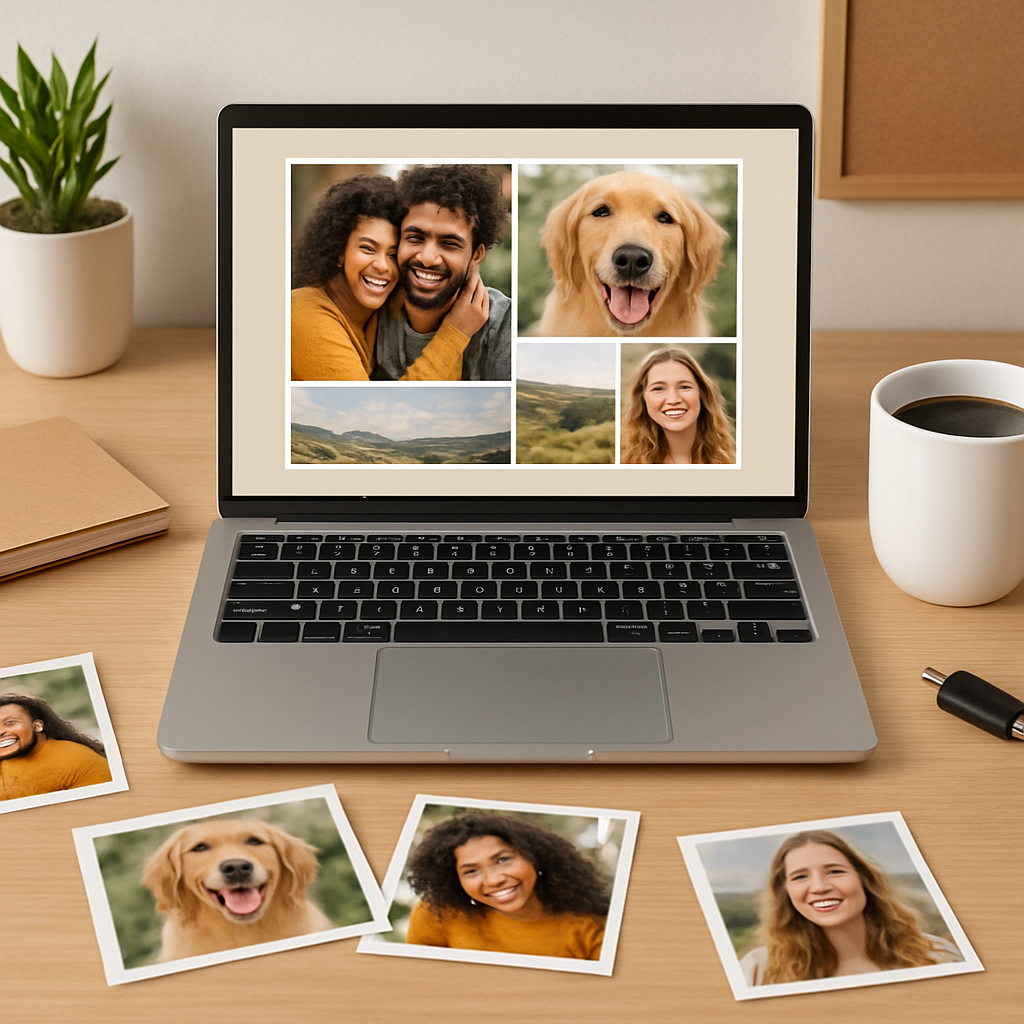
What if you could turn those cherished memories into a single piece of art that hangs on your wall and sparks conversations? That’s exactly what learning how to make a photo collage on canvas can do. Imagine a vibrant canvas that blends birthday smiles, vacation sunsets, and your kids’ goofy faces into one harmonious story.
First things first: the quality of the images matters. Even the most stunning layout will look flat if the photos are blurry or poorly lit. A quick way to boost your source material is to sharpen your phone‑camera skills. A short smartphone photography course can teach you tricks for better lighting, composition, and focus, so every picture you select looks crisp on the canvas.
Next, decide on a layout. Whether you prefer a classic grid, a free‑form collage, or a heart shape, most online design tools offer templates you can drag and drop. Play with the size of each photo—mix close‑ups with wide shots—to create visual rhythm. If you’re feeling adventurous, try a thematic flow: start with childhood images on the left and progress to recent family gatherings on the right.
When you’ve settled on a design, it’s time to print. Our print‑on‑demand service at heartful.gifts takes your digital file and reproduces it on premium canvas that’s stretched over a sturdy frame. The result is a museum‑quality finish that resists fading. For a detailed walkthrough of the whole process, see our guide on Create a Heart Photo Collage Canvas: Step‑by‑Step Guide for a Memorable Keepsake. It walks you through uploading, selecting dimensions, and even choosing the perfect hanging hardware.
Here’s a quick checklist to keep you on track:
- Gather 8‑12 high‑resolution photos (300 dpi is ideal).
- Edit for brightness, contrast, and cropping.
- Choose a layout that matches the space you’ll hang the canvas in.
- Export the design as a high‑quality PDF or PNG.
- Upload to the canvas printer, select size, and add any framing options.
- Order and wait for the excitement of unboxing your custom collage.
And that’s it—your living room, hallway, or office now sports a personalized masterpiece that tells your story at a glance. Ready to start? Grab your favorite photos, give your phone a quick photography refresher, and let your creativity flow onto canvas.
TL;DR
Learn how to make a photo collage on canvas in minutes, turning your favorite snapshots into a vibrant wall‑art piece that tells your family’s story.
Follow our step‑by‑step checklist, pick the perfect layout, and order a museum‑quality canvas from heartful.gifts to brighten any room instantly for you and loved ones.
Step 1: Gather Photos and Materials
Alright, before we dive into the fun part of arranging everything on canvas, we need a solid foundation—your photos and the tools that will bring them to life. Think of it like prepping ingredients before you start cooking; without the right pieces, the dish (or collage) just won’t taste right.
Pick the photos that speak to you
First, pull out the images that make you smile, laugh, or even tear up a little. You don’t need a hundred; eight to twelve high‑resolution shots are usually perfect. Aim for at least 300 dpi so they stay crisp when blown up on a large canvas. If some pictures look a bit dull, give them a quick boost in brightness or contrast—most phone editors can handle that in a snap.
Pro tip: mix close‑ups with wide‑angle shots. A baby’s tiny grin next to a sweeping beach sunrise adds visual rhythm, just like a good playlist balances upbeat tracks with slower ones.
Do you ever wonder where to find fresh inspiration? I like scrolling through Midnight Scriber’s storytelling blog for quirky photo ideas. Their features on everyday moments reminded me to include that goofy picture of the family dog chasing a ball—yes, that one that always ends up blurry.
Gather the physical supplies
Now that you have your digital assets, it’s time to line up the tangible stuff. Here’s a quick checklist:
- Computer or tablet with a decent screen (color‑accurate if possible).
- Photo‑editing software or an online collage maker.
- External hard drive or cloud folder to back up your chosen images.
- USB stick or SD card (handy for transferring to the printing service).
- Optional: a clean, flat workspace where you can lay out prints before uploading.
And don’t forget a good internet connection—uploading a high‑resolution PDF can be a pain on a shaky Wi‑Fi. If you’re working from home, a wired Ethernet cable is a lifesaver.
While you’re sorting, I like to keep a pet‑friendly vibe going. My sister swears by Pet Cloud’s advice hub for keeping furry friends out of the workspace, so no accidental paw prints on your design files.
Organize your files like a pro
Create a folder named something like “Canvas Collage – March 2025”. Inside, make subfolders: “Raw Photos”, “Edited”, and “Final Export”. This way you can always backtrack if a tweak goes sideways. It also speeds up the upload process when you’re ready to send the file to heartful.gifts.
Once everything’s tidy, export a master file as a high‑quality PDF or PNG. Keep the dimensions at the exact size you plan to order—most canvases are offered in standard sizes like 30×40 cm or 50×70 cm. Double‑check that the resolution stays at 300 dpi after export; a quick zoom‑in will tell you if any pixelation sneaked in.
So, what’s next? After you’ve gathered and prepped, you’re ready to jump into the layout stage, where the magic truly begins.
Need a visual refresher? Watch this short walkthrough that walks you through selecting, arranging, and exporting your collage files.
Take a moment to pause the video and compare what you see on screen with the screenshots of your own project. Notice how the presenter highlights the importance of leaving a little white space around the edges? That “breathing room” keeps your canvas from feeling cramped.
When the video ends, you should feel confident that every image is ready, every file is backed up, and your material list is complete. That’s the foundation for a stunning canvas that’ll make guests say, “Wow, where did you get that?” without you having to explain the whole process.
Remember, the more intentional you are now, the smoother the rest of the project will go. Let’s keep the momentum and move on to designing the layout in the next step.
Step 2: Choose Layout and Arrange Designs
Now that you’ve gathered the perfect batch of photos, it’s time to give them a home on the canvas. Think of this as setting the table for a dinner party—you want everything to flow, but you also want a few surprising seats that make people smile.
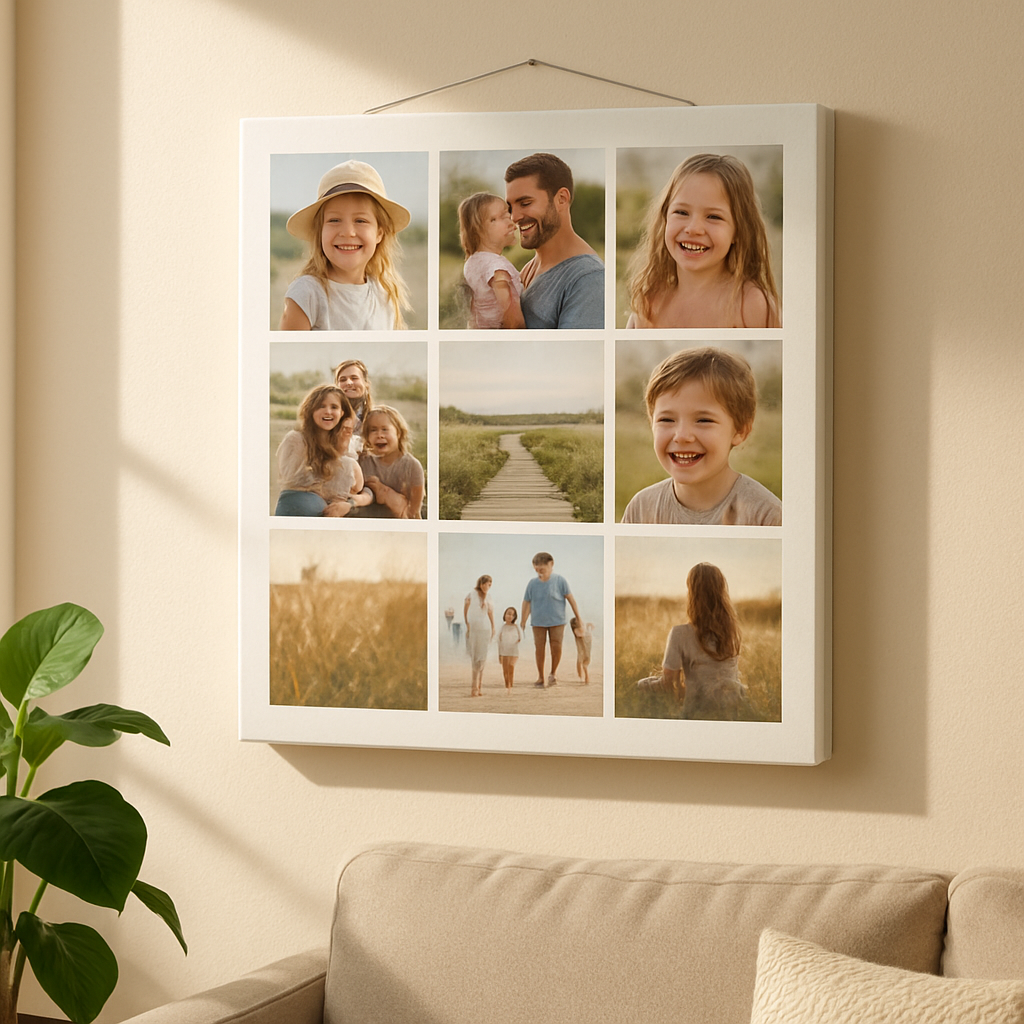
First, ask yourself: what story am I trying to tell? A family vacation? A year‑in‑review? Your answer will steer the shape of the layout. If you’re going for a chronological tale, a left‑to‑right grid works like a timeline. For something more playful, a free‑form canvas lets you scatter images like memories drifting on a wall.
Pick a template that matches your vibe
Most online design tools ship with dozens of ready‑made templates—from tidy grids to whimsical heart shapes. The SCRL app’s hand‑picked collage templates are especially handy because they’re organized by occasion and style, so you can skip the endless scrolling and jump straight into a layout that feels right.
If you’re feeling adventurous, start with a “freeform canvas” option. Zoom in, drag a photo, then zoom out to see the whole picture. This back‑and‑forth dance helps you spot gaps before they become awkward white space.
Mix sizes and orientations for visual rhythm
Don’t force every picture into the same square. Pair a wide‑angle beach shot with a tight‑crop of a laughing toddler. The contrast creates a beat that guides the eye across the canvas. A good rule of thumb: pick one or two anchor photos—those that are the most emotionally charged or visually striking—and let the rest orbit around them.
Pro tip: if a portrait‑oriented photo feels lost in a sea of landscape shots, rotate the whole layout 90° and see if a vertical column feels more natural. Small adjustments like this can turn a flat collage into a dynamic composition.
Play with spacing and alignment
Even spacing is the secret sauce of a polished look. Most tools have an “auto‑align” or “snap to grid” feature—use it, but don’t be afraid to nudge a photo slightly off‑center for a handcrafted feel. Think of it like arranging books on a shelf: you want order, but a little tilt shows personality.
Before you lock the layout, step back and squint. If any area looks crowded, shrink one of the images or swap it for a simpler shot. Remember, less is often more on a canvas that will sit on a wall for years.
Check colors and mood
Take a quick glance at the overall color palette. Are the warm sunset tones clashing with cool winter blues? A quick adjustment—like adding a subtle filter to a handful of images—can unify the collage without making it look over‑edited.
The Mixbook guide suggests using one or two fonts and a consistent color scheme for any text or background elements; the same principle applies to your photos. Harmonious hues keep the eye moving smoothly across the piece.
Once you’ve settled on a layout, hit the preview button. Most platforms let you see a full‑size mockup of the canvas. This is your last chance to spot a mis‑aligned corner or a photo that looks too dark once it’s stretched.
And now, a quick visual break—here’s a short video that walks you through swapping templates and fine‑tuning spacing in a popular design tool:
Take a minute to watch, then return here to finalize your arrangement. When the layout feels just right—balanced, colorful, and full of personal moments—you’re ready to export the file.
Exporting? Choose a high‑resolution PDF or PNG (300 dpi is the sweet spot). Save it in the same folder you created in Step 1, naming it something like “Canvas_Design_Final”. This keeps everything tidy for the upload step later.
Final checklist before you move on:
- One or two anchor photos highlighted?
- Mixed orientations and sizes for rhythm?
- Even spacing, no crowded corners?
- Color palette feels cohesive?
- High‑resolution export saved?
If you can answer “yes” to all of those, congratulations—you’ve just nailed the layout phase. The next step will be uploading the design and picking the perfect canvas size, but that’s a story for the next section.
Step 3: Print and Prepare Images
Now that your layout is looking good, it’s time to turn those digital files into a physical canvas. This part feels a little like waiting for a birthday cake to bake – the anticipation is half the fun.
Choose the right file settings
First, double‑check that your export is truly high‑resolution. A 300 dpi PDF or PNG is the industry sweet spot; anything lower will look soft once it’s stretched.
Make sure the color mode is set to CMYK if the print shop asks for it – most print‑on‑demand services, including heartful.gifts, handle RGB just fine, but CMYK removes any surprise shifts in hue.
Pro tip: add a 3‑5 mm bleed around the edges. That tiny margin lets the printer trim the canvas without cutting off a photo you’ve carefully placed.
Pick a paper or canvas type
If you’re ordering a canvas, you’ll usually get a polyester‑coated, museum‑grade material. It’s lightweight, won’t sag, and reproduces colors with a nice matte finish.
Some folks love a glossy photo paper for a more “photo‑album” feel, but on a wall that catches sunlight a matte canvas tends to stay looking fresh longer.
Run a quick test print
Before you commit to a 30×20 inch masterpiece, print a small 8×10 proof on regular paper. Hold it up next to your screen and see if any colors look off or if any text is too small.
Spotting a problem now saves you from a costly re‑order later. If the proof looks good, you’re ready to hit “order.”
Upload to the printer
Log into heartful.gifts, navigate to the canvas creator, and drag your file into the upload box. The platform will automatically preview the canvas on a virtual wall – take a moment to rotate it, zoom in, and make sure nothing’s shifted.
When you pick a size, remember the space you measured earlier. A 30×20 canvas looks amazing over a sofa, but a 12×12 square might be cozier above a bedside table.
Double‑check the final checklist
- File is 300 dpi PDF or PNG.
- Bleed added and colors set to RGB (or CMYK if required).
- Proof printed and approved.
- Canvas size matches your wall.
- Shipping address entered correctly.
If you can answer “yes” to each, you’ve covered the technical side.
Prepare the canvas for hanging
When the canvas arrives, you’ll notice a sturdy wooden frame already stretched with the print. Most heartful.gifts canvases come with a pre‑drilled keyhole hanger on the back.
Grab a level, a pencil, and a couple of picture‑hook screws. Mark the spot where you want the center of the canvas, then hammer in the hook. A quick level check ensures your masterpiece hangs straight – no crooked memories.
For extra security, especially on a busy hallway, add a small “gallery wire” across the back. It distributes weight and makes future swaps a breeze.
Final touch – protect and enjoy
Consider a clear, UV‑protective coating if your canvas will live in a sun‑filled room. It’s a tiny extra cost that can keep colors vibrant for years.
Now step back, take a breath, and admire the collage you just brought to life. The best part? Every time you walk past it, you’ll be reminded of the moments you chose to celebrate.
Ready to share your creation with friends or gift it to a loved one? A printed canvas is a perfect, personal present that feels both thoughtful and high‑end.
Step 4: Assemble Collage on Canvas
Okay, the design is saved, the file is high‑resolution, and the canvas box is finally in your hands. Now the fun part begins: actually putting those memories together on the stretched canvas. It feels a bit like a puzzle, except you get to decide which piece goes where.
Gather your tools and set a workspace
First, clear a flat surface near a bright lamp. You’ll need a clean cloth, a soft‑rubber roller (or a clean paint roller), and a pair of scissors for any last‑minute trimming. If your canvas came with a pre‑drilled keyhole hanger, keep the screw driver handy – you’ll need it later when you hang the finished piece.
Do you ever notice how a little extra light makes colors pop? Position a desk lamp so it shines straight onto the canvas; it helps you spot any bubbles or misalignments before they set.
Lay out the printed sheets (if you’re using a multi‑panel kit)
Some of us order a Collagewall‑style kit that prints each photo on its own mini‑sheet. Those kits come with a life‑size hanging guide and push‑pins, which make alignment a breeze. Mpix’s Collagewall kits even include step‑by‑step instructions so you don’t have to guess where the next picture belongs.
Spread the sheets on the floor exactly as they appear in the preview. If something feels cramped, feel free to swap a portrait for a landscape – the goal is a balanced rhythm, not a rigid grid.
Apply the adhesive (or use the built‑in backing)
Most heartful.gifts canvases arrive with a thin, peel‑away backing that’s ready for your design file. If you’re working with separate prints, a spray‑adhesive works best. Lightly mist the back of each photo, wait 30 seconds for tackiness, then press gently onto the canvas. Start with your anchor images – the ones that hold the emotional weight – and build outward.
Here’s a tip: use a soft‑rubber roller to smooth each sheet from the center outward. This pushes out air bubbles and ensures a flat, professional look.
Check alignment and make micro‑adjustments
Step back and squint. Does a corner look a few millimeters off? Lightly lift that piece, reposition, and re‑press. Because you’re working on a stretched canvas, you have a little wiggle room before the adhesive sets.
And what about color balance? If a bright sunrise feels too dominant next to a muted portrait, consider adding a subtle white border around the brighter image. It softens the transition without requiring a new print.
Seal the surface for durability
Once every sheet is firmly in place, protect the collage with a clear, UV‑blocking spray. This step is especially helpful if the canvas will live in a sunny hallway or near a window. A quick 2‑minute coat keeps colors vivid for years and guards against fading.
Even if you skip the spray, a thin layer of matte varnish can add a professional sheen and keep dust from settling into the seams.
Attach hanging hardware
Now that the collage is solid, it’s time to make it wall‑ready. Most canvases ship with a keyhole hanger, but you can also add a D‑ring or a gallery wire for extra security. Using a level, mark the desired center point on your wall, drill a pilot hole, and screw in the hook. A quick level check guarantees your masterpiece will sit perfectly straight.
Do you remember the last time you saw a crooked picture and thought, “That could have been better”? A few extra seconds now saves you an eye‑rolling moment later.
Final walkthrough checklist
- All printed sheets are adhered without bubbles.
- Anchor photos are centered and balanced with surrounding images.
- UV‑protective coating applied (optional but recommended).
- Hanging hardware securely installed and level‑checked.
Take a step back, breathe, and admire the story you just stitched together. If you’re happy with the result, you’ve mastered how to make a photo collage on canvas – and you’ve got a piece that’ll spark conversation every time someone walks by.
Need a quick reference for the hardware part? Walgreens Photo’s collage‑print guide walks you through hanging basics and even suggests the right type of picture‑hook for different wall weights.
Step 5: Seal, Hang, and Care
Now that your collage is glued, smoothed, and looking picture‑perfect, the real magic begins: turning it into a wall‑ready masterpiece that stays vibrant for years. This part feels a bit like putting the final coat of varnish on a painting—you want it to protect the work without stealing the spotlight.
Seal the surface for durability
First, give the canvas a clear, UV‑blocking spray. A two‑minute mist works wonders in a well‑ventilated room. Hold the can about 12‑18 inches away, sweep left to right, then repeat right to left. Let it dry 10‑15 minutes before you touch anything.
If you prefer a matte finish, a thin layer of water‑based varnish does the trick. It adds a subtle sheen, keeps dust from settling into the seams, and won’t yellow over time. Pro tip: test the spray on a scrap piece of canvas first—some formulas can leave a faint halo if applied too heavily.
Pick the right hanging hardware
Most heartful.gifts canvases ship with a keyhole hanger, but you can upgrade to a D‑ring or a gallery‑wire system for extra security, especially on high‑traffic walls. Here’s a quick run‑through:
- Keyhole hanger: Simple, low‑profile, ideal for canvases under 20 lb.
- D‑ring set: Two rings give you a sturdier anchor point and make level‑checking a breeze.
- Gallery wire: Distributes weight evenly; perfect for larger pieces or when you might want to swap photos later.
Grab a pencil, a level, and a drill. Mark the center point on your wall, drill a pilot hole, and screw in the appropriate hook. A quick level check guarantees your collage will sit straight—no more “why does this look crooked?” moments.
Real‑world example: the family hallway
Emily, a mom of two, wanted a 30×40 inch collage for the hallway that sees a lot of foot traffic. She chose a gallery‑wire set, attached it at 5 ft height, and sealed the canvas with a UV spray. After a month, the colors were still bright, and the wire held firm even when the kids brushed against it on the way to school. The extra step of sealing saved her from having to touch‑up the edges later.
Long‑term care tips
Dusting once a month with a soft microfiber cloth keeps the surface clean without scratching the finish. If you notice a spot of grime, a barely‑damp cloth followed by a dry one works fine—avoid harsh chemicals.
Sunlight is the biggest foe. If your collage lives in a sunny room, hang it out of direct glare or add a sheer curtain. A UV‑blocking coating (the one you sprayed earlier) adds a second layer of defense, extending the life of the inks by up to 5 years according to CanvasPop’s quality guarantee.
| Task | Tool/Material | Key Tip |
|---|---|---|
| Seal surface | UV‑blocking spray or matte varnish | Apply thin coats, let dry 10‑15 min between layers. |
| Hang securely | Keyhole hanger, D‑ring, or gallery wire | Use a level; place hook at wall‑center height. |
| Maintain freshness | Microfiber cloth, soft brush | Dust monthly; avoid abrasive cleaners. |
Actionable checklist before you step back
- Apply UV‑blocking spray (2 light coats) and let dry.
- Choose hanging hardware that matches canvas weight.
- Mark wall center, drill pilot hole, install hook.
- Level the canvas and adjust as needed.
- Dust with a microfiber cloth and set a monthly cleaning reminder.
When you’ve crossed every box, take a step back, breathe, and watch your memories become a lasting piece of art. That’s how to make a photo collage on canvas that not only looks great today but stays gorgeous for years to come.
Conclusion
So you’ve walked through picking photos, arranging a layout, printing, sealing, and hanging – and now the canvas is finally breathing on your wall.
Remember the two biggest tricks: choose one or two anchor images that carry the emotional weight, and protect the surface with a quick UV‑blocking spray. Those tiny steps keep the colors lively for years.
If you ever feel stuck, go back to the “story” you wanted to tell. Does the flow still feel like a memory road trip, or does it look like a random jumble? A quick rearrange in the design tool can save you a lot of “what‑if” later.
And don’t forget the practical side – level the hook, set a monthly dust‑off reminder, and keep the canvas out of direct sun. Small habits make a big difference.
Next move
Now that you know how to make a photo collage on canvas, why not turn that favorite family album into a centerpiece for your living room? Grab your favorite shots, follow the steps, and let heartful.gifts handle the printing. You’ll have a personalized piece that sparks conversation every time someone walks by.
Enjoy the process, and watch your memories become art that lasts. And remember, the joy is in the journey as much as the final display.
FAQ
What size canvas works best for a family photo collage?
It really depends on the wall space you have and how many images you want to showcase. A popular sweet spot is a 24×30‑inch rectangle – big enough to let each picture breathe but not so massive that it overwhelms a modest room. If you’re short on wall real‑estate, a 12×12 square can still feel impactful, especially when you pick two or three anchor photos and let the rest orbit around them. Measure the area, picture the frame in your mind, then let the dimensions follow the story you want to tell.
How should I prepare my photos so they print sharply on canvas?
First, aim for at least 300 dpi resolution; that’s the gold standard for crisp canvas prints. Open each image in a free editor like Photopea or GIMP, adjust brightness and contrast just enough to make the subject pop, and apply a light sharpen filter – but don’t over‑do it, or you’ll get a grainy halo. Save the files as high‑quality PNG or PDF, and keep the original filenames tidy so you can match them to the layout later. A quick test print on regular paper can reveal any color shifts before you send the final file.
Can I tweak the layout after I’ve uploaded my design to heartful.gifts?
Absolutely – most print‑on‑demand tools let you revisit the canvas preview any time before you hit “order.” Just log back into your account, pull up the saved project, and drag‑drop, resize, or swap images as needed. It’s a good habit to double‑check spacing and colour harmony after a short break; you’ll often spot a crowded corner that looked fine when you were fresh. If you’ve already placed an order, you can still request a revision within a few hours, but it’s easier to make changes beforehand.
What’s the easiest way to hang my collage so it stays level and sturdy?
Start with a sturdy keyhole hanger that comes pre‑installed on most heartful.gifts canvases – it’s low‑profile and holds up to 20 lb. Grab a pencil, a level, and a drill. Mark the exact centre of where you want the piece, drill a pilot hole, and screw in a picture hook that matches the hanger’s size. Use the level to align the canvas; if you’re nervous about a slight tilt, place a small piece of painter’s tape on the wall as a temporary guide.
How often should I clean and protect my canvas?
Dust it gently with a microfiber cloth once a month – that’s enough to keep surface grime from settling into the weave. If you notice a stubborn spot, lightly dampen the cloth with water, wring it out well, and wipe in a circular motion; never spray cleaners directly on the canvas. For homes with pets or high traffic, consider a quick UV‑blocking spray every six months; it adds a thin protective layer without changing the matte look.
Is a UV‑blocking coating really necessary, and how do I apply it?
If your collage lives in a sunny room or near a window, the extra coating can extend colour vibrancy by a few years. Pick a clear, museum‑grade UV spray, shake it well, and hold the can about 12‑18 inches from the surface. Sweep left‑to‑right, then back again, using thin coats and letting each layer dry 10‑15 minutes. Test on a scrap piece first – you’ll see if the finish stays matte or gets a subtle sheen. The process is quick, inexpensive, and gives you peace of mind.