
How to Design Your Own Custom Photo Moon Lamp: A Step-by-Step Guide
Ever caught yourself scrolling through endless gift ideas, wondering if there's something that feels truly personal enough to make a moment unforgettable?
We get it. That split‑second when you picture your loved one's face lighting up, the room glowing with a memory you both share – that feeling is pure magic. And that's exactly what a custom photo moon lamp does.
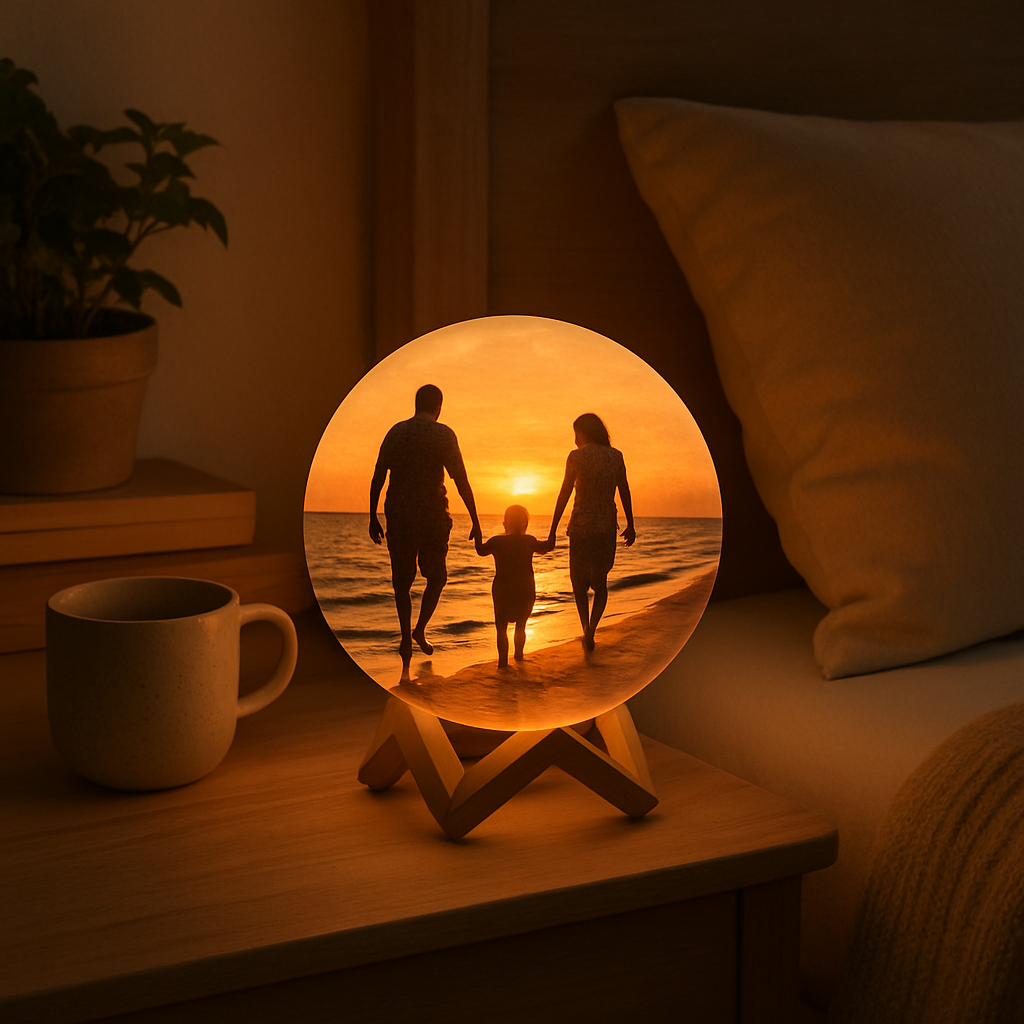
Imagine taking a favorite snapshot – maybe the first family vacation, a newborn's sleepy grin, or that candid laugh from a backyard barbecue – and turning it into a soft, lunar‑like glow that hangs on your wall. It's not just a lamp; it's a three‑dimensional keepsake that captures the texture of the moon and the emotion of your photo.
But why choose a moon lamp over a framed picture or a digital photo frame? For one, the 3D effect adds depth you can't get from flat prints. The gentle illumination creates a cozy ambience, perfect for bedtime stories, romantic dinners, or a quiet corner where you can reflect on happy times.
Now, you might be thinking, "Is it complicated to get one?" Nope. Most services let you upload your image, pick a size – usually 10 cm, 15 cm, or 20 cm – and they'll 3D‑print the lunar surface with your picture embedded. The result feels like holding a piece of the night sky that’s uniquely yours.
So, what does the process actually look like? First, you choose the photo that tells your story. Second, you select the lamp size that fits the space you have in mind. Third, you hit order, and the maker prints, assembles, and ships it right to your door. In just a few days, you have a one‑of‑a‑kind light that sparks conversation.
Think about the possibilities: a wedding gift that glows with the couple’s first dance photo, a birthday surprise that showcases a cherished childhood memory, or a simple "I love you" that lives on your nightstand. The emotional punch is instant, because the lamp is literally lit with your love.
Ready to turn that special picture into a lasting glow? Let’s dive deeper into how you can pick the perfect photo, avoid common pitfalls, and make the most of your custom photo moon lamp.
TL;DR
A custom photo moon lamp transforms your favorite picture into a glowing, 3‑D lunar keepsake that brightens any space while preserving cherished memories in a uniquely personal way.
Choose a size, upload your image, and in just a few days you’ll have a stunning night‑sky gift that sparks conversation, perfect for birthdays, weddings, or everyday love.
Step 1: Choose Your Photo and Size
Alright, you’ve made it this far, and now it’s time to pick the picture that will become the heart of your custom photo moon lamp. It sounds simple, but there are a few quirks that can turn a good photo into a dazzling night‑light or, well, a disappointing one.
First thing’s first: think about the emotion you want the lamp to carry. Is it the warm glow of a family beach sunset, the goofy grin of your toddler’s first birthday, or that quiet moment when you and your partner watched fireworks? The story behind the image will guide every other choice.
What makes a photo work?
High‑contrast images tend to shine the brightest. Look for photos where the subject stands out from the background – dark hair against a light sky, a bright dress against a muted wall, etc. If the picture is flat or washed‑out, the 3‑D printing process can struggle to translate depth, leaving the lamp looking blurry.
Pro tip: open the photo on your phone and tap “Edit.” Boost the contrast a notch, sharpen the edges, and make sure the resolution is at least 1080 × 1080 px. You don’t need a professional DSLR; a good smartphone snap will do as long as it’s clear.
But what about size? Most shops, including Custom Photo Moon Lamp, 3D Printed Photo Lamp, ..., offer three standard diameters: 10 cm, 15 cm, and 20 cm. Here’s a quick way to decide.
Choosing the right diameter
10 cm – perfect for a bedside table, a small shelf, or a gift that won’t dominate a room. It’s subtle, like a night‑time whisper.
15 cm – the sweet spot for most living rooms or a mantlepiece. It’s big enough to be a conversation starter but still fits comfortably in most spaces.
20 cm – go big or go home. This size makes a bold statement, ideal for a feature wall, a wedding reception backdrop, or a dedicated “memory corner.” Just be sure you have the wall real‑estate – you don’t want it to feel cramped.
Ask yourself: where will the lamp live? Measure the intended spot, then add a couple of centimeters for breathing room. If you’re unsure, picture the lamp on a piece of paper the same diameter – it helps you visualise scale.
Avoid common pitfalls
Don’t pick a group photo where faces are tiny; the details get lost in the 3‑D rendering. And steer clear of heavily filtered images with pastel overlays – the lamp’s light will mute those tones, making the picture look muddy.
If you have a photo with text (like a handwritten note), test it first. Small lettering can become illegible once the lamp is printed. A bold, blocky font works best.
What about color? The lamp’s light will slightly wash the hues, turning bright reds into softer pinks. If you love a particular colour, choose a version of the photo where that shade is already muted.
Final checklist before you upload
- Clear subject with contrast.
- Resolution ≥1080 × 1080 px.
- Edited for brightness and sharpness.
- Chosen size matches your space.
- No tiny text or crowded group shots.
Once you’ve ticked those boxes, go ahead and upload. Most platforms let you preview a low‑res mock‑up – use it to double‑check that the faces line up where you expect them.
And remember, this isn’t just a lamp; it’s a memory you’ll see glow night after night. Taking a few minutes now to choose the right photo and size will pay off in countless smiles later.
Step 2: Edit and Prepare Your Image
Now that you've got the perfect shot, it's time to give it a little TLC before it becomes a glowing moon.
First thing: clean up any distractions. A stray coffee cup, a messy background, or a stray sock can pull focus away from the faces you want to celebrate.
So, what should you actually do?
Here’s a quick cheat‑sheet you can follow:
- Open the photo in your favorite editor (Photoshop, GIMP, or even a phone app) and zoom in to spot any blemishes.
- Use the clone or healing brush to erase stray objects – think of it like tidying up a room before guests arrive.
- Crop the image to a square so it fits the lamp’s circular canvas; keep the main subject centered.
- Resize the file to at least 1500 × 1500 px; most services accept 300 dpi, so you won’t lose detail.
- Boost contrast slightly so the highlights and shadows pop on the 3‑D surface; avoid over‑saturation.
- Sharpen the image just enough to bring out facial features – a little extra crispness helps the relief carving.
Once those tweaks are done, export the image as a PNG with a transparent background if you plan to add text on the back.
Why PNG? Because JPEG compression can introduce artifacts that look fuzzy once the lamp prints the tiny grooves.
Do you need to check anything else?
Before you hit upload, open the file on your computer and view it at 100 % zoom. Can you still see each eye, each smile line? If anything looks blurry, go back a step and increase the resolution or reduce the amount of noise.
If you’re visual‑learner, this short video walks you through the exact edits in a popular free editor.
Notice how the editor isolates the background, crops to a perfect square, and applies a subtle contrast boost – exactly what we just described.
Most custom moon lamp services let you add a short message on the reverse side. Keep it under 20 characters so the font stays legible; think of a simple “Love you” or a date.
What about color balance?
If your original photo has a warm, golden tone, you might want to preserve that warmth; but if it’s too yellow, slide the temperature a notch cooler so the lamp’s LED doesn’t turn everything orange.
Final checklist before you click “order”:
- Image is square, 1500 × 1500 px or larger.
- Contrast and sharpness look good at 100 % zoom.
- Background is clean or transparent.
- Optional back‑text is set and within character limit.
When you’re confident everything checks out, upload the file, preview the 3‑D mock‑up, and make any last‑minute tweaks. The preview will show you how the faces will glow in the dark – if they look flat, go back and increase contrast a touch.
And that’s the sweet spot: a polished, perfectly sized image ready to become a luminous keepsake that will light up your loved one’s smile every night.
Step 3: Select Moon Lamp Material and Finish
Now that your photo is polished, the next decision feels a bit like picking a frame – but for a moon. Do you want a lamp that feels lightweight and budget‑friendly, or one that screams premium and will become a heirloom?
Material choices you’ll encounter
Most custom photo moon lamp providers stick to two main plastics: PLA (polylactic acid) and resin. PLA is the go‑to for most shoppers because it’s cheap, biodegradable, and prints quickly. It gives a matte feel that works well in a bedroom or nursery.
Resin, on the other hand, is a bit pricier but delivers a smoother surface and finer detail – think of the tiny hair strands on a portrait staying crisp even after the lamp is lit.
And if you’re feeling adventurous, some boutique makers experiment with a thin glass coating over the 3‑D printed core. That mixed‑finish glass can add a subtle shimmer, but it also raises the price and requires extra care handling.
For a quick glimpse of how mixed‑finish glass is described in the industry, check out the product note on mixed finish glass options. While it’s a tile supplier, the wording mirrors what you’ll see on premium lamp listings: a balance of aesthetic appeal and material complexity.
Finish options – matte, glossy, or frosted?
Once you’ve settled on a material, the finish determines how the light spreads. Matte finishes absorb a bit of the LED glow, giving a softer, more diffuse light – perfect for a calm night‑stand vibe.
Glossy finishes reflect the light, creating a brighter, more “pop‑in‑the‑dark” effect. If you want the moon to be the focal point of a living‑room wall, glossy is your friend.
Frosted or sand‑blasted finishes sit somewhere in the middle, softening harsh highlights while still letting details shine. They’re a favorite for parents who want a night‑light that’s bright enough for a toddler but not blinding.
How to pick the right combo for your space
Here’s a quick decision matrix you can run in your head (or on a sticky note):
- Room lighting: bright room → glossy or resin; dim room → matte PLA.
- Budget: under $30 → PLA matte; $30‑$50 → resin matte or glossy; $50+ → resin + glass/frosted.
- Durability: kids’ room → matte PLA (less glare, easier to clean); adult lounge → glossy resin or glass for a luxe feel.
Real‑world example: Maya ordered a resin‑finished lamp with a frosted surface for her home office. The lamp now doubles as a soft desk lamp and a conversation piece during virtual meetings.
Another case: Ben, a new dad, chose a matte PLA lamp for his baby’s nursery. The gentle diffusion helps the baby fall asleep without overstimulating the eyes.
Step‑by‑step checklist
- Review the material list on the vendor’s product page – note PLA, resin, and any glass‑coated options.
- Match the finish (matte, glossy, frosted) to the room’s existing lighting and your budget.
- Read any material‑care notes – for example, glass‑coated lamps may need a soft cloth, not a spray cleaner.
- Use the table below to compare three popular combos.
- Make a final call, add the selection to your cart, and proceed to checkout.
Quick comparison table
| Material | Finish | Notes |
|---|---|---|
| PLA (biodegradable plastic) | Matte | Budget‑friendly, lightweight, great for dim rooms. |
| Resin (high‑resolution plastic) | Glossy or frosted | Sharper detail, brighter light, ideal for display areas. |
| PLA core + glass coating | Mixed‑finish glass | Premium look, subtle sparkle, requires gentle cleaning. |
Take a minute now: glance at the lamp you’ve imagined on your wall. Does it feel like a sleek, glossy piece of art, or a soft, matte moon that whispers “good night”?
Whatever you choose, remember the material and finish are the final brushstrokes on your custom photo moon lamp masterpiece. Pick the combo that matches the mood you want to create, and you’ll have a keepsake that feels as personal as the photo itself.
Step 4: Upload Your Photo and Place Order
Alright, you’ve narrowed down the perfect picture, picked the size, and decided on a matte PLA or glossy resin finish. Now it’s time for the moment that actually makes the lamp yours – uploading that photo and hitting “place order.”
Where to start
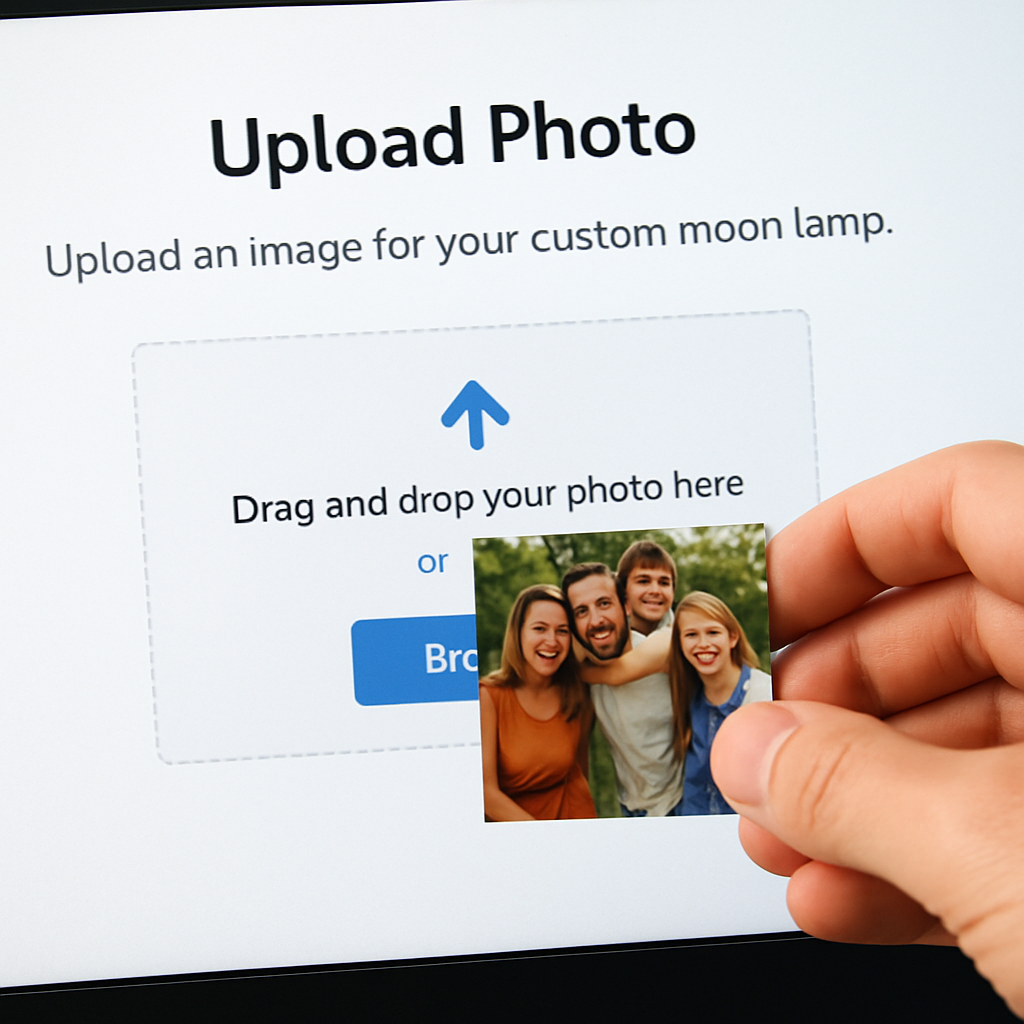
First, head to the product page of the custom photo moon lamp you chose. Most sites have a bright “Upload Image” button right under the size selector. It’s usually a simple drag‑and‑drop area, or you can click “Browse” and find the file on your computer or phone.
Do you remember the checklist from Step 2? Keep it handy: the file should be at least 1500 × 1500 px, square, and saved as a PNG or high‑quality JPEG. If the uploader flags the resolution as too low, go back to your editor and bump it up – you’ll thank yourself when the relief on the lamp looks crisp.
Quick preview tricks
After you drop the file, most platforms generate a 3‑D preview that you can rotate. Take a minute to spin it around. Can you still see the smile on that birthday cake? If the face looks washed out, adjust the contrast in your original file and re‑upload. A tiny tweak now saves you a disappointment later.
Pro tip: many services let you add a short message on the back of the lamp. If you want to include a date or a loving note, type it in the “Back Text” field before you confirm the order. Keep it under 20 characters so the font stays legible.
Shipping details – don’t overlook them
Now that the visual is locked, scroll down to the shipping section. Enter the address where you want the lamp delivered – maybe the recipient’s home, or your own address if you plan to wrap it as a gift. Double‑check the zip code; a single digit off can delay the whole process.
Some vendors offer gift‑wrapping or a personalized card for an extra fee. If you’re sending it to a loved one, those little extras can turn a nice present into an unforgettable one.
Payment and final check
Pick your payment method – credit card, PayPal, or whatever the site supports. Before you click “Place Order,” review the summary: size, material, finish, back text, and total cost. Look for any hidden fees like customs duties if you’re shipping internationally.
Got a coupon code? Apply it now. It’s easier than hunting for a discount after the order is placed.
Once everything looks good, smash that “Place Order” button. You should get an immediate confirmation email with an order number and a link to track the production status.
What happens next?
Behind the scenes, the printer takes your image, slices it into layers, and prints the lunar surface. In 2‑5 business days the lamp is printed, a LED module is installed, and it’s packed carefully – usually in a bubble‑wrap box with a “handle with care” sticker.
While you wait, think about where you’ll display the lamp. A nightstand, a mantle, or a bedside table? Planning the placement now helps you avoid a last‑minute scramble when the package arrives.
If you ordered a glass‑coated version, remember to handle it gently – a soft microfiber cloth is best for cleaning. For matte PLA, a quick dust‑off with a dry cloth keeps it looking fresh.
And there you have it – the upload and order step is really just a few clicks, but those clicks lock in a memory that will glow for years.
Step 5: Shipping, Setup, and First Light
Okay, the order is in the system and you’ve got that confirmation email. What you’re really waiting for now is the box that holds your custom photo moon lamp – the moment when a memory finally gets a glow.
Tracking the journey
Most vendors send a tracking number within the same email. Pop it into the carrier’s website and you’ll see a little map that updates every few hours. It feels oddly satisfying to watch the parcel move from the printer’s workshop to the local depot, right?
Pro tip: if the email doesn’t include a link, copy the order number and head straight to the shop’s “Track Order” page. A quick check now can save you a frantic call later if the package gets delayed.
Preparing for arrival
While the lamp is on its way, take a minute to think about where it will live. The surface it sits on matters – a sturdy nightstand, a wooden shelf, or a dedicated lamp base. If you’re placing it on a glass table, make sure the surface is clean and dry; a little dust can cause the lamp to wobble.
Another small but often missed step is to clear a tiny space for the power cord. Most custom photo moon lamps come with a USB‑C or micro‑USB cable that plugs into a wall adapter. If you’re tucking the cord behind a nightstand drawer, measure the gap now so you don’t end up with a tangled mess.
Unboxing like a pro
When the box arrives, resist the urge to rip it open. Instead, lay it on a soft surface – a towel or a carpet – and cut the tape with a clean pair of scissors. Inside you’ll typically find:
- The 3‑D printed lamp (often wrapped in a protective foam sleeve)
- A power cable and adapter
- A quick‑start guide (yes, it’s usually one page)
- If you chose a glass‑coated finish, a soft microfiber cloth
Give the lamp a quick visual check. Look for any dents, scratches, or missing pieces. If something’s off, snap a photo of the damage and contact customer support right away – most shops will replace a faulty unit free of charge.
First light setup
Now comes the fun part: plugging it in and turning it on. Most lamps have a simple touch sensor on the base – a light tap powers it up, a double‑tap changes brightness, and a triple‑tap cycles through color modes (if your model supports RGB). If you’re not sure, the quick‑start guide will have the exact pattern.
Before you settle on a brightness level, dim the lamp to about 30% and sit in the room for a minute. Does the photo still read clearly? If the details look washed out, crank the brightness up a notch. The goal is a gentle glow that highlights the texture without turning the room into a spotlight.
Real‑world examples
Emily ordered a 15 cm matte PLA lamp for her husband’s home office. She placed it on a small metal stand next to his monitor. The first night she turned it on, the soft light helped him unwind after long Zoom calls – he even told her it “feels like the moon is watching over the desk.”
Another story: Carlos bought a 20 cm glossy resin lamp as a surprise for his parents’ anniversary. He set it on the mantel above the fireplace. The extra brightness made the photo of their wedding day pop, and the color‑changing mode let him sync the lamp with the holiday lights during Christmas.
Maintenance tips for that first glow and beyond
Cleaning is easy – a dry microfiber cloth does the trick for both matte and glossy finishes. If you have a glass‑coated version, avoid abrasive cleaners; a light mist of water followed by a gentle wipe is enough.
Because the lamp uses LED technology, you won’t have to worry about bulb replacements. Just keep an eye on the power adapter; if it gets hot to the touch, unplug it and let it cool before using it again.
Finally, think about sharing the moment. Snap a photo of the lamp lit in its new spot and post it with a short note about why you chose that memory. It turns a simple gift into a story that friends and family can enjoy too.
So, you’ve tracked, unpacked, and lit your custom photo moon lamp. Now it’s ready to become a quiet, glowing reminder of the moment you captured. Enjoy the first light – it’s yours.
Step 6: Care, Maintenance, and Troubleshooting
Now that your custom photo moon lamp is shining on the shelf, you’ll want it to keep looking magical for years. The good news? It’s low‑maintenance, but a few mindful habits can prevent the occasional hiccup.
Everyday cleaning routine
Dust is the sneakiest enemy. A quick swipe with a dry microfiber cloth every few days removes surface particles without scratching the finish. If you have a glossy or glass‑coated lamp, avoid abrasive wipes; a light mist of water followed by the same cloth does the trick.
For matte PLA lamps, you can even give them a gentle blow‑dry to dislodge stubborn dust from the lunar grooves. The texture actually helps hide tiny specks, so you’ll notice a build‑up only after a few weeks.
Dealing with the LED module
Because the lamp runs on LED, you’ll never swap bulbs, but the power adapter does age. If the adapter feels warm after a few minutes, unplug it, let it cool, and check the cord for bends or frayed ends. A loose connection can cause flickering or dim spots.
Should the lamp suddenly dim, try these three steps:
- Reset the lamp by unplugging for 30 seconds, then plug back in.
- Press the touch sensor three times to cycle through brightness modes.
- If the issue persists, swap the USB‑C cable with a spare (many kits include an extra).
Preventing moisture damage
LEDs love dry air. Placing the lamp near a bathroom mirror or a kitchen steam hood can invite condensation inside the base. If you notice water droplets on the underside, wipe them immediately and let the lamp dry before powering it back on.
A handy trick is to tuck a small silica gel packet in the box when you first unpack – it absorbs any residual humidity during transit.
What to do if the photo looks faded
Sometimes the engraved image can lose contrast after months of use. This usually isn’t a hardware problem; it’s the LED’s color temperature drifting toward a cooler hue.
Most custom photo moon lamps let you switch between warm (white/yellow) and cool (white/blue) modes via a triple‑tap. Choose the warm setting for richer colors, especially if your original photo had golden tones.
If the lamp offers a “reset to factory” option in the app or via a long‑press, use it to recalibrate the LED driver. Many manufacturers confirm that a simple reset restores original brightness levels according to LunarLamps’ FAQ.
Real‑world troubleshooting stories
Maria bought a 15 cm resin lamp for her mother’s birthday. After a week, the left side flickered intermittently. She checked the cord, found a tiny kink near the plug, and straightened it. The flicker vanished.
Another example: Alex noticed a faint haze over the photo on his glass‑coated lamp. He gently cleaned the surface with a damp microfiber cloth, avoiding any solvent. The image popped right back, and the glass stayed crystal‑clear.
Quick care checklist
- Dust with a dry microfiber cloth 2–3 times a week.
- Wipe glossy or glass finishes with a lightly misted cloth.
- Inspect the power cable for kinks each month.
- Keep the lamp away from steam or high‑humidity zones.
- Reset the LED driver if brightness drops.
- Store the original packaging and silica packet for future moves.
Extending the lamp’s life
When you’re not using the lamp for an extended period (say, during a move), unplug it and store it in its original box with the protective foam. The foam cushions the delicate lunar surface and prevents accidental scratches.
If you plan to gift a second lamp later, you can reuse the same USB‑C adapter – just make sure it’s the original 5 V/2 A version that came with the first unit. Using a mismatched charger can shorten LED lifespan.
Finally, think of the lamp as a living memory, not just a piece of tech. Treat it like a cherished photo frame: occasional dusting, a gentle touch, and a little love go a long way.
Got a hiccup you can’t solve? Reach out to the seller’s support team with a clear photo of the issue. Most companies, including the ones behind the custom photo moon lamp, will gladly offer a replacement if the defect is covered under warranty as explained in the Creality Cloud tutorial.
With these habits in place, your custom photo moon lamp will keep radiating the moment you chose, night after night.
FAQ
What is a custom photo moon lamp and how does it work?
Think of it as a tiny moon that’s been sculpted from a 3‑D printer using the picture you upload. The printer slices your photo into layers, carving the relief onto a spherical surface. Inside, a USB‑C powered LED shines through those grooves, so the light literally follows the contours of faces, hair, or a favorite landscape. The result is a glowing keepsake that looks like a real moon‑lit snapshot.
Can I use any photo, or are there limits?
Most services recommend a high‑resolution image (300 dpi or more) and a simple background. Portraits work, but landscape shots usually translate better because the lamp wraps the picture around a circle. Try to keep the subject clear – a blurry group selfie will lose detail in the relief. If you’re unsure, test the image at 100 % zoom; you should still see each eye and smile line.
Which size should I pick for my space?
We’ve seen three common diameters: 10 cm, 15 cm, and 20 cm. A 10 cm lamp fits a nightstand or baby’s nursery, offering a soft, intimate glow. The 15 cm version balances presence and subtlety, perfect for a hallway shelf or office desk. If you want a statement piece that dominates a mantel or living‑room wall, go for 20 cm. Think about the room’s existing lighting – brighter spaces can handle the larger size without feeling overwhelming.
What material and finish options are best for durability?
PLA plastic is budget‑friendly and works well in dim rooms thanks to its matte finish, which diffuses light gently. Resin gives a smoother surface and sharper detail, ideal for glossy finishes that make the image pop in well‑lit areas. Some premium kits add a thin glass coating for a subtle sparkle, but that needs extra care when cleaning. Choose matte PLA for a kid‑friendly night‑light, or glossy resin if you want a showcase piece.
How do I set up the lamp after it arrives?
Unbox the lamp on a soft surface, check for any dents, then plug the included USB‑C cable into the supplied adapter. Most lamps have a touch sensor on the base: a single tap powers it on, a double tap adjusts brightness, and a triple tap cycles color modes (if your model supports RGB). Start at about 30 % brightness and see if the details read clearly; you can always raise it a notch.
What if the LED starts to dim or flicker?
First, unplug the lamp for 30 seconds and plug it back in – a quick reset often clears minor glitches. Next, try the touch sensor three times to cycle through the brightness presets. If the problem persists, swap the USB‑C cable with the spare one most kits include. Should the lamp still act up, inspect the power adapter for overheating; a warm‑to‑the‑touch adapter may need replacement.
How should I care for my custom photo moon lamp long‑term?
Dust it with a dry microfiber cloth every few days; the lunar grooves trap particles, so a gentle swipe keeps the surface clean without scratching. For glossy or glass‑coated finishes, a light mist of water followed by a soft wipe is safe. Keep the lamp away from steam‑filled rooms like bathrooms, and store it in its original box with the silica packet if you won’t use it for months. A quick reset of the LED driver restores original brightness if it ever drifts.
Conclusion
We've walked through every step, from picking the perfect snapshot to the moment the lamp first glows on your nightstand.
Now, think about how that soft, lunar light will feel in the room where you unwind – the way it catches the smile in the photo, the gentle hum of the LED, the quiet reminder of a cherished memory.
So, what's the next move? Grab your favorite photo, follow the quick checklist we laid out, and place that order. It only takes a few clicks, and soon you'll be holding a piece of the night sky that’s truly yours.
Remember, the magic lives in the details: a square, high‑resolution image, the right material finish for your space, and a little bit of love when you set it up. A simple dust‑off with a microfiber cloth will keep it looking fresh for years.
If you’re still on the fence, picture the moment your partner sees the lamp lit for the first time – that gasp, that smile. It’s more than a gift; it’s a story you get to replay every night.
Ready to turn a memory into a glow? Head over to heartful.gifts and create your custom photo moon lamp today. It’s the perfect way to celebrate birthdays, anniversaries, or just because.