
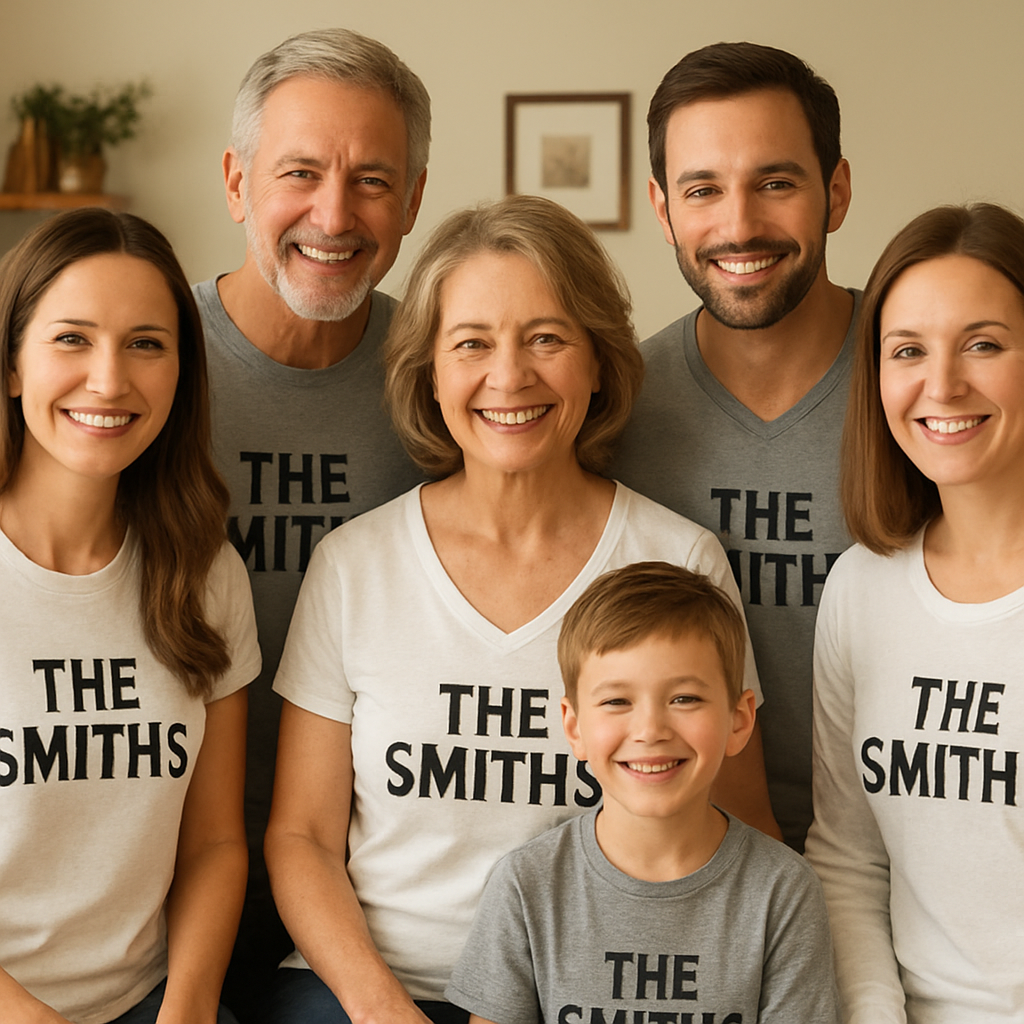
How to Design and Order Custom Last Name Shirts: A Friendly Step‑by‑Step Guide
Ever walked into a family gathering and spotted a shirt that proudly flaunted someone's surname? It feels like a tiny, personalized flag waving right there in the crowd, and suddenly you wish you could wear that same badge of belonging.
Or maybe you’ve imagined gifting a dad his own last name stitched across a comfy tee for Father’s Day, just to see that proud smile light up the room. That little detail turns an ordinary gift into a memory that sticks.
So why are custom last name shirts becoming the go‑to choice for gift buyers, parents, and spouses alike? Because they combine simple style with a deep sense of identity – and they’re easier to create than you might think.
Think about it this way: a plain shirt is like a blank canvas, and your last name is the brushstroke that tells a story. Whether it’s “Smith” on a baby’s first birthday shirt or “Garcia” on a reunion tee, the name instantly says “we’re in this together.”
But there’s a catch – you don’t want a cheap print that fades after a wash. You need a reliable print‑on‑demand shop that knows how to blend fabric, ink, and fit so the name stays sharp and the shirt stays comfy.
Here’s the good news: modern printing tech lets you choose font, placement, and even thread color, all from the comfort of your couch. You can preview the design, tweak it, and order a single shirt or a whole batch without breaking the bank.
Imagine gifting a set of custom last name shirts to a sports team, each player wearing their own surname on the back. It turns practice drills into a mini‑celebration of teamwork, and the kids love seeing their name in bold letters.
And if you’re a parent, a “Johnson” shirt for your newborn isn’t just cute – it’s the first piece of a family wardrobe that will grow with them, making every future photo a little more cohesive.
So, what’s the first step? Start by thinking of the moment you want to capture – a birthday, a family reunion, a wedding party – then jot down the exact name and style you envision. From there, a quick click on a trusted print‑on‑demand site will bring that vision to life.
Ready to turn a simple name into a standout piece of clothing? Let’s dive in and explore how you can design, order, and cherish custom last name shirts that feel as personal as a handwritten note.
TL;DR
Custom last name shirts turn personal moments into wearable memories, offering effortless design, instant preview, and durable printing that keeps the name sharp wash after wash.
Start by choosing the exact name, font, and color you love, then order from a trusted print‑on‑demand shop like heartful.gifts for a gift that feels as personal as a handwritten note.
Step 1: Choose Your Shirt Style
Alright, picture this: you’ve settled on the perfect name to feature, but the shirt itself still feels like a blank canvas. The first real decision isn’t the font or color – it’s the style of the shirt that will carry that name. Your choice here shapes how the shirt looks, feels, and even how often it gets worn.
Know Your Fit
Do you picture a relaxed, lived‑in vibe or something a bit more tailored? A classic crew‑neck tee in a regular fit is the safest bet for most families – it drapes nicely over a toddler’s chubby arms and still looks sleek on a grown‑up at a reunion. If you want a sharper silhouette, a slim‑fit tee or a polo can add a touch of polish without sacrificing comfort.
And here’s a quick tip: always check the size guide on the print‑on‑demand site. A half‑size up can make a huge difference for kids who love to grow quickly, while a size down on a loose‑fit shirt might feel snug enough to keep the name close to the chest.
Pick a Neckline
Necklines are more than a design flourish; they set the tone. A crew neck whispers “casual everyday,” perfect for birthday brunches or family BBQs. A V‑neck adds a dash of modern flair – think dad‑t‑shirt vibes that still keep the surname front‑and‑center. If you’re designing for a sports team, a raglan sleeve with a contrasting collar can make the name pop while giving the shirt an athletic edge.
Not sure which to choose? Grab a shirt you already own, hold it up to your face, and see which neckline feels most “you.” That little moment of recognition can save you a dozen returns later.
Decide on Sleeve Length
Short sleeves are the go‑to for warm weather and for kids who can’t wait to swing their arms. Long sleeves become handy for cooler evenings or for a cohesive family look that spans seasons. Some print shops even offer a “3‑quarter” option that works wonders for transitional climates.
Think about the occasion: a summer reunion calls for breathability, while a winter holiday photo shoot might look sharper with long sleeves that keep everyone cozy.
Now, let’s talk a little inspiration. I was scrolling through Midnight Scribe’s style guide and noticed how they pair bold name placement with simple, timeless shirt cuts. That minimalist approach can make your custom last name shirt feel less “gimmicky” and more like a cherished heirloom.
Also, if you’re eye‑balling accessories that match your shirt, take a peek at designer shoulder bags under $1000. A coordinating bag can turn a simple tee into a coordinated outfit, especially for a family photo day.
After you’ve settled on fit, neckline, and sleeve length, it’s time to preview the design. Most print‑on‑demand platforms let you toggle between a crew and a V‑neck view, so you can see exactly how the name will sit. If the preview looks off, adjust the placement a millimeter – it’s that easy.
One more thing to consider: the fabric blend. A cotton‑rich blend gives you softness and durability, while a polyester mix can boost color vibrancy, which is great for darker inks. For families who plan to wash the shirts often, a pre‑shrunken cotton option helps keep the name crisp after many cycles.
Finally, don’t overlook the little details that make a shirt feel personal. A subtle tag inside the collar with the family motto, or a matching color thread for the stitching, can elevate a simple custom last name shirt into a keepsake.
When you’ve nailed the style, you’ll notice how the name itself starts to “belong” on the shirt. That’s the sweet spot where design meets sentiment.
And if you’re looking for more design inspiration, Poppas Wooden Creations showcases beautiful handcrafted pieces that remind us how a personal touch can turn everyday items into treasured memories.
Step 2: Pick the Perfect Font and Layout
Now that your shirt style is set, it’s time to give the name its own personality. Think of the font as the voice of your custom last name shirts – it can be bold and sporty, elegant and subtle, or playful and quirky.
First, ask yourself what feeling you want the shirt to convey. Are you celebrating a dad’s milestone? A classic serif might whisper tradition. Planning a kids’ birthday? A rounded sans‑serif feels friendly. The right vibe makes the name instantly click with the wearer.
Choose a Font Style
Start with three easy categories:
- Serif – adds a timeless, refined touch. Great for weddings, family reunions, or any moment that feels a bit formal.
- Sans‑serif – clean and modern. Works for everyday tees, sporty teams, or a sleek birthday gift.
- Display or script – adds flair, hand‑written charm, or a retro feel. Perfect for a grandma’s “Grandma” shirt or a teen’s street‑style tee.
Pick one that matches the occasion, then preview it on the design tool. Most platforms let you swap fonts with a single click – treat it like trying on shoes.
Test Readability
Even the prettiest font falls flat if it’s hard to read from a few feet away. Zoom out in the preview and ask yourself: does the name still stand out?
Here’s a trick: put a dummy name like “Smith” in all caps, then shrink it to the size you plan to use. If you can still make out each letter, you’re good. If it looks fuzzy, dial back the complexity or pick a bolder weight.
Play with Color Contrast
Color is the secret sauce that makes the font pop. Dark shirts love light colors – think white, pastel yellow, or soft gold. Light shirts shine with deep navy, charcoal, or even a rich burgundy.
One mistake I see often is matching a light gray font with a light gray tee. It looks like a watermark and fades fast in the wash. Instead, aim for a difference of at least three shades – that way the name stays legible after dozens of cycles.
Layout Matters
Where you place the name can change the whole vibe. The classic back‑center works for most teams, but a left‑chest placement feels intimate, especially on a family photo shirt. If you’re feeling adventurous, try a diagonal sweep across the shoulder or a small tag inside the collar.
Keep the layout balanced: the name should sit in the visual sweet spot, not too high where it gets cut off, and not too low where it slides under a belt line. Most design tools show a safe‑zone grid – use it.
Final Checklist
- Pick a font style that matches the occasion.
- Make sure the font stays readable at the final size.
- Choose a high‑contrast color combo.
- Decide on placement – back center, left chest, or creative angle.
- Preview on both mock‑up colors to catch any clipping.
- Order a single sample before you bulk‑order.
Once you’ve ticked these boxes, you’ll have a name that looks as good on the screen as it will on the fabric. And the best part? All of this happens from your couch, so you can keep tweaking until it feels just right.
Step 3: Add Your Last Name – Design Tips & Comparison
Now that you’ve nailed the font and the color, it’s time to actually slap the surname onto the shirt. This part feels a lot like choosing the perfect frame for a favorite photo – you want it to highlight the name without stealing the spotlight.
Pick a Placement That Matches the Moment
Back‑center is the classic “team jersey” vibe. It works great for sports squads, family reunions, or anyone who wants their name to be the first thing you see when they walk by.
If you’re designing a keepsake for a newborn’s first‑birthday photo, a tiny left‑chest tag feels intimate and keeps the focus on the smiling face.
And for the daring – think diagonal sweeps across the shoulder or a subtle inside‑collar tag. Those little surprises make the shirt feel custom‑made, not mass‑produced.
Size the Name Right
Here’s a rule of thumb: the name should be at least three‑quarters of an inch tall on a standard adult tee. Anything smaller and you’ll end up with a name that looks like a faint watermark after a few washes.
Most design tools let you toggle a “safe‑zone” grid. Align the top of the letters just inside that line and you’ll avoid the dreaded cut‑off at the hem.
Choose a Fabric That Holds Up
Durability isn’t just about ink – the shirt itself matters. A soft cotton blend that’s preshrunk and fade‑resistant will keep the name crisp wash after wash. One popular option on Amazon describes its tees as “preshrunk short sleeve tagless graphic tee… shrink & fade resistant,” which translates to less shrinking and a name that stays sharp for years.soft cotton blend also feels buttery against the skin, so you won’t have to choose between comfort and longevity.
Contrast Is Your Best Friend
High‑contrast combos are non‑negotiable. Light lettering on dark fabric (white on navy, gold on charcoal) pops instantly, while dark lettering on a pastel shirt (navy on light gray) does the same. Avoid matching shades – a light gray name on a light gray tee looks like a secret you’ll have to squint to read.
Pro tip: preview the design on both a dark and a light mock‑up. If the name disappears on one, adjust the color before you hit “order.”
Quick Comparison Table
| Feature | Option | Notes |
|---|---|---|
| Placement | Back‑center, Left‑chest, Diagonal shoulder | Back‑center = classic; Left‑chest = intimate; Diagonal = bold |
| Font Size | 0.75–1.0 in tall (adult) | Ensures readability after washing |
| Fabric | Preshrunk soft cotton blend | Shrink & fade resistant, comfortable all day |
Step‑by‑Step Checklist
1. Choose your placement based on who’s wearing it and the occasion.
2. Set the font size so the tallest letter hits at least three‑quarters of an inch.
3. Pick a high‑contrast color combo – test both dark and light mock‑ups.
4. Select a preshrunk, fade‑resistant cotton blend for lasting crispness.
5. Use the design tool’s safe‑zone grid to keep the name inside the printable area.
6. Order a single sample before you commit to a bulk run – it’s the cheapest way to catch any surprises.
When you follow these steps, you’ll end up with a custom last name shirt that feels as personal as a handwritten note and looks as polished as a designer piece. And the best part? You can tweak each element from your couch until it feels just right.
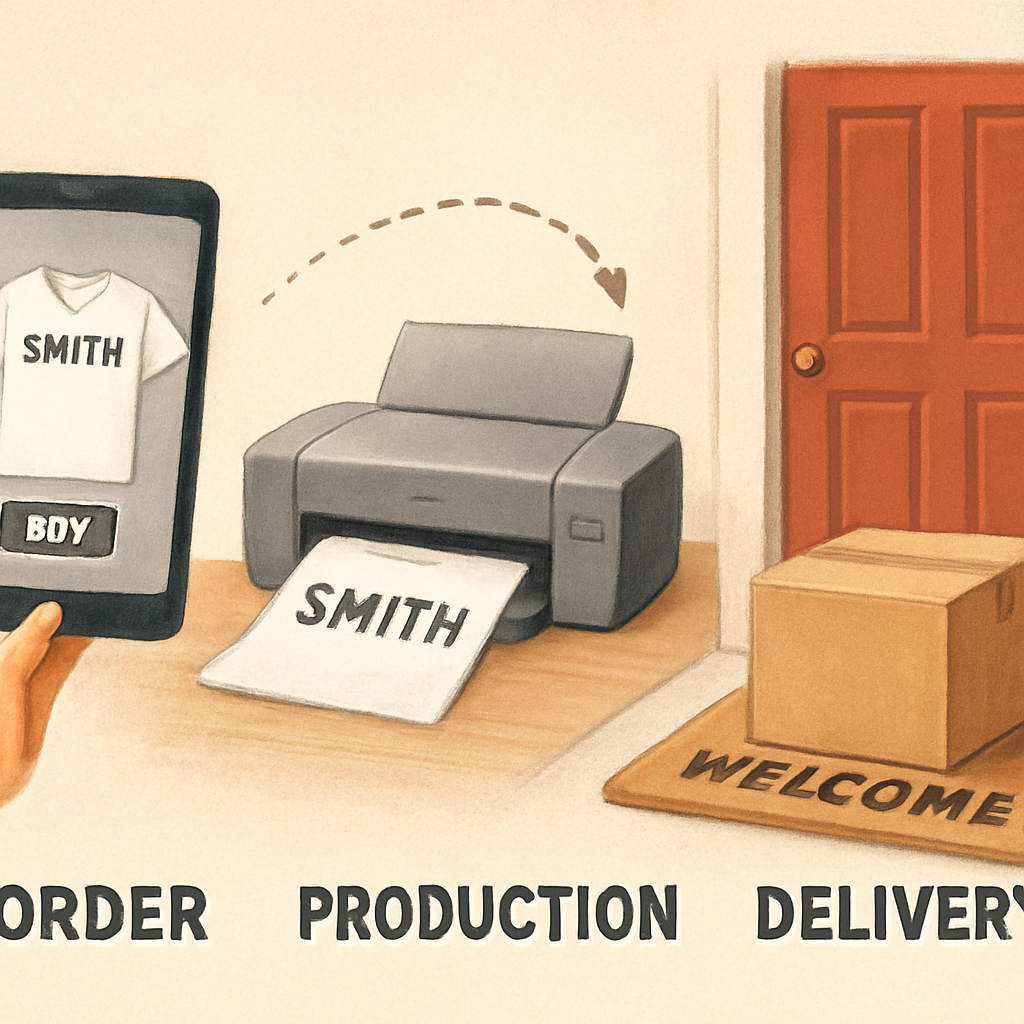
Step 4: Order and Shipping – What to Expect
Alright, you’ve nailed the design and you’re staring at that shiny “Add to Cart” button. What happens after you click it can feel like a mystery, but it doesn’t have to be. Let’s walk through the whole ordering journey so you know exactly when the shirt will leave the printer and land in your hands.
1. Review the final mock‑up
Before you confirm anything, double‑check the preview on both a dark and a light shirt. This tiny step catches the occasional color‑clash that only shows up when the fabric changes. If the name looks faint on a charcoal tee, swap to a lighter ink – you’ll thank yourself after the first wash.
2. Choose quantity and size distribution
Most print‑on‑demand shops, including heartful.gifts, let you order any mix of sizes in a single cart. A real‑world example: a family in Ohio ordered 12 shirts – four adults (L/M), six teens (S/M), and two toddlers (XS). They saved about 12% by bundling the order instead of buying each size separately.
Pro tip: if you’re unsure about size, order one sample in the most common size for each age group. It’s cheaper than a full bulk run and guarantees the fit before you commit.
3. Understand production timelines
Standard production for custom last name shirts is usually 2–4 business days. During peak seasons (holiday shopping, graduation weeks) it can stretch to 7 days. USA Tees, a veteran screen‑printing shop, notes that “orders of 300 or more get the best rate and fast, free shipping” and that “shipping is fast and free” for bulk runs according to their graduation shirt page. If you need the shirts for a specific date – say a birthday party on Saturday – place the order at least one week in advance and select expedited shipping if the platform offers it.
4. Shipping options and costs
Most services ship via standard USPS First‑Class or UPS Ground for domestic orders. Expect $4‑$6 for a single shirt, but the fee drops dramatically when you hit a higher quantity. For example, a batch of 24 shirts often ships for a flat $8 total, which works out to less than $0.35 per shirt.
International buyers should watch out for customs duties – they’re not included in the checkout price. A quick tip: add a small buffer (5‑10% of the order total) to cover unexpected fees.
5. Tracking and delivery
After the printer stamps the package, you’ll receive a tracking number via email. Keep an eye on it, especially if you’re sending the shirts as a gift to someone else. If the tracking shows “Delivered – Signed for,” it’s a good idea to confirm receipt with the recipient, just in case the carrier left the box at a neighbor’s door.
6. What to do if something’s off
Even with careful checks, a mistake can slip through. Most reputable shops have a “re‑print” policy within a certain window (usually 7‑10 days) if the name is mis‑spelled or the color is wrong. Document the issue with photos, then contact support right away – the faster you act, the smoother the resolution.
Here’s a quick checklist to run before you open the box:
- Confirm the name spelling matches your design file.
- Check the ink color against the preview you approved.
- Inspect stitching and seams for any loose threads.
- Give the shirt a quick wash on gentle cycle – the fabric should feel soft, not stiff.
If anything looks off, snap a photo and reach out to the shop’s support team within the return window. Most will either send a replacement or offer a partial refund.
7. Caring for your custom last name shirts
To keep the name crisp for years, turn the shirt inside out before tossing it in the washer, use cold water, and avoid high‑heat drying. A gentle tumble dry on low heat or line‑dry works best. The preshrunk cotton blend we recommend holds ink well, so you’ll still see a sharp name after dozens of washes.
And hey, if you’re ordering a set for a family reunion, consider adding a short care card with these tips – it shows you care and helps everyone keep the shirts looking fresh.
Ready to hit that order button? Remember, the whole process is a conversation between you and the printer. Keep an eye on each step, ask questions when you’re unsure, and you’ll end up with custom last name shirts that feel as personal as a handwritten note.
Need a deeper dive into the design phase before you order? Check out How to Design a Custom Picture T Shirt: Friendly Step‑by‑Step Guide for more hands‑on tips.
And that’s the whole picture – from clicking “order” to unboxing that perfect, personalized tee. Happy shipping!
Step 5: Care and Maintenance for Your Custom Shirt
So you’ve finally got that perfect custom last name shirt in your hands. It feels good, right? But the real test comes when you wash it for the first time – will the name stay sharp, or will it fade like a bad memory?
Pre‑wash prep: turn it inside out
Before you even think about the machine, flip the shirt inside out. This tiny step shields the printed letters from the agitator and reduces friction against other garments.
And while you’re at it, check the care card (if you printed one). A quick glance at those bullet points can save you a lot of hassle later.
Washing tips that actually work
Cold water is your new best friend. Hot water can cause the cotton blend to shrink and the ink to bleed, especially on darker fabrics.
Use a gentle cycle – a regular “normal” wash is fine for a sturdy tee, but if you’re dealing with a delicate organic cotton baby shirt, opt for the “delicates” setting.
Do you wonder whether a detergent matters? A mild, enzyme‑free detergent is ideal. Harsh chemicals can break down the ink’s bond to the fibers over time.
Drying without drama
High‑heat drying is a no‑go. The heat can melt the ink layer, leaving a ghosted name that looks half‑finished.
Instead, tumble dry on low or, even better, lay the shirt flat on a clean towel and let it air‑dry. It might take a little longer, but the result is a shirt that still feels soft and looks crisp.
Ever tried line‑drying? Hanging the shirt on a shaded clothesline keeps sunlight from fading the colors while the breeze does the work for you.
Ironing and touch‑ups
If you need to iron, place a thin cloth between the iron and the printed area. A low heat setting (wool/linen) is enough to smooth wrinkles without scorching the design.
Never steam directly on the print – the moisture can cause ink to lift, especially on newer prints.
Storing for the long haul
When the shirt isn’t being worn, fold it rather than hanging it. Heavy hangers can stretch the shoulders and distort the printed name.
Store in a cool, dry place. Moisture and heat are the silent enemies of both fabric and ink.
Real‑world proof
Customers on Amazon’s custom shirt listings frequently mention that following these simple steps keeps the name looking “as fresh as day one” even after dozens of washes.
Quick care checklist
- Turn shirt inside out before washing.
- Use cold water and a gentle cycle.
- Choose a mild, enzyme‑free detergent.
- Dry low, or air‑dry on a towel.
- Iron on low heat with a protective cloth.
- Fold and store in a cool, dry spot.
Does that feel doable? Absolutely. It’s just a handful of habits you can slip into your regular laundry routine.
And here’s a little bonus: if you’re gifting a set for a reunion, slip a one‑page care card into each package. It shows you care, and it saves everyone a trip back to the FAQ page.
Now you’re ready to keep those custom last name shirts looking sharp for years to come. Happy washing!
Bonus Tips: Creative Ideas for Custom Last Name Shirts
Okay, you’ve got the basics down – you know the fit, the font, and the care routine. Now let’s sprinkle a little magic on those custom last name shirts so they become conversation‑starters, not just wardrobe basics.
1. Turn the Name into a Family‑Tree Graphic
Think about the moment you first heard the whole family lineage laid out at a reunion. That feeling of connection can live on every time someone slips on a shirt. Grab a simple tree silhouette, then weave each branch with a last name. The trick? Use a lighter shade for the trunk and bold the name itself, so it pops even from a distance. One family in Omaha used this exact approach and called the shirts “our living roots” – the design not only looked great, it became a keepsake that survived three reunions in a row.family‑tree inspiration
Action steps:
- Sketch a basic tree outline in a free design tool.
- Place each surname on a branch, adjusting size so the longest name still reads clearly.
- Preview on both a dark and a light tee to ensure contrast.
2. Color‑Code by Generation or Role
Colors can do a lot of heavy lifting when you want each generation to stand out without shouting. Assign pastel blues to grandparents, bright oranges to teens, and a neutral gray for adults. When the crew gathers for a photo, the subtle rainbow tells a story at a glance.
Pro tip: stick to high‑contrast combos – a light name on a dark shirt or vice‑versa – because the ink will stay sharper after wash cycles. If you’re unsure, run a quick test print on a single shirt before ordering the whole batch.
3. Add a Mini‑Badge or Crest
If your family has a coat of arms, a hobby logo, or even a quirky nickname (“The Beach Bunch”), shrink it down to a badge on the sleeve or inside the collar. It’s a tiny surprise that feels premium.
Steps to execute:
- Upload the crest as a PNG with a transparent background.
- Resize to about 1‑inch width – big enough to notice, small enough to stay classy.
- Place it on the left sleeve or the back‑neck area.
4. Mix Media: Photo Collage Meets Name
One of the most Instagram‑worthy ideas is to blend a small family photo collage with the last name overlay. The collage can sit on the chest, while the name arcs over the shoulder. It works especially well for milestone events like a 50‑year reunion or a senior‑grad celebration.
Real‑world example: A cruise crew ordered matching shirts that featured each member’s nickname on the front and a tiny sailboat icon on the back. The personalization was praised for its “fun yet polished” vibe, and the shirts sold out in minutes.cruise‑crew customization
5. Interactive Elements – QR Codes
Want to turn a shirt into a digital hub? Generate a QR code that links to a private photo album, a reunion playlist, or a family tree website. Print the code on the lower back or near the hem so it’s visible but not overpowering.
Here’s how:
- Use a free QR generator and set the URL to a private Google Photos album.
- Download the code as a high‑resolution PNG.
- Upload it as an extra “image” layer in your design tool, positioning it about 2‑inches above the hem.
6. Seasonal Themes for Year‑Round Wear
Don’t limit the shirt to one event. Create a “seasonal capsule” where the base name stays the same, but you swap out a small graphic each quarter – a snowflake for winter, a sun for summer, a leaf for fall. Customers love having a shirt that feels fresh all year without reordering.
To make it easy, order a multi‑color pack from heartful.gifts and keep the extra shirts in a drawer for future swaps. The cost per extra shirt drops dramatically when you buy in bulk.
7. Checklist Before You Hit “Order”
Before you send that design off, run through this quick sanity check:
- Is the name at least 0.75 inches tall on an adult tee?
- Do the colors meet a 3‑shade contrast rule?
- Have you placed any extra elements (badge, QR, collage) within the safe‑zone grid?
- Did you order a single sample in the most common size?
- Is the fabric preshrunk, fade‑resistant, and comfortable for the target wearer?
Crossing those boxes means fewer surprises and a shirt that feels as personal as a handwritten note.
So, what’s your next move? Pick one of these ideas, sketch a quick mock‑up, and let heartful.gifts bring it to life. The result? A custom last name shirt that not only looks great on the day but becomes a cherished piece of family history for years to come.
FAQ
How long does it take to receive custom last name shirts?
Production usually runs 2–4 business days once you’ve approved the final mock‑up. Shipping adds another 2–5 days for standard US delivery, so most customers see their shirts within a week. If you’re ordering for a specific event, give yourself a buffer of at least ten days and consider expedited shipping during peak seasons. The extra time helps avoid last‑minute surprises and gives you a chance to inspect the sample before the whole batch arrives.
Can I order different shirt colors in the same batch?
Absolutely. Most print‑on‑demand platforms let you mix and match colors, sizes, and even fabrics in one order. Just add each variant to the cart and assign the same design file to every item. When you preview, double‑check that the name contrast works on each background – a light font on a dark shirt, or vice‑versa, will stay readable after washes.
What font styles work best for readability on custom last name shirts?
Sans‑serif fonts like Arial, Helvetica, or a clean modern slab tend to stay crisp at smaller sizes, especially on cotton blends. If you want a touch of personality, a bold script can work, but keep the weight heavy enough that the letters don’t blur when the fabric stretches. Test the design by zooming out in the preview tool; if you can still read the name from a few feet away, you’re good to go.
How do I ensure the name size is right for kids versus adults?
For adults aim for a minimum height of 0.75 inches for the tallest letter; for kids shrink it slightly but never below 0.5 inches. Most design tools let you enter exact measurements – use those to set a baseline, then print a single sample in the most common size for each age group. Holding the sample up to a child’s chest gives you a realistic sense of whether the name looks balanced.
What if the printed name looks faded after the first wash?
First, check that you followed the care instructions: turn the shirt inside out, wash cold, and avoid high‑heat drying. If fading still occurs, it’s often a sign of low‑quality ink or a non‑preshrunk fabric. Reach out to the shop within the 7‑day re‑print window, share photos of the issue, and request a fresh print on a fade‑resistant cotton‑poly blend. Most reputable vendors will replace the batch at no extra cost.
Is it possible to add extra graphics like a family crest or QR code?
Yes, you can layer a small badge, crest, or QR code on a sleeve, collar, or lower back. Keep the extra element under an inch wide so it doesn’t compete with the name. Upload a transparent PNG, position it in the design tool’s safe‑zone grid, and preview on both dark and light shirt colors. A QR code works best when it’s at least 1 inch tall and placed where it won’t get folded or creased.
Do you offer bulk discounts for large family reunions?
Many print‑on‑demand shops, including heartful.gifts, lower the per‑shirt price once you hit certain quantity thresholds – often 12, 24, or 48 pieces. The discount usually comes from reduced setup fees and bulk shipping rates. If you’re ordering for a reunion, group sizes of 20 + can shave a few dollars off each shirt, making the personalized gift feel even more affordable for everyone.
Conclusion
We've taken you from picking the right shirt style all the way to caring for the finished piece, and hopefully you can picture that moment when you hand a custom last name shirt to someone and see the smile light up.
Remember, the magic lives in the details: a high‑contrast color combo, a font that matches the occasion, and a preshrunk, fade‑resistant fabric. When those boxes are checked, the name stays sharp wash after wash, and the shirt feels as comfortable as a favorite hoodie.
So, what’s the next step? Grab a single sample in the most common size, give it a test wash, and make sure the placement feels just right. If anything feels off, tweak the size or color before you order the full batch – it’s the cheapest way to avoid a surprise.
Once you’re happy, hit the order button, add a quick care card, and let the shirts do the talking at your reunion, birthday, or family photo day. Those little personal touches turn a simple tee into a keepsake that lasts for years.
Ready to make your family’s name stand out? Dive back into the design tool and bring your vision to life – your custom last name shirts are just a few clicks away.