
How to Design and Order a Custom Picture Hoodie: A Step‑by‑Step Guide
Ever caught yourself scrolling through photos and thinking, “What if I could wear this memory?” That little spark is exactly why the custom picture hoodie has become the go‑to gift for parents, partners, and anyone who loves a personal touch.
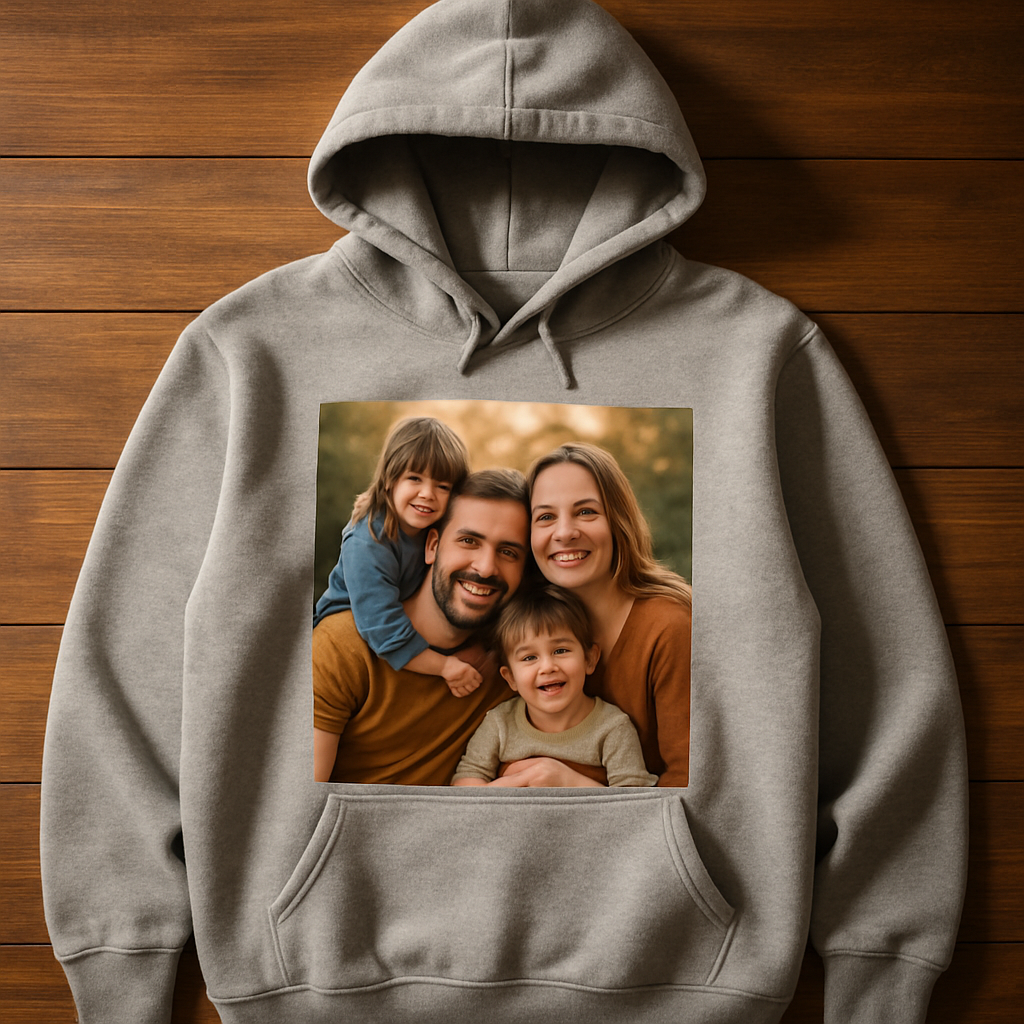
Imagine pulling a soft, cozy hoodie over your head and instantly seeing your kid’s grin printed across the chest, while your favorite vacation snapshot hugging you like a warm hug. It’s not just a piece of clothing; it’s a portable reminder of a moment you don’t want to forget.
But here’s the thing: not every printed hoodie feels right. Some look cheap, colors get dull after a wash, and the fit can be off. That’s why we care about the quality of the fabric, the vibrancy of the print, and the simplicity of the design tool.
So, what makes a custom picture hoodie truly special? First, the image you choose should be high‑resolution enough to survive the printing process. Second, think about placement – a centered portrait works great for a family photo, while a small logo in the corner feels more subtle for a couple’s hoodie. Third, consider the hoodie’s material; a blend of cotton and polyester gives you that buttery softness without sacrificing durability.
And don’t worry about the tech side – the online designer lets you upload, drag, and preview in real time. You can zoom in, add a splash of text, or even experiment with a filter before you hit “order.” It feels almost like playing with a digital scrapbook, except the end result is something you can actually wear.
Now, picture the reaction when you hand over that hoodie. Maybe it’s a dad’s eyes lighting up as he sees his kid’s face, or a partner laughing because the inside pocket bears a goofy selfie they thought was lost. Those moments turn a simple garment into a story you’ll retell for years.
If you’re ready to turn a favorite photo into a wearable memory, let’s dive in and explore how easy it is to create your own custom picture hoodie.
TL;DR
A custom picture hoodie transforms a treasured photo into a soft, wearable keepsake that looks vibrant, feels buttery soft, and stays bright after washes.
Just upload your high‑resolution image, pick placement or a subtle corner logo, select the cotton‑poly blend, and order – it arrives ready to instantly hug you today.
Step 1: Choose Your Photo and Hoodie Style
Okay, picture this: you’ve just found that perfect snap from last summer’s road trip – the one where the sunset hits the lake just right and everyone’s laughing. The first question that pops up is, "Will this photo look good on a hoodie?" The short answer: yes, if you pick the right style and make a few smart choices.
Start by checking the resolution. Anything under 1500 px on the shortest side will look fuzzy once it’s printed, especially on a larger chest area. If the file is a bit grainy, try grabbing the original from your phone or camera, or ask the person who took it for a higher‑resolution copy. Trust me, a crisp image makes the whole hoodie feel premium.
Next, think about placement. A centered portrait works great for family photos, while a small corner logo feels more subtle for couples or friends. If you’re unsure, the design tool on heartful.gifts lets you drag‑and‑drop and see a live preview. In fact, you can follow How to Design and Order Your Perfect Custom Embroidered Hoodie for a step‑by‑step walkthrough of the preview features.
Now, the hoodie style itself. Do you want a classic crew‑neck, a zip‑up, or maybe a raglan with contrasting sleeves? Each cut changes how the image sits on your body. A zip‑up gives you a little extra room to hide the print if you’re feeling shy, while a crew‑neck showcases it front‑and‑center. Look at the fabric blend, too – a cotton‑polyester mix gives you that buttery softness while keeping colors vibrant after wash.
Here's a quick checklist you can print out or keep on your phone:
- Resolution ≥ 1500 px on shortest side
- Choose placement: centered, chest‑logo, or back‑print
- Select hoodie style: crew‑neck, zip‑up, raglan
- Fabric blend: cotton‑poly for softness + durability
- Preview in the designer before confirming
So, what if you accidentally spill coffee on your brand‑new hoodie? Good news – most of our hoodies are machine‑washable, but if you ever face a soggy situation, it’s wise to know how to rescue it. In a pinch, you might even need a professional service like emergency water damage restoration in Grand Rapids, MI to dry out the fabric without ruining the print.
Once you’ve settled on the image and style, it’s time to see it in action. Below is a short video that walks you through the upload and positioning steps in the design tool. Grab a coffee, follow along, and you’ll have your hoodie looking just the way you imagined.
After you’ve watched the video, take a moment to compare your preview with the image placeholder below. This helps you catch any off‑center alignment before you hit “order”.
Finally, give yourself a quick sanity check: does the hoodie still feel comfortable when you try it on? Does the image sit where you want it? If the answer is yes, you’re ready to add it to the cart and let us handle the rest. The whole process usually takes just a few clicks, and before you know it, you’ll have a wearable memory that’s as soft as a hug.
Remember, the magic is in the details – a sharp photo, the right placement, and a hoodie style that matches your vibe. Nail those three, and you’ll end up with a custom picture hoodie that feels personal, looks amazing, and lasts for years.
Step 2: Prepare Your Image for Printing
Alright, you’ve picked the perfect snapshot and the hoodie style that feels just right. Now comes the part that most people skip – getting the image ready so it looks crisp, vibrant, and true to life on fabric.
Check the resolution – PPI matters
First things first: open your photo in any image editor (even the free ones on your phone work). Look for the pixel‑per‑inch (PPI) setting. Aim for at least 300 PPI at the size you plan to print. Anything lower and you’ll start to see fuzziness once the design is transferred to the cotton‑poly blend.
BlueCotton’s guide points out that 300 PPI is the sweet spot for hoodie prints, and the maximum printable area is usually around 13″ × 10″. Most people stick to 10‑11″ wide for a clean look that won’t overwhelm the garment.
Resize without losing quality
Got a giant Instagram photo that’s 4000 × 3000 px? Great! Use a tool like Photoshop, GIMP, or an online resizer to set the canvas to the exact dimensions you need – say 12″ × 8″ for a front‑center design. Keep the aspect ratio locked so the image doesn’t get stretched.
If the file is too small, you can try a gentle up‑scale, but remember: enlarging a low‑resolution picture will only make pixelation worse. In that case, grab the original source file or ask the photographer for a higher‑resolution version.
Mind the color profile
Most design tools default to sRGB, which is fine for web images. However, printing works best with an RGB file that’s been converted to the printer’s color space (usually CMYK). If your design software offers a “Print‑Ready” or “Export for DTG” option, choose it. That way the colors you see on screen stay true after the hoodie hits the dryer.
Pro tip: avoid heavy filters that dramatically shift hues. A subtle boost to contrast and saturation often does the trick without compromising print fidelity.
Clean up background noise
Sometimes a photo has a busy background that steals attention from the main subject. Use a quick “remove background” feature or a brush tool to blur or mask the edges. The result feels more polished – think of it as giving the image a soft vignette that guides the eye to the face or object you want to showcase.
Here’s a quick checklist you can copy‑paste into a note:
- Resolution ≥ 300 PPI at final print size
- Canvas set to ≤ 13″ × 10″ (standard max)
- File saved as PNG or high‑quality JPEG
- Color mode: RGB → printer‑optimized profile
- Background cleaned or subtly blurred
Once you’ve ticked those boxes, you’re basically ready to hit “upload.”
Upload and preview – the safety net
Our design studio lets you drag the prepared file onto the hoodie mock‑up. Zoom in to 150 % – that’s the sweet spot we mentioned earlier – and look for any jagged edges or color banding. If something looks off, go back to your editor, make a tiny tweak, and re‑upload. It feels a little extra work, but trust me, you’ll thank yourself when the final product looks flawless.
Does it feel a bit overwhelming? Not at all. Think of it like getting ready for a photo shoot: you check the lighting, adjust the pose, and make sure the background is tidy before the camera clicks.
That short video walks you through the exact steps in our online tool – from uploading your high‑resolution file to positioning it on the hoodie’s chest, back, or sleeve. It’s a handy visual companion if you’re a more “see‑it‑to‑believe‑it” kind of person.
Real‑world examples
Take Maya, a new mom who wanted a keepsake of her baby’s first grin. She started with a 4000 × 4000 px portrait, cropped it to 12″ × 12″, set the resolution to 300 PPI, and lightly brightened the eyes. After a quick preview, the design looked sharp, so she placed it on the left chest of a charcoal hoodie. The final product? A soft, buttery‑feel hoodie where the tiny smile is as clear as the day the photo was taken.
Then there’s Alex, who created a collage of his hiking crew’s summit photos. He used a free collage maker, kept the total size under 13″ × 10″, and exported a PNG at 300 PPI. The back‑full placement turned the hoodie into a moving “trail journal,” and friends kept pointing out how the colors stayed vivid even after a week of mountain‑air washes.
Final quick‑fire steps
1. Open your image, verify ≥ 300 PPI at desired size.
2. Resize canvas to ≤ 13″ × 10″.
3. Convert to RGB and apply a print‑ready profile.
4. Clean up background or add a subtle vignette.
5. Save as PNG (or high‑quality JPEG).
6. Upload, preview at 150 % zoom, adjust if needed.
7. Order with confidence.
Follow these steps, and you’ll end up with a custom picture hoodie that looks just as sharp on fabric as it does on your screen.
Step 3: Select Printing Method and Placement
Okay, you’ve got the perfect photo and you know where you want it. Now the real question is – how do we actually get that image onto the hoodie so it looks as good in the wash as it did on your screen?
Know your printing options
There isn’t a one‑size‑fits‑all answer. Different techniques shine with different fabrics and design complexities. Printify explains the various hoodie printing methods – from the classic, bold screen printing to the ultra‑detailed direct‑to‑garment (DTG) approach, plus dye‑sublimation for all‑over polyester designs, DTF for versatile transfers, and even embroidered accents for a premium touch.
Screen printing is cheap for bulk runs and gives you thick, durable ink, but it’s best for simple, few‑color graphics. DTG, on the other hand, works like a giant inkjet that sprays tiny droplets directly onto a cotton‑poly blend, preserving every nuance of a photo – perfect for that smile you want crisp on the chest.
If you’re dreaming of a full‑back, all‑over collage that covers the hoodie from seam to seam, dye‑sublimation is the way to go, but it only bonds to polyester fabrics. DTF lets you print on virtually any material, though it adds a thin film layer that can feel a bit plasticky under the skin.
Match method to material
Our hoodies are a soft cotton‑poly blend, which means DTG is usually the sweet spot: it handles intricate gradients, skin tones, and subtle shadows without sacrificing the hoodie’s buttery feel. If you pick a heavier fleece or a 100% cotton shell, screen printing can still work, especially for bold logos or single‑color text.
Thinking about embroidery? It adds a textured, raised logo that never fades, but it’s not ideal for full‑photo reproductions. Use it for a tiny monogram on the cuff or a discreet name tag on the hem.
Placement matters as much as the method
Now that you know which technique fits your fabric, decide where the design lives. Front‑center is the classic portrait spot – it grabs attention and works well with DTG because the printer can lay down a dense layer of ink without worrying about seams.
Left‑chest is great for a subtle “signature” snapshot or a small logo. Because the area is smaller, you can even opt for a heat‑transfer vinyl (HTV) or a low‑cost screen print and still get crisp edges.
Back‑full is the storytelling canvas. If you go the all‑over route, choose dye‑sublimation on a polyester‑blend hoodie; the ink fuses into the fibers, so the image won’t crack or peel after washes.
Sleeve details – a tiny date, coordinates, or a tiny icon – can be done with DTG or HTV. Just remember the sleeve’s curve; a flat print might warp, so a thin‑film DTF transfer often gives the cleanest result.
Quick decision checklist
- Fabric: cotton‑poly blend → DTG for photos; polyester → dye‑sublimation for all‑over.
- Design complexity: photo‑rich → DTG; simple logo → screen printing or HTV.
- Placement size: small chest or sleeve → HTV or screen; large back → DTG or sublimation.
- Quantity: bulk logo tees → screen printing; one‑off gift hoodie → DTG.
When you’re staring at the preview screen, zoom to 150 % and ask yourself: does the edge look clean? Does the color still pop? If something feels fuzzy, swap the method or shrink the area a bit.
Pro tip: combine techniques
Don’t be afraid to mix. Many of our customers print a full‑color photo on the back with DTG, then add a tiny embroidered monogram on the front pocket. The result feels luxe, and the embroidery never fades, even after a hundred washes.
Finally, give the hoodie a quick “wear test” in your mind. Imagine you’re pulling it on after a rainy walk – will the print stay vibrant? Will the placement feel comfortable against your skin? If the answer is yes, you’re good to go.
Pick the method that matches your fabric, align the placement with the story you want to tell, and hit order. In just a few days, you’ll have a custom picture hoodie that looks as alive as the memory it captures.
Step 4: Review Proofs and Make Adjustments
Now that your photo is resized, the printing method is chosen, and the hoodie style is set, the next moment feels a bit like waiting for a birthday present – you’ve got the box, but you still need to peek inside.
Our design studio will email you a digital proof. This isn’t just a pretty picture; it’s your last chance to catch any hiccup before the ink hits fabric.
What the proof actually shows
Zoom in to 150 % – that’s the sweet spot we keep mentioning. Look for jagged edges, unexpected color shifts, or stray pixels that might have crept in when you trimmed the background.
Check the placement too. Does the image sit comfortably on the chest, or does it drift toward the seam? Imagine the hoodie on your body and ask, “Will this feel right when I pull the zipper?”
Real‑world example: The “First‑Day‑of‑School” hoodie
Sara uploaded a candid of her son’s first‑day smile. In the proof she saw a faint white halo around the edges because the original had a bright classroom wall. She cropped a little tighter, re‑uploaded, and the halo vanished. The final hoodie arrived with the smile crisp enough to see the tooth‑y grin.
Another case: Mark ordered a collage of his travel photos for the back of a zip‑up. The proof revealed that the collage overlapped the zipper pull, making the design look cramped. He nudged the whole layout a half‑inch up, and the final piece looked like a polished travel journal.
Step‑by‑step checklist
1. Open the proof on a desktop or tablet – mobile screens can mask pixelation.
2. Zoom to 150 % and scan the edges of the image. Any jagged lines? Adjust the file or shrink the design.
3. Verify colors. Does a bright red shirt appear as a muted pink? If so, toggle the color profile in your editor or select a different printing method.
4. Confirm placement. Use the on‑screen ruler to measure distance from seams, pockets, and zipper pulls.
5. Look for text or small details. Are they legible? If not, increase font size or simplify the wording.
6. Hit “Approve” only when every box feels right. If you’re on the fence, request a second proof – most services, including Embroly, offer unlimited edits with no extra fees.according to Embroly’s proof‑and‑edit policy
Pro tips from the pros
– Keep a “one‑pixel buffer” around the outer edge of the image. This prevents the print from accidentally clipping on the hoodie’s seam.
– If you’re mixing DTG with embroidery (like a monogram on the sleeve), ask for separate proofs for each technique. The embroidery proof will show stitch direction and density, which can affect how the DTG image sits next to it.patches4less explains the value of separate design proofs for embroidered elements
– Trust your gut on texture. If the proof looks “plastic” on a polyester mock‑up, that’s a sign you might be better off with DTG on a cotton‑poly blend for that photo.
Quick decision table
| Aspect | What to Look For | Adjustment Tip |
|---|---|---|
| Edge clarity | Jagged or pixelated borders at 150 % zoom | Resize or clean up the file; add a 1‑px buffer |
| Color fidelity | Shifts from vibrant on screen to dull in proof | Convert to printer‑approved color profile or choose a different method |
| Placement accuracy | Design too close to seams, pockets, or zipper pull | Use ruler tool; nudge layout by 0.5‑1 inches |
Once you’ve signed off, the production team gets to work. Most printers turn around a proof‑approved custom picture hoodie in 3‑5 business days, then ship it out fast enough that you’ll have it before the next family gathering.
And if you’re still nervous, remember: many services let you request a final “wear test” photo of the hoodie on a mannequin. It’s a tiny extra step, but seeing the hoodie draped on a real‑world shape can calm any lingering doubts.
Bottom line? Treat the proof like a final rehearsal. A few minutes of scrutiny now saves you from a “what‑went‑wrong” moment after the hoodie arrives. You’ll end up with a piece that feels as perfect as the memory it’s meant to carry.
Step 5: Place Your Order and Track Shipping
Double‑check your design before you click
Now that you’ve tweaked the proof, it’s time to hit that big “Order” button. But before you do, take a quick breath and glance at the final preview one more time. Zoom in to 150 % – that’s the sweet spot we keep mentioning – and make sure the edges are crisp, the colors still pop, and the placement feels right against the seam.
Ask yourself: does the hoodie still look like the memory you wanted to wear? If anything feels off, most print‑on‑demand services let you edit the design right up until you confirm payment, so there’s no rush to panic.
Fill out the order form like a conversation
When you enter your shipping address, treat it like you’re telling a friend where to meet you for coffee. Use the exact street name, apartment number, and any gate code. A tiny typo can send your custom picture hoodie to the wrong mailbox, and that’s a mood‑killer.
Tip: copy‑paste the address from your phone’s contacts list – it cuts down on human error and saves you a call to customer service later.
Select the right delivery option
Most of our customers aren’t in a hurry, so the standard 3‑5 business‑day turnaround works fine. If you’ve got a birthday or a surprise party coming up, consider the rush‑shipping upgrade – it usually adds 1‑2 days and can be worth the extra cost.
According to Yes We Print’s guide on custom picture hoodies, they offer same‑day printing for urgent orders, but the final delivery still depends on your location and carrier.
Payment – keep it simple
Credit cards, PayPal, or a quick bank transfer – pick whatever feels easiest. Most platforms encrypt your info, so you don’t have to worry about safety. If you’re buying as a gift, look for the “gift receipt” option; it hides the price but still lets the recipient know you care.
Pro tip: use a card that offers purchase protection. If the hoodie arrives with a print defect, you’ll have an easy path to a refund or replacement.
What happens after you click “Place Order”?
The moment you confirm, the production queue lights up. Your design is sent straight to the DTG printer, which prints the image onto the cotton‑poly blend in under an hour. Then the hoodie slides through a curing tunnel, gets folded, and is boxed for shipment.
Most services send you two emails: an order confirmation with a summary of your choices, and a shipping notification that includes a tracking number. Keep that second email handy – you’ll refer to it more than once.
Tracking your custom picture hoodie
Open the tracking link in your email. It usually opens a carrier dashboard (UPS, FedEx, DHL, or the local postal service). You’ll see a timeline: “Label created,” “In transit,” “Out for delivery.” If the status stalls for more than 48 hours, don’t panic – just hit the “Contact support” button and ask for an update.
Real‑world example: Maya ordered a hoodie for her baby’s first birthday. She got the tracking number, watched the package move from the fulfillment center in Helsinki to her doorstep in Stockholm, and even got a text when the carrier was one block away. That little notification turned the waiting game into a mini‑celebration.
Inspect on arrival – the final quality check
When the box arrives, open it on a clean surface and lay the hoodie flat. Compare the actual print to the online preview. Look for any misaligned seams, color shifts, or smudges. If everything matches, give yourself a high‑five – you just turned a digital memory into a tangible keepsake.
If you spot a problem, snap a clear photo of the issue and email customer service right away. Most reputable shops will offer a free reprint or a refund, especially if the defect is printer‑related.
Quick‑fire checklist before you close the tab
- Zoomed preview at 150 % – edges clean, colors vibrant.
- Shipping address verified – no typos.
- Delivery speed selected – standard or rush?
- Payment method chosen – with purchase protection.
- Order confirmation saved – you’ll need the number.
- Tracking link bookmarked – keep an eye on the journey.
- Final inspection plan – know what to look for.
Following these steps makes the whole process feel less like a gamble and more like a well‑planned adventure. Before you know it, you’ll be pulling that custom picture hoodie over your head, feeling the soft fabric, and smiling at the memory printed right on the chest.
So, what’s the next move? Grab your favorite photo, hit “Order,” and watch the magic travel from the printer to your front door. Your hoodie is only a few clicks away, and the story it tells will travel with you wherever you go.
Step 6: Caring for Your Custom Picture Hoodie
Now that your custom picture hoodie is hanging in the closet, you might be wondering: “Do I have to treat it like a delicate piece of art?” The short answer is yes, but the good news is the routine is surprisingly simple.
Why proper care matters
Every time you wash a garment, the fibers flex and the ink or dye can fade. A well‑kept hoodie keeps the photo crisp, the colors vivid, and the fabric buttery soft for years. Think of it like caring for a family photo album – the more gently you handle it, the longer the memories stay bright.
Basic wash rules
First, turn the hoodie inside out. This protects the printed side from friction with other clothes or the washing machine drum. A mild detergent without bleach does the trick.
Second, avoid heavy‑duty cycles. A gentle or hand‑wash setting gives the fabric a calm spin and reduces the chance of print cracking.
Step‑by‑step washing routine
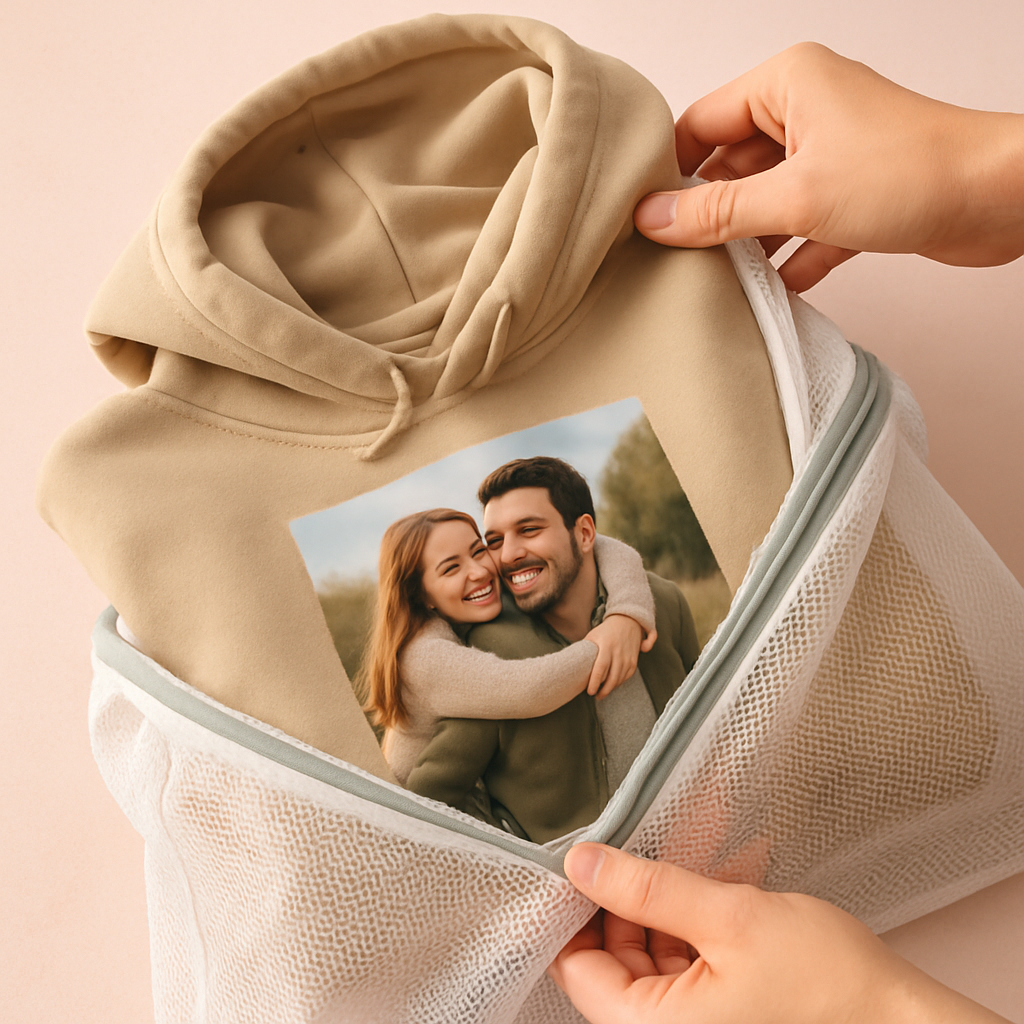
1. Zip or pull the hoodie closed – this keeps the front image from rubbing against the zipper teeth.
2. Place the hoodie in a mesh laundry bag; the bag acts like a soft pillow for the print.
3. Add a small amount of liquid detergent, then start the gentle cycle.
4. As soon as the wash ends, remove the hoodie promptly to prevent mildew.
5. Turn it right side out before drying.
Real‑world example
Take Maya, who ordered a hoodie with her baby’s first grin. She followed the inside‑out rule, used a cold wash, and hung the hoodie to dry. After three months of weekly wear, the photo still looked as sharp as the day it arrived – no fading, no cracking.
Drying tips that actually work
Lay the hoodie flat on a clean towel and reshape the shoulders while it’s damp. Avoid the dryer whenever possible; the heat can shrink the cotton‑poly blend and cause the print to lift.
If you’re in a hurry, tumble on the lowest heat for just five minutes, then pull it out and let it finish air‑drying.
Ironing and storage
If you need to iron, set the iron to a low heat and place a thin cloth between the iron and the printed area. Too much direct heat can melt the ink droplets.
Store the hoodie hanging on a wide wooden hanger. This prevents creases on the chest where the picture sits.
Stubborn stains? Here’s a quick fix
For a spilled juice spot, blot (don’t rub) with a clean cloth, then apply a dab of mild dish soap diluted in water. Gently work it in with your fingertips, rinse with cold water, and repeat if necessary. Never soak the printed side for more than five minutes.
Longevity checklist
- Wash inside out, cold, gentle cycle.
- Use a mesh bag, zip closed.
- Avoid bleach and fabric softener.
- Air‑dry flat; low‑heat tumble only if needed.
- Iron low, with a protective cloth.
- Hang on a wide hanger, no heavy weight.
Following these steps aligns with the care instructions from Bags of Love, which recommend washing at 86°F and hanging to dry to preserve print quality.
And if you ever notice a faint line or a loose stitch, remember that many providers, including Embroly’s three‑year guarantee, back their custom hoodies with a three‑year guarantee on print, components and stitching – so you can reach out for a replacement without stress.
Bottom line: a little extra attention now means your custom picture hoodie stays a wearable memory for countless seasons. So go ahead, throw it on, snap a selfie, and let the story keep unfolding.
Conclusion
So, you’ve walked through every step—from picking the perfect snap to caring for the hoodie after it lands in your hands.
What does all that effort buy you? A custom picture hoodie that feels less like a garment and more like a memory you can wear, day after day.
Remember Emma’s family‑hoodie moment or Maya’s baby grin? Those little stories show that a little extra care at the design stage pays off in a piece that sparks joy every time you pull it on.
Here’s the quick recap: choose a high‑resolution image, set it to 300 PPI, pick DTG for photo‑rich prints on our soft cotton‑poly blend, double‑check the proof at 150 % zoom, and follow the gentle wash routine.
If you’re still on the fence, ask yourself: would you rather gift a generic hoodie or one that captures a laugh, a sunrise, a milestone?
Ready to turn that favorite photo into a wearable keepsake? Head over to our shop, upload your image, and let us handle the rest. Your custom picture hoodie is just a few clicks away—let’s make it happen.
And don’t forget, a well‑cared hoodie can last years, keeping those moments vivid long after the season changes.
Enjoy the wear, share the love.
FAQ
How do I pick the perfect photo for a custom picture hoodie?
First, think about the moment you want to wear – a baby grin, a wedding smile, or a goofy pet pose. Choose a high‑resolution shot (at least 300 PPI) so the details stay sharp when they’re stretched across the chest. Look for simple backgrounds; a clutter‑free scene lets the subject shine without competing for attention. And ask yourself, will this image still make you smile years from now? If the answer is a loud yes, you’ve got a winner.
What image specs does my hoodie need?
We recommend a PNG or high‑quality JPEG saved at 300 PPI for the final print size you’ve chosen – usually no bigger than 13 × 10 inches on a cotton‑poly blend. Keep the file under 15 MB so the upload stays smooth, and work in RGB; the printer will handle the conversion to its own color space. A quick sanity check: open the file on your computer, zoom to 150 % and make sure no edges look jagged.
Which printing method gives the best photo quality?
Direct‑to‑garment (DTG) is the go‑to for photo‑rich designs on our soft cotton‑poly hoodies. It sprays microscopic ink droplets that capture gradients, skin tones, and tiny details without feeling heavy. Screen printing is great for bold logos but can’t render the subtle shadows of a family portrait. If you want an all‑over splash, dye‑sublimation works only on polyester, so for a classic picture hoodie DTG is the sweet spot.
Can I order several hoodies with different pictures in one checkout?
Absolutely. Our cart lets you add multiple designs, each with its own preview and proof. Just make sure you finish the proof step for every artwork before you hit “place order.” It’s handy to label each item in your cart (e.g., “Mia’s grin” vs. “Grandpa’s fishing trip”) so you don’t mix them up later. The system bundles the production runs, so you still get the same fast turnaround.
How long does it take from upload to delivery?
After you upload and approve the proof, the printer usually fires up the DTG job within 1‑2 business days. Production runs take another 2‑3 days, then the hoodie is handed off to the carrier. In total you’re looking at about 3‑5 business days for standard shipping, plus a day or two for transit depending on your location. If you’re racing a birthday, the rush‑shipping upgrade can shave off a couple of days.
What’s the best way to care for my custom picture hoodie?
Treat it like a favorite photo album – gentle is key. Turn the hoodie inside out, zip it closed, and toss it in a mesh laundry bag. Use cold water, a mild detergent, and the gentle cycle. Skip bleach and fabric softener; they can dull the inks. Air‑dry flat or tumble on the lowest heat for just five minutes, then reshape the shoulders while it’s damp. This routine keeps the print vibrant for years.
What should I do if the print looks off when I receive the hoodie?
Open the package on a clean surface, lay the hoodie flat, and compare the actual print to the online proof. Look for color shifts, blurry edges, or misalignment. Snap a clear photo of any issue and email customer support right away – most shops, including us, offer a free reprint or refund if the defect is printer‑related. Keep the original packaging until the issue is resolved; it speeds up the claim process.