
How to Design a Photo Collage T Shirt That Stands Out
Ever stared at a pile of family photos and thought, “There’s got to be a cooler way to wear these memories?”
That feeling is exactly what sparked the rise of the photo collage t shirt – a wearable scrapbook that lets you flaunt your favorite moments without digging out a photo album every time someone asks for a glimpse.
But let’s be honest, not every DIY idea ends up looking like a polished Instagram post. You might end up with a blurry mess or colors that clash like socks on a rainy day. That’s why a little guidance can turn a frantic collage into a gift that feels intentional, heartfelt, and actually wearable.
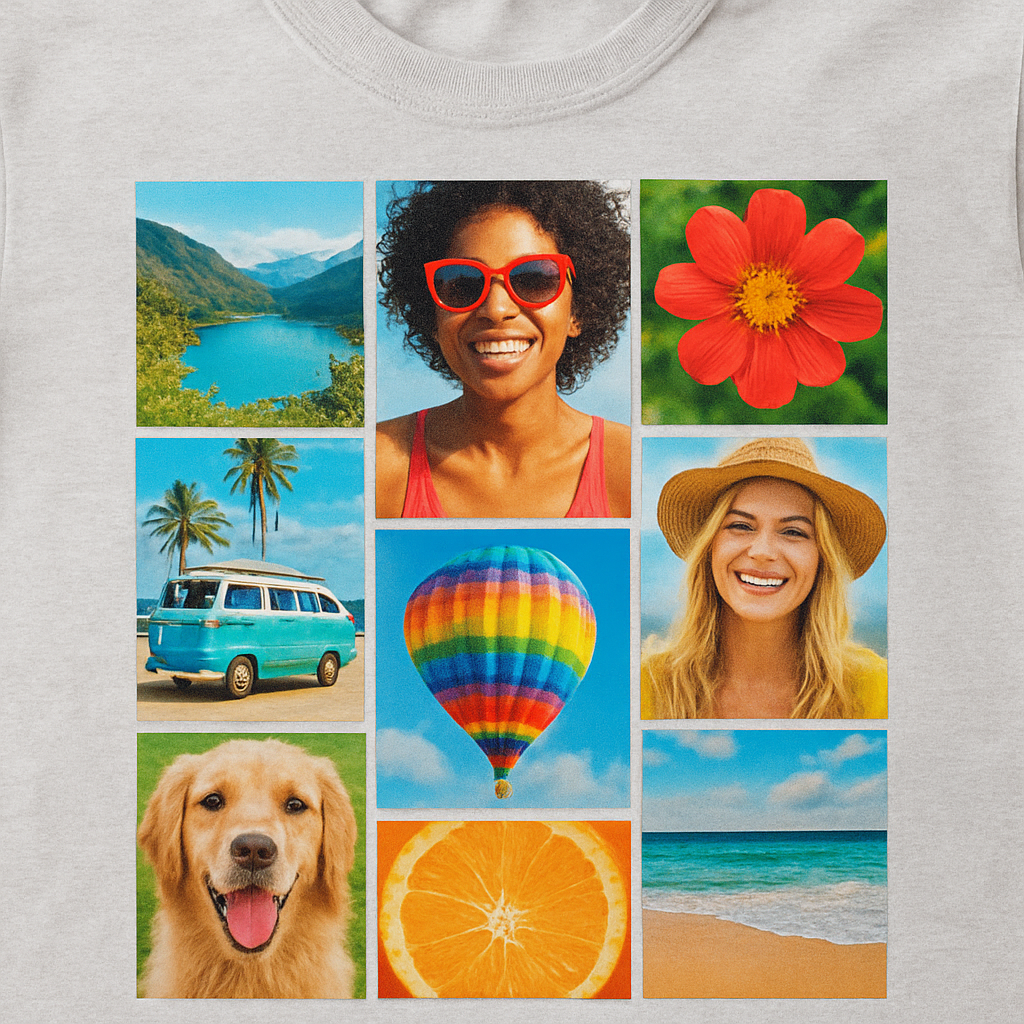
So, what does a great photo collage t shirt look like? Imagine a soft, breathable cotton tee that serves as a canvas. Your favorite snapshots—maybe a beach sunrise, a goofy pet moment, and that candid laugh from last summer—are arranged in a balanced grid or a playful heart shape, each image crisp and true to color.
And the best part? You don’t need a professional designer. With a few clicks on a print‑on‑demand site like heartful.gifts, you can upload your pictures, drag‑and‑drop them into a template, and preview the final shirt before it ships. No messy Photoshop layers, no guesswork, just a straightforward process that lets your creativity shine.
Now picture the reaction when you hand that shirt to a friend or family member. Their eyes light up, they run a finger over the printed faces, and suddenly you’ve turned a digital file into a tangible memory they can hug. That’s the magic of a photo collage t shirt – it’s personal, it’s playful, and it’s instantly shareable.
So, if you’ve been dreaming of a way to wear your memories without the hassle, stick around. In the next sections we’ll walk through picking the right photos, choosing a layout that flatters your style, and avoiding common pitfalls that can turn a masterpiece into a mishap. Let’s dive in and start turning those cherished moments into a shirt you’ll actually want to wear.
TL;DR
A photo collage t shirt lets you turn treasured snapshots into a wearable memory that’s instantly shareable and uniquely yours today.
Follow our simple, step‑by‑step guide to pick perfect photos, choose a flattering layout, and avoid common pitfalls, so you can create a shirt you’ll actually want to wear easily.
Step 1: Gather Your Favorite Photos
You know that moment when you scroll through old photos and a flood of memories hits you like a warm wave? That's exactly why step one feels so personal – you’re about to hand‑pick the snapshots that will literally become a piece of clothing you can wear.
First thing’s first: think about the story you want the shirt to tell. Is it a family vacation, a goofy pet series, or maybe a collage of birthday smiles? When the purpose is clear, the photo hunt becomes less of a scavenger‑hunt and more of a curated gallery.
Start by gathering everything in one place – a folder on your computer, a cloud album, or even a physical box if you’re still printing. Pull in pictures from your phone, social media archives, and that dusty photo album grandma kept in the attic. The more you dump now, the easier the culling later.
Quality matters more than quantity. Aim for images that are at least 1200 pixels on the longest side – that way the printer won’t have to stretch them and you’ll avoid the dreaded pixel‑grain look on fabric. If a photo looks fuzzy on your screen, it’ll probably look worse on cotton.
Next, sort the pool into themes. Create sub‑folders like “Beach Days,” “Family Gatherings,” and “Funny Faces.” This simple organization lets you see which moments complement each other and which ones clash like socks on a rainy day. Trust your gut – if a picture makes you smile, it’s a keeper.
When you’ve narrowed it down to about 6‑10 high‑resolution shots, it’s time to think about layout. A balanced grid works for most occasions, but a heart shape or a free‑form collage can add personality. Need a step‑by‑step walkthrough? Check out our How to Design and Order a Custom Photo T Shirt: A Step‑by‑Step Resource for layout tips that sync perfectly with the photos you just chose.
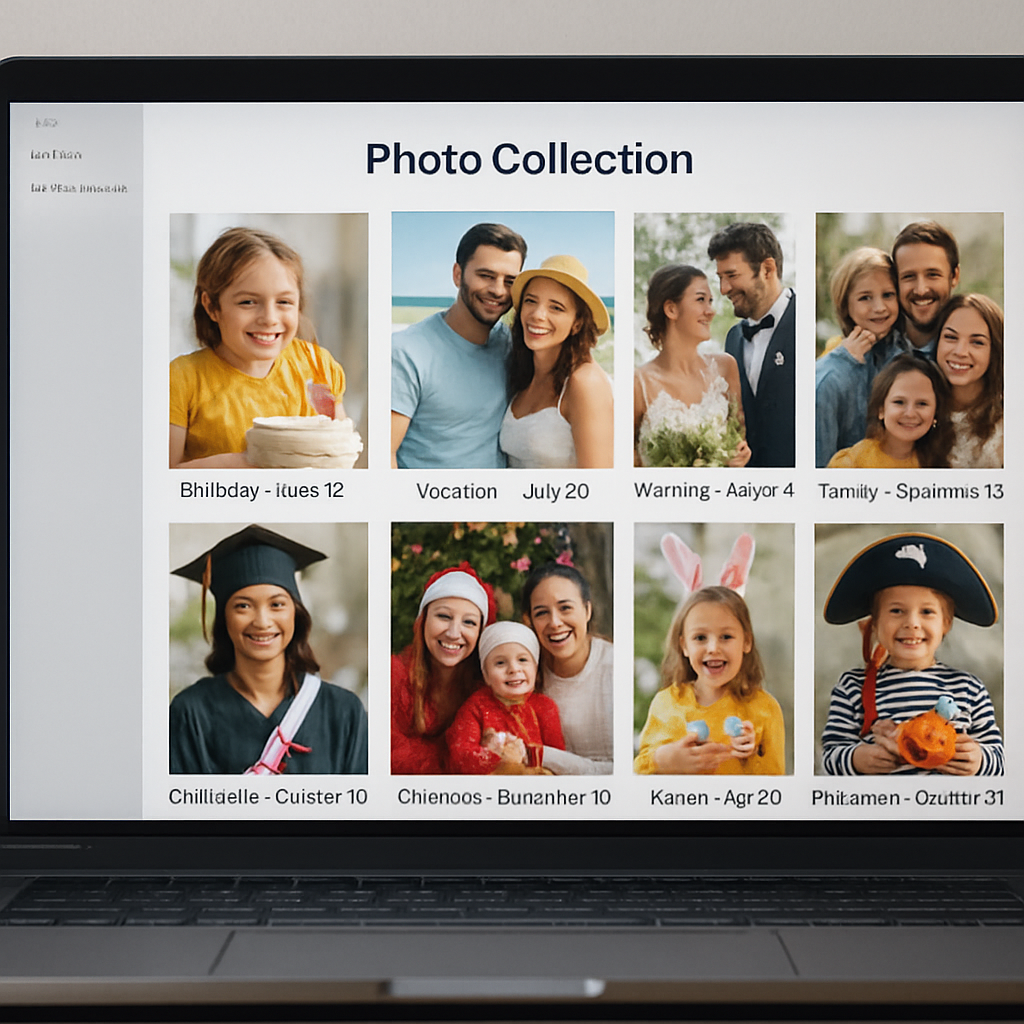
Here’s a quick visual guide to help you sort and select the perfect pictures.
Watch the clip, pause whenever a tip clicks, and then head back to your folder. You’ll see how a simple color‑check or cropping trick can make a blurry sunset suddenly look crisp enough to wear.
Below is a visual mock‑up of a well‑organized photo collection ready for the t‑shirt canvas.
If you’re looking for a little extra energy while you’re brainstorming layouts, you might enjoy a natural boost. Many creators swear by the mushroom blends from Natural Elevate to stay focused during design sessions.
Now that your photos are curated, labeled, and stored, you’re ready to move on to the design phase. Keep the folder handy, because the next step will ask you to drag each image into the online editor and play with size and placement. Remember, the more organized you are now, the smoother the whole process will feel – no frantic searching, just pure creative flow.
A quick naming trick saves a lot of hassle: add the event and date to each file, like “Beach_2023_07_14.jpg”. When the editor asks for a photo, you’ll spot the right one in seconds.
Step 2: Choose a Collage Layout
Now that you’ve got a tidy folder of high‑resolution memories, it’s time to think about how they’ll sit on the tee. The layout you pick is the skeleton that turns a random bunch of snaps into a story you can actually wear.
Start with the shape of your shirt
Most photo collage t shirts use a simple rectangular canvas, but you can break the mold. A heart‑shaped grid works wonders for a romantic gift, while a circular burst feels playful for a kids’ birthday shirt. Ask yourself: what vibe does the occasion call for? The shape you choose will guide the rest of your decisions.
Grid vs. free‑form
A classic grid—think 2 × 3 or 3 × 3—is the safest bet. It gives each picture equal breathing room and looks clean even if some photos are a bit busy. If you’re feeling adventurous, a free‑form collage lets you overlap images, tilt them, or let one picture peek out from behind another. The trade‑off? It can get chaotic if you don’t keep a visual anchor, like a central photo that draws the eye.
So, which style fits your collection? If you have a handful of hero shots (maybe a wedding kiss or a pet’s goofy grin), let those dominate a free‑form layout. If you’re comfortable, stick with a grid.
Consider orientation and flow
Mixing portrait and landscape can add rhythm, but only if you space them intentionally. Place a landscape photo at the top or bottom to create a visual “bridge” between portrait shots. This little trick prevents the collage from feeling like a jigsaw puzzle that never quite fits.
Think about the natural reading direction—left to right, top to bottom. Arrange the images so the eye moves smoothly across the shirt, like you’d flip through a photo album. A common mistake is clustering all the bright, colorful pics on one side, leaving the other side looking flat. Balance is key.
Size matters—keep the printable area in mind
Most print‑on‑demand services, including heartful.gifts, recommend keeping the collage within a 12‑inch × 12‑inch square for a standard unisex tee. Anything larger risks stretching or losing detail. When you’re dragging and dropping in the design tool, watch the guidelines and make sure no photo spills over the safe zone.
Here’s a quick checklist you can copy‑paste into a note:
- Choose a shape (rectangle, heart, circle).
- Decide grid or free‑form.
- Balance portrait vs. landscape.
- Keep total area ≤ 12 × 12 inches.
- Leave at least 0.25 inch margin around the edge.
Does this feel overwhelming? Take a breath, then pull up a blank canvas in your design tool and start moving the thumbnails around. You’ll quickly see which arrangement feels natural.
Color harmony is another silent hero. Pull a subtle hue from one of your favorite photos—maybe the turquoise of a beach wave or the warm amber of a sunset—and use it as a background tint for the whole collage. This tiny trick ties everything together without drowning any single picture.
After you’ve settled on a layout, the next step is to fine‑tune spacing and add any finishing touches like text or decorative borders. But first, make sure the core arrangement feels right—if it makes you smile, you’re on the right track.
Step 3: Edit and Arrange Images
Alright, you’ve dragged those thumbnails into a shape that feels right. Now it’s time to give each picture a little polish so the whole collage sings when it lands on a shirt.
1. Trim, brighten, and unify
First, open every photo in a quick‑edit tool. Crop out any distracting edges, crank the brightness just enough to match the lightest shot, and add a subtle contrast boost. If a few images look a bit washed out, a dash of saturation can bring the colors back without over‑doing it.
Canva’s photo editor makes this painless – you can crop, flip, and adjust brightness in a single click, and even use the auto‑focus background blur to keep the subject sharp.
Pro tip: apply the same filter (or at least the same temperature) to all photos. That tiny visual thread ties everything together and prevents the collage from looking like a random scrapbook.
2. Fine‑tune spacing and alignment
When you’re happy with the look of each image, zoom out and look at the negative space. Too much breathing room can make the design feel airy, but not enough will crowd the shirt and risk a blurry print. Aim for a consistent gutter – about 0.1‑0.2 inches works well on a 12‑inch canvas.
Use the grid overlay in your design tool to line up edges. If you’re working free‑form, lock the “anchor” photo (the one you want eyes to land on first) and arrange the rest around it like satellites.
Here’s a quick checklist you can copy‑paste:
- All photos cropped to a similar aspect ratio.
- Brightness/contrast within 10 % of each other.
- Even gutters between images.
- At least a 0.25‑inch margin from the shirt’s edge.
3. Add text, borders, and playful details
Sometimes a single word or a date can turn a nice collage into a story. Keep text short – think “Summer ’23” or “Best Dog Ever.” Choose a font that matches the vibe: handwritten for a family vibe, bold sans‑serif for a modern look.
PicCollage gives you a treasure chest of fonts, stickers, and border shapes that snap onto any photo. If you want a subtle frame, try a thin white line; for a festive shirt, a light‑hearted doodle in a corner works wonders.
Remember: less is more. Too many stickers can drown the memory you’re trying to showcase.
4. Preview on the actual tee
Most print‑on‑demand sites, including heartful.gifts, let you toggle a 3‑D mock‑up. Spin the shirt, zoom in, and check that no photo spills over the safe zone. If a corner looks fuzzy, it’s probably because the original resolution dropped below 150 dpi – swap it out for a higher‑res version.
Take a screenshot of the mock‑up, hold it up to the light for a second, and ask yourself, “Does this make me smile?” If the answer is yes, you’re golden.
5. Save, export, and lock it in
When everything feels right, lock the layers (most editors have a “lock” button). This prevents accidental moves later when you upload the file. Export as a PNG with a transparent background – that way the shirt’s color shows through the collage’s gaps.
Now you’ve got a polished, print‑ready file that will look crisp on cotton, polyester, or a blend.
Quick‑Reference Table
| Feature | Tool/App | Why It Matters |
|---|---|---|
| Crop & Brightness Adjust | Canva | Ensures each photo shares the same visual tone. |
| Grid Overlay & Lock Layers | PicCollage | Helps keep spacing even and prevents accidental shifts. |
| Font & Sticker Library | PicCollage | Adds personality without overwhelming the design. |
And that’s it – you’ve turned a handful of raw snapshots into a cohesive collage that’s ready to wear. The next step is to hit “order” on heartful.gifts and watch your memories materialize on fabric. Happy designing!
Step 4: Select Printing Method
Now that your collage is locked, saved as a PNG, and waiting in the “Collage T‑Shirt” folder, the next big decision is how the design actually lands on fabric.
Do you want the colors to pop like a neon billboard, or are you after a soft, subtle look that feels like a memory whispered on cotton? The answer lies in the printing method you pick.
Screen printing – the classic bulk workhorse
Screen printing pushes ink through a mesh screen onto the shirt. It’s the go‑to for big orders because each color gets its own screen, so the cost per shirt drops dramatically once you hit volume.
Pros: bright, durable colors; great for simple designs with 1‑4 solid hues; inexpensive when you’re printing dozens or hundreds. Cons: every extra color means a new screen, so multicolored photo collages can become pricey, and fine photographic detail can get lost in the dot pattern.
Vinyl (heat‑transfer) printing – bold shapes, texture
Vinyl printing cuts your design out of colored PVC sheets and then heat‑presses them onto the garment. The result feels slightly raised, almost like a sticker you can’t peel off.
Pros: superb for single‑color logos or crisp text; the vinyl layer is tough and resists fading. Cons: each color adds a new layer, so a full‑color collage quickly becomes expensive, and the method isn’t ideal for gradients or photo‑realistic images.
Direct‑to‑garment (DTG) printing – photo‑level detail
DTG works like a giant ink‑jet printer that sprays pigment directly onto the fabric. Because it can reproduce thousands of colors in one pass, it’s perfect for the intricate shades and gradients in a photo collage.
Pros: captures photographic detail, works well for short runs, no setup fees. Cons: best on light‑colored cotton; dark tees require a white underbase that can mute vibrancy, and the per‑shirt cost stays higher than screen printing for large quantities.
These three options cover the most common T‑shirt printing methods used by hobbyists and pros alike.
So, which method matches your project? Here’s a quick decision checklist:
- How many shirts do you need? (10‑20 = DTG, 50+ = screen)
- What’s the base color of your tee? (Light cotton works best for DTG; dark shirts favor screen or vinyl.)
- How many colors or shades does your collage contain? (More than 4 = DTG, 1‑4 = screen or vinyl.)
- Do you want a tactile feel? (Vinyl gives a raised texture.)
- What’s your budget per shirt? (Screen is cheapest at high volume.)
Once you’ve ticked the boxes, reach out to your printer – heartful.gifts in our case – and ask for a sample of each method. Seeing a physical swatch will instantly tell you if the photo details stay crisp or get mushy.
Finally, upload your locked PNG, confirm the file format (most printers accept PNG or PDF), and let the printer know your chosen method. Double‑check the proof, approve the color match, and hit “order.” In a few days you’ll have a shirt that turns your favorite moments into wearable art.
Pick the method that feels right for your story, and you’ll end up with a photo collage t shirt that looks as good in person as it does on your screen.
Before you finalize, confirm the printer’s file requirements: most ask for CMYK‑converted PNGs at 300 dpi, and they’ll tell you whether they need a vector version for screen printing. A quick test print (even just one shirt) can save you from costly surprises later.
Step 5: Order and Care for Your Shirt
Alright, you’ve just hit “order” on heartful.gifts and the excitement is real. But before the shirt lands on your doorstep, there are a few tiny things that can make the difference between “wow, it’s perfect” and “uh‑oh, something’s off.”
Double‑check the specs
First, glance at the order summary. Is the size right? Remember that a unisex tee often runs a bit larger than a women’s cut, so if you’re between sizes, lean toward the smaller number. Check the color of the shirt – light cotton works best for DTG prints, while darker shades are ideal for screen or vinyl. If you’re unsure, most sites let you view a size chart; a quick peek can save you a return.
Next, verify the file you uploaded. It should be a CMYK‑converted PNG at 300 dpi, with no hidden layers. A common pitfall is accidentally sending a JPEG that’s been compressed – the print can look grainy. If you see a warning from the printer, re‑export the file and re‑upload.
Shipping and tracking
Most print‑on‑demand shops, including heartful.gifts, ship within 2‑3 business days after approval. Ask yourself: do you need the shirt for a specific date? If so, consider upgrading to expedited shipping – the extra cost is usually worth the peace of mind.
When the tracking number arrives, keep an eye on the carrier’s status updates. If the package gets held at a depot, a quick call can prevent it from sitting in a warehouse for days. And don’t forget to inspect the box before you open it; a dented package might hint at a creased shirt inside.
First wash – the golden rule
Okay, the shirt is in your hands. The first wash is where a lot of newbies slip up. Turn the tee inside out, use cold water, and pick a gentle cycle. Hot water can shrink cotton and fade the ink, especially if the print was done with DTG.
Skip the dryer for the first round. Lay the shirt flat on a clean towel, reshape it, and let it air‑dry. The heat from a dryer can set any residual moisture into the fibers and cause the design to crack over time.
Pro tip: use a mild, colour‑safe detergent
A mild, colour‑safe detergent can preserve the vibrancy without stripping the ink. Look for something labeled “for darks” or “color‑preserving.” If you’re worried about lint, add a fabric softener ball – it won’t affect the print but will keep the shirt feeling soft.
Ongoing care – keep it fresh
After the first wash, you can be a little more relaxed, but the basics still matter. Wash the shirt inside out every time you can; this protects the edges of the collage where the ink meets the fabric.
If you notice a small snag or a loose thread, address it right away. A tiny stitch can prevent the fabric from pulling and tearing around the printed area. And remember, avoid bleach – it’ll turn those photo colors into a sad watercolor.
For those who love to wear the shirt often, consider a quick spot‑clean with a damp cloth for minor stains. It’s gentler than a full machine wash and keeps the design crisp.
Real‑world examples
Take the La Wilson photo collage tee – a 100 % cotton unisex shirt that’s been praised for its soft feel and vivid print. Fans report that a cold‑water wash and air‑dry routine keeps the colors looking fresh after dozens of wears Lainey Wilson photo collage t shirt.
Even the iconic Black Sabbath “Master of Reality” collage shirt follows the same care logic: fans recommend turning it inside out and avoiding the dryer to preserve the intricate artwork Black Sabbath photo collage t shirt. Those little habits add up to a shirt that lasts years, not months.
Quick checklist before you hit “Done”
- Confirm size, color, and fit.
- Ensure the file is CMYK PNG @ 300 dpi.
- Choose appropriate shipping speed.
- First wash: cold, gentle, inside‑out, air‑dry.
- Use colour‑safe detergent; skip bleach.
- Wash inside‑out each time, spot‑clean when possible.
Follow these steps, and your photo collage t shirt will stay as vibrant as the memories it captures. Now go ahead – order that shirt, give it a gentle wash, and wear your story proudly.
Conclusion
We've walked through every step, from digging up those goofy snapshots to choosing the right printing method, and now your photo collage t shirt is practically waiting in the mail.
Do you feel that little rush of excitement when you picture yourself pulling on a shirt that literally holds your favorite moments? That feeling is what makes a photo collage t shirt more than just a piece of clothing—it becomes a portable memory album.
Remember the quick checklist: pick high‑resolution images, settle on a layout that flows, export a CMYK PNG at 300 dpi, and select DTG for full‑color detail (or screen if you’re printing in bulk). A gentle, cold wash inside‑out will keep those colors popping for years.
So, what’s the next move? Head over to heartful.gifts, upload your finished file, and hit order. The platform’s simple preview lets you double‑check the design before you commit, and their fast shipping means you won’t have to wait long to wear your story.
Finally, treat your new shirt like a conversation starter—share the story behind each photo, and watch friends light up. Your memories deserve to be seen, and now they can be worn.
Ready to turn your cherished snapshots into a wearable masterpiece? Grab your design, order today, and let every day feel a little more personal.
FAQ
How do I choose the best photos for my photo collage t shirt?
Start by picking images that spark an emotion – a goofy pet, a sunset, a candid laugh. Aim for 6‑9 pictures so the layout stays clean and each memory gets breathing room. Make sure every photo is sharp, well‑lit, and has a similar vibe; a quick brightness tweak across all shots can tie them together and prevent one picture from looking out of place.
What file format and resolution should I use for a crisp print?
Export your collage as a PNG with a transparent background – that keeps the shirt’s color visible through any gaps. Set the canvas to 300 dpi and work in CMYK colour space if the printer asks for it; this ensures the colours you see on screen translate accurately onto fabric. Avoid JPEG compression, which can introduce grain that shows up as fuzz on the final tee.
Which printing method gives the brightest colors for a photo collage t shirt?
Direct‑to‑garment (DTG) is the go‑to for vivid, photo‑level detail. It sprays thousands of tiny ink droplets, so gradients and subtle shades stay true. DTG works best on light‑coloured cotton, so choose a white or pastel tee if you want the colours to pop. For large orders, screen printing can be cheaper, but it may lose some of the fine detail you see in a photograph.
How can I make sure my design fits within the printable area?
Most platforms, including heartful.gifts, limit the safe zone to about 12 × 12 inches. When you drag your images onto the canvas, keep an eye on the guide lines and leave at least a quarter‑inch margin around the edge. If a picture bleeds past the border, it will be trimmed or blurred. A quick preview on a 3‑D mock‑up will let you spot any overspill before you order.
What are the best care instructions to keep the collage looking fresh?
Turn the shirt inside out, wash on a gentle cold cycle, and use a colour‑safe detergent. Skip the dryer for the first wash – air‑drying protects the ink from heat‑induced cracking. After the initial wash, you can tumble dry on low, but always keep the shirt inside out. Spot‑cleaning minor stains with a damp cloth also helps preserve the vibrancy.
How long does it usually take to receive a custom photo collage t shirt?
Production typically takes 2‑3 business days once you approve the proof, and shipping adds another 2‑5 days depending on the carrier and your location. If you need the shirt for a specific event, many services offer expedited printing and priority shipping for a small extra fee. Tracking numbers are usually emailed right after the order ships, so you can watch the journey in real time.
Can I order multiple shirts with different designs in one checkout?
Yes – most print‑on‑demand stores let you add several custom items to the same cart. Just upload each design as its own file, select the size and colour you want, and the system will calculate a combined total. Double‑check each preview before you hit “order” to avoid mixing up designs, and you’ll receive all the shirts together in one package.