
How to Design a Personalized Photo Phone Case That Stands Out
Ever pulled out your phone and thought, “This case could be a tiny gallery of my favorite moments?” You’re not alone—most of us stare at a bland, generic cover and wish it could say something personal.
That’s where a personalized photo phone case swoops in like a friendly sidekick. Imagine scrolling through your feed, and every time you glance at your screen you see a cherished family photo, a vacation snap, or even that goofy selfie you love.
But why settle for just any case? A personalized photo phone case protects your device, sure, but it also turns an everyday object into a conversation starter. You know that moment when a friend asks, “Where did you get that case?” and you get to share the story behind the picture? It’s instant connection.
Think about the feelings you want to capture. Maybe it’s the warm glow of a sunset over the lake, the laughter at a birthday cake, or the proud grin of your child’s first day of school. Those tiny details make the case feel truly yours, not a mass‑produced accessory.
And here’s a little secret: because it’s custom‑made, you get to choose the material, finish, and layout that fit your style. Do you prefer a sleek matte feel or a vibrant glossy shine? The choice is yours, and the result is a case that feels like an extension of your personality.
So, what’s holding you back? If you’ve ever felt the sting of a cracked screen, imagine the peace of mind knowing your phone is protected by something you love looking at every day. It’s a simple upgrade that blends function with sentiment.
Ready to turn that ordinary phone into a personal showcase? Let’s dive in and explore how easy it is to design a personalized photo phone case that feels just right for you.
TL;DR
If you want a phone case that protects your device while showcasing a cherished memory, a personalized photo phone case lets you blend style and sentiment effortlessly.
Just upload your favorite snapshot, pick matte or glossy finish, and in a few clicks you’ll have a one‑of‑a‑kind cover that sparks conversation every time you pull out your phone.
Step 1: Choose Your Photo & Design Concept
Ever stared at your phone and thought, “What if this case could actually tell a story?” That tiny “aha” moment is where we start – by picking the picture that’ll turn a plain cover into a personal showcase.
Pick the right photo (and keep it crisp)
First thing’s first: quality matters more than sentiment alone. A blurry selfie might be cute on Instagram, but on a case it turns into a fuzzy blur. Aim for a photo that’s at least 1500 pixels on the longest side – that’s the sweet spot most printing services recommend for clear, vibrant prints.
Need proof? Resolution guidelines explain how pixel count translates to real‑world sharpness. In practice, a 12 MP portrait from your phone’s rear camera usually passes the test, while a screenshot from a messaging app probably won’t.
Here are three quick checks you can run before you hit “upload”:
- Zoom in on a laptop screen – can you still see individual hairs or texture?
- Check the lighting – soft, even light avoids harsh shadows that can look muddy on a case.
- Make sure the subject is centered or intentionally offset, depending on your layout plan.
Example: Sarah, a mom of two, chose a candid shot of her kids splashing in a backyard sprinkler. The photo was taken in bright daylight with the phone on “portrait” mode, giving her a 4000 × 3000‑pixel canvas that printed crystal‑clear on her iPhone case.
Think about the design mood
Now that you have a solid image, ask yourself what vibe you want the case to radiate. Is it a nostalgic, warm‑toned collage? Or maybe a bold, high‑contrast pop‑art feel? Your answer will guide the finish (matte vs glossy), any filters, and whether you add text or graphic accents.
Color psychology can be a handy shortcut. For instance, blues tend to feel calming, while yellows add a splash of optimism. Understanding how colors affect mood can help you decide if you need to boost saturation or dial it down for a softer look.
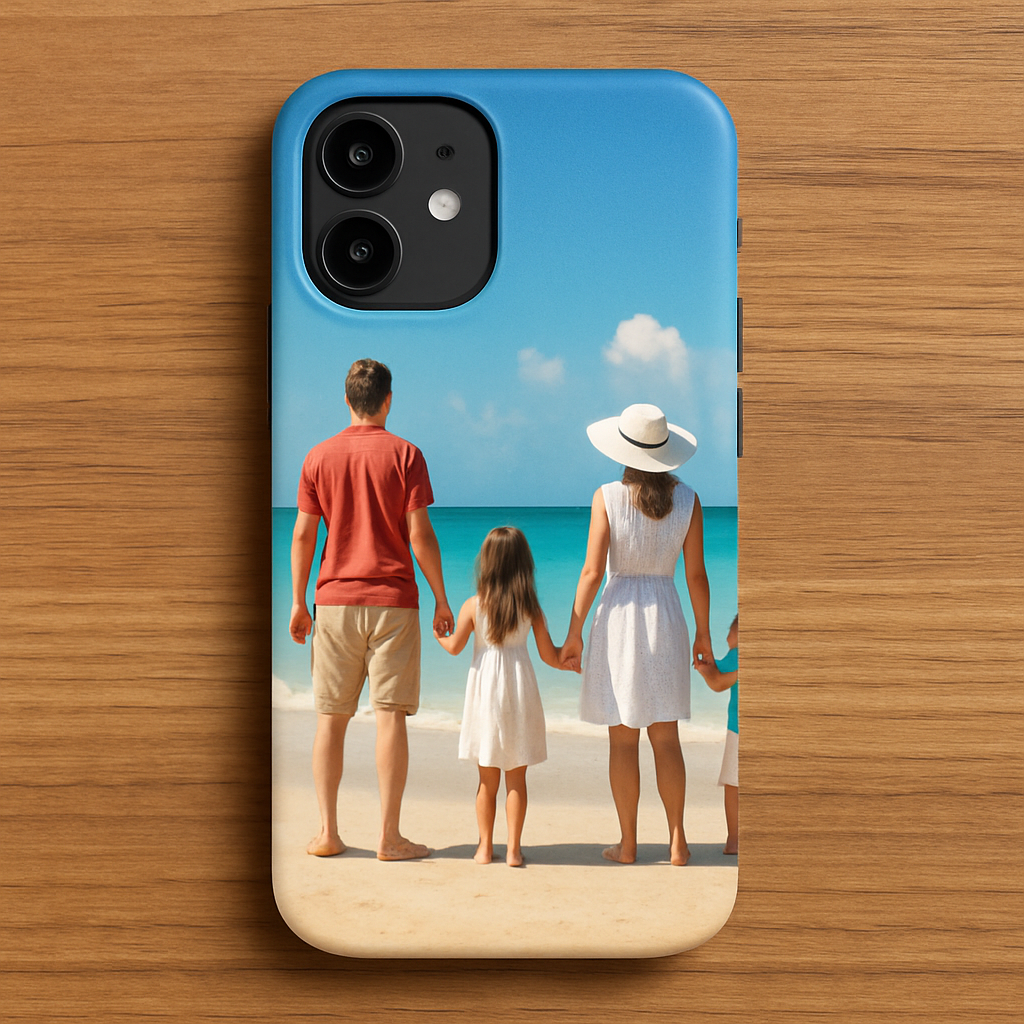
Real‑world tip: If you love a family vacation beach photo, try a matte finish to mute glare and let the sand tones speak softly. Conversely, a vibrant concert shot often shines brighter with a glossy surface that catches the light just like stage spotlights.
Don’t forget layout. Most custom case tools let you choose “full‑bleed” (photo covers the whole back) or “framed” (white or colored border). Full‑bleed works great when the image has no distracting edges, while a framed layout can highlight a central subject – think of a portrait with a subtle drop shadow.
Test and refine – the mini‑prototype step
Before you lock in the order, use the preview tool (most sites offer a real‑time mock‑up). Rotate the phone in the preview, zoom in, and pretend you’re holding the actual device. Does the key detail sit near a corner where a grip might hide it? Does any text you added get cut off by the camera cutout?
Here’s a quick checklist you can print or keep on your phone:
- Is the main subject at least ¼ of the case width away from the edges?
- Do the colors stay true when you view the mock‑up on a dark vs light background?
- If you added a quote, is the font size legible without looking cramped?
- Do you like how the image looks in both portrait and landscape orientation (some people switch phone orientation often)?
Take a minute to ask a friend for a second opinion – fresh eyes often spot something you missed, like a stray reflection or a misplaced pixel.
Once you’re happy, hit “save” and move on to the next step: selecting the case material and protection level. Remember, the photo you chose is the heart of the design; the rest of the choices just amplify its impact.
Step 2: Select Your Phone Model and Case Type
Why the exact model matters
First thing’s simple: the case has to fit your phone like a glove. Even a tiny difference in camera bump size or button placement can throw off a full‑bleed photo and leave you with a crooked edge.
Take a look at the iPhone 15 specifications or the Galaxy S23 specs on GSMArena – they list dimensions down to the millimeter, so you know exactly what the case shell needs to accommodate.
Step‑by‑step: Picking the right model
1. Grab your phone and check the model name in Settings → About Phone. If you’re buying a gift, ask the recipient for the exact model (iPhone 15 Pro, Pixel 8, etc.).
2. Open the product filter on the heartful.gifts store and select that model. Most sites will auto‑filter out cases that don’t match, saving you a headache later.
3. Verify the case’s cutouts line up with the camera module, side buttons, and speaker grille. A quick side‑by‑side photo of the mock‑up and your device can reveal mismatches you’d otherwise miss.
Choosing the case type
Now that the model is locked, think about the lifestyle you (or the gift‑receiver) lead. Are you a clumsy‑but‑loving‑parent who needs extra cushion, or a style‑savvy friend who wants a sleek feel?
Here are three common types and when they shine:
- Soft TPU (flexible rubber) – great for shock absorption. Ideal for kids’ pockets or anyone who drops their phone often.
- Hard polycarbonate (hard shell) – ultra‑thin, lets the photo pop, but offers less drop protection.
- Hybrid (TPU + polycarbonate) – the best of both worlds; a slim frame with a rubberized back.
Real‑world example: Maya, a recent graduate, chose a hybrid case for her iPhone 15 because she wanted a slim profile for her new job, yet she also travels a lot and needed a little extra cushion for bumpy train rides.
Matching case type to finish
The finish you pick (matte vs glossy) works hand‑in‑hand with the case material. Matte on a soft TPU reduces glare and fingerprints – perfect for a beach‑photo that already has a lot of soft light. Glossy on a hard polycarbonate makes colors pop like a mini‑canvas, which works wonders for a vibrant concert shot.
Pro tip: if your photo has a lot of white or bright tones, a matte finish can keep the case from looking washed out under sunlight.
Actionable checklist before you click “Add to Cart”
• Confirm the exact phone model (including generation, e.g., iPhone 15 Pro Max).
• Match the case material to the user’s daily routine – cushion vs slim.
• Verify that the camera cutout won’t eat into any key detail of your photo.
• Test the mock‑up in both portrait and landscape orientation; some photos look tighter when the phone is turned.
• Double‑check that any added text or quote stays clear of the side button area.
If anything feels off, go back to the preview tool and nudge the image a few pixels. It’s like adjusting a picture frame on the wall – a tiny shift can make all the difference.
Final thought
Choosing the right model and case type isn’t just a checkbox; it’s the foundation that lets your personalized photo phone case shine and protect at the same time. Once you’ve nailed these details, the next step – picking the exact material and protection level – will feel like adding the perfect frame to a masterpiece.
Step 3: Upload & Customize Your Image
Why the upload matters
When you finally hit “Upload,” you’re not just moving a file – you’re transferring the feeling you captured in that moment onto a piece of plastic that will travel with you everywhere. If the image is fuzzy or the colors shift, the whole vibe can feel off, just like a song with a bad remix.
That’s why we always start by checking the resolution. According to dots‑per‑inch standards, a 300 dpi image printed at 1500 px on the longest side gives crisp, salon‑quality results on a phone case.
Step‑by‑step upload checklist
1. Prepare the file. Keep the file under 3 MB, save as PNG or high‑quality JPEG, and make sure the canvas is at least 1000 × 1500 px. If you’re unsure about DPI, right‑click the file → Properties → Details (Windows) or Get Info → More Info (Mac) to confirm.
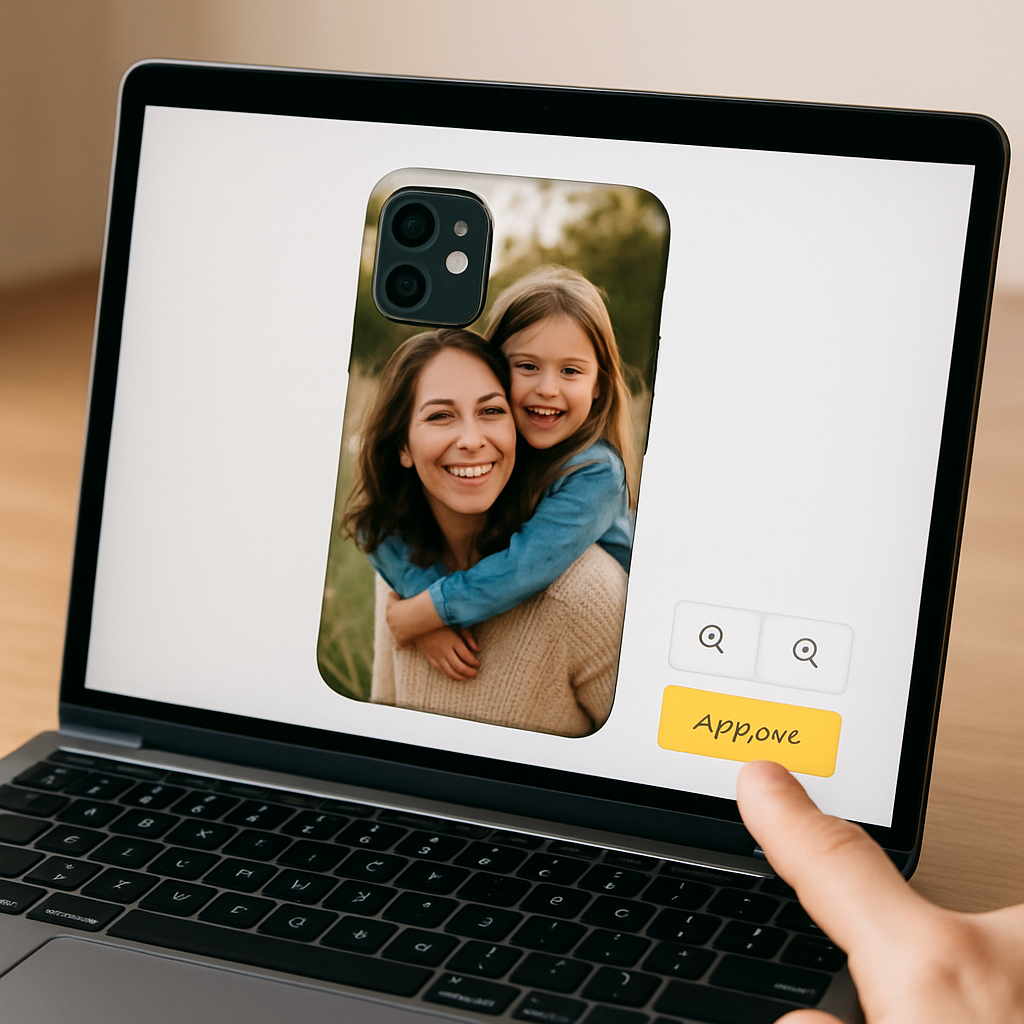
2. Drag‑and‑drop or click “Browse.” Most custom case tools, including heartful.gifts, support both methods. Drag‑and‑drop feels like moving a photo into a scrapbook – it’s quick and visual.
3. Watch the live preview. As the image appears on the mock‑up, rotate the phone, zoom in, and peek at both portrait and landscape orientations. Does a family’s smile get cut off by the camera bump? Does a sunset’s horizon line sit too close to the edge?
4. Adjust position and scale. Use the on‑screen sliders or click‑and‑drag to nudge the image. A one‑pixel shift can make the difference between a centered focal point and a hidden detail. Think of it like hanging a picture – a tiny tilt changes the whole room.
5. Test contrast and finish. Switch between matte and glossy previews if the tool offers it. Glossy amplifies saturation (great for concert neon lights), while matte tones down glare (perfect for beach sand). If the preview looks washed out, dial back brightness by a few percent.
Real‑world examples
Emma, a recent graduate, uploaded a photo of her dog playing in autumn leaves. The original file was 2500 × 1600 px, but the colors looked dull on a glossy mock‑up. She switched to a matte finish and nudged the dog’s face a few pixels away from the top‑right corner, where the camera cutout sits. The final case looked like a mini‑canvas, and the matte surface kept the orange leaves from reflecting too much light.
Meanwhile, Carlos wanted a bold festival shot. He used a high‑contrast JPEG, kept the image full‑bleed, and chose a glossy finish. The preview showed the neon stage lights sparkling just like the real thing – a perfect match for his personality.
Pro tips from designers
• Use a solid‑color border. Adding a thin white or black border around the image can prevent the case’s rounded corners from cutting off important details.
• Mind the side‑button zone. Most cases hide a sliver of the image near the volume buttons. Place any text or logos at least 5 mm away from that zone.
• Check file size before uploading. If the platform rejects the file, compress it with a free tool like ILoveIMG – just keep an eye on quality.
Quick “before you order” sanity check
- Is the main subject at least ¼ in from every edge?
- Do the colors stay true when you toggle between dark and light background in the preview?
- Is any added text legible at the smallest zoom level?
- Have you tried the preview on both portrait and landscape orientations?
If you answered yes to all of those, you’re ready to hit “Save & Continue.” And if something feels off, just go back – it’s easier to tweak now than to wait for a printed case that looks off‑center.
Need a step‑by‑step walkthrough of the whole process? Check out Create a Personalized Photo Phone Case That Shows Your Style for a deeper dive into design choices, material options, and care tips.
Step 4: Review, Proof, and Place Your Order
Alright, you’ve dragged your favorite snap onto the mock‑up, nudged it a few pixels, and you’re staring at that preview like it’s the final brushstroke on a painting. That moment feels good, but before you click “Place Order,” there’s a tiny, crucial pause you shouldn’t skip.
Why a final review matters
Think of a personalized photo phone case as a tiny gallery you’ll carry everywhere. A misaligned edge or a washed‑out color is like hanging a masterpiece crooked on the wall – you’ll notice it every day.
Studies show that shoppers who double‑check their cart details are 30% less likely to request a return according to Nielsen Norman Group’s checkout usability research. In short, a careful proof saves you time, money, and that awkward “I need a new case” text later.
Step‑by‑step proof checklist
1. Zoom in to 200%. Look at the edges of the image where the case’s rounded corners bite in. Are any important details getting clipped? If you see a fingertip of the photo disappearing, pull the canvas a touch inward.
2. Switch backgrounds. Most design tools let you toggle between a dark and a light preview. Does the photo stay vibrant on both? A glossy finish can make whites pop, but it can also cause glare on a dark background.
3. Test readability. If you added a quote or name, shrink the preview to the smallest zoom level. Can you still read it without squinting? If not, consider a bolder font or a thin border around the text.
4. Rotate the phone. Flip between portrait and landscape. Some images look perfect upright but get cramped on the side when the phone rotates. Adjust the focal point to the center of the safe zone.
5. Verify file size and format. The platform usually caps uploads at 3 MB. If your file is larger, compress it with a free tool like ILoveIMG—just keep an eye on quality.
Real‑world examples
Take Maya, who chose a vibrant beach sunrise for her iPhone 15 case. In the first preview, the sun’s edge was sliced off by the camera cutout. She moved the whole scene a few pixels left, and the sunrise now sits perfectly centered, even when she switches to the matte preview.
Then there’s Carlos, who added his name in a cursive script over a concert photo. At 100% zoom the script was crisp, but at 50% it blurred. He swapped the script for a bold sans‑serif and added a thin white outline. The result? The name reads clearly no matter the zoom, and the case feels balanced.
Pro tips before you click “Place Order”
• Take a screenshot of the final preview. Store it in a folder called “Case Proofs.” If the printed case ever looks off, you have a visual reference to compare.
• Ask a second pair of eyes. Send the screenshot to a friend or family member. Fresh eyes often spot a stray pixel or a color shift you’ve grown accustomed to.
• Check the return policy. Knowing whether you can exchange a misprinted case gives you peace of mind. Most POD shops, including heartful.gifts, offer a hassle‑free replacement if the proof doesn’t match the final product.
• Confirm shipping details. Double‑check the address, especially if it’s a gift. A typo can turn a surprise into a delayed disappointment.
Ready to seal the deal? Hit the “Place Order” button, and you’ll see a confirmation screen summarizing your design, price, and estimated delivery date. Keep that screen handy; it’s your receipt and a quick way to track the order later.
So, what’s the next move?
Take a deep breath, run through the checklist one last time, and then click. Your personalized photo phone case will soon be on its way, ready to turn heads and protect your device.
Need a deeper dive into the whole design journey? You’ll find a full walkthrough on the Create a Personalized Photo Phone Case That Shows Your Style page.
Comparison: Top Materials & Finishes for Personalized Photo Phone Cases
When you finally pick the photo that makes your heart skip a beat, the next big decision feels oddly technical: should the case be matte or glossy? And what material will hug your phone the best? It’s more than a style question—your choice affects durability, fingerprint resistance, and how the colors in your picture pop.
Material matters first
Most print‑on‑demand shops, including heartful.gifts, offer two base materials: a rigid polycarbonate shell and a flexible TPU (thermoplastic polyurethane) layer. Polycarbonate gives a hard, snap‑fit feel, while TPU adds a rubbery grip that’s softer on the hand.
Here’s a quick way to think about it: if you treat your phone like a piece of art you’d frame, the hard shell is your canvas; if you see it as a daily companion that might tumble, the soft TPU is your protective bumper.
Glossy vs. matte – the visual trade‑off
Glossy finishes crank up the shine, making reds richer and blues deeper. They’re perfect for high‑contrast shots like fireworks or neon concert lights. The downside? A glossy surface loves fingerprints and can glare under bright indoor lighting, which sometimes masks the detail you spent hours perfecting.
Matte finishes, on the other hand, mute reflections. They give your photo a subtle, museum‑quality vibe and hide smudges like a champ. The trade‑off is a slight loss of vibrancy; bright colors may look a touch softer, but the overall look feels sophisticated and less “shiny.”
According to a recent consumer‑preference study, about 60% of custom‑case buyers lean toward matte for everyday use because it stays cleaner longer, while the remaining 40% pick glossy when they want a statement piece that catches the eye (see matte finish overview).
Real‑world examples
Emma, a new mom, uploaded a soft‑focus portrait of her newborn. She chose a matte TPU case because the gentle texture matched the tender mood and the case stayed fingerprint‑free during diaper changes.
Meanwhile, Carlos, a festival photographer, wanted his neon‑lit stage shot to explode off the phone. He went with a glossy polycarbonate shell; the shine amplified the electric colors, and he’s fine with wiping it clean after each show.
Actionable checklist
- Identify your photo’s dominant vibe – subtle and pastel or bold and neon.
- Match the vibe to a finish: matte for understated, glossy for high‑impact.
- Consider your daily routine: heavy‑handed users often prefer matte TPU for grip and fingerprint resistance.
- Test the preview in both light and dark mode on the design tool; notice if glare distracts you.
- Read product reviews for durability – glossy polycarbonate can chip more easily if dropped, while matte TPU may yellow over years of sun exposure.
Quick comparison table
| Material / Finish | Look & Feel | Pros | Cons |
|---|---|---|---|
| Polycarbonate – Matte | Sleek, non‑reflective surface | Resists fingerprints; sharp image reproduction; sturdy snap‑fit | Can feel a bit slippery; less shock absorption |
| Polycarbonate – Glossy | High‑shine, vibrant | Colors pop; premium look; solid protection | Shows fingerprints; glare under bright light; may chip |
| TPU – Matte | Soft, rubbery, subtle sheen | Great grip; flexible; hides smudges; shock‑absorbent | Can slightly mute colors; may stretch over time |
| TPU – Glossy | Glossy soft‑touch | Vibrant look with flexible protection | Fingerprints more visible; surface may become sticky with wear |
So, which combo feels right for your personalized photo phone case? If you love a clean, low‑maintenance look, matte TPU is a safe bet. If you want your image to sparkle like it’s on a gallery wall, glossy polycarbonate will do the trick. Either way, remember to preview both finishes, run the checklist above, and trust your gut – after all, you’re the one who’ll be looking at that photo every time you pick up your phone.
Caring for Your Personalized Photo Phone Case
Cleaning routine
You’ve just hit “order” and the excitement is buzzing—your new personalized photo phone case is on its way. But once it arrives, the real work begins: keeping that picture crisp, the colors vibrant, and the case protecting your phone for months to come.
First thing’s first: give the case a gentle wipe before you even slide it onto your phone. A soft microfiber cloth dampened with a splash of water (no harsh chemicals) removes any dust from the printing process. Think of it like dusting a new piece of art before you hang it on the wall.
Now, let’s talk daily cleaning. Most manufacturers recommend a quick wipe‑down once a week. For a matte TPU finish, a dry cloth is usually enough because the texture hides fingerprints. For glossy polycarbonate, you might need a tiny dab of 70% isopropyl alcohol on the cloth to banish smudges without dulling the shine. According to Lifewire, a soft microfiber cloth and a dab of 70% isopropyl alcohol are safe for most phone case materials.
Shielding from UV and impacts
So, how do you avoid those dreaded yellowing or cracking issues that some users report after a year? The trick is simple: keep the case out of prolonged direct sunlight. UV rays can break down the polymer chain in both TPU and polycarbonate, leading to a faint haze. If you’re a beach‑goer, toss the case into a bag when you’re not using it. Research explains how UV exposure can cause plastic to yellow over time.
A real‑world example: Maya, a freelance photographer, noticed her matte TPU case started looking a little dull after three months of daily coffee shop use. She switched to storing the phone in a drawer during the night, and the case’s vibrancy bounced back. The lesson? Even a short “night‑off” habit can extend the life of your custom print.
What about drops? No case is indestructible, but you can add an extra layer of protection by pairing your personalized case with a thin clear screen protector. This prevents scratches right on the printed area and keeps the image sharp. Many users report that a tempered‑glass protector adds only 0.1 mm of thickness—hardly noticeable.
Maintenance checklist
Here’s a quick, actionable checklist you can print and stick on your fridge:
- Wipe with microfiber before first use.
- Clean weekly with a dry cloth (matte) or 70% isopropyl alcohol (glossy).
- Avoid direct sun >4 hours per day.
- Store in a pouch when not in use.
- Add a clear screen protector for scratch defense.
- Inspect edges monthly for peeling or lifting.
Charging and DIY tricks
Do you ever wonder if the case will affect charging? Good news: both TPU and polycarbonate are non‑conductive, so wireless charging works fine. Just make sure the case isn’t too thick—most heartful.gifts cases stay under 1 mm, which is well within Qi standards.
If you’re into DIY care, try this: mix a teaspoon of baking soda with a few drops of water to create a mild paste. Gently rub the paste on any stubborn grime, then wipe clean. The mild abrasive lifts residue without scratching the surface. A friend of mine swears by it for keeping his glossy case looking showroom‑ready.
When things go wrong
Finally, keep your order confirmation handy. If you notice a printing defect—like a blurred edge or a color shift—most print‑on‑demand shops, including heartful.gifts, will replace the case within 30 days. Document the issue with a photo, reference your proof screenshot, and you’re set.
So, what’s the next step? Treat your personalized photo phone case like a piece of memorabilia: clean it gently, shield it from harsh light, and give it a little TLC now and then. With these habits, your favorite photo will stay vivid and your phone will stay safe for the long haul.
FAQ
How do I choose the right material and finish for my personalized photo phone case?
First, think about how you hold your phone. If you love a rubbery grip and want the case to absorb drops, TPU is your buddy. If you prefer a snap‑fit feel and a bit more rigidity, polycarbonate works well.
Next, decide on shine. Glossy finishes make colors pop—great for neon or high‑contrast shots—but they attract fingerprints. Matte tones mute glare and hide smudges, perfect for everyday use. Mix‑and‑match: matte TPU for a soft feel, glossy polycarbonate for a gallery‑like shine.
Can I use wireless charging with a personalized photo phone case?
Good news: both TPU and polycarbonate are non‑conductive, so they don’t interfere with Qi charging. Just make sure the case stays under the typical 1 mm thickness most shops, including heartful.gifts, use.
If you notice slower charging, check that the case isn’t warped or that a thick screen protector isn’t sandwiched behind it. A quick test—place the phone on the charger without the case—will tell you if the case is the culprit.
How should I clean and maintain the printed image so it stays vibrant?
Start with a soft microfiber cloth slightly dampened with water. For glossy polycarbonate, add a dab of 70 % isopropyl alcohol to lift fingerprints; matte TPU usually needs just a dry wipe.
For stubborn grime, a homemade paste of a teaspoon of baking soda and a few drops of water works wonders—rub gently, then wipe clean. Avoid abrasive cleaners; they can dull the coating and fade the photo over time.
What if the photo printing looks blurry or the colors are off when I receive the case?
Take a clear photo of the case in natural light and compare it to your original file. Small shifts can happen if the image resolution was too low (<300 dpi) or if the file was compressed.
Most print‑on‑demand shops, including heartful.gifts, offer a 30‑day replacement for defects. Snap a photo of the issue, attach your order confirmation, and reach out to customer support for a hassle‑free swap.
Is it safe to put my personalized case on a screen protector, and will it affect image quality?
Yes—pairing a thin, clear tempered‑glass protector adds scratch resistance without noticeable thickness. It sits on top of the case, so the printed image remains fully visible.
Just be sure the protector is truly “ultra‑thin” (around 0.1 mm). Thicker protectors can create a slight magnifying effect, making the photo look a touch softer, but most users don’t notice the difference.
If you prefer a film‑type protector, pick one labeled “anti‑glare” and test it on a bright spot of your photo; it usually preserves clarity while reducing reflections.
How long does a personalized photo phone case typically last before it starts yellowing or peeling?
Under normal indoor use, a high‑quality case can stay bright for 12‑18 months. UV exposure accelerates yellowing, so keeping the phone out of direct sunlight—especially on a beach or car dashboard—helps preserve the colors.
If you notice edge lifting or bubbling, that’s a sign the adhesive is aging. In that situation, swapping the case or applying a clear edge seal can extend its life a few more months.
Conclusion
We've walked through everything you need to feel confident about your personalized photo phone case—from picking the right finish to keeping the image crisp for months.
Remember, a matte TPU gives you a soft grip and hides fingerprints, while glossy polycarbonate makes colors pop like a gallery print. The choice really comes down to how you use your phone every day.
Cleaning is simple: a microfiber wipe before the first slide‑on, then a weekly gentle wipe (dry for matte, a dab of 70 % isopropyl alcohol for glossy). Avoid long sun exposure and store it in a pouch when you’re not using it, and you’ll push the vibrant life of your case well beyond a year.
And if a scratch or a tiny bubble appears, a thin clear screen protector or a quick edge seal can buy you extra months without sacrificing the photo.
So, what’s the next step? Grab that favorite snap, head over to heartful.gifts, and design a case that tells your story. Treat it with the easy care routine we’ve outlined, and you’ll keep that memory looking fresh every time you pick up your phone.
Enjoy the blend of personal style and practical protection—your personalized photo phone case is ready to become a daily reminder of the moments you love.