
How to Create Custom Photo Magnets for Fridge Gift that Delight Loved Ones
Ever opened your fridge and felt that tiny burst of nostalgia when a favorite photo pops up, turning a cold spot into a little gallery?
If you’ve ever thought, “I wish I could keep that memory right here, within arm’s reach,” you’re not alone.
That’s exactly why custom photo magnets for fridge gift have become the go‑to surprise for parents, spouses, and anyone who loves a personal touch.
Imagine a rainy Saturday, you’re sipping coffee, and the kitchen hum is punctuated by a bright smile of your kids stuck on the fridge door.
It’s not just décor; it’s a daily reminder that the people you love are literally right there, cheering you on.
And because it’s a magnet, swapping out a photo is as easy as sliding a coaster – no nails, no paint, no hassle.
So, what makes a good custom photo magnet? First, quality. You want vibrant colors that don’t fade after a few washes.
Second, size. A 2‑inch square works great for a quick peek, while a larger 4‑inch piece becomes a mini‑artwork.
Third, personalization. Add a short message, a date, or even a tiny doodle to make it truly yours.
At heartful.gifts, the process feels like sending a postcard to yourself – you upload, preview, and hit order in minutes.
Because they print on demand, each magnet arrives fresh, and you avoid the waste of bulk‑printed junk.
Ready to turn that fridge into a memory board? Let’s dive in and explore how to pick the perfect photo, finish, and order.
Think about the moment you’ll catch a glimpse of that smiling face while grabbing a snack – it’s a tiny boost of joy that brightens an ordinary routine.
And if you’re gifting it, you’re giving more than a magnet; you’re offering a piece of home, a story that sticks around literally and emotionally.
TL;DR
If you want a quick, heart‑warming way to turn fridge space into a personal showcase, custom photo magnets for fridge gift blend sentiment and style. Just upload your favorite snap at heartful.gifts, pick a size, add a note, and in minutes you’ll have a vibrant, stick‑on reminder that brightens meals and brings smiles.
Step 1: Choose Your Photos and Theme
Picture this: you’re standing in front of the fridge, coffee in hand, and you realize there’s a blank spot begging for a splash of memory.
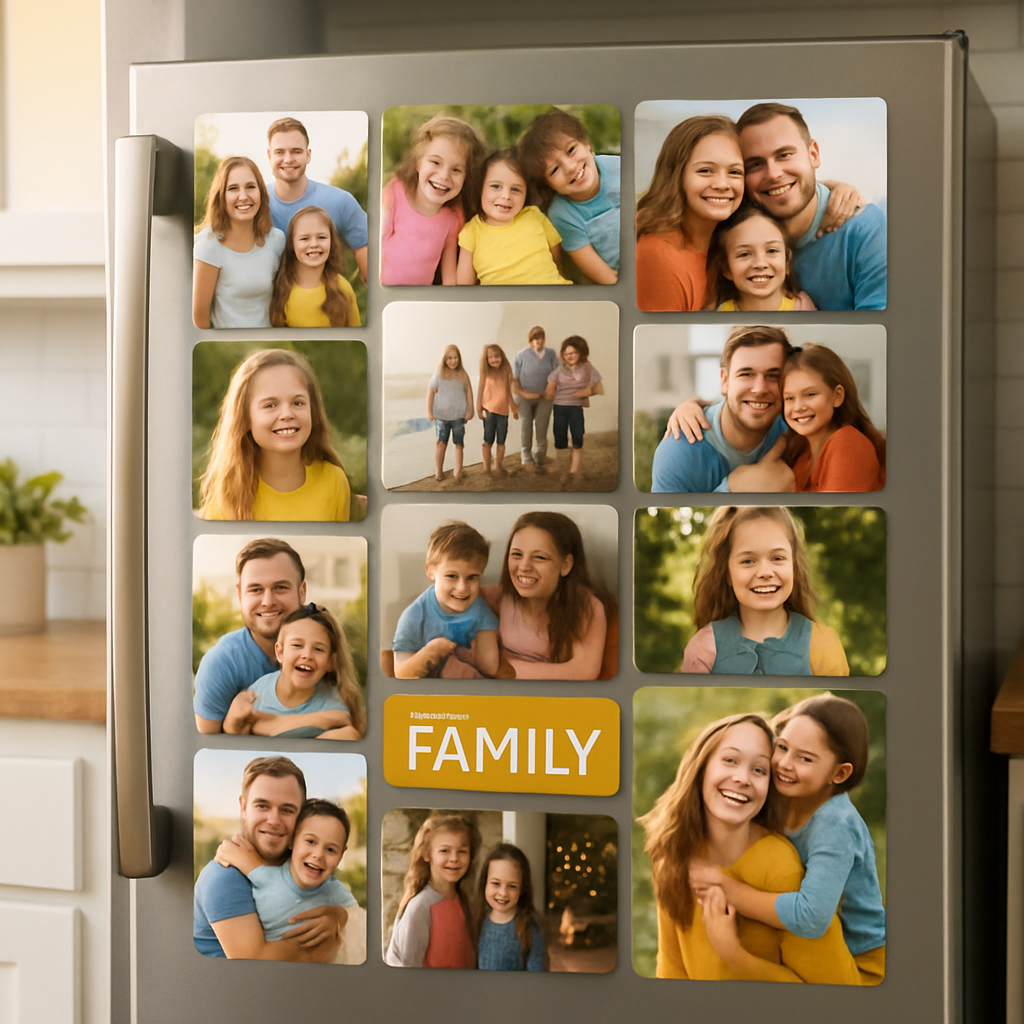
That empty space? It’s the perfect canvas for custom photo magnets for fridge gift. The first thing you’ll need is a photo (or a few) that instantly sparks joy—maybe that goofy family selfie from last summer’s beach trip, or the candid shot of your toddler’s first cake smash.
But how do you pick the right one? Start by asking yourself what feeling you want the magnet to evoke each time you open the door. Do you want a burst of laughter, a warm hug, or a reminder of a milestone?
1. Gather your favorite moments
Go through your camera roll and pull out images that feel alive. Look for bright colors, clear faces, and moments that tell a story without needing explanation. A photo of fresh‑baked cookies, for example, not only looks yummy but also doubles as a subtle reminder to treat yourself.
Pro tip: if you have a lot of candidates, create a quick collage on your phone and see which one stands out when you shrink it down to magnet size. That way you avoid choosing a picture that looks great full‑screen but loses detail when it’s only a few centimeters wide.
And if you’re stuck, remember that Shutterfly explains how custom magnets let you showcase family photos, travel snapshots, or artistic designs—so think about the vibe you’d love to see every time you grab a snack.
2. Decide on a theme
Themes give your magnet set coherence. You could go for “seasonal vibes” with a spring flower, summer beach, autumn leaf, and winter snowflake, or stick to a single event like a wedding or birthday.
When you’re picking a theme, consider the existing décor of your kitchen. If your fridge is stainless steel and minimalist, a clean white border with a single bold photo works best. If it’s covered in chalkboard paint, a playful doodle border adds charm.
Here’s a little secret: mixing a black‑and‑white portrait with a pop‑color accent (like a bright red balloon) creates visual interest without feeling cluttered.
Need inspiration for matching themes? StickerIt’s guide to photo fridge magnets shows how color palettes can tie your whole kitchen together.
3. Choose the right layout and size
Most services, including heartful.gifts, let you select square, circle, or rectangle shapes. Square works well for portraits, circle for whimsical snaps, and rectangle for panoramic scenes.
Think about where the magnet will sit. A narrow vertical strip near the handle is perfect for a tall rectangle, while the middle of the door can accommodate a cluster of smaller squares.
And don’t forget to preview the layout. A quick mock‑up helps you see if the photo’s key elements (like faces) stay visible after the trim.
4. Add a personal touch
Even a simple phrase can turn a magnet into a keepsake. A short note like “Our first hike, 2023” or “Love you to the fridge and back” adds sentiment without overcrowding the design.
If you’re gifting the magnet, consider a tiny inside joke or a nickname that only you and the recipient share. That little extra makes the gift feel tailor‑made.
And hey, if you’re already thinking about other personalized goodies, check out our guide on custom name coffee mugs for a matching kitchen vibe.
Once you’ve settled on the photo, theme, shape, and any text, you’re ready to hit “upload” and let the magic happen. The next step will be customizing the finish—glossy for a vibrant pop or matte for a soft, understated look.
Step 2: Pick the Right Magnet Size and Material
We've got the photo and the shape sorted, but now you're staring at a blank canvas and wondering: how big should my magnet actually be?
It feels a bit like choosing a picture frame—you don't want it so tiny that it gets lost on the fridge, and you certainly don't want a giant slab that dwarfs the rest of your kitchen decor.
Sizing up your fridge real‑estate
First, take a quick look at the space you have. A narrow vertical strip near the handle works like a runway for a tall rectangle, while the middle of the door can host a cluster of smaller squares.
Most print‑on‑demand shops, including heartful.gifts, offer the two most popular dimensions: 2×3.5 inches (two per sheet) and 3×4.5 inches. The smaller size is perfect for a single portrait or a tiny quote, whereas the larger one gives you room for a collage or a short message.
Need a reference? The magnet size guide from UPrinting breaks down five common sizes and explains how visibility changes with each dimension. While those numbers are aimed at car magnets, the principle is the same: bigger = more eye‑catching, but only if it fits your surface.
Material matters: E‑Surface vs. Metallic
When it comes to the actual paper, you have two main options. The E‑Surface finish is matte and reproduces colors faithfully—great for a family photo that feels like a printed memory.
The Metallic option adds a subtle shimmer, which can make blues and whites pop on a stainless‑steel fridge. If you want a bit of sparkle without going full‑gloss, this is the sweet spot.
Both finishes sit on a 13 pt. vinyl magnetic backing that holds up to kitchen humidity and the occasional stray spoon.
Here's a quick checklist to help you decide:
- Do you want a matte look that reads like a photo album? → E‑Surface.
- Do you love a hint of shine that catches the kitchen light? → Metallic.
- Is the magnet going on a busy fridge with lots of other magnets? → Smaller size, matte finish.
- Is this a centerpiece gift you want to showcase? → Larger size, metallic finish.
Still not sure which combo feels right? Watch this short video where we walk through a live design demo and show the magnets on a real fridge.
Notice how the larger 3×4.5 inches piece fills the door without overwhelming it? That visual cue can guide your final pick.
Practical tip: mock it up before you print
Print a cheap paper cutout of your chosen size, tape it to the fridge, and step back. Does the composition feel balanced? Are any important faces getting cut off by the fridge's trim? If something feels off, adjust the size or crop and try again.
Another fast trick is to use the free design tool on heartful.gifts. It lets you drag‑and‑drop your photo, switch between E‑Surface and Metallic, and instantly preview how each size looks on a virtual fridge door.
Remember, the goal isn’t just to stick a magnet on the fridge; it’s to create a keepsake that invites a smile every time someone grabs a snack.
So, which size and finish will you choose for your custom photo magnets for fridge gift? Take a moment, test a mock‑up, and trust your eye. The right combo will turn a simple magnet into a daily burst of joy.
Step 3: Design Your Layout and Add Personal Touches
Alright, you’ve picked the size that fits your fridge door—now it’s time to make those photos sing.
Start with a visual hierarchy
Think about the story you want to tell. Do you want a family portrait to be the hero, or maybe a goofy pet snap to steal the show? Place the focal image in the center or slightly off‑center, just like a photographer would frame a shot.
And if you have multiple pictures, give each a little breathing room. A thin white margin (often called a “bleed”) keeps the edges from getting lost against the metal.
Play with backgrounds and finishes
Heartful.gifts lets you choose between a glossy “E‑Surface” or a sleek metallic finish. Gloss works great for vibrant colors—think sunrise hues on a beach vacation photo. Metallic adds a subtle shimmer that can make black‑and‑white portraits feel modern.
Not sure which vibe fits? Try both in the free design customizer tool to see a live preview. Switching back and forth only takes a few clicks, and you’ll instantly notice which option makes your image pop.
Typography and little details
If you want to add a short quote or a name, keep the font simple and legible from a distance. Sans‑serif fonts like Open Sans or Helvetica work well on fridge doors where the magnet might be glanced at while grabbing a snack.
But don’t overload the space—one line of text is enough. A tiny “Happy Birthday, Mom!” under a birthday cake photo feels personal without crowding the design.
Test the layout before you order
Remember the cheap paper cutout trick from the previous step? Let’s level it up. Print your layout on a regular sheet, tape it where the magnet will sit, and step back. Does the composition feel balanced? Are any faces clipped by the fridge trim?
Here’s a quick checklist:
- Is the main image centered or purposefully off‑center?
- Do the margins stay at least 3 mm from the edge?
- Is any text readable without squinting?
- Does the finish (gloss or metallic) match the mood of the photo?
Once you’re happy, hit “Add to Cart.” Your custom photo magnets for fridge gift will be printed on demand, so you’re not stuck with a bulk order you don’t need.
Borrow design wisdom from other magnets
Even though car magnets aren’t the same, the design fundamentals are surprisingly alike. A recent guide on magnetic print design highlights the importance of contrast and negative space to keep the message clear. Apply that rule: make sure your photo’s colors stand out against the fridge background, and avoid busy patterns that can clash with kitchen tiles.
And here’s a little secret: a subtle drop shadow behind your image can give the illusion that the photo is floating slightly off the fridge. It’s a tiny effect, but it adds depth without extra cost.
Final polish
Before you finalize, double‑check the file resolution. Aim for at least 300 dpi; most smartphones capture enough detail, but a quick edit in your phone’s gallery to boost the resolution can make a difference.
Lastly, think about the personal touch that makes a gift unforgettable. Maybe include a tiny handwritten note on the back of the magnet—your loved one will discover it later and smile.
So, ready to hit “order”? You’ve laid out the perfect design, added the right finish, and gave it a personal flair. Your custom photo magnets for fridge gift are now set to become the little piece of art that brightens every morning.
Step 4: Print, Finish, and Compare Production Options
We’re finally at the part that turns your cute photo into something you can actually stick on the fridge.
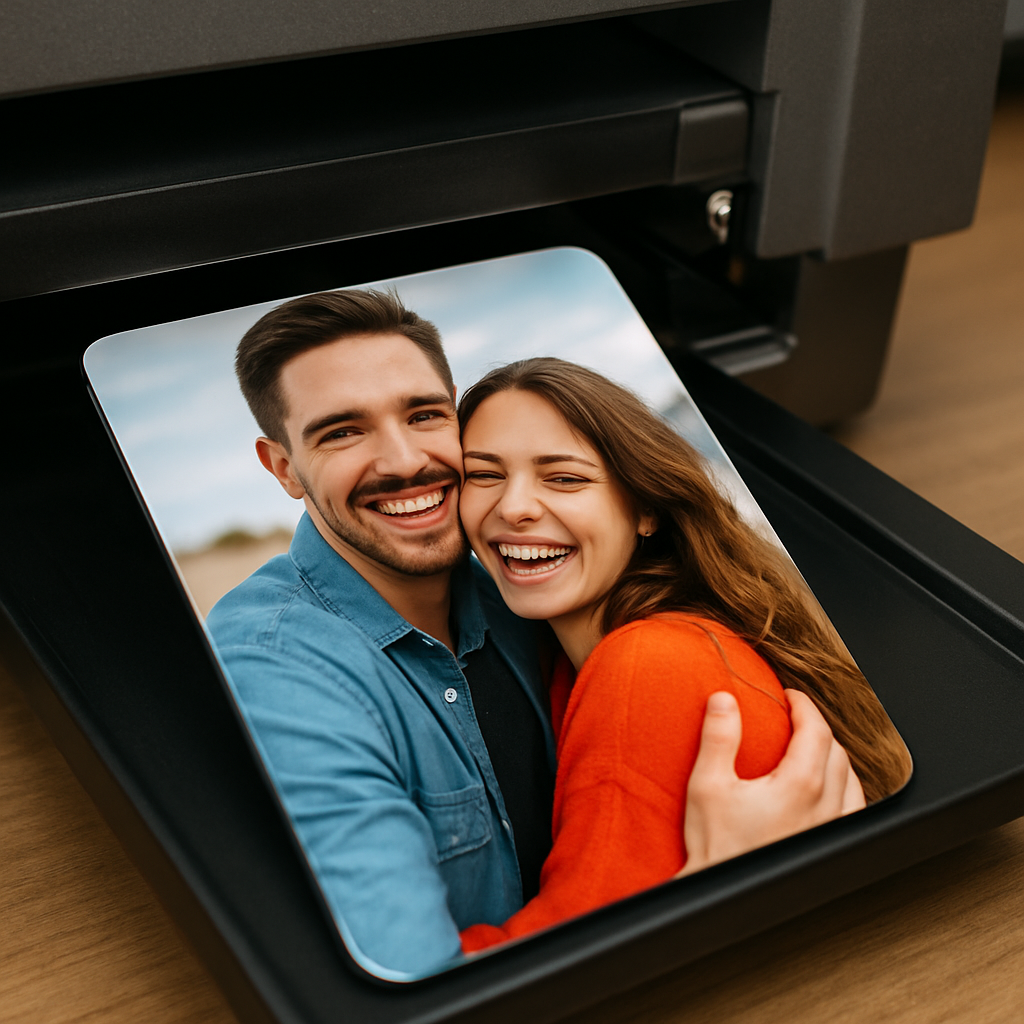
At heartful.gifts we keep the process simple: you upload, choose a finish, and hit "order." But there are a few decisions that can change how your custom photo magnets for fridge gift look and feel.
1. Choose your printing method
Most online print‑on‑demand shops use digital UV printing because it reproduces colors straight from your screen. VistaPrint's online design tool describes UV printing as “quick, vibrant, and durable,” which is exactly what you want for a fridge magnet that will see daily spills and temperature swings.
Some vendors also offer dye‑sublimation, a technique that embeds ink into the magnet’s surface for a slightly softer look. The trade‑off? It can be a bit pricier and you lose the ability to add a glossy top coat.
2. Pick a finish that matches the mood
Finish is the secret sauce. A glossy coat makes colors pop – perfect for bright family portraits. A matte finish tones things down for a more subtle, modern vibe. And there’s the soft‑touch option that feels almost like a rubbery pillow, great for kids who love to poke the magnet.
Which one feels right? Imagine the moment your loved one opens the fridge: do you want their eyes to be drawn instantly, or do you prefer a quiet, tactile surprise?
Quick finish cheat‑sheet
| Finish | Look & Feel | Best For |
|---|---|---|
| Glossy | High shine, colors pop | Vibrant photos, bold designs |
| Matte | Soft, no glare | Elegant portraits, subtle palettes |
| Soft‑Touch | Velvety, tactile | Kids’ art, playful gifts |
Remember, a finish isn’t just about looks – it also affects durability. Glossy coatings tend to resist fingerprints better, while matte can show smudges more easily.
3. Size and shape considerations
Standard magnets are 2"×2" or 3"×3", but you can go custom. Bigger magnets make a statement, but they also need a sturdier backing to stay flat on the fridge surface. If you’re unsure, start with the classic 2"×2" – it fits most spots and leaves room for a handwritten note on the back.
Do you ever wonder why some magnets curl after a few weeks? It’s usually a mismatch between the magnet core and the adhesive layer. Choosing a reputable provider that bonds the layers in a heat‑press step helps prevent that.
4. Compare production options
Below is a snapshot of the most common production routes you’ll encounter:
| Option | Turnaround | Cost (per piece) | Notes |
|---|---|---|---|
| Digital UV Print + Gloss | 2–4 days | $$ | Bright colors, quick |
| Dye‑Sublimation + Matte | 4–7 days | $$$ | Soft look, slightly higher price |
| Soft‑Touch UV + Premium Magnet | 5–8 days | $$$$ | Extra tactile feel, best for kids |
Do any of those numbers make you pause? The good news is you don’t have to pick the most expensive option to get a high‑quality result. Our own production line at heartful.gifts balances speed and durability, so you get a professional finish without a long wait.
5. Proofing before you press "order"
Always request a digital proof. Most platforms will send you a mock‑up that shows exactly how the finish will look. Look for any color shift caused by the gloss coating – sometimes a bright orange can appear a shade muted under a matte surface.
And here's a tiny tip: add a 2‑pixel bleed around the edges of your image. It guarantees that the finish covers the entire magnet, leaving no white border.
6. Final checklist
- Upload a 300 dpi image (you already did in the previous step).
- Select finish based on the gift’s personality.
- Confirm size – 2"×2" works for most fridges.
- Request a proof and double‑check colors.
- Place the order and watch the magic happen.
So, which finish are you leaning toward? Whatever you choose, you’re about to turn a simple snapshot into a daily smile on the fridge door.
Step 5: Assemble, Attach, and Test Your Magnets
Alright, you’ve just hit “order” and the printer at heartful.gifts is busy turning your favorite photo into a glossy (or matte) magnet. While you wait, let’s talk about the moment when that little square meets the fridge and actually sticks.
1. Gather your freshly printed magnets
When the package arrives, open it on a clean surface. You’ll notice a thin, flexible backing on the back of each magnet – that’s the adhesive layer that keeps the printed side flat while you handle it.
Give each piece a quick visual check. Look for any smudges, edge chips, or bubbles. If something looks off, reach out to heartful.gifts’ support right away – they’re quick to replace any defective piece.
2. Peel and press – the “attach” step
Here’s a tiny trick: peel the backing half‑way, press the printed side onto the fridge, then finish peeling the rest. This way you avoid trapping air pockets that can make the magnet feel loose.
And if you’re feeling fancy, use a clean microfiber cloth to smooth out the surface as you go. It feels a bit like polishing a small window, but it’s worth it for a seamless look.
3. Test the pull force
Now the fun part – does it actually hold? Most custom photo magnets are made from neodymium or ferrite material that can handle a few ounces of pull. If you want to be sure you’ve got enough strength for a busy kitchen door, you can run a quick test with a kitchen utensil.
Grab a lightweight spoon or a small spice jar and hang it from the magnet. If it stays put, you’re good. If it slides, you might need a stronger magnet or a smaller photo.
For a more scientific check, the magnet pull force calculator from K&J Magnetics lets you estimate how much weight a standard 2"×2" disc can hold based on its grade and thickness. Plug in the specs from your order (usually listed in the product details) and you’ll see a number in ounces or grams. Aim for at least double the weight of whatever you plan to hang – that little safety margin keeps your fridge looking tidy even when you add a grocery list.
I also spotted a quick tip in a Facebook DIY magnets group – they suggest hanging a paperclip from the magnet first to gauge grip before attaching heavier items.
4. Position for visual impact
Think about the story you want to tell. Centered on the middle of the door? Or tucked into a corner next to the kids’ doodles? Play with placement before you press down fully – a quick lift and re‑stick won’t damage the magnet, but it saves you from a crooked photo later.
And if you have more than one magnet, create a mini‑gallery. Align edges, step back, and adjust until the composition feels balanced. This is where the “personal touch” really shines.
5. Final durability check
Give the whole arrangement a gentle tug. You should feel a solid resistance, not a flimsy “pop”. If you hear a faint click, that’s the magnet’s internal bond giving way – replace that piece.
Also, consider the fridge’s surface. A glossy stainless steel door can be a bit slick, so a tiny dab of clear, non‑permanent adhesive (like a museum‑grade tack) can give extra grip without marring the finish.
Quick checklist before you call it a day
- All magnets free of visual defects.
- Adhesive backing fully removed.
- Pull force meets or exceeds the weight of any attached items.
- Placement looks intentional and balanced.
- Final tug test passes without slipping.
There you have it – a straightforward, hands‑on way to make sure your custom photo magnets for fridge gift not only look great but actually stay where you want them. And if you ever wonder “Did I choose the right finish?”, just remember the proof you saw earlier and the extra confidence a strong pull test gives you.
Feeling ready to stick your memories onto the fridge? Go ahead, press that first magnet and watch the smile appear.
Step 6: Gift Wrapping and Presentation Ideas
Okay, you’ve printed the perfect custom photo magnets for fridge gift, and now you’re staring at a stack of tiny, magnetic memories. How do you make the unboxing feel as special as the photos themselves? Let’s dive into some low‑key, heart‑warming packaging tricks that turn a simple magnet into a keepsake.
If you need a visual boost, check out these packaging ideas on Pinterest.
1. Choose a “gift‑ready” container
Forget the generic cardboard box. A small kraft mailer, a reusable tin, or even a pretty fabric pouch adds texture and surprise. The moment they see a rustic envelope, they already sense you’ve put thought into it.
Pro tip: line the inside with tissue paper printed with a subtle pattern that matches the photo theme – think tiny snowflakes for a winter scene or pastel dots for a baby shower.
2. Personalize the wrap with a hand‑written note
Nothing beats a quick scribble that says, “I saw this and thought of you.” Keep it short, maybe a single line that references the photo, like “Remember our sunset on the pier?” It feels like a whisper across the table.
And if you’re not the best writer, just draw a quick doodle or a heart. The effort matters more than perfect grammar.
3. Add a “reveal” element
Consider a folded “pop‑up” card that lifts the magnets as the recipient opens it. You can DIY with a single piece of cardstock – fold a small “window” that slides up, revealing the magnets like a mini‑gallery.
Or, for an extra wow, slip the magnets into a clear acrylic sleeve and seal it with a ribbon. When they pull the ribbon, the sleeve slides open and the magnets tumble gently onto the fridge.
4. Use themed accessories
If the photos are from a family vacation, tie a small tag shaped like an airplane or a palm leaf. For a holiday gift, a tiny pine‑cone or a gold‑foil star works like magic.
Even a simple sticker that says “Made with love at heartful.gifts” reinforces brand love without sounding salesy.
5. Think about the “first magnet” presentation
Place one magnet on a small, magnetic board or a fridge‑magnet strip inside the package. When the box opens, that first magnet is already stuck, guiding the giver to place the rest.
This tiny cue reduces any awkward “where do I put these?” moment and turns the whole process into a smooth ritual.
6. Eco‑friendly touches
More people care about waste than ever. Swap plastic ties for twine, use recycled paper, and add a tiny seed‑paper card that they can plant later. It’s a small gesture that echoes the sentiment of preserving memories.
And yes, you can still keep it classy – a sprig of dried lavender or a cinnamon stick adds scent and a personal feel.
7. Quick checklist before you seal
- Magnet surface clean, no fingerprints.
- Wrap in kraft or fabric, add tissue layer.
- Insert hand‑written note or doodle.
- Include a themed tag or sticker.
- Seal with twine, ribbon, or eco‑friendly tape.
For more inspiration on turning magnets into fridge art, see this guide from Square One.
Does any of this feel overwhelming? Not really – you can pick just one or two ideas that match your style and still create a memorable unboxing.
Finally, remember that the presentation is an extension of the gift itself. When the recipient opens a beautifully wrapped bundle of custom photo magnets for fridge gift, they instantly feel the love you poured into every step.
Ready to wrap? Grab your favorite kraft mailer, a pen, and a sprig of lavender. Your magnets are waiting to become the highlight of someone’s kitchen.
FAQ
What makes custom photo magnets for fridge gift so special?
Because they're literally a piece of your memory you can see every time you grab a snack.
Instead of a generic souvenir, you get a magnet that shows a family photo, a wedding snapshot, or a kid's art.
How do I choose the right size and shape?
Think about where the magnet will live. If you want it to sit alongside grocery lists, a 2‑inch square works great. For a bold statement, a 3‑inch round or a custom silhouette can fill a bigger space.
Most print‑on‑demand shops, like heartful.gifts, let you preview a mock‑up, so you can see how it’ll look before you click "order".
Can I add a personal message without cluttering the design?
Absolutely. A short line of text—maybe a date or a nickname—can sit in the corner or along the edge. Because the magnet itself is small, keep the font simple and the wording brief.
We often recommend a handwritten‑style font; it feels intimate without stealing the spotlight from the photo.
What’s the best way to package and ship these magnets?
Use a sturdy kraft envelope with a little tissue paper inside. Slip in a tiny thank‑you note or a seed‑paper tag for an eco‑friendly twist.
Seal it with twine or a cute sticker, and you've turned the shipping box into part of the gift experience.
How long does it take to receive my custom photo magnets?
Most print‑on‑demand services have a 3‑5 business day production window, then shipping adds another 2‑4 days depending on your location.
If you're planning for a birthday or anniversary, order at least a week in advance—just in case.
Are these magnets safe for all fridge surfaces?
Yes, they're made with a thin rubber backing that won't scratch painted or stainless steel finishes. The magnet strength is strong enough to hold a photo but gentle enough not to damage the surface.
And if you ever need to remove one, a gentle peel will leave no residue.
Can I reorder the same design later?
Definitely. Most sites store your design in your account, so you can reorder with one click. It's perfect for yearly holidays or when you want to update a family portrait.
Just upload the new photo, tweak the text, and you're good to go.
What if my photo looks blurry—will the magnet still look good?
Most services run a quick auto‑enhance, but a clear photo always wins. If the image is fuzzy, you might notice it when the magnet sits on the fridge.
Try uploading a higher‑resolution file or choose a simple background; the magnet will turn out crisp and eye‑catching.
Conclusion
We've walked through everything you need to know about custom photo magnets for fridge gift, from ordering timelines to surface safety.
So, what does all this mean for you?
It means you can turn a favorite snap into a heartfelt keepsake that lives right where you grab a snack.
Because the magnets are gentle on painted, stainless or glass surfaces, you won’t worry about scratches, and the rubber backing makes removal a breeze.
If you’re planning a birthday, anniversary, or just a surprise for Mom, order at least a week ahead—just like we suggested earlier—so the 3‑5 day production and shipping window doesn’t catch you off guard.
And when you’re ready to refresh the design next year, most print‑on‑demand platforms keep your file handy, so a one‑click reorder is literally that easy.
Remember, the magic isn’t just in the magnet itself—it’s the smile you’ll see every time the door swings open.
Ready to create yours? Head over to heartful.gifts, upload your favorite photo, add a sweet note, and let the fridge become your personal gallery.
Give it a try today and watch a simple magnet turn everyday moments into lasting memories.
You’ll wonder how you ever celebrated without them today.