
How to Create a Personalized Picture Night Light that Glows Your Memories
Ever found yourself scrolling through endless gift ideas, wondering if anything could truly capture that special moment you share with a loved one?
I get it—standard mugs and picture frames start to feel a bit predictable after the hundredth birthday or anniversary.
That's why a personalized picture night light feels like a tiny piece of magic you can actually turn on.
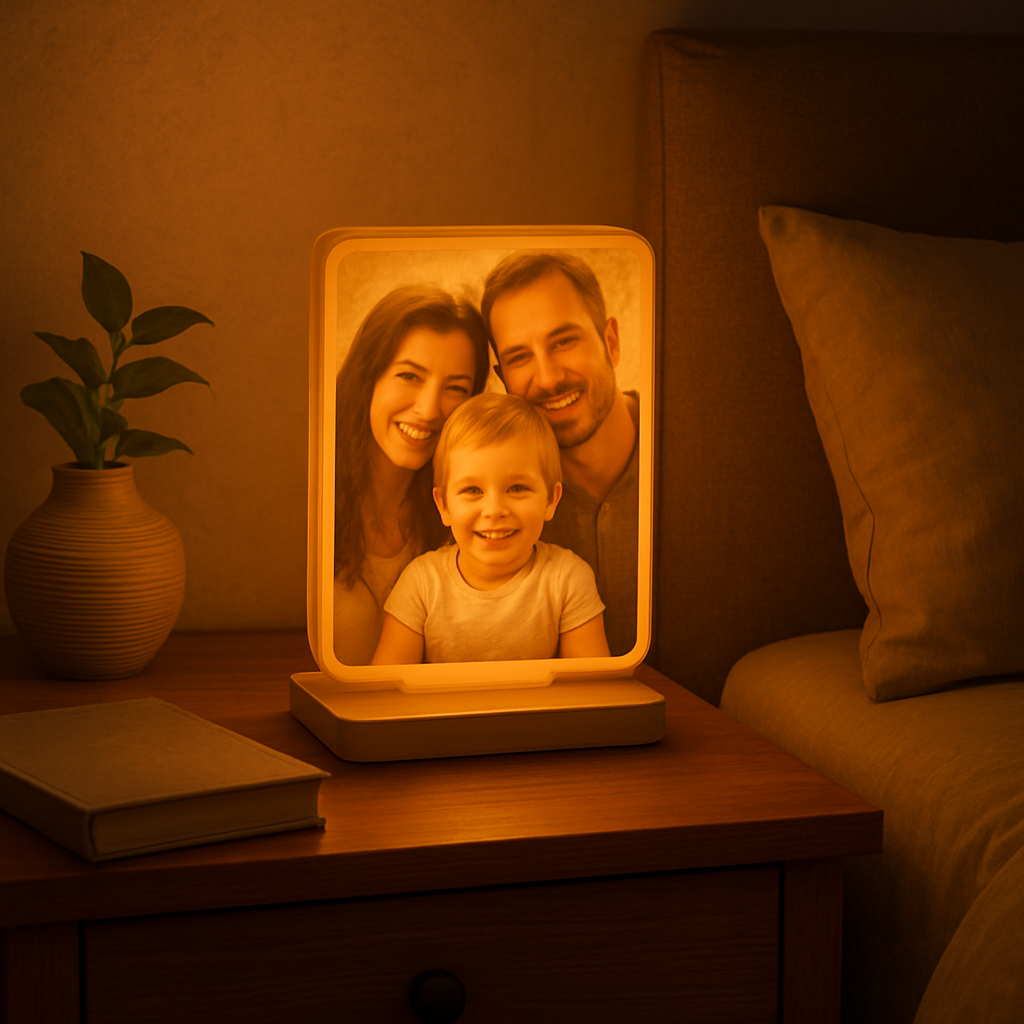
Imagine the grin on your partner's face when the bedroom glows with a soft halo of your favorite vacation snap.
It’s not just a night light—it’s a reminder that those memories keep shining, even after the lights go out.
And the best part? You can choose any photo, from a newborn’s sleepy yawn to a goofy pet pose, and the lamp prints it right onto a smooth, frosted surface.
Because the design process is basically drag‑and‑drop, you don’t need any Photoshop wizardry—just upload, pick a layout, and voilà.
So, what does that mean for you as a gift buyer?
It means you can give a present that feels personal, useful, and instantly mood‑lifting without breaking the bank.
Plus, because it emits a gentle, warm glow, it doubles as a night‑time comfort object for kids who need a bit of reassurance.
If you’ve ever worried about a gift ending up dusty on a shelf, this one actually gets used—night after night.
Ready to turn that favorite snapshot into a soft, glowing keepsake? Let’s explore how easy it is to bring your memory to light.
Think about the first time you saw a photo lamp at a friend’s house—a simple image of a beach sunrise, but the way the light washed the walls made the memory feel alive.
You don’t have to be a tech geek either; most services let you preview the glow on your screen before you hit order, so you know exactly how it’ll look beside the nightstand.
And if you’re still on the fence, remember that a personalized picture night light makes a sweet surprise for holidays, birthdays, or even as a “just because” token that says, “I’m thinking of you when the world goes dark.”
TL;DR
A personalized picture night light turns any beloved photo into a warm, glowing keepsake that comforts kids, brightens bedrooms, and makes gift‑giving feel truly thoughtful. It’s simple to order—just upload, preview, and click—so you can surprise loved ones with a custom glow that reminds them of happy moments every night.
Step 1: Choose Your Photo and Design
Alright, you’re about to turn a treasured snapshot into a soft‑glowing night light. The first decision? Picking the picture that will sit behind that gentle light. It sounds simple, but the little details you choose now will decide whether the lamp feels like a heartfelt keepsake or just another piece of décor.
Pick the perfect photo
Think about the moment you want to relive every night. Is it a sleepy newborn’s yawn, a goofy dog mid‑sprint, or a sunset from that beach vacation you keep talking about? Choose an image with clear focus and good contrast – a bright subject against a darker background tends to translate best onto the frosted surface.
If you’re using a phone, consider a quick refresher on composition and lighting. A short smartphone photography course can teach you how to avoid glare and capture the details that make a night‑light pop.
And don’t stress about perfection. Most services let you crop and rotate later, so you can experiment with framing before you lock it in.
Consider layout and colors
Once you have your image, think about how it will sit inside the lamp. Some sites offer a few layout presets – a full‑bleed circle, a centered square, or a subtle border. If the photo has a busy background, a simple circular cut‑out can keep the focus on the main subject.
Color tones matter, too. Warm hues (oranges, reds) tend to amplify the cozy glow, while cool blues can give a calming, almost lullaby‑like feel. If you’re designing for a kid’s room, you might lean toward pastel shades; for a romantic bedroom, richer tones work better.
Need inspiration? Our How to Design Your Own Custom Photo Moon Lamp: A Step‑By‑Step Guide walks you through choosing palettes and layout options without any design jargon.
Test the preview
Before you click “order,” most platforms generate a digital mock‑up. Take a minute to compare it on a dark‑mode screen – does the image still read clearly when the light is on? Zoom in to check that tiny details (like a smile or a paw print) aren’t lost.
Here’s a quick checklist:
- Is the subject centered?
- Do the edges have enough contrast?
- Does the preview look good on both a phone and a laptop?
If anything feels off, swap the photo or adjust the cropping. It’s way easier to tweak now than to receive a lamp you’re not thrilled about.
And if the night light is headed for a nursery, think about the whole bedtime environment. Pairing it with blackout curtains can create the perfect darkness for sleep while the lamp provides just enough comfort glow.
Now that you’ve nailed the image, it’s time to see the magic in motion.
Watch the short video above for a visual walk‑through of uploading your photo, choosing a layout, and previewing the final night light.
With the perfect picture selected and the design set, you’re ready for the next step: placing your order and waiting for that first gentle glow. Trust the process, and soon you’ll have a one‑of‑a‑kind night light that feels like a hug every evening.
Step 2: Select the Right Night Light Hardware
Now that your photo is ready, the next big decision is what kind of night‑light hardware will actually bring it to life. It sounds simple, but the right base can mean the difference between a flickering novelty and a reliable, cozy glow that lasts night after night.
Power source: plug‑in vs. battery
If the lamp will live on a bedside table near an outlet, a plug‑in unit with a low‑wattage LED driver is the safest bet. You won’t have to worry about the battery dying in the middle of a bedtime story. For a more portable setup—say, a nursery that moves with a crib or a guest room without easy access to sockets—choose a rechargeable battery pack. Look for a capacity of at least 2000 mAh; that usually gives you 8‑10 hours of soft light.
Pro tip: many modern LED bases include a USB‑C charging port, so you can top them up with the same charger you use for your phone.
Brightness and colour temperature
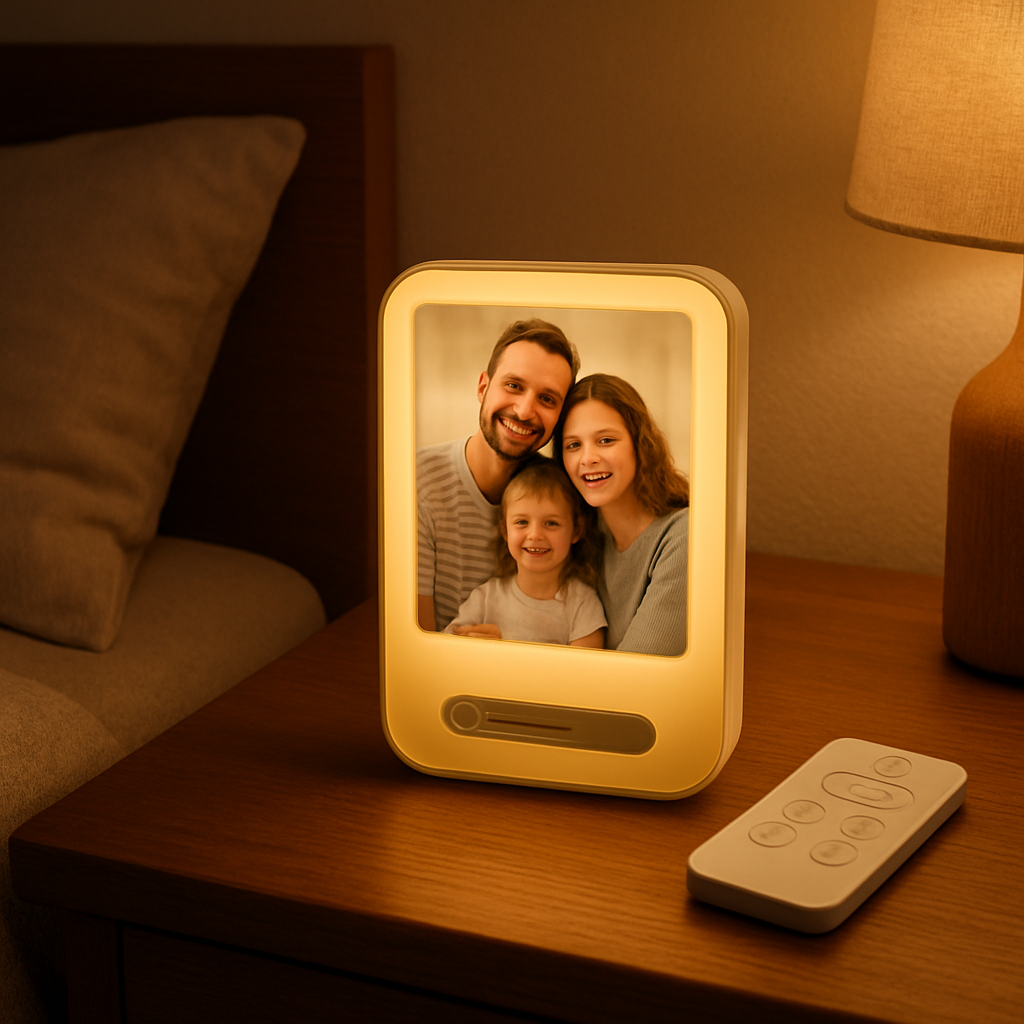
Kids’ rooms benefit from a warm 2700‑3000 K hue because it mimics the soft glow of a sunset and won’t disrupt melatonin production. For adult spaces, a neutral 3500‑4000 K can feel more “awake” while still being gentle. Look for a dimmable driver or a remote‑controlled colour‑wheel if you want the flexibility to switch to a calming blue or a playful pink for special occasions.
One popular option that checks both boxes is a LED‑backlit acrylic frame—think of the personalized picture frame that customers rave about for its soft illumination and easy plug‑in design(see customer feedback). The frame’s built‑in LED strip spreads light evenly across the photo, avoiding hot spots.
Shape and material considerations
Round “moon” lamps create a dreamy atmosphere, perfect for a teen’s dorm or a cozy reading nook. If you prefer a more classic look, a rectangular acrylic or wooden base works well on a nightstand. Acrylic is lightweight and shatter‑resistant—great for households with toddlers—while wood adds a warm, organic feel that complements rustic décor.
For a truly whimsical touch, check out the unicorn‑themed terrarium kit that doubles as a LED night light(customers love its playful design). It shows how a themed housing can become a conversation piece while still serving the practical purpose of nighttime illumination.
Stability and safety
Never underestimate the importance of a sturdy base. A wobbling lamp not only looks cheap, it can tip over and break the frosted surface where your photo lives. Look for a weighted base—metal or thick wood works best. If you’re buying a slim acrylic frame, make sure it comes with a rubber‑foot grip to keep it from sliding on polished surfaces.
For kids’ rooms, double‑check that any cords are short, concealed, and meet UL safety standards. Some battery‑operated units even offer a “child‑lock” switch to prevent accidental toggling.
Actionable checklist
- Decide plug‑in or rechargeable battery based on location.
- Choose colour temperature (warm 2700 K for sleep‑friendly, neutral 3500 K for multi‑use).
- Select shape (round moon lamp, rectangular acrylic, or themed housing).
- Verify base weight ≥ 1 lb for stability.
- Confirm LED dimming or colour‑change options if you want mood flexibility.
- Check safety certifications (UL, CE) especially for children’s spaces.
Once you’ve ticked those boxes, you’ll have a hardware foundation that lets your personalized picture night light shine exactly the way you envision.
Ready to see a real‑world example in action? Below is a quick video that walks through setting up a plug‑in acrylic frame, swapping the battery, and adjusting the dimmer.
Take a moment after the video to compare the two hardware styles we discussed. Which one feels like a natural extension of the room you’re designing? Grab that choice, order the base, and you’ll be one step closer to turning a cherished photo into a nightly beacon of love.
Step 3: Prepare Your Image for Printing
Okay, you’ve picked the perfect snap – maybe it’s the goofy grin of your toddler or that golden‑hour beach shot you’ve been scrolling over for weeks. The next hurdle is making sure the picture actually looks good when it’s lit from behind. Trust me, a blurry or poorly sized file will turn your dreamy night light into a ghostly smudge.
Check resolution and file size
Most print‑on‑demand services need at least 300 dpi for a crisp finish. If you’re pulling the image straight from your phone, open the photo in the gallery’s “details” view – you should see something around 1–2 MB. Anything smaller usually means you’ll lose detail once the light spreads across the frosted surface.
Pro tip: if the file is under 1 MB, pop it into a free editor like GIMP or an online compressor and export at a higher quality setting. You’ll be surprised how much sharper the final lamp looks.
Mind the colour palette
Because the lamp glows, high‑contrast images tend to pop the most. Think bold blues, warm oranges, or deep reds against a neutral background. Soft pastels can still work, but you’ll want to boost the contrast a notch so the light doesn’t wash them out.
One quick test: switch your screen to a dark mode, open the photo, and dim the room lights. If you can still make out the main shapes, you’re in good shape.
Crop to the lamp’s shape
Round “moon” lamps need a centred subject, while rectangular acrylic frames give you a little more wiggle room. Grab the crop tool, lock the aspect ratio to match your chosen hardware, and leave at least a half‑inch margin around the key element. This prevents the edges from getting clipped when the printer trims the image.
Example: I had a portrait of my dog that was taller than wide. I switched to a square crop, nudged the pup a bit off‑centre, and the final round lamp ended up looking like a cute, framed silhouette instead of a chopped‑off head.
Preview the back‑lit effect
Most platforms let you toggle a “glow preview.” Use it. If the details disappear in the darkness view, open a simple photo editor, increase the brightness and contrast, then re‑upload. A little extra punch now saves you a disappointing surprise later.
For those who love to experiment, Merchize’s custom photo night light lets you order the acrylic sheet alone, so you can test different images without committing to the full base right away. It’s a low‑risk way to see how your design behaves under LED light.
File format matters
Stick with PNG for crisp edges or high‑quality JPEG if you need smaller files. Avoid GIF or BMP – they either add unwanted artifacts or inflate the size without benefit.
If you’re adding text (like a name or date), embed the font into the image before uploading. That way the printer won’t try to substitute a default font that looks totally off.
Final checklist before you hit “order”
- Resolution ≥ 300 dpi.
- File size 1–2 MB (or higher if you’ve added text).
- High‑contrast colours, especially for dim settings.
- Cropped to match lamp shape with a safe margin.
- Previewed in a dark‑room simulation.
- Saved as PNG or high‑quality JPEG.
When you’ve ticked every box, you’re ready to move on to the hardware. If you’re still on the fence about the exact product, Printway’s personalized picture frame light box offers a no‑minimum‑order option and a sleek acrylic design that works beautifully with the images you’ve just refined.
Bottom line: the better you prep the image, the more your night light will feel like a genuine memory rather than a generic glow. Take a few extra minutes now, and you’ll end up with a personalized picture night light that truly lights up the room – and the heart.
Step 4: Customize Light Settings and Controls
Now that your image is perfect and the hardware is in hand, the fun part begins – tweaking the light itself so it feels just right.
Most personalized picture night lights come with a tiny controller, a dimmer switch, or even a little remote. If you grabbed a plug‑in acrylic frame, you’ll probably see a smooth slider on the side; battery‑run units often hide a button underneath the base.
Adjust brightness
First, decide how bright you want the glow. A good rule of thumb is to keep the light low enough that it’s soothing at bedtime but bright enough to see the main shapes in your photo.
- Start at the lowest setting and glance at the lamp from across the room.
- If the image looks washed out, inch the slider up a notch.
- Stop when the details are just visible without dazzling the eyes.
Does that sound a bit trial‑and‑error? It is, but it only takes a minute and saves you from a night of squinting.
Pick colour temperature
Warm light (around 2700‑3000 K) mimics a sunset and is best for kids’ rooms or any space where you want the lamp to signal “time to wind down.” If you’re using the night light as a decorative accent in a living area, a neutral 3500‑4000 K can feel more lively without being harsh.
Many LED bases let you toggle between warm and neutral with a simple press. If your model has a colour‑wheel remote, give each hue a few seconds and watch how the same photo shifts mood. You’ll notice that a beach sunrise picture actually looks more vivid under a slightly cooler tone.
Set up timers or smart controls
Do you want the light to turn on automatically when the room gets dark? Look for a built‑in dusk sensor or pair the lamp with a smart plug that you can schedule from your phone. A 2‑hour timer works wonders for bedtime routines – the light fades out just as the little one drifts off.
If you’re feeling fancy, many modern lamps talk to Alexa or Google Assistant. A quick voice command like “Hey Google, dim the night light to 30 %” can become part of your nightly ritual.
Test in real night‑time conditions
It’s tempting to rely on the on‑screen preview, but nothing beats a real‑world test. Turn off the main lights, switch the lamp on, and sit on the edge of the bed. Ask yourself: can you still make out the smile on the photo? Is the glow gentle enough that it doesn’t keep you awake?
If something feels off, go back to the controller and tweak a bit more. Small adjustments—like lowering brightness by just 10 %—can make a huge difference in how comforting the light feels.
And remember, you can always revisit these settings later. As seasons change or the child grows, you might prefer a cooler tone in summer and a warmer one in winter.
Finally, lock in your favorite configuration. Some units have a “memory” button that remembers the last setting; others keep the last position after power cycles. If yours doesn’t, just make a mental note or write it on a sticky note for the next night.
By customizing brightness, colour temperature, and timing, you turn a simple personalized picture night light into a truly personal bedtime companion.
Take a few minutes now to play with the controls, and you’ll end up with a night‑light that not only showcases your favorite memory but also supports a calm, restful sleep for anyone in the room.
Step 5: Assemble and Test Your Personalized Picture Night Light
Alright, you’ve got the perfect photo, you’ve chosen the right base, and you’ve dialed in the brightness and colour temperature. Now it’s time to bring everything together and make sure the magic actually works when the lights go down.
Unbox and check the parts
First thing’s always the unboxing. Lay out the lamp, the controller (or remote), any screws, and the power cord. Take a quick inventory – does the package include the memory button you read about earlier? If something’s missing, pause now and contact the seller before you waste time trying to assemble an incomplete kit.
Tip: Keep the instruction sheet handy. Even if you’ve watched a video before, a quick glance at the printed steps can save you from a missed screw or a mis‑aligned panel.
Secure the photo panel
Most personalized picture night lights use a thin acrylic or frosted glass panel that slides into a groove. Gently slide your printed image (usually a thin polymer sheet) into the slot, making sure it’s flush and not tilted. You’ll feel a soft click when it’s seated properly.
If the panel feels loose, double‑check that the backing clips are fully engaged. A wobbling panel can create uneven light and, honestly, looks cheap.
Mount the base
Now attach the base. For plug‑in models, screw the base onto the panel using the supplied screws – a Phillips‑head screwdriver works fine. Tighten just enough to hold it firm; overtightening can crack the acrylic.
Battery‑run units often snap together. Align the magnetic connectors and give a gentle press until you hear a satisfying snap. Once it’s together, give the lamp a little shake; it should feel stable.
Power up and do a quick sanity check
Plug the lamp in or press the power button on a battery model. The LED strip should glow softly within a second. If you get no light, double‑check the outlet or battery charge – it’s easier to fix now than after you’ve spent an hour adjusting settings.
Turn the dimmer or remote to the lowest setting first. Look at the image from across the room. Can you still make out the main shapes? If it’s too faint, raise the brightness a notch and re‑evaluate. Keep adjusting until the details are visible but the glow stays gentle enough for bedtime.
Fine‑tune colour temperature
Warm up the light to around 2700 K if you’re using it in a child’s room – it mimics a sunset and won’t interfere with melatonin. If the lamp has a colour‑wheel remote, toggle through the options and watch how the same photo shifts mood. A cooler tone can make a beach sunrise pop, but it might feel too energising for sleep.
Don’t be afraid to experiment. You might discover that a slightly warmer hue makes a family portrait feel cozier, while a neutral tone works better for a modern living‑room décor.
Test the timer or smart features
If your lamp includes a timer, set it for 2 hours and watch it dim down automatically. For smart plugs, use the app to schedule the light to turn on at sunset. A quick test now ensures the feature won’t fail later when you’re half‑asleep.
Ask yourself: does the lamp turn off exactly when you expect it to? If not, adjust the timer or check the smart‑plug’s firmware. A few minutes now saves a night of frustration.
Do a “real‑world” night test
Turn off all other lights, close the curtains, and let the lamp shine in its natural environment. Lie on the bed, glance at the photo, and see how the glow feels against the darkness. Is the light too bright for a restful vibe? Does the image stay clear or get washed out?
Take notes. Write down the brightness percentage, colour temperature, and timer setting that felt just right. A sticky note on the nightstand can be your cheat sheet for future adjustments.
Secure the memory setting
If your unit has a memory button, press it now so the lamp remembers your preferred settings after you unplug it. If not, the notes you just took become your go‑to reference.
Finally, give the lamp a gentle nudge to make sure the base is stable and the panel stays in place. A quick wiggle test now prevents a mid‑night tumble later.
And there you have it – a fully assembled, perfectly tuned personalized picture night light ready to glow over bedtime stories, quiet evenings, or a quick selfie‑check before you drift off. Enjoy the soft glow of your memories, and remember: a little tweaking today makes countless cozy nights tomorrow.
Step 6: Care, Maintenance, and Gift Ideas
Now that your personalized picture night light is shining just right, the real question is – how do you keep that glow looking fresh night after night?
First thing’s always the same: treat it like you would a favorite piece of art. A little love now means fewer surprises later, and honestly, it feels good to know your gift will keep on giving.
Everyday TLC
Dust the acrylic or frosted surface with a soft, lint‑free cloth every few days. If you notice fingerprints, a barely damp microfiber wipe does the trick – no harsh chemicals, just gentle care.
Does the lamp get moved around a lot? A quick check of the base stability each week prevents wobble, especially in kids’ rooms where the night light might get nudged during bedtime stories.
Deep‑clean routine
Once a month, unplug the lamp and give the whole unit a once‑over. Use a dry brush to clear any dust from the ventilation slots – that keeps the LED driver cool and extends its life.
And don’t forget the photo panel. If you’ve chosen a removable acrylic sheet (like the KoxSmar custom picture frame with multi‑color lighting), you can pop it out and give it a gentle rinse with water, then let it air‑dry before slipping it back in.
Battery vs. plug‑in upkeep
Battery‑powered units benefit from a charge‑cycle habit: charge them fully once a week, even if they still have juice. This avoids the dreaded “sudden die” in the middle of a bedtime story.
Plug‑in lamps are simpler – just make sure the cord isn’t twisted or pinched. A quick visual inspection each time you change the room layout is all it takes.
When to replace parts
LEDs are built to last, but the driver can wear out after a few years of constant use. If you notice flickering or a dimmer that won’t stay where you set it, it’s time to swap the driver – most manufacturers sell replacements as a cheap add‑on.
The photo panel itself is replaceable on most models, so if the image fades or you simply want a new memory, just order a fresh print and slide it in.
Gift ideas that pair perfectly
Now that you’ve nailed the maintenance game, think about who else could use a little glow.
Parents love a night light that doubles as a memory keeper for kids – choose a baby’s first smile or a family picnic shot. It becomes a bedtime ritual that says, “I’m here, and I remember this moment.”
For couples, a photo from your honeymoon or a favorite travel destination makes a romantic bedside accent. Pair it with a handwritten note tucked under the lamp base for extra sentiment.
Even grandparents appreciate a nostalgic picture of grandchildren. The soft warm light (around 2700 K) feels like a gentle hug, perfect for those who might need a night‑time comfort object.
Looking for a quick add‑on? A set of decorative stickers or a slim wooden frame strip can customize the lamp’s silhouette without changing the core design.
Quick checklist before you hand it over
- Wipe the surface with a microfiber cloth.
- Verify base stability and cord integrity.
- Charge battery units fully each week.
- Test the memory button or note your favorite settings.
- Package the lamp with a small care guide and a spare photo panel.
Comparison table – care & gift ideas at a glance
| Aspect | Care Tip | Frequency |
|---|---|---|
| Surface cleaning | Wipe with lint‑free cloth; damp microfiber for fingerprints | Every 2–3 days |
| Ventilation check | Brush dust from LED driver vents | Monthly |
| Battery health | Full charge cycle, even if not empty | Weekly |
So, what’s the next step? Grab a fresh photo, give your lamp a quick dust‑off, and think about the lucky person who’ll get to see that memory glow every night. A little upkeep now means a lasting, heartfelt gift that never loses its sparkle.
FAQ
Got questions about the personalized picture night light? Below are the most common ones we hear, with straight‑forward answers to help you feel confident about your glow‑up.
What is a personalized picture night light and how does it work?
It’s a small LED lamp that holds a thin, frosted acrylic panel printed with your chosen photo. The LEDs shine from behind, turning the image into a soft, back‑lit keepsake. Because the light source is low‑wattage and often dimmable, the glow stays gentle enough for bedtime while still showcasing the picture’s details.
Can I use any photo for my night light?
Almost any image will work, but aim for at least 300 dpi and a file size around 1–2 MB. High‑contrast shots—bright colors against a darker background—tend to pop best once the lamp is lit. If the picture is grainy or too dark, you might want to boost the contrast in a basic editor before uploading.
Is the light safe for children’s rooms?
Yes, most models use UL‑certified LEDs and a sturdy, weighted base that won’t tip easily. The colour temperature is usually set to a warm 2700‑3000 K, which mimics a sunset and won’t disrupt melatonin production. Just keep cords out of reach and use the short, concealed power cable that comes with the lamp.
How do I change the photo after the lamp is already assembled?
Most lamps have a slide‑in panel that you can pop out without tools. Simply remove the acrylic sheet, swap in a new printed panel, and slide it back until you hear a click. If your model uses magnetic clips, align the magnets and press gently. Make sure the new image is trimmed to the correct dimensions to avoid edge gaps.
What battery life can I expect and how do I maintain it?
Rechargeable units with a 2000 mAh battery typically run 8–10 hours on a low‑brightness setting. To keep the battery healthy, charge it fully once a week even if you haven’t drained it completely. Avoid leaving the lamp plugged in for days on end, as that can stress the cells over time.
Do I need any special tools to install or clean the lamp?
No special tools are required. A small Phillips‑head screwdriver is enough for any screws that hold the base, and a soft microfiber cloth does the trick for dusting the acrylic. If you notice fingerprints, a barely damp cloth will wipe them away without harming the surface. Regular gentle cleaning keeps the glow crisp.
Conclusion
We've walked through everything from picking the perfect photo to fine‑tuning the LED driver, so you now have a clear picture of how a personalized picture night light can turn a simple memory into a nightly ritual.
Remember, the magic starts with a high‑contrast image, a sturdy base, and a warm colour temperature that won’t disturb sleep. A quick weekly charge, a soft microfiber wipe, and a once‑a‑month ventilation check keep the lamp humming for years.
And the best part? You don’t need a toolbox or a design degree – just a phone, a favorite snap, and a few minutes of tweaking. Imagine the smile on a child's face when they see their own bedtime story glow, or the quiet joy of a couple sharing a sunrise picture before drifting off.
So, what’s the next step? Grab that cherished photo, head over to heartful.gifts, and order your custom night light. A little extra care now means countless cozy nights later, and a gift that feels as personal as a handwritten note.
Because a personalized picture night light blends function and sentiment, it becomes more than décor—it’s a quiet reminder of what matters most, lighting up both rooms and hearts.
Happy glowing, and enjoy the soft, memory‑filled light every night.