
How to Create a Personalized Photo Phone Case That Looks Great
Ever caught yourself scrolling through endless phone case options, feeling like every design looks the same?
You know that moment when you pull out an old photo, smile at the memory, and think, “What if I could carry that feeling in my pocket?”
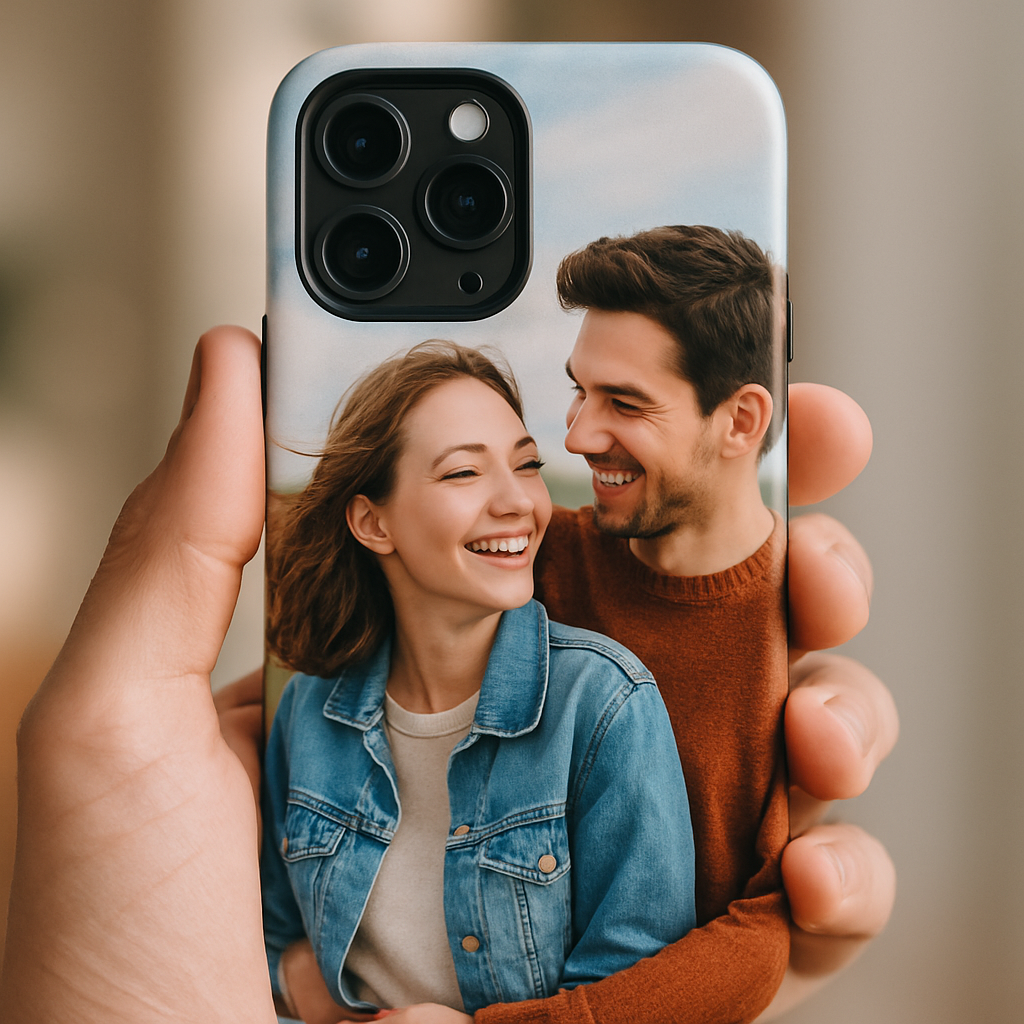
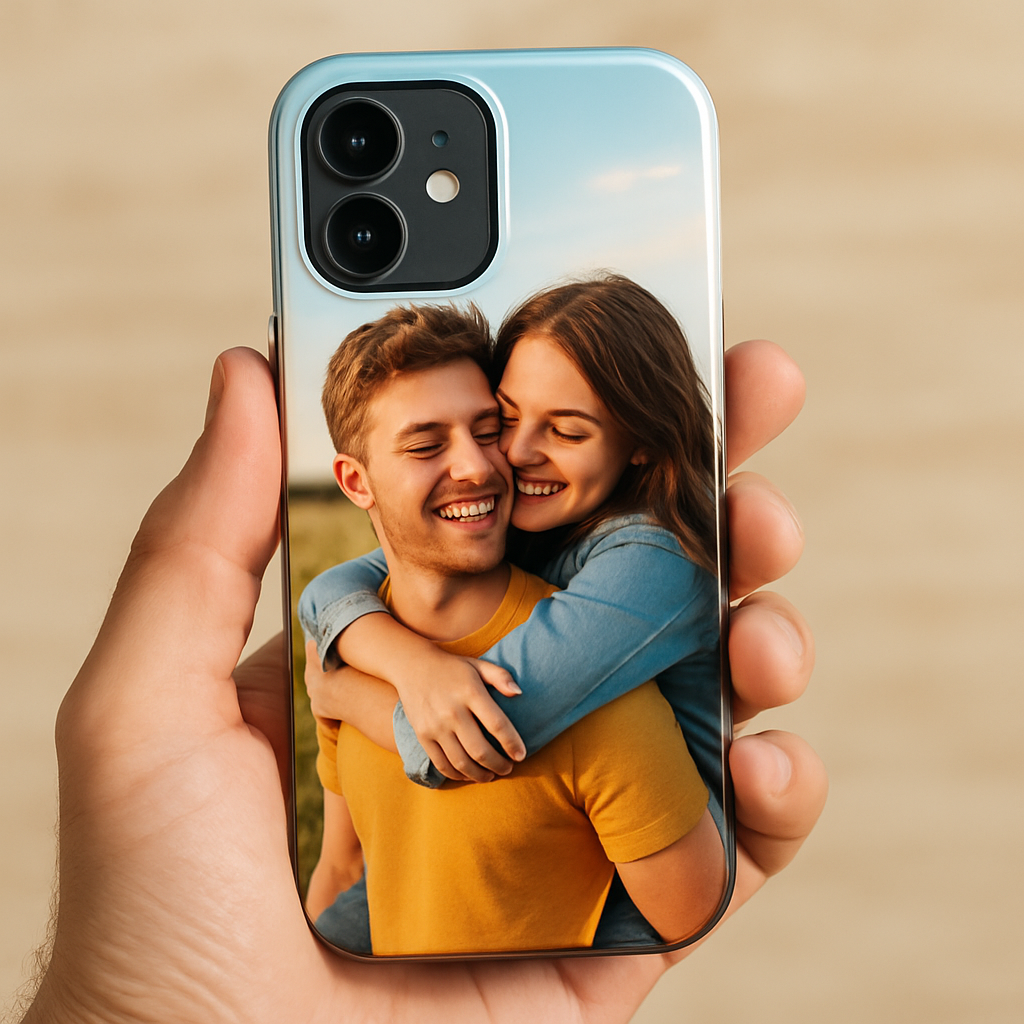
That’s exactly why a personalized photo phone case feels like a tiny, daily hug – it turns a simple gadget into a story you can show off every time you answer a call.
But let’s be real: not all photo cases are created equal. Some fade after a few washes, others chip the moment you drop the phone, and a handful look cheap enough to make you wonder if you just bought a coaster.
So, why does a truly personalized photo phone case matter? First, it’s a reminder of people, places, or moments that matter most – like that goofy beach snap with your kids or the candid laugh you shared at a wedding. Second, it’s an instant conversation starter. Imagine a friend noticing the bright sunrise you captured on a vacation and asking, “Where was that?” Suddenly you’ve turned a simple “hello” into a deeper connection.
And here’s the good news: modern print‑on‑demand services, like heartful.gifts, use high‑resolution UV printing that locks your image in vivid color for months, while protective silicone layers keep scratches at bay.
If you’re still on the fence, think about the little joy you’ll get each time you pull your phone out of your bag – a quick smile, a warm memory, and maybe even a chance to share that story with someone new.
Ready to turn your favorite snapshot into a protective, eye‑catching accessory? Let’s dive in and discover how you can create a personalized photo phone case that not only looks great but also lasts.
Plus, you’ll have a unique gift that shows you really care, without breaking the bank.
TL;DR
A personalized photo phone case turns your favorite memory into a durable, eye‑catching accessory that brightens every call and sparks conversation.
Follow our simple guide to design, order and care for a case that looks great, lasts long, and makes a heartfelt gift for you, your family, and friends, every day.
Step 1: Choose Your Phone Model
Picture this: you’ve just found the perfect sunset snap, and you’re ready to lock it onto a case. But before the design magic begins, you need to know exactly which phone you’re dressing up. That’s the first, and arguably the most important, decision.
Why does the model matter? A personalized photo phone case isn’t a one‑size‑fits‑all garment. Different phones have different dimensions, camera placements, and button layouts. If you pick the wrong size, your beautiful image might end up covering the camera or, worse, the case won’t snap on at all.
Start by locating your phone’s exact model number. For iPhones, flip to the back and you’ll see something like “iPhone 14 Pro Max”. Android folks can head to Settings → About phone, where the model name (e.g., “Samsung Galaxy S23 Ultra”) is listed. Write that down – you’ll need it when you browse case options.
Don’t just rely on the brand name; even within a single brand, sizes vary. The iPhone 13 mini, the standard 13, and the 13 Pro all have different widths and camera bumps. The same goes for Samsung’s S22, S22+, and S22 Ultra. A quick Google search of your model plus “dimensions” will give you the exact height, width, and thickness in millimetres.
Next, compare those dimensions to the case specifications offered by the print‑on‑demand shop. Most sites, including heartful.gifts, list the compatible models next to each case design. If the list includes your exact model, you’re good to go. If not, look for a “universal” size that matches your measurements, but double‑check the camera cut‑out.
Here’s a handy tip: measure the camera bump itself. Some cases are built for a flat‑back phone, while others have a recessed area for a protruding lens. A case that’s too shallow will leave the lens exposed, risking scratches. A case that’s too deep might make the camera look buried and affect photo quality.
Think about any extra features you use daily – like a fingerprint sensor on the back, a magnetic charging strip, or a side‑mounted fingerprint reader. Make sure the case you pick leaves those spots accessible. Most modern designs account for these, but it never hurts to verify.
When you’ve confirmed the model and checked the compatibility chart, you can move on to the fun part: uploading your photo and customizing the layout. If you need a refresher on how to get the best print results, our How to Create a Personalized Photo Phone Case That Stands Out guide walks you through file preparation, color profiles, and edge‑to‑edge printing tips.
To wrap it up, follow this quick checklist before you hit “Add to Cart”:
- Identify the exact model name and number.
- Record the phone’s height, width, and thickness.
- Match those numbers to the case’s listed dimensions.
- Confirm camera bump depth and any special sensor locations.
- Double‑check that the case’s compatibility list includes your model.
Once every box is ticked, you’ll know the case will hug your phone like a glove, keeping your favorite memory safe and your device protected. Ready to move on to uploading that photo? Let’s keep the momentum going.
Step 2: Select and Prepare Your Photo
Now that you’ve nailed the exact phone model, it’s time to pick the picture that will turn your case into a keepsake. You’ve probably stared at your camera roll, wondering which snap captures the vibe you want to carry around every day.
Pick a Photo That Tells a Story
Don’t just grab the highest‑resolution file; choose an image that makes you smile, laugh, or feel a little nostalgic. Maybe it’s the sunrise you chased on a beach vacation, or a candid of your toddler’s first steps. The emotional hook is what turns a plain case into a conversation starter.
Check Resolution – Bigger Is Safer
Most print‑on‑demand services recommend a minimum of 150 dpi at the final printed size, but aiming for 300 dpi gives you extra breathing room and sharper details. For a typical iPhone 15 Pro Max case (about 3.0 × 6.5 in), that translates to roughly 1800 × 3900 pixels.
- Open the image in your OS file explorer or a free viewer and check the pixel dimensions.
- If it’s under 1500 × 3000 px, consider up‑scaling with a tool like Adobe’s print‑resolution guide or swapping for a larger original.
- Avoid heavy compression; a JPEG saved at 80‑90 % quality usually keeps enough detail without bloating the file.
Mind the Crop and Aspect Ratio
Phone cases have a slightly curved edge and a cut‑out for the camera bump. If your photo is too wide, the design tool will auto‑crop, potentially chopping off a beloved face. A safe move is to start with a portrait‑oriented image and leave at least a 10 % margin on every side.
- Use a simple editor (even the built‑in Photos app) to add a “safe zone” overlay.
- Test the preview: if the subject sits too close to the edge, nudge it inward.
- Real‑world example: Maya’s newborn photo originally had a tight head‑shot. After adding a small border, the case printed perfectly without cutting off the tiny ear.
Color & Brightness – Keep It Real
Phones display in sRGB, so convert your file to that color profile before uploading. This prevents the case from looking washed out or overly saturated once printed. A quick check: compare the on‑screen image with a printed photo from a local shop; if they match, you’re good to go.
For a deeper dive, see B&H’s guide on choosing the correct image resolution, which walks through why sRGB matters for everyday prints.
Use the Design Tool’s Preview
Most sites, including heartful.gifts, offer a live preview where you can drag, rotate, and zoom. Spend a minute rotating the phone model in 3‑D; if the photo looks odd from the back or the side, tweak the placement now rather than after the case ships.
Pro Tip: Keep a Master File
Save a copy of the edited image in a lossless format (like PNG) before you upload. That way you can revisit the design, tweak the crop, or use the same photo for future gifts without starting from scratch.
Final Checklist
- Photo is at least 150 dpi, ideally 300 dpi at final case dimensions.
- Resolution meets or exceeds 1800 × 3900 px for larger phones.
- Image saved as JPEG (80‑90 % quality) or PNG for lossless detail.
- Subject sits inside a 10 % safe margin to avoid cut‑offs.
- File is converted to sRGB color profile.
- Preview looks good on all angles in the design tool.
If you’re still uncertain, order a cheap sample or use the site’s free mock‑up preview. Seeing the case in your hand before the final print can save you a redesign and a few dollars.
Once you tick every box, hit “Upload” and watch your memory transform into a personalized photo phone case that fits like a glove. Ready to see your favorite moment on your phone? Let’s move on to the next step and add that image to the mock‑up.
Step 3: Design Your Case Layout
Alright, you’ve got a crystal‑clear, perfectly sized photo ready to go. Now comes the fun part: turning that flat image into a design that looks great from every angle of your phone.
Map out the safe zone first
Think of the case as a tiny canvas with a few “no‑go” zones – the camera bump, the side buttons, and the curved edges. Most design tools let you toggle a safe‑zone overlay. Drag your picture into the center and keep the most important details (faces, text, bright colors) at least 10 % away from the edges. If you’re not sure, add a faint border in Photoshop or even in a free app like Canva’s phone‑case template – it automatically shows where the cut‑outs will be.
Does that sound like a lot? It isn’t. It’s basically the same habit you use when you frame a photo for a wall.
Play with scale and rotation
Sometimes the hero shot you love is a little too “in‑your‑face.” Try shrinking it down to 80 % of the canvas width and nudging it off‑center. A slight rotation (‑5° to +5°) can add movement and keep the design from feeling static. Real‑world example: Maya’s newborn portrait looked flat until she rotated it 3° and added a soft white vignette – the result felt like a gentle hug every time she looked at her phone.
Pro tip: most mock‑up tools let you spin the phone 360°. Rotate it to the back view and make sure nothing looks sliced off. If you spot a stray edge, go back and adjust the crop.
Add complementary elements (but don’t overdo it)
Want to sprinkle a little extra love? A subtle pattern, a short quote, or a tiny icon can make the case feel personalized without stealing the spotlight. Keep those additions under 15 % of the total area – think of it as seasoning, not the main dish.
Here’s a quick checklist for extras:
- Pick a font that matches the photo’s mood – handwritten for candid shots, clean sans‑serif for modern vibes.
- Use a single accent color that echoes a hue in the photo; this ties everything together.
- Test readability: if you add text, zoom in on the mock‑up to ensure it stays legible at phone‑size.
Use the right file format for layers
If you’re layering text or graphics, save the working file as a PNG with transparency. When you finally export for upload, flatten it to a high‑quality JPEG (80‑90 % quality) so the print‑on‑demand service can handle it quickly. Many creators swear by photoshop tutorials for phone‑case layouts because the layer control is unbeatable.
And remember: you can always go back to that master PNG later if you want to tweak the text or swap out a graphic for a new holiday.
Finalize and preview
Before you click “Upload,” run through this mini‑audit:
- All key elements sit inside the safe zone?
- Colors look vibrant in the sRGB preview?
- Background isn’t too busy – the photo should still be the star?
- Check the back view for any hidden cut‑outs.
If anything feels off, hit the undo button and experiment a bit more. A few minutes now saves you a pricey re‑order later.
Quick decision‑making table
| Feature | Recommended Tool | Quick Tip |
|---|---|---|
| Safe‑zone overlay | Canva phone‑case template | Enable “margin guides” and keep subjects 10 % away from edges. |
| Layered text & graphics | Adobe Photoshop (PNG with transparency) | Use Ctrl+T to scale and rotate in small increments. |
| 3‑D mock‑up rotation | Heartful.gifts design tool (built‑in 360° viewer) | Switch between front, back, and side to catch hidden cuts. |
Once you’ve signed off on the layout, you’re basically done. The next step is hitting that upload button and watching your memory turn into a sleek, protective accessory. Ready to see your design in your hand? Let’s move on to the final polishing stage.
Step 4: Choose a Printing Service & Materials
Alright, you’ve nailed the layout. Now comes the part that actually turns your masterpiece into something you can hold – picking the right printing service and material. It feels a bit like shopping for a new outfit: you want something that looks good, fits right, and won’t fall apart after a week.
What to look for in a printing partner
First, ask yourself: does the service support the exact phone model you’re targeting? A tiny mismatch in camera cut‑outs can ruin the whole vibe. Most reputable sites let you filter by model, so double‑check before you add anything to the cart.
Second, consider turnaround time. If you’re ordering a gift for a birthday next weekend, you’ll need a provider that ships within 2‑3 business days. Many print‑on‑demand shops offer “express” options for a small premium.
Third, read reviews that mention print fidelity. A good clue is whether customers say the colors look “vibrant” or “faded.” If you see repeated complaints about blurry images, move on.
Does any of that sound familiar? You’re not alone – we all dread the surprise of a dull‑looking case after weeks of waiting.
Material matters more than you think
Now, the fun part: choosing the material. The two most common choices for a personalized photo phone case are polycarbonate (hard plastic) and TPU (soft, flexible rubber). Each has its own personality.
Polycarbonate gives you crisp, showroom‑ready prints. The material is lightweight, so the case feels sleek on your hand. It’s perfect if you love the glossy, “photo‑gallery” look and don’t mind a slightly slippery feel.
TPU, on the other hand, is all about grip and shock absorption. The soft texture masks fingerprints and adds a little bounce when you drop the phone. The trade‑off is that TPU can yellow over time if it sits in direct sunlight.
Here’s a quick comparison:
- Polycarbonate: sharp colors, thin profile, may feel slick.
- TPU: grippy, shock‑proof, can yellow with UV exposure.
- Hybrid (hard back + soft bumper): best of both worlds, a tad bulkier.
Which one fits your style? If you’re gifting a grandma who likes a classic look, polycarbonate might win. If you’re sending a case to a teen who’s always on the go, TPU could be the safer bet.
Want the nitty‑gritty on material science? Check out the polycarbonate overview and the TPU guide for deeper details.
Printing technology you can trust
Most services use UV‑direct printing or sublimation. UV printing cures the ink instantly, giving you razor‑sharp details that won’t bleed. Sublimation, while a bit slower, embeds the ink into the material, making the design virtually un‑scratchable.
Ask the provider: “Do you use UV curing for photo cases?” If they answer “yes,” you’re in good hands. If they’re vague, it might be worth a quick Google search to see if other customers have tested the finish.
And don’t forget about eco‑options. Some shops now offer biodegradable TPU or recycled polycarbonate. It’s a small extra step, but it can turn a simple gift into a feel‑good statement.
Final checklist before you click “order”
- Model match – double‑check the exact phone version.
- Material choice – polycarbonate for glossy, TPU for grip.
- Print method – UV curing for vivid colors.
- Shipping speed – at least 2‑3 business days for urgent gifts.
- Eco‑friendly option – consider recycled or biodegradable material.
If you’ve ticked all those boxes, you’re practically ready to hit “order.” The personalized photo phone case you’ve been dreaming about is just a few clicks away.
One last thing: always order a single sample before you launch a bulk run. A quick test lets you feel the texture, see the true colors, and catch any surprise fit issues before you spend on dozens of cases.
Ready to see your photo come to life? Let’s get that case printed and in your hand.
Step 5: Order, Review Proof, and Care for Your Case
Now that you’ve nailed the design and picked the perfect material, the moment of truth arrives – placing the order, reviewing the proof, and then looking after your new personalized photo phone case.
It feels a bit like waiting for a birthday present you already know you love. You’re excited, but you also want to make sure nothing goes sideways.
Double‑Check the Proof Before You Click “Buy”
Most print‑on‑demand sites will send you a digital proof. Treat it like a final exam – zoom in, rotate, and compare every edge with your original mock‑up.
Ask yourself: does the photo stay inside the safe‑zone? Are the colors still vibrant in the sRGB preview? If the provider offers a 3‑D mock‑up, spin the case 360° and look for any stray cut‑outs near the camera bump or side buttons.
A quick trick many designers swear by is to overlay the proof onto a screenshot of your phone’s home screen. That way you instantly see whether icons get obscured. If something looks off, hit the “request edit” button – most services allow at least one free revision.
Actionable Checklist for Your First Sample
Even if you’re only buying one case, treat it like a pilot run. Here’s a step‑by‑step list you can print out or keep on your phone:
- Verify model number matches exactly (iPhone 15 Pro, Samsung Galaxy S24, etc.).
- Confirm material choice (polycarbonate for glossy shine, TPU for grip).
- Check resolution: the uploaded JPEG should be at least 300 dpi at actual size.
- Look at the proof’s color profile – it should be sRGB, not CMYK.
- Order the fastest shipping option if the case is a time‑sensitive gift.
- When the package arrives, examine the case under natural light. Are there any bubbles, scratches, or misaligned edges?
- Test the fit: snap the case on, press the camera, and press each side button. No wobble means you’ve got a solid match.
If any item on the list fails, don’t hesitate to contact customer support right away. A polite “I love the design, but the corners look off” usually gets a replacement shipped within a day.
How to Keep Your Personalized Photo Phone Case Looking Fresh
You’ve got the case in hand – now comes the care routine. A photo‑rich surface can attract fingerprints, so a gentle clean every few days helps keep the colors popping.
Use a microfiber cloth lightly dampened with water, or a 50/50 mix of isopropyl alcohol and distilled water for tougher grime. Avoid harsh chemicals like bleach or ammonia; they can fade the printed image. For a deeper dive on safe cleaning methods, check out this step‑by‑step cleaning guide.
If you chose TPU, remember it can yellow over time when exposed to direct sunlight. Store the phone in a shaded spot when you’re not using it, and consider a clear anti‑UV spray designed for plastics. Polycarbonate cases are less prone to yellowing but can develop micro‑scratches. A quick polish with a non‑abrasive plastic cleaner restores the gloss.
Finally, treat the case as a keepsake. When you travel, slip it into a soft pouch rather than tossing it in a bag with keys or coins. The extra care pays off – a study by a mobile‑accessories market analyst showed that properly maintained cases last up to 30 % longer than neglected ones (TechRadar’s case longevity analysis).
So, what’s the next move? Place that order, keep the checklist handy, and give your case a little TLC once it arrives. You’ll end up with a personalized photo phone case that not only looks amazing but also stands the test of daily use.
Conclusion
After we’ve walked through choosing the right material, checking the proof, and giving your new case a little TLC, the final picture is clear: a personalized photo phone case can be both a heartfelt gift and a durable everyday companion.
Remember the core steps – match the exact phone model, pick polycarbonate for that glossy gallery vibe or TPU for extra grip, confirm UV‑cured printing for vibrant colors, and ship fast enough for any deadline.
Did you ever worry that a custom case might look cheap or fade fast? Most of us have, and that’s why the care routine matters. A quick microfiber wipe, avoiding harsh chemicals, and storing it out of direct sunlight keep those memories vivid for months.
What to do next?
Grab your favorite photo, head over to heartful.gifts, and use the checklist you just built. One sample is a smart move – it lets you feel the texture and see the true color before committing to a bulk order.
And once it arrives, snap it on, take a selfie, and enjoy the smile that comes from seeing your own story on your phone every day. If you loved this guide, feel free to share it with anyone hunting for a meaningful, picture‑perfect present.
FAQ
How long does a personalized photo phone case actually last?
Honestly, you can expect a good case to stick around for a year or more if you treat it right. Polycarbonate stays glossy for months, while TPU might lose a bit of its bounce after a while. The key is keeping it out of direct sun and wiping it with a microfiber cloth. Many users report their cases looking fresh for 12‑18 months before any noticeable fading.
Can I upload any photo size or file type?
Almost any image will work, but for the sharpest result aim for at least 300 dpi at the final size. JPEG, PNG, or even TIFF are fine – just make sure the dimensions match your phone’s back area. If the file is too small, the printer will have to upscale and you might see pixelation. A quick check: zoom in on the preview; it should stay crisp at 100 %.
Will the printed design interfere with my camera or buttons?
Good question. Reputable printers leave a safe‑zone around the camera lens, speaker grilles, and side buttons. When you review the proof, you’ll see a faint outline showing where the image stops. If you spot any overlap, ask for a revision before you hit “order.” Most services guarantee that the case won’t block functionality.
Do personalized photo phone cases fade over time?
They can, especially if you expose them to harsh UV light or use abrasive cleaners. UV‑cured inks are pretty resilient, but sunlight will slowly dull the colors. A simple habit – store the phone in a shaded spot and clean with a damp microfiber – can keep the photo looking vibrant for months. Some folks even spray a clear anti‑UV coat on TPU for extra protection.
Which material should I choose: polycarbonate or TPU?
If you love a sleek, glass‑like finish, polycarbonate is the way to go. It shows colors brilliantly and stays thin. TPU, on the other hand, gives you a grippy, shock‑absorbing feel and masks fingerprints. The trade‑off is that TPU can yellow if left in direct sunlight for too long. Think about your daily routine – a slick look for a desk‑bound job, or a rugged feel for an active lifestyle.
What if the case doesn’t fit my phone perfectly?
First, double‑check the model number you entered – even a “Pro” vs. “Pro Max” can make a difference. If the dimensions are off, most vendors will accept a return or exchange within a few days of delivery. Keep the original packaging and any proof screenshots handy; they’ll speed up the process. A quick fit test before you snap it on saves a lot of hassle.
Can I order a bulk set for a family reunion or birthday?
Absolutely. Many print‑on‑demand shops offer bulk discounts once you hit a certain quantity. It’s smart to order one sample first, just to confirm the color and material feel. Once you’re happy, place the larger order and ask if they can bundle the shipping. That way you get a consistent look for everyone without breaking the bank.