
How to Create a Personalized Photo Bookmark That Makes Reading Special
Ever found yourself turning a page, only to lose your place because the bookmark you grabbed was a bland metal clip?
We've all been there – that tiny moment of frustration that feels like a tiny betrayal from a book we love.
Imagine swapping that generic slip for a tiny, custom‑made snapshot of your kids' smile, a beloved pet, or that vacation spot you keep daydreaming about. That’s the magic of a personalized photo bookmark.
It’s not just a functional tool; it’s a little piece of memory you slide into the margin, a reminder that every chapter you read is shared with the people and moments that matter most.
So why are personalized photo bookmarks suddenly popping up in gift guides and birthday wishlists? Because they hit two sweet spots at once: they’re practical and they feel personal, turning a simple reading habit into a tiny celebration.
Think about the parents who want to give their little readers a bookmark featuring a picture of the family dog – a subtle nudge that “you’re loved” every time they open the book. Or the spouse who slips a snapshot from your first trip together into the novel they’re reading on the couch, turning a solitary moment into a shared memory.
And if you’re looking for a gift that won’t break the bank but still feels premium, these bookmarks are printed on sturdy cardstock, coated to resist wear, and often come with a ribbon or magnetic clasp for extra flair.
But you might wonder, “Is it really worth the extra effort?” The answer is simple: when you see that familiar face or scene peeking out from the pages, the tiny boost of joy outweighs the cost of a few extra minutes designing it.
Ready to turn your favorite photo into a reading companion? Let’s dive into how you can create a personalized photo bookmark that feels just right for any book lover in your life.
TL;DR
A personalized photo bookmark turns a simple page‑turn into a heartfelt reminder, for you, blending practical function with a cherished memory in every read.
Create yours in minutes with printable cardstock, add a ribbon or magnetic clasp, and gift a tiny keepsake for anyone that makes every chapter feel special.
Step 1: Choose Your Photo and Design Theme
Okay, picture this: you’re scrolling through your phone, looking at a photo of your kids’ first bike ride, or maybe that sun‑kissed beach you visited last summer. That moment feels right, doesn’t it? That’s the exact feeling we want to capture in a personalized photo bookmark.
First thing’s first – pick a photo that tells a story you’ll want to see every time you open a book. A candid laugh, a pet’s goofy face, or a snapshot of a place that makes you sigh. Avoid anything too busy; the smaller the bookmark, the more you want the image to stay clear.
Still not sure which image to choose? Try this quick test: open the photo on your phone, zoom in, and see if the main subject is still recognizable at thumbnail size. If you can still spot the smile or the silhouette, you’re good to go.
Now, onto the design theme. Think about the vibe of the book you’ll be reading. A cozy mystery? Maybe a vintage parchment feel with muted tones. A bright children’s story? Go for bold colors and playful fonts. The theme should complement, not clash with, the photo.
And here’s a little secret: many creators pull inspiration from other personalized gifts they love. For a rustic look, check out Poppas Wooden Creations – they often use natural wood textures that translate well onto cardstock.
When you’re ready to design, most online print‑on‑demand tools let you drag‑and‑drop your image, choose a background pattern, and add a short phrase if you like. Keep the text minimal – a single word like “Love” or a tiny date works best.
Need a bit of guidance on layout? Below is a handy comparison of common design routes:
| Design Option | Best Photo Type | Quick Tip |
|---|---|---|
| Minimalist White | High‑contrast portrait | Leave plenty of white space; it makes the face pop. |
| Rustic Woodgrain | Outdoor or nature scene | Overlay a subtle grain texture for depth. |
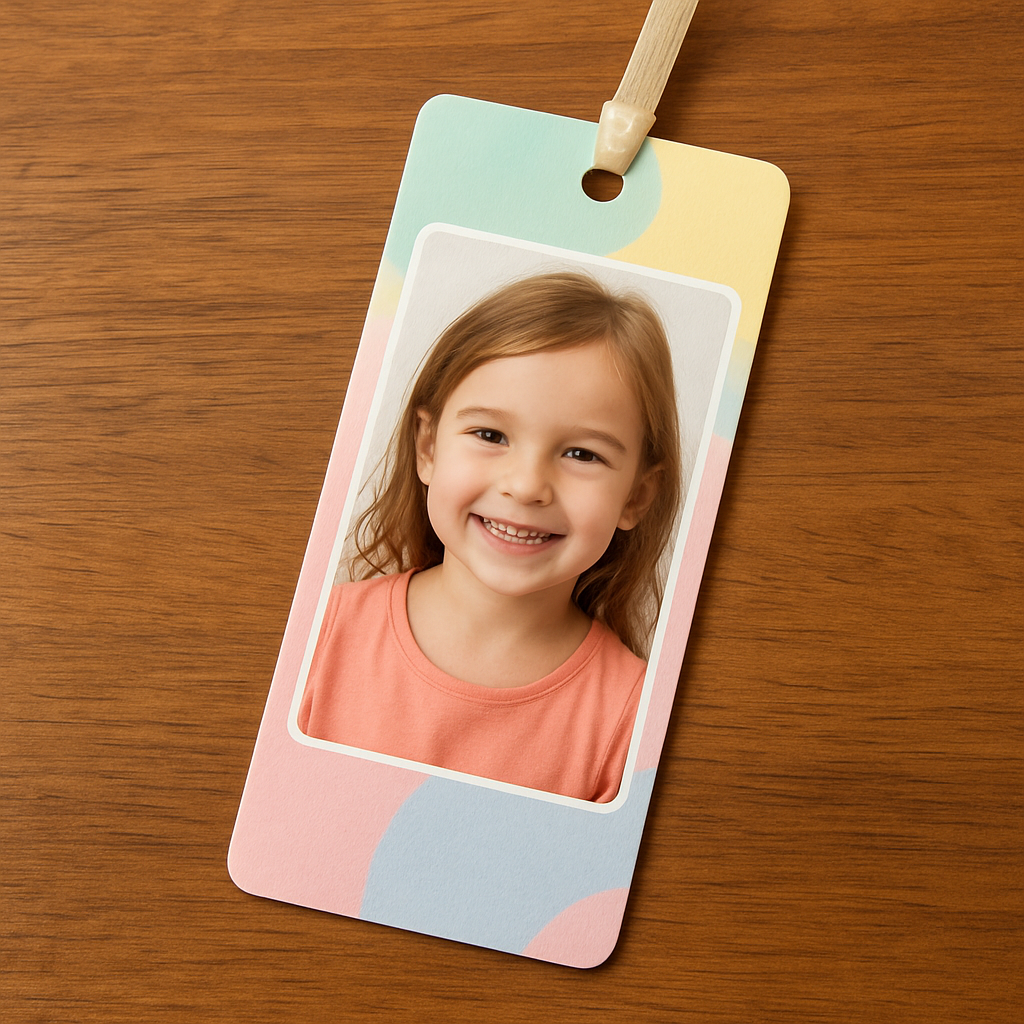
| Playful Pastel | Kids, pets, or bright objects | Use a soft pastel background; keep fonts rounded. |
Feel a little stuck? A great resource for design inspiration lives at Midnight Scriber, where you can browse mood boards that blend photography with typographic flair.
Once you’ve settled on a photo and theme, it’s time to preview the final size. Most bookmarks are about 2 × 6 inches – that’s roughly the size of a postcard. If the image looks cramped, try cropping a little tighter around the subject.
Here’s where the video comes in – a short walkthrough of uploading your image, picking a theme, and exporting a print‑ready file:
Take a minute after the video to double‑check the alignment. A misaligned image will look off once it’s cut.
Final sanity check: hold the printed proof up to a book page. Does the image still read clearly? Does the theme feel like it belongs in the same room as the story you’re about to read? If you’re nodding, you’re ready to send it to print.
And there you have it – the first step is done. Choose a photo that sparks joy, match it with a theme that feels right, and you’re well on your way to a bookmark that’s more than just a placeholder; it’s a tiny memory you’ll flip to again and again.
Step 2: Select Materials & Tools
Now that you’ve chosen the perfect photo, the next step feels a bit like picking the right canvas for a painting – the material can make—or break—the whole experience. A good bookmark should be sturdy enough to survive daily flips, but thin enough to slide smoothly between pages without tearing the paper.
Pick the right cardstock
Most print‑on‑demand services offer two basic finishes: matte and glossy. Matte cardstock reduces glare, which is a lifesaver when you’re reading under a bright kitchen light. Glossy cardstock makes colors pop, so your child’s goofy dog face will look extra vibrant. A popular compromise is a satin‑finish that gives a soft sheen without the harsh shine.
Size matters, too. A standard bookmark measures about 2" × 6"; however, if you’re gifting a teen who loves oversized novelty items, you can stretch it to 2.5" × 7" and still keep it functional. Just remember to keep the photo’s resolution at 300 dpi or higher to avoid pixelation.
Finishing touches that add polish
Rounded corners are a tiny detail with a big payoff – they stop the edges from fraying after months of use. If you want a touch of elegance, consider a foil‑stamped accent or a subtle embossing along the top edge. Magnetic backing is another game‑changer: it holds the bookmark firmly in thicker paperbacks and eliminates the risk of it slipping out.
Ribbons, tassels, or even a tiny leather loop can turn a simple strip into a keepsake. In my own kitchen, I used a thin jute twine for a rustic look that matched the homemade jam jars my grandma kept on the shelf.
Tools you’ll need (and where to find them)
Here’s a quick checklist:
- High‑resolution photo file (300 dpi recommended)
- Design software or a free online editor (most print sites have built‑in tools)
- Scissors or a precision craft knife
- Corner rounder (optional but worth the investment)
- Ruler and pencil for measuring
- Adhesive for optional ribbon or magnetic strip
If you’re a DIY‑enthusiast, you can even print the photo on iron‑on transfer paper and apply it to fabric, then seal with Mod Podge – a technique detailed on Mod Podge Rocks. The result is a flexible, waterproof bookmark that’s perfect for kids who love to read in the bath.
Real‑world example: a mom’s memory boost
Sarah, a busy mother of two, wanted a reminder of her family’s beach vacation. She chose a matte 300 gsm cardstock, added a thin gold foil strip, and attached a small ribbon. After printing, she used a corner rounder and slipped a tiny magnet into the back. The final product survived her toddler’s frantic page‑turning and still looked pristine three months later.
Batch‑printing for teachers or book clubs
Teachers love bulk orders because they can hand out a personalized bookmark as a reward. Pick a durable 350 gsm cardstock, use a simple border design, and let the class choose their own photos. The extra weight keeps the bookmark from tearing during a busy school day.
Pro tip: print a single test strip on regular printer paper first. Hold it up to the book you’ll use most and check for color bleed or misalignment. Once you’re happy, place the order for the full run.
Need a quick visual guide? Check out this step‑by‑step walkthrough on creating a Heart Photo Collage Canvas – the same design principles apply to bookmarks.
Looking for a study‑aid angle? A personalized photo bookmark can double as a reminder of your study schedule or a motivational quote. StudyInFocus notes that visual cues improve retention, so attaching a picture of your favorite study spot might just boost your focus.
And if you’re planning a kid‑friendly gift bundle, consider pairing the bookmark with a wooden toy from Poppa's Wooden Creations. The tactile contrast of wood and paper makes the reading experience feel extra special.
Actionable checklist
1. Choose matte or glossy cardstock based on lighting conditions.
2. Decide on a finishing option – rounded corners, foil, or magnet.
3. Gather tools: scissors, ruler, corner rounder, adhesive.
4. Print a test strip on regular paper.
5. Upload your high‑resolution photo to the print portal.
6. Add any extra embellishments (ribbon, magnetic backing).
7. Review the digital proof, then place the order.
8. Once received, trim any excess and enjoy your personalized reading companion.
With the right materials and a few handy tools, you’ll create a bookmark that’s not only functional but also a tiny piece of cherished memory you’ll want to slide into every book.
Step 3: Assemble and Print Your Photo
Now that you’ve nailed the design, it’s time to bring that digital mock‑up into the real world. Think of it like baking a cake—you’ve picked the recipe, measured the ingredients, and now you just have to turn on the oven.
Proof your design
First, double‑check the digital proof. Zoom in to 100 % and make sure the photo isn’t cropped too close to the edge. Ask yourself: does any text sit on top of a busy part of the picture? If you spot a clash, pull the slider a millimeter back and let the white space breathe.
Print a single test strip on ordinary printer paper. Hold it up against the book you plan to use most. Does the color look right under the kitchen light? Does the image stay centered when you fold the strip?
That quick test saves you from a costly re‑print later, and it’s a perfect excuse to sip coffee while you wait for the ink to dry.
Choose a printing service
Most on‑demand shops let you upload your file directly from your phone or computer. Look for a service that offers at least 300 dpi resolution on matte or glossy cardstock—both options work, it just depends on where you’ll read.
If you love a subtle shine, go glossy; if you tend to read under bright kitchen bulbs, matte will keep glare at bay. Some sites even throw in a satin finish that gives a soft sheen without the glare.
When you’re ready, select the size (standard 2 × 6 in works for most books) and any extra finishing like rounded corners or foil accents. A tiny foil strip at the top can make the bookmark feel a bit more luxe without breaking the bank.
Order and wait
Hit the “order” button and breathe. Most providers ship within 3‑5 business days, so you’ll have a little anticipation built in—kind of like waiting for a new chapter to drop.
While you wait, gather any extra embellishments you plan to add after the print arrives: a thin ribbon, a small magnet, or a dab of clear sealant. Having these on hand means you can finish the bookmark the moment the package lands.
Final assembly
When the cardstock arrives, lay it flat on a clean surface. If the edges look a bit rough, trim them with a precision cutter or sharp scissors. A corner rounder is a tiny tool that makes the corners smooth and prevents fraying—worth the few extra cents.
Now attach any extra touches. Slip a small neodymium magnet into a pocket cut at the back, or tie a soft ribbon through a tiny hole punched near the top. If you’re feeling crafty, a dab of Mod Podge can seal the ribbon and give the whole piece a waterproof coat.
Take a moment to slide the finished bookmark into the book you used for the test strip. Does it glide effortlessly? Does the photo stay visible when the page is turned?
Quick quality checklist
- Image centered and not pixelated.
- Colors look true to life under your usual reading light.
- Edges are clean; corners are rounded.
- Any added ribbon or magnet is securely attached.
- Bookmark slides easily without tearing paper.
If you tick all the boxes, congratulations—you’ve just turned a simple photo into a keepsake you’ll reach for again and again. And the best part? You can repeat the process for every family member, friend, or even for yourself as a little study‑aid reminder.
So, what’s next? Grab another favorite snap, tweak the layout, and let your next personalized photo bookmark be the surprise waiting on the next page.
Step 4: Add Personal Touches & Laminating
Alright, you’ve got your printed strip, the corners are rounded, and the photo is looking sharp. Now’s the moment we get a little extra love onto that personalized photo bookmark so it feels as special as the memory it holds.
1. Tweak the design with tiny extras
Think about the little details that make you smile. A thin ribbon slipped through a tiny hole at the top can turn a plain strip into a mini‑tassel that flutters when you flip a page. If you’re into magnets, a tiny neodymium disc tucked into a pocket on the back keeps the bookmark glued to thick paperbacks without scratching the pages.
Another low‑effort trick is to dab a dab of clear Mod Podge over any added ribbon or decorative paper. It gives a waterproof seal and a subtle gloss that catches the light just right. And if you’re feeling artsy, a speck of metallic paint on a flower petal or a tiny star can add a pop of sparkle—just make sure the paint dries completely before you move on.
Here’s a quick sanity check: after you’ve attached any embellishment, give the bookmark a gentle tug. Does the ribbon stay put? Does the magnet feel snug? If anything feels loose, add a drop more adhesive and let it set for a few minutes.
2. Prep for laminating
Laminate, and you’ll have a bookmark that survives coffee spills, backpack bumps, and the occasional dog‑nose nudge. The trick is to start with the right paper weight. The folks at Leslie Nicole recommend using a heavyweight matte or archival paper because thinner sheets tend to buckle when you run them through a laminator see their printing and laminating tips.
Before you feed anything into the machine, let the printed bookmarks dry for at least 24 hours. That “gas out” period lets any residual ink settle and prevents bubbling under the laminate. If you’re in a hurry, a cool, dry spot on a flat surface works fine—just don’t rush the drying step.
When you’re ready, choose laminating pouches that are 3 mil (about 0.08 mm) thick for a nice balance of flexibility and protection. Thicker pouches are sturdy but can make the bookmark feel stiff; thinner ones might not hold up to repeated use.
Feed the bookmark into the laminator smooth‑side first, keeping the feed rollers aligned so the pouch doesn’t wrinkle. Once the strip slides out, you’ll notice a thin border of clear film around the edges. That’s your safety margin.
3. Trim and finish
After laminating, let the strip cool for a minute, then trim away the excess film. Aim for about a 4 mm border all around—that gives you a sealed edge while keeping the full image visible. A paper trimmer or a sharp craft knife with a metal ruler works best; a quick snip with scissors can leave ragged edges.
Now’s the perfect time to punch a tiny hole at the very top if you want to add a final ribbon or cord. Slip the cord through, tie a neat knot, and you’ve got a bookmark that feels both handmade and professionally finished.
Give it a test run in the book you used for the test strip. Does it glide without catching? Does the laminated surface stay smooth after a few flips? If everything feels right, you’ve just turned a simple photo into a durable, heartfelt keepsake.
And here’s the best part: because the process is so repeatable, you can batch‑make a set of personalized photo bookmarks for a classroom, a family reunion, or a set of “just‑because” gifts. Each one carries the same love, but with a unique picture that sparks a smile every time a page turns.
So, what’s the final takeaway? Add a personal flair you love, protect it with a quick laminate, and you’ve got a bookmark that lasts months, maybe years, and keeps the memory alive each time you settle into a new chapter.
Step 5: Cut, Shape, and Finish the Bookmark
Alright, the printed strip is in front of you – time to turn that flat piece of paper into a bookmark that feels just right in your hand.
Trim to the perfect size
First, grab a sharp pair of scissors or a craft knife. Measure 2 × 6 inches (or whatever size you chose earlier) and cut a clean edge. If you’re using a ruler, line up the blade and give a slow, steady slice – no ragged edges.
Why does this matter? A bookmark that’s too wide will snag, and one that’s too short won’t give you enough room for a tassel or magnet.
Round the corners
Next, pop the cut piece into a corner rounder. Even a tiny ¼‑inch curve keeps the paper from fraying after months of page‑turning. If you don’t have a rounder, a small piece of sandpaper can smooth the edges – just be gentle.
Think about it this way: rounded corners are like the soft elbows on a favorite sweater – they add comfort without you even noticing.
Seal the surface
If you chose a glossy or matte cardstock, a quick laminate protects the photo from coffee spills and fingertip smudges. Use a 3 mil pouch, feed the strip in smooth‑side first, and watch it glide out with a clear film hugging the edges.
Let the laminate sit for a minute, then trim the excess film, leaving about a 4 mm border. That border is your safety net – it keeps the seal intact while still showing the whole picture.
Attach the final flourish
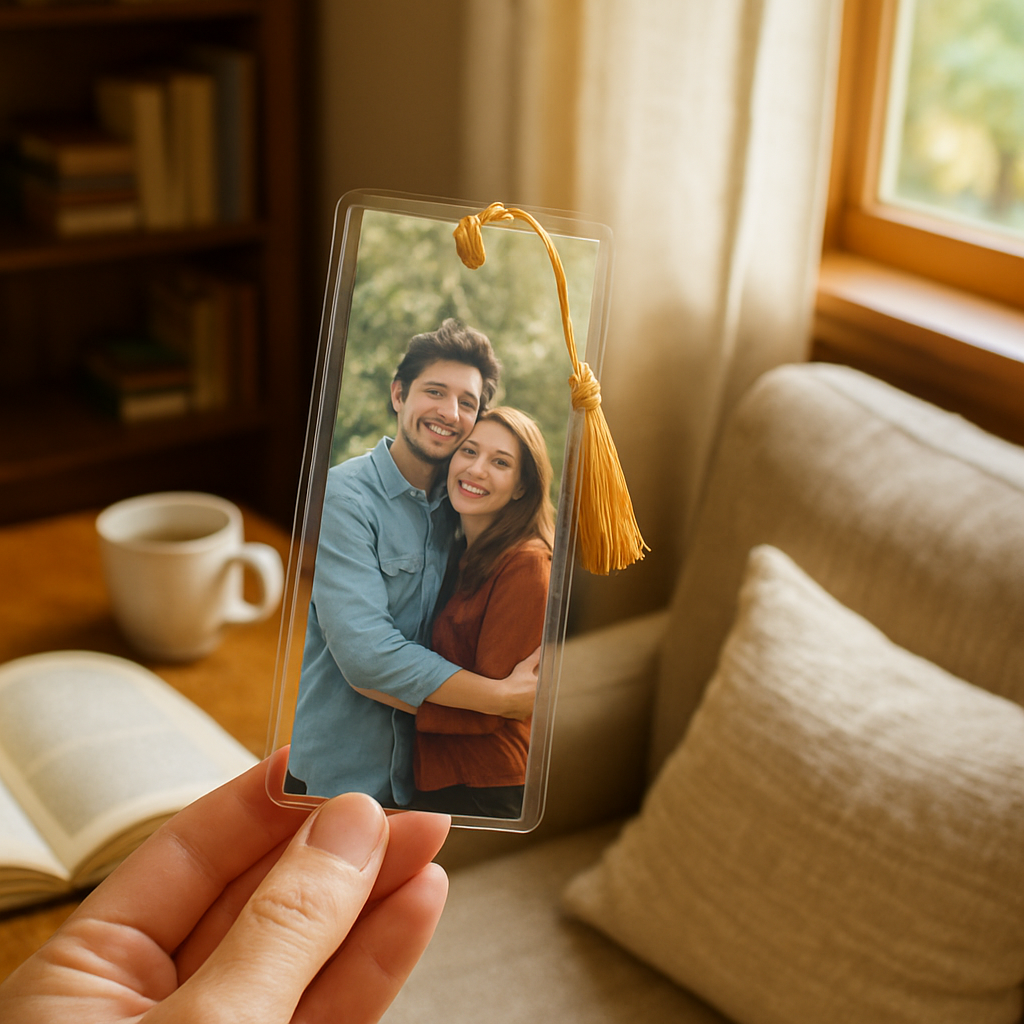
Now for the fun part: the tassel, ribbon, or magnetic backing. If you love a gold tassel, simply slide it through the pre‑punched hole at the top. Many shoppers rave about the “gold tassel” option on personalized wooden bookmarks with gold tassels, saying it adds a touch of elegance without extra cost.
For a magnetic bookmark, cut a tiny pocket on the back, slip in a neodymium disc, and seal it with a dab of clear glue. The magnet stays hidden but holds firm, especially on thick paperbacks.
And if you’re feeling extra crafty, a dab of Mod Podge over the ribbon secures it and adds a subtle shine that matches the laminate.
Quick quality checklist
- Edges trimmed cleanly, no stray paper.
- Corners rounded evenly.
- Laminated surface smooth, no bubbles.
- Embellishments (ribbon, tassel, magnet) firmly attached.
- Bookmark slides easily without catching.
Give it a test run in the book you used for the test strip. Does it glide? Does the photo stay vivid after a few flips? If everything feels right, you’ve just finished a personalized photo bookmark that’s ready for daily use or gifting.
Remember, you can batch‑make a set for a classroom, a family reunion, or a “just because” surprise. The same steps apply – just print multiple strips, cut, round, laminate, and add your chosen finishing touch. Before you know it, you’ve got a whole collection of tiny memory keepers.
So, what’s the next move? Grab another favorite snap, repeat the process, and watch your bookshelf fill with colorful reminders of the people and places you love.
Now you have a polished, personalized photo bookmark that not only marks your spot but also tells a story every time you open a book. Enjoy sharing them with friends and watching the smiles appear.
Conclusion
We’ve walked through every step, from picking that perfect snap to sealing the final strip, and you now have a clear roadmap for a personalized photo bookmark that feels both handmade and pro‑finished.
So, what’s the next move? Grab another favorite picture, tweak the design, and let the laminate protect your memory for months of reading joy.
Remember, a small batch of bookmarks makes a thoughtful gift for teachers, grandparents, or that special someone who loves to get lost in a story.
If you ever feel stuck, a quick test strip on regular paper is a safe way to double‑check colors and alignment before you hit order.
And don’t forget the little details—a ribbon loop, a tiny magnet, or a dab of Mod Podge—that turn a functional strip into a keepsake your loved ones will actually use.
Finally, share your creations on social media or a family chat; seeing that smile when someone spots their photo peeking from the pages is the best proof that your effort mattered.
Ready to fill your bookshelf with personal moments? Start today, and let every chapter be a reminder of the people and places you cherish.
Happy bookmarking, and enjoy the joy each page turn brings!
FAQ
Got questions about making or caring for a personalized photo bookmark? We’ve gathered the most common ones and packed each answer with practical tips you can start using right away.
How do I choose the right photo for a personalized photo bookmark?
Pick an image that instantly makes you smile – a candid kid’s grin, a pet’s goofy pose, or a sunrise you love. Make sure the picture is clear and has a bit of breathing room around the edges so nothing important gets cut off. Aim for at least 300 dpi; a phone snap works fine if it’s sharp, and avoid heavy shadows that could disappear when printed on thin cardstock.
What cardstock and finish work best for durability?
Matte cardstock is forgiving under bright kitchen lights, while glossy gives colors a pop. If you want a happy middle ground, a satin‑finish offers a soft sheen without glare. Choose 300–350 gsm weight so the bookmark feels sturdy but still slides easily. Adding rounded corners and a thin laminate (3 mil pouch) protects against fraying, spills, and everyday wear.
Can I add a ribbon or magnet after the bookmark arrives?
Absolutely. Drill a tiny hole near the top, thread a thin ribbon or jute twine, and knot it securely – this creates a tassel that flutters with every page turn. For a magnetic back, cut a shallow pocket on the reverse side, slip in a small neodymium disc, and seal it with a dab of clear glue. Both upgrades are quick, low‑cost, and make the bookmark feel more like a keepsake.
How should I care for my laminated personalized photo bookmark?
Treat it like a light‑weight piece of art. Wipe the surface with a soft, dry cloth to remove fingerprints; avoid abrasive cleaners that could scratch the laminate. If it gets a splash, pat it dry rather than rubbing. Store it flat when not in use, and it will stay vibrant for months, even years, without the colors fading.
Is it worth ordering a test strip before the full batch?
Yes, a test strip saves you money and headaches. Print one on regular paper, slide it into your favorite reading book, and check color accuracy, alignment, and how the image looks under your usual lighting. If anything feels off, tweak the design or choose a different finish before you place the larger order. It’s a tiny step that guarantees the final product looks just right.
Can I batch‑produce bookmarks for a classroom or gift party?
Definitely. Set up a simple template, let each participant upload their favorite photo, and order a bulk run on matte 350 gsm cardstock for extra durability. Bulk orders often qualify for discounts, and you can add a uniform ribbon or magnetic backing for a cohesive look. Once they arrive, a quick corner‑rounder pass and optional laminate finish will make them classroom‑ready in minutes.
What’s the quickest way to personalize a bookmark for a last‑minute gift?
Grab a high‑resolution photo from your phone, choose a ready‑made template on your print‑on‑demand site, and stick with a glossy finish – it needs no extra drying time. Skip the ribbon if you’re short on time, or use a pre‑tied satin tassel that slides through a pre‑punched hole. Most services ship in 3‑5 days, so you can have a heartfelt, custom gift on the table before the weekend.