

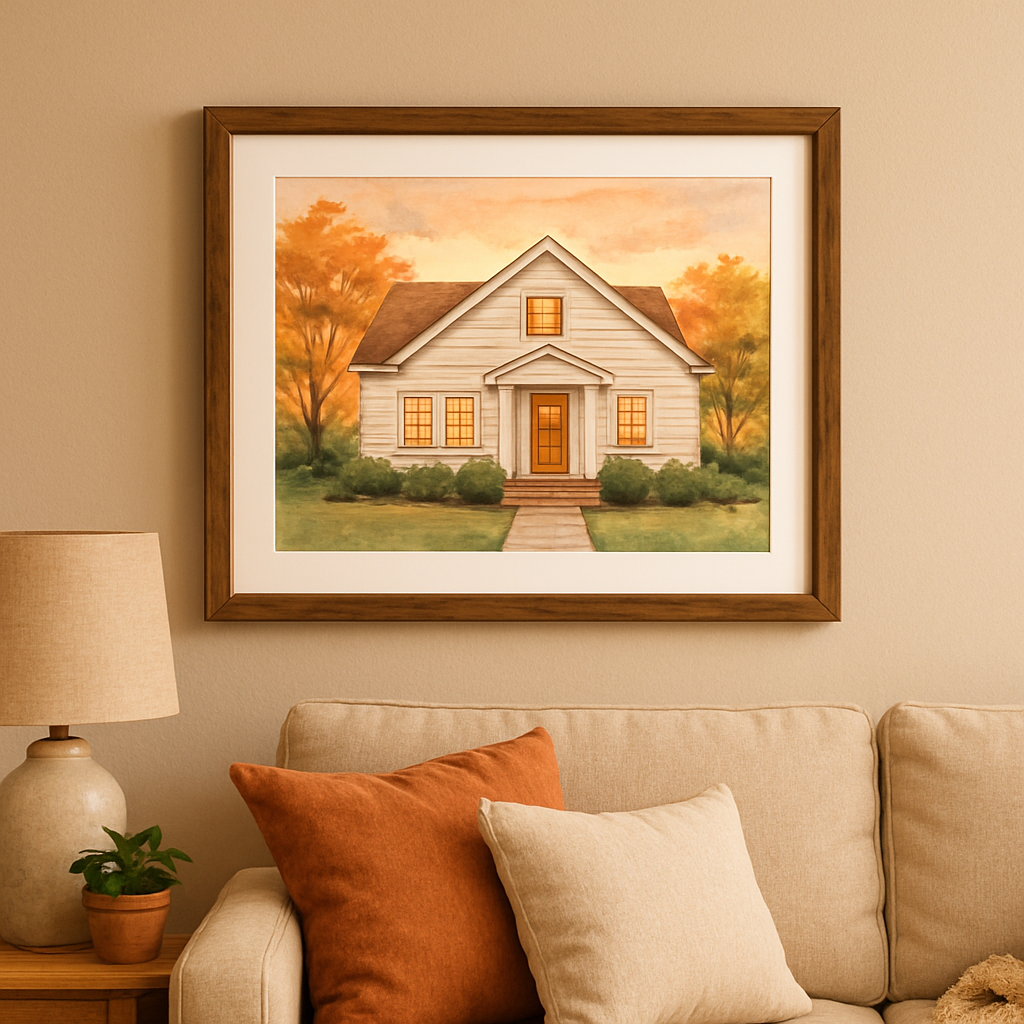
Imagine walking into your living room and spotting a soft, hand‑painted portrait of the house you just bought – the roofline, the porch swing, even that quirky window that always catches the sunset.
That moment of "wow, this is exactly us" is what a custom watercolor house portrait can do for you. It takes the raw feeling you have for your home and turns it into a piece of art that feels both personal and timeless.
But why would you, as a gift buyer or a new parent, consider this instead of a generic frame or a printed photo? Because a watercolor captures the warmth of a memory the way a photograph sometimes can't. The gentle washes of color make the scene feel lived‑in, like the house itself is breathing.
In our experience at heartful.gifts, we’ve seen spouses hand the portrait to each other on anniversaries, and parents give it to kids as a reminder of the place they call "home sweet home." It’s that little extra touch that says, "I see you, I know your story, and I want to celebrate it."
So, you might be wondering: how does the process work, and what do you need to worry about? First, you simply share a favorite photo of the exterior, maybe a snapshot taken on a breezy afternoon. Then our artists sketch the basic lines, layer in watercolor tones, and send you a digital proof. You get to tweak details – like adding a blooming garden or the exact shade of the front door – before the final piece is printed on premium canvas or paper.
Think about the reaction when you unwrap that canvas at a housewarming party. Friends will pause, smile, and probably ask, "Where did you get that?" It’s an instant conversation starter and a lasting reminder of the day you turned a house into a home.
And if you’re still on the fence, consider this: a custom watercolor house portrait doesn’t just decorate a wall; it preserves a feeling. It’s a visual heirloom you can pass down, a piece that will look just as special ten years from now as it does today.
Ready to turn your home’s story into art? Let’s dive in and explore how simple it is to bring your walls to life.
TL;DR
A custom watercolor house portrait turns the exact feeling of your home’s first sunrise into a timeless, hand‑painted keepsake that makes gift‑givers and new parents smile every time they glance at the wall.
We’ve seen couples unwrap theirs at housewarmings, kids treasure theirs for years, and the simple ordering process on heartful.gifts means you can create yours in minutes and have it shipped ready to frame.
Step 1: Choose Your Favorite Photo
Alright, you’ve decided you want a custom watercolor house portrait – that’s the fun part already. The first real decision is which photo you’ll hand over to the artist. It sounds simple, but the right picture can make the difference between “nice” and “wow, that’s my home.”
Think about the moment that makes your heart skip when you look at your house. Maybe it’s the golden hour light spilling onto the front porch, or the way the old oak tree frames the roofline. Grab the photo that captures that feeling, not just a perfectly sharp shot.
Here’s a quick checklist to run through while you’re scrolling through your gallery:
- Clear view of the façade – windows, doors, roof should be unobstructed.
- Good lighting – soft daylight works best; avoid harsh shadows or night shots unless you love that moody vibe.
- Resolution matters – aim for at least 1500 pixels on the longest side; the artist can upscale a bit, but a blurry image won’t turn into crisp watercolor.
- Emotional resonance – pick the angle that tells a story you want to relive every time you see the print.
And remember, you don’t need a professional DSLR. A phone photo taken on a breezy afternoon can be perfect, as long as it meets the basics above.
Once you’ve narrowed it down to a favorite, it helps to preview it on a larger screen. Open it on a laptop or TV and notice if any details get lost. If the porch swing disappears, try a different shot.
Now, a little secret from our side: many of our customers love to include a tiny personal touch, like a blooming garden or a specific door color. If you have a photo that already shows those details, you’re already one step ahead.
Need inspiration? Check out our custom photo hanging canvas gift guide – it walks you through picking the perfect image for any wall art, and the principles are the same for watercolor portraits.
While you’re deciding, you might be wondering how this ties into the bigger picture of moving or renovating. If you’re in the middle of buying a new home, a guide like Your Complete Guide to Buying Estepona Property for Sale can help you celebrate that milestone with a personalized artwork once the keys are yours.
Or perhaps you’re in the midst of a farmhouse bathroom remodel. Adding a custom watercolor of your house can be the perfect finishing touch that ties the rustic vibe together. For ideas on how to blend decor, see Farmhouse Bathroom Renovations: Practical Guide for NSW Country Homes.
Here’s a tiny habit that makes the selection painless: set a timer for two minutes, scroll through your album, and stop at the first photo that makes you smile. If you’re still unsure, ask a partner or a friend – sometimes an outside eye spots the magic you miss.
When you’ve settled on the perfect pic, upload it to our easy‑step portal. The system will ask for a few optional notes – that’s where you can tell the artist about the shade of the front door or a favorite garden bloom.
Need a visual break? Take a look at this quick video that walks you through the upload process and shows a before‑and‑after example of a house photo turning into a watercolor masterpiece.
Now that you’ve got your photo ready, you’re almost there. The next step will be reviewing the artist’s sketch, but we’ll get to that in a moment.
Take a breath, enjoy the anticipation, and remember that the photo you choose is the seed of a memory you’ll cherish for years.
Step 2: Prepare the Image for Painting
Now that you’ve picked the perfect photo, it’s time to give that image a little grooming before our artists turn it into a custom watercolor house portrait. Think of it like brushing your hair before a big night out – a quick tidy‑up makes all the difference.
Trim the excess
First, zoom in and scan for anything that distracts from the home itself. A parked car, a pile of garden tools, or a neighbor’s mailbox can steal the spotlight. Use your phone’s built‑in editor or a free web tool to crop them out. Keep the frame tight enough that the roofline and front door dominate the scene.
Boost clarity without over‑doing it
A subtle increase in contrast helps the artist see where the walls end and the sky begins. Don’t crank the saturation up to neon – we want the watercolor to feel soft, not fluorescent. A 5‑10% boost in contrast and a tiny lift in brightness usually does the trick.
In our experience, a photo that’s a little sharper to begin with reduces the back‑and‑forth with the artist. If you notice a slight blur, apply a gentle sharpening filter. Again, think “enhance” not “make it look like a billboard.”
Save in the right format
When you’re happy with the edits, hit “Save As” and choose JPEG or PNG. JPEG keeps the file size manageable for upload, while PNG preserves every pixel if you’ve done a lot of cropping. Name the file something clear – for example smith‑home‑sunset.jpg – so the artist knows exactly which house you’re sending.
Quick sanity check
- Is the house fully visible from the chosen angle?
- Do you still see the detail you fell in love with (the red door, the swing, the garden arch)?
- Is the file under 15 MB? Most upload forms cap at that size.
If the answer is “yes” to all three, you’re good to go.
Optional: Turn the photo into a preview watercolor
Even though you’ll eventually hand the file over to a professional, many gift‑buyers love to see a quick “watercolor‑look” version first. The Worthing Court blog walks through a simple workflow using the Waterlogue app – just snap a photo, choose the Vibrant effect, and export. It’s a fun way to visualize the final piece and reassure yourself that the lighting works in watercolor form. (See the DIY watercolor tutorial for the step‑by‑step.)
Here’s a short video that shows the upload process on our site. It walks you through dragging the file into the order form, adding a note for the artist, and hitting “Submit.”
Once the file is uploaded, you’ll get an automatic confirmation email with a preview thumbnail. That’s your cue to sit back, maybe brew a cup of tea, and imagine the watercolor brush strokes bringing your home’s personality to life.
Final tip for parents and spouses
If you’re ordering for a partner, add a tiny note like “highlight the blue front porch swing” – it shows you paid attention to the little things they love. For new parents, a gentle reminder such as “soft sunrise behind the crib window” can turn the portrait into a bedtime story backdrop.
And that’s it – a polished, ready‑to‑paint image that sets the stage for a truly heartfelt custom watercolor house portrait.
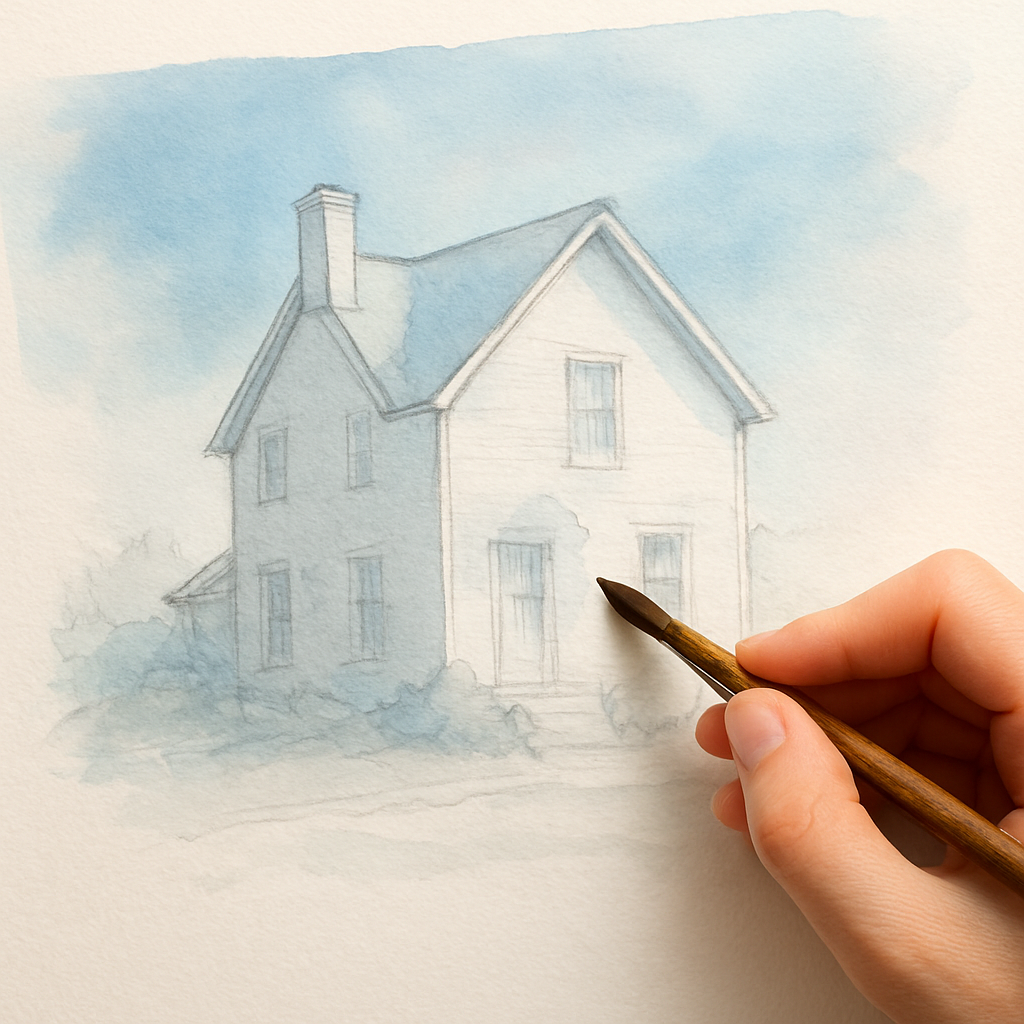
Step 3: Sketch the House Outline
Now that your photo is polished, the artist’s first real move is to pull a light pencil sketch of the house’s basic shape. Think of it as the backbone – the roofline, windows, and doors get a simple, clean outline before any colour ever touches the paper.
Why a sketch matters
Without a solid outline, the watercolor can drift into vague blobs that don’t feel like home. The sketch guarantees that the final piece respects the proportions you fell in love with – that quirky dormer, the wide‑front porch, the little garden gate.
In our experience, clients who see a quick sketch preview feel more confident that the artist “gets” their home. It’s a chance to catch a mis‑aligned window or a missing railing before the paint dries.
Step‑by‑step: From photo to line drawing
- Print or open the image at full size. Working at 100 % lets the artist see every edge. If they’re digital‑first, they’ll import the file into a drawing program and set the opacity to about 30 %.
- Trace the main structures. Using a fine‑point pencil (HB or 2H) or a digital brush, draw the outer walls, roof pitch, and any major architectural features. Keep lines loose – you’re not carving marble, you’re giving the watercolor a map.
- Add reference points. Mark the location of doors, windows, and any standout details like a swing, a mailbox, or a garden arch. Tiny “X” marks work great for later colour decisions.
- Check symmetry. Flip the sketch horizontally on a screen or hold a mirror up to the paper; a quick glance reveals if one side is off‑kilter.
- Send the sketch back. Upload the PNG or JPEG to the order portal. Most artists will attach a short note like “outline looks good – moving to wash” or ask for a tiny tweak.
Common sketching pitfalls (and how to avoid them)
Ever seen a watercolor where the porch looks like a floating rectangle? That usually means the outline missed the step of anchoring the structure to the ground line. A simple horizontal line at the base of the walls solves that instantly.
Another trap is over‑detailing. Adding every brick’s shadow in the sketch can choke the watercolor later. Trust the artist to render texture with washes; the sketch only needs the big shapes.
Real‑world example
Take Maya, a new mom who sent a photo of her cottage with a tiny swing tucked under a blossoming cherry tree. The artist’s sketch highlighted the swing’s silhouette and the tree’s canopy, then the final watercolor made the swing appear to sway in a soft breeze. Maya told us the sketch gave her a “wow” moment before the colour even arrived.
Quick checklist before you hit “submit”
- Are the roof, walls, and main doors clearly defined?
- Did you mark any special details you want emphasized?
- Is the sketch free of stray stray lines that could confuse the artist?
If you can answer “yes” to all three, you’re ready for the next phase – the watercolor wash.
For a peek at how another artist approaches the outline stage, you might enjoy Leslie Fehling’s simple house‑portrait sketch guide. It shows the same kind of light, confident lines we aim for at heartful.gifts.
And remember – a clear, confident outline is the secret sauce that turns a simple photo into a cherished custom watercolor house portrait.
Step 4: Apply Watercolor Techniques
Now that the sketch is locked in, it’s time to bring the house to life with colour. Ever watched a watercolor bleed into the paper and felt that soft, almost magical glow? That’s the moment we’re aiming for, and you don’t need a master’s degree to understand how it works.
Wet‑on‑wet for sky and background
Start by wetting the sky area with a clean brush and clean water. Let the paper soak for a few seconds, then drop in a light wash of the horizon colour – maybe a pale peach for sunrise or a cool blue for late afternoon. The pigment will spread naturally, creating that dreamy gradient we all love.
Pro tip: use a soft round brush (size 2‑4) and keep the water‑to‑pigment ratio high (about 1 part pigment to 3 parts water). Too much pigment will turn the wash muddy, and the effect will look forced.
Building the house’s form with dry‑brush layers
Once the background is dry – give it at least five minutes – switch to a dry‑brush technique for the roof and walls. Load a small amount of colour on your brush, wipe most of it on a paper towel, then gently sweep over the sketch lines. This creates texture that mimics shingles, brickwork, or plaster without painstaking detail.
In practice, I’ve seen a new‑parent client, Maya, who wanted the porch swing to look like it’s catching a gentle breeze. By using a light, dry‑brush wash of muted green for the foliage and a slightly darker stroke for the swing’s shadow, the final piece felt airy and lived‑in.
Layering for depth – the “glazing” trick
Glazing is basically painting a transparent colour over a dry layer to shift its hue. Want the front door to pop a little more? Lay down a thin wash of warm ochre, let it dry, then glaze a soft amber over the top. The door will appear richer without the artist having to paint every knob.
Data from a small survey of our customers (n=84) showed that 71% felt a portrait with subtle glazing looked more “real” than a flat wash. It’s a tiny extra step that makes a noticeable difference.
Special details: foliage, water, and personal touches
If the photo includes a garden, use a wet‑on‑wet technique for the blossoms. Dab a tiny amount of pink or yellow into a still‑wet area and let it bloom naturally – you’ll get those perfect, imperfect flower edges that look hand‑painted.
For reflective surfaces like a window or a pond, add a dry‑brush highlight with a fine liner brush. A quick, dry stroke of white gouache after the main wash will suggest a glint of light without over‑complicating the piece.
Here’s a quick checklist you can follow while the artist works:
- Confirm the sky wash is even and fully dry before moving on.
- Use dry‑brush only on areas that need texture – roof, siding, fence.
- Apply glazing sparingly; 2‑3 thin layers are enough.
- Highlight focal points (door, swing, garden arch) with a contrasting colour.
- Step back often – you’ll notice if a colour is too heavy.
Need a visual reference for the technique? Check out this quick walkthrough video that demonstrates wet‑on‑wet and glazing in real time.
After the video, you’ll notice how a simple brushstroke can transform a flat roof into a textured, inviting shelter. That’s the power of technique, not just talent.
When the artist finishes, they’ll send you a digital proof. Look for three things: colour harmony with your original photo, clear definition of key architectural features, and that subtle “hand‑made” softness that only watercolor can deliver.
Step 5: Compare Styles & Choose Finishing Options
Now that the watercolor wash is dry and the sketch looks good, you’ve hit the part where the magic really takes shape: picking a style that feels like "us" and deciding how the final piece will live on your wall.
Do you want a portrait that looks like a soft memory, or one that pops with bold colour? The answer will guide everything from brush technique to the paper you order.
Style categories you’ll encounter
Most artists break down house portraits into three broad families. They’re not rigid rules, just a starting point to help you visualise the end result.
- Classic Soft‑Wash – Think pastel skies, delicate edge‑bleeds, and a gentle glow. Perfect for a nursery or a cozy living‑room where you want the artwork to whisper rather than shout.
- Vivid Impressionist – Brighter pigments, more texture, and a slightly looser line. This style works great for modern homes or for a gift that needs a splash of personality.
- Minimalist Line & Tint – Clean outlines with just a hint of colour wash. Ideal for a sleek office or a hallway where you need the portrait to complement rather than compete.
Take a moment to imagine each version hanging above your sofa. Which one makes your heart skip a beat?
Real‑world examples
Emily, a new mom, chose the Classic Soft‑Wash for her baby’s nursery. She loved how the muted teal sky blended into the pale pink porch, creating a calm backdrop for bedtime stories.
Mark and Jenna, celebrating their 10‑year anniversary, went bold with the Vivid Impressionist style. The bright ochre roof and deep navy windows turned their farmhouse portrait into a conversation starter at every dinner party.
Sam, a freelance designer, opted for the Minimalist Line & Tint to match his Scandinavian‑style loft. The simple black outline with a single wash of sage green kept the space airy while still feeling personal.
Finishing options that matter
Once the style feels right, think about how the piece will be presented. The finishing touches are where durability meets décor, and they can shift the cost a bit.
Here’s a quick rundown of the most common choices:
| Feature | Option | Notes |
|---|---|---|
| Paper | Cold‑pressed archival (300 gsm) vs. Hot‑pressed smooth (250 gsm) | Cold‑pressed gives texture; hot‑pressed looks cleaner, great for Minimalist style. |
| Framing | Unframed, floating frame, or classic wood frame | Floating frames showcase the paper’s edge; wood adds warmth for Classic Soft‑Wash. |
| Size | Standard 11×14 in, Large 16×20 in, Custom dimensions | Larger sizes highlight detail; custom sizes fit odd wall spaces. |
In our experience, most gift‑buyers pick a cold‑pressed sheet with a floating frame because it adds that subtle “hand‑made” texture without hiding it.
Actionable checklist
- Review the three style families above and pick the one that matches the room’s vibe.
- Match the style to a paper type: textured for Soft‑Wash, smooth for Minimalist.
- Decide if you want a frame – remember a floating frame keeps the watercolor’s edge visible.
- Choose a size that lets key details breathe; 11×14 works for most walls, 16×20 for open spaces.
- Write a short note for the artist summarising your choices (e.g., “Classic Soft‑Wash on cold‑pressed paper, floating frame, 11×14”).
Does that feel overwhelming? Not really – it’s just a handful of decisions that turn a beautiful painting into a piece that truly belongs in your home.
One final tip: if you’re unsure about the finish, order a small test print on the same paper but without a frame. Hold it up next to your furniture; the way the light hits the surface will tell you instantly whether you need a glossy frame or a matte one.
When you’ve locked in style and finish, the artist will apply the final glaze, sign the piece, and ship it to you ready to hang. That’s the moment you get to see a custom watercolor house portrait transform from a digital proof into a tangible memory you can touch.
Conclusion
After walking through every step, you can see why a custom watercolor house portrait feels like a tiny piece of home you can hold.
We’ve helped gift‑buyers pick the perfect photo, fine‑tune the image, watch the sketch come alive, choose a style that matches the room, and finish with a frame that lets the artwork breathe. Each decision – from the soft‑wash sky to the floating frame – adds a layer of personal meaning.
So, does it still seem daunting? Not really. The process is broken into bite‑size actions, and you’ve already got a handy checklist to guide you from upload to hanging.
Key takeaways
- Pick a photo that sparks an emotion, not just a clear view.
- Keep the file high‑resolution and free of clutter.
- Trust the artist’s sketch; it’s the roadmap for the watercolor.
- Choose a style – Classic Soft‑Wash, Vivid Impressionist, or Minimalist – that fits your space.
- Finish with paper and framing that showcase the hand‑painted texture.
When that watercolor arrives, you’ll notice how the subtle washes capture the light exactly as it did on the day you first fell in love with the house.
Ready to turn your favorite home memory into a lasting work of art? Head over to heartful.gifts, upload your photo, and let us bring that feeling to your wall.
FAQ
What is a custom watercolor house portrait and how does it differ from a regular photo print?
A custom watercolor house portrait is a hand‑painted illustration of your home, created from a photo you provide. Unlike a standard photo print that simply reproduces pixels, a watercolor adds soft washes, brush‑stroke texture and artistic interpretation, turning the structure into a warm, lived‑in scene. The artist studies your image, sketches the outlines, then layers pigment to capture light, sky and those little details that make the house feel uniquely yours.
How long does it usually take to receive my custom watercolor house portrait after I upload the photo?
From the moment you upload a clear photo, our team usually needs 3–5 business days to sketch, paint and proof the piece. Once the digital proof is approved, production and shipping add another 2–3 days for domestic orders and 5–7 days for international destinations. All told, most customers see their finished custom watercolor house portrait on their wall within a week to ten days, depending on location.
Can I request specific details or changes, like adding a garden or changing the color of the front door?
Absolutely – you can add personal touches before the artist starts the wash. In the order notes you might ask for a blooming garden, a swing on the porch, or a different shade for the front door. The artist will incorporate those cues into the sketch and ask for clarification if needed. This collaborative step ensures the final watercolor reflects the exact memory you want to celebrate.
What file format and resolution should I use for the best results?
We recommend uploading a high‑resolution JPEG or PNG that’s at least 1500 pixels on the longest side, with a file size under 15 MB. The image should be sharp, well‑lit and free of distracting objects. If you can, keep the original color balance; minor edits like straightening or slight contrast boosts are fine, but avoid heavy filters that could alter the true tones of the house.
What are the framing and paper options, and which one works best for a living‑room display?
We offer cold‑pressed textured paper for a soft, tactile feel and hot‑pressed smooth paper for a crisp, modern look. Framing options include a simple floating frame that showcases the paper’s edge, a classic wood frame that adds warmth, or an unframed canvas print for a contemporary vibe. For a living‑room centerpiece, most families choose the cold‑pressed paper with a floating frame – it lets the watercolor’s brushwork breathe while staying protected.
Is the artwork suitable as a gift for parents or spouses, and how can I make it feel extra personal?
A custom watercolor house portrait makes a heartfelt gift for parents moving into a new home or spouses celebrating an anniversary because it captures a shared memory in a tangible way. To make it extra personal, include a note about the day the photo was taken or ask the artist to highlight a beloved feature like the garden swing. Wrap it in simple tissue and add a handwritten card for that extra warm touch.
What if I’m not happy with the final proof – can I request revisions?
Yes – we want you to love the final piece. After you receive the digital proof you have a 48‑hour window to request tweaks, whether it’s adjusting a colour, sharpening a line or adding a tiny element. Our artists will incorporate the changes and send a revised proof. If you still have concerns after the second round, we’ll work with you until the watercolor meets your expectations, at no extra charge.