
How to Design and Order a Custom Photo T Shirt: A Step‑by‑Step Resource
Ever looked at a plain tee and thought, 'That could be so much more?'
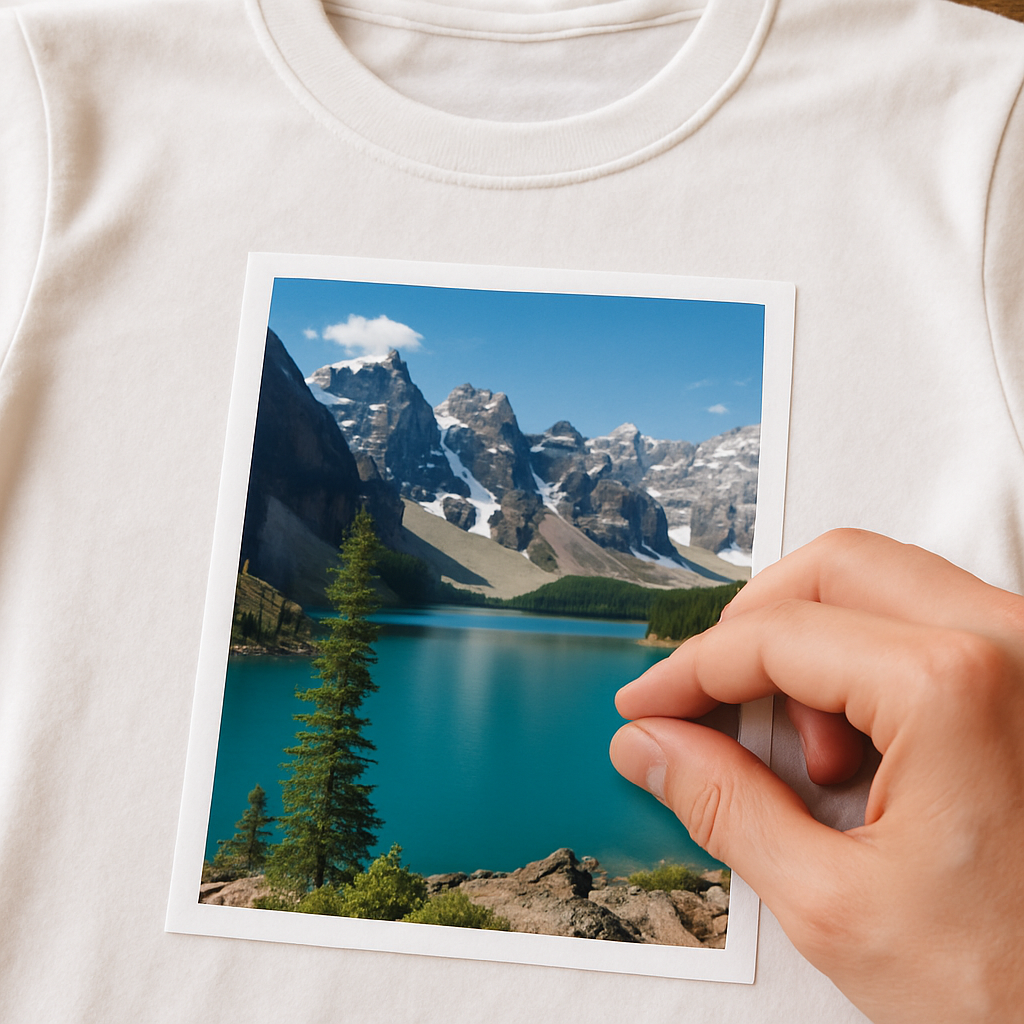
Imagine taking a favorite snap—maybe a goofy family selfie, a breathtaking vacation view, or your kid's first art masterpiece—and turning it into a wearable memory. That's the magic of a custom photo t shirt.
We get it, gifts can feel risky. You want something that says, 'I really see you,' without ending up in the closet. A personalized shirt sidesteps that guesswork because it's built around a moment that already matters to you both.
And the process? Simpler than you think. Upload your image, choose a style—classic fit, soft cotton, or a bold cut—and let the print‑on‑demand team handle the rest. No bulk orders, no leftover stock; just a one‑off piece that looks like it was made just for the wearer.
But why stop at a single picture? Stack a collage of travel postcards, blend a pet’s grin with a funny quote, or go artsy with a pop‑art filter. The options are as limitless as your imagination, and each variation still lands on the same reliable, comfy fabric.
So, what’s the real payoff? When they pull that shirt out at a gathering, you’ll see the smile that says, 'I remembered that night we laughed till we cried.' It transforms a simple garment into a conversation starter, a keepsake, and a subtle brag about how thoughtful you are.
And if you’re still on the fence, think about the practical side: easy care, durable print that won’t fade after a few washes, and a piece that fits any casual occasion—from brunch to a backyard BBQ.
Ready to turn that photo into fashion? Let’s dive in and explore how a custom photo t shirt can become your go‑to gift for birthdays, anniversaries, or just because.
Give it a try today—upload that beloved picture and watch it come alive on a soft, high‑quality tee that you’ll be proud to wear or gift.
TL;DR
A custom photo t shirt turns your favorite memory into a wearable story, gifting a high‑quality tee that sparks conversation and lasts wash after wash.
Upload an image, pick a style, and let heartful.gifts print it on demand—perfect for birthdays, anniversaries, or just because, with easy care and lasting comfort.
Step 1: Choose the Perfect Photo
We've gotten you excited about turning a memory into a wearable piece, but the magic really starts with the photo you pick. Imagine scrolling through your camera roll and spotting that goofy family selfie where Uncle Mike is mid‑laugh – that's the kind of image that will make a custom photo t shirt feel alive.
First thing's first: resolution matters. Aim for at least 150 dpi at the final print size, which usually means a photo that's 1800 × 2400 pixels or larger. If the picture looks pixelated on your phone screen, it will look blurry on a shirt, and nobody wants a fuzzy memory.
Next, think about composition. Centered subjects work great because the print area is roughly a rectangle on the chest. If your picture has a lot of empty space, the design can feel floaty. Crop it so the main focus—whether it's a smiling face or a striking landscape—fills most of the frame.
Color and contrast are also key players. Bright, saturated colors tend to survive the printing process better than muted pastels. If the photo is too dark, boost the exposure a notch in a simple editor; if it's washed‑out, increase the contrast a little. The goal is a picture that pops even from a few feet away.
Don't forget the story behind the image. A picture of your kids' first bike ride, a pet's goofy grin, or a sunset from a vacation all carry emotion. When you see that story every time you pull the shirt on, the garment becomes a conversation starter rather than just clothing.
One quick rule: avoid images with copyrighted logos, watermarks, or text overlays unless you own the rights. Those elements can get blurry or be removed during printing, and they might even cause legal headaches.
If you want to add an artistic twist, consider turning the photo into a custom abstract geometric portrait. This style simplifies details into bold shapes while keeping the recognisable vibe – perfect for a modern look. Check out our custom abstract geometric portrait t‑shirt for inspiration.
Before you hit order, use the mock‑up tool on the site to preview how the image wraps around the fabric. Zoom in to see edge details and make sure nothing important gets cut off at the seams. If something looks off, go back to your editor, adjust the crop, and re‑upload.
Finally, run through this quick checklist: is the file high‑resolution? Is the main subject centered and well‑cropped? Do the colors look lively? Is the image free of protected logos? And have you previewed it on a mock‑up? If you can answer “yes” to all, you’re ready to order a custom photo t shirt that looks as good in reality as it does on your screen.
Pro tip: save the image as a PNG or high‑quality JPEG and give it a simple name like “family‑beach‑2024.jpg”. That helps the upload system keep the colors true and avoids weird compression artifacts. Also, double‑check the orientation—portrait images should stay vertical, otherwise they’ll print sideways and look odd.
Step 2: Pick Your T‑Shirt Style & Fabric
Now that your photo is polished, the next decision feels almost as personal as choosing the perfect frame – you have to pick the shirt that will wear your memory comfortably.
Do you picture a relaxed, crew‑neck tee for a weekend brunch, or a sleek, fitted style for a night out? Your answer will set the tone for the whole gift, so let’s walk through the main options and why they matter.
1️⃣ Choose the cut that matches the wearer’s vibe
Classic crew necks are the safest bet – they sit flat on the shoulders and give the design plenty of breathing room. If the person you’re gifting loves a sportier look, a raglan or a 3/4‑sleeve can add a subtle edge without stealing the spotlight from the photo.
One of our customers, a dad who loves fishing, opted for a relaxed fit because he wanted to layer the shirt under a flannel on chilly mornings. The result? He now wears it on every early‑rise trip, and the photo of his family at the lake stays crisp even after multiple washes.
2️⃣ Fabric matters more than you think
Most custom photo tees are printed on 100 % ringspun cotton – soft, breathable, and easy on the skin. The tighter the yarn, the smoother the surface, which means the printer can embed the ink deeper into the fibers for a print that resists fading.
For a summer gift, a lightweight jersey (around 4.5 oz) feels airy and drapes nicely, while a heavier 6 oz “heavyweight” cotton adds a premium feel that’s perfect for cooler evenings. If you’re unsure, ask yourself: will the shirt be worn mostly indoors or outdoors? That simple question can steer you toward the right weight.
Pro tip: fabrics with a slight stretch (a cotton‑poly blend) can help the shirt keep its shape after repeated laundry cycles, especially if the wearer is active.
3️⃣ Neckline & rib color – tiny details with big impact
Most shoppers overlook the ribbed collar, but a contrasting neck color can turn a plain tee into a subtle style statement. Think a charcoal rib on a white shirt for a modern look, or a pastel shade that matches the dominant hue in your photo.
When a mother ordered a shirt for her teenage daughter, she chose a soft pink rib that echoed the pastel sunset in the picture. The little extra coordination made the gift feel “custom‑crafted” rather than off‑the‑rack.
4️⃣ Size matters – use the size chart, but add a personal touch
Every brand measures a little differently, so always double‑check the size chart before you click “add to cart.” Measure the wearer’s chest, then add a half‑inch for a relaxed fit or subtract a half‑inch for a snug, athletic cut.
Here’s a quick checklist:
- Measure around the fullest part of the chest, under the arms.
- Compare to the brand’s size chart (most offer XS‑7XL for both men and women).
- Consider the wearer’s preferred fit – “I like it loose” vs. “I like it fitted.”
- Round up to the next size if you’re between two.
Even a tiny misstep here can turn a thoughtful gift into a return nightmare, so take a minute now.
5️⃣ Real‑world style combos
Example 1: A grandparent wanted a shirt featuring a collage of grandkids’ hand‑drawings. He chose a classic crew neck in heavyweight cotton, a neutral grey rib, and a relaxed fit so the shirt draped nicely over his cardigan.
Example 2: A college student celebrated a study‑abroad trip with a photo of the Eiffel Tower. He went for a slim‑fit, short‑sleeve jersey in light heather‑gray, letting the vibrant sky in the picture pop against the muted fabric.
Both combos proved that matching the shirt’s style to the wearer’s lifestyle makes the photo feel like it belongs, not just an after‑thought.
Actionable steps to lock in your choice
1. Sketch a quick mental picture of where the shirt will be worn most often.
2. Pick a cut (crew, raglan, fitted) that aligns with that setting.
3. Decide on fabric weight – 4.5 oz for warm weather, 6 oz for cooler climates.
4. Choose a rib color that either matches or subtly contrasts the dominant hue in your photo.
5. Measure, consult the size chart, and add a half‑inch buffer for comfort.
6. Add the shirt to your cart, upload the photo, and preview on both desktop and mobile before finalizing.
By treating the shirt style like a backdrop to your photo, you turn a simple custom photo t shirt into a piece of personal storytelling that feels as natural as a conversation over coffee.
Step 3: Upload & Position Your Image
Now that you’ve picked the perfect tee, it’s time to get that photo onto the fabric. The upload step feels like a tiny digital handshake—your image meets the shirt, and they become partners in crime.
1. Open the Design Lab and drop your file
Log in to heartful.gifts, click “Start Design,” and you’ll see a clean canvas that mirrors the front of the shirt. Drag your picture into the upload box or hit the “Browse” button. The system accepts high‑quality JPEG or PNG files; keep the compression above 80 % so you don’t lose detail.
Pro tip: If you’re nervous about file size, a 5 MB PNG usually gives you plenty of wiggle room without slowing the page.
2. Choose where the image lives on the tee
Most custom photo t shirts let you print on the front, back, left chest, or even a sleeve. Front‑center is the classic choice for a bold statement, while a left‑chest logo feels subtle and works great for family reunions. Printful notes that center‑chest placement should sit about 3‑3.5 inches below the collar and stay within a 6″ × 6″ to 10″ × 8″ safe zone according to their design placement guide. If you want a full‑back tribute—say, a panoramic beach shot—make sure the image fits inside a 10″ × 12″ rectangle.
Custom Ink points out that you can print any image on a tee for events like birthdays or reunions, and there’s no minimum order requirement according to their photo‑t‑shirt service page.
Does the idea of a back design sound too much? Think of it as a secret handshake that only the wearer sees until they turn around.
3. Resize and align
After the upload, a bounding box appears around your picture. Grab the corners to scale—remember, digital printing works best when the file is at least 300 dpi at the final size. If the preview shows a fuzzy edge, pull the slider back a notch; the system will automatically down‑sample to keep the print sharp.
Use the alignment tools (center, left, right) to lock the image in place. A quick trick: turn on the “snap to grid” option so the picture snaps to the shirt’s middle line. That way you avoid a lopsided look that would make you cringe in the mirror.
4. Preview on multiple devices
Heartful.gifts offers a live mock‑up that you can toggle between desktop and mobile views. This matters because a design that looks perfect on a wide screen might shift a few pixels on a phone‑sized thumbnail. Spend a minute scrolling through both—if the image drifts off‑center, drag it back until it feels balanced.
And here’s a handy habit: zoom in to 100 % on the mock‑up, then zoom out to 50 % to see how the design reads at a distance. That’s the same trick designers use when checking billboard legibility.
Once the preview feels right, hit “Save” and move on to the checkout. The system will generate a final PDF proof that matches the exact dimensions you just set.
5. Real‑world examples
Emily, a new mom, uploaded a candid of her baby’s first steps. She chose a left‑chest placement on a soft heather‑gray tee so the photo peeked out when she tucked the shirt into jeans. The final product measured 4.5″ × 4.5″—just enough to be sweet without stealing the whole outfit.
Mark, an avid cyclist, wanted a full‑back mountain‑range shot for his weekend rides. He uploaded a 4000 × 2500 px panorama, scaled it to the 12″ × 16″ maximum back area, and added a small logo on the right chest. The result was a shirt that turned heads at the bike shop and survived 30 washes without fading.
6. Quick checklist before you click “Add to Cart”
- File type: PNG or high‑quality JPEG (≥80 % compression)
- Resolution: 300 dpi at final print size
- Placement: front center (6″‑10″), left chest (2.5″‑5″), or back (10″‑12″) as needed
- Alignment: use center‑align and snap‑to‑grid
- Preview: check desktop and mobile mock‑ups, zoom in/out
- Save a PDF proof for your records
Following these steps turns a simple upload into a polished, ready‑to‑wear piece. And the best part? The whole process takes under ten minutes, so you can get back to sipping coffee and dreaming up the next gift.
Ready to see your memory come alive? Upload, position, preview, and hit “order”—your custom photo t shirt is just a few clicks away.
Step 4: Review Options & Pricing
Alright, you’ve got the perfect photo, the right tee style, and the design is looking sharp. Now comes the part that makes most people pause – the price. It’s not just a number; it’s a decision about fabric, print method, quantity, and any extra goodies you might want. Let’s break it down so you can feel confident about every dollar you spend.
Understand the cost drivers
First thing’s first: what actually makes a custom photo t shirt cost more or less? The biggest factors are the shirt’s material, the printing technique, the number of colors, and how many shirts you’re ordering. Real Thread points out that a standard 100 % cotton tee starts around $7‑$10, while a softer tri‑blend can push the price to $9‑$13 per shirt.source
But there’s more nuance. A larger size (like XXL) uses extra fabric, nudging the price up a dollar or two. Adding a second print location (say, a chest logo plus a back photo) also adds a few bucks because the printer has to set up another run.
Pick a fabric that fits your budget
If you’re buying a single shirt as a heartfelt gift, you might opt for the classic ringspun cotton – it’s soft, affordable, and prints beautifully. If you’re ordering for a whole family reunion, consider the tri‑blend for that buttery feel; the price bump is often worth the “wow” factor.
Here’s a quick way to decide:
- Ask yourself: will the shirt be worn often? If yes, go for a durable 6 oz cotton.
- Is comfort during summer a priority? A lightweight 4.5 oz jersey keeps things breezy.
- Do you want a premium vibe? The tri‑blend adds a subtle sheen for just a few dollars more.
Calculate your final price
Now let’s talk numbers. Pull up the pricing calculator on your favorite print‑on‑demand site, enter the fabric, size, and quantity, then add any add‑ons like foil printing or custom tags. UberPrints notes that bulk orders dramatically lower the per‑shirt cost – 20 shirts might be $8.29 each, but 100 shirts can drop to about $9 each after the bulk discount kicks in.source
Don’t forget shipping. Many shops, including heartful.gifts, waive shipping on orders over $100, so bundling a few extra shirts can save you both on the shirt price and on delivery.
Below is a handy comparison to help you visualize the trade‑offs:
| Option | Typical Cost per Shirt | Best For |
|---|---|---|
| Standard 100% cotton (4.5 oz) | $7‑$10 | Single gifts, budget‑friendly builds |
| Tri‑blend (soft, 4.5 oz) | $9‑$13 | Family reunions, premium feel |
| Heavyweight 6 oz cotton | $10‑$12 | Cool‑weather wear, durability seekers |
Real‑world pricing scenarios
Meet Jenna. She wanted a photo of her toddler’s first day of school on a tee for each grandparent. She chose a standard cotton tee, ordered 6 shirts, and added a single left‑chest logo. At $8 each plus $5.99 shipping, her total came to $53 – under $9 per shirt, which felt like a win.
Then there’s Carlos, who organized a weekend bike‑ride charity. He printed a panoramic mountain scene on the back of a tri‑blend, ordered 30 shirts, and added foil‑stamped sponsor logos. The bulk discount dropped the price to $11 per shirt, and the foil added $1.50 each – still well under $13 total per piece, a price his sponsors were happy to cover.
Action checklist before you hit “Add to Cart”
- Confirm fabric: cotton vs. tri‑blend vs. heavyweight.
- Count print locations and colors – fewer colors = lower cost.
- Choose size wisely – avoid unnecessary XXL upgrades unless needed.
- Enter quantity to see bulk pricing; add a couple extra shirts to unlock free shipping.
- Review any add‑ons (foil, custom tags) and tally their per‑shirt cost.
- Double‑check the final PDF proof for any hidden fees before checkout.
When you walk through these steps, the price stops feeling like a mystery and becomes a clear, controllable part of your gift‑making process. And the best part? You’ll still end up with a custom photo t shirt that looks amazing and fits perfectly in your budget.
Step 5: Order, Shipping & Care
Alright, you’ve polished the design, chosen the perfect cut, and you’re staring at the “Add to Cart” button – what’s the next move?
First, double‑check the final proof. The live preview on heartful.gifts shows exactly what the printer will see, so zoom in to 100 % and make sure no stray pixel is lurking.
Confirm the order details
• Fabric, size, and fit – match them to the checklist you built in Step 2.
• Quantity – remember that adding just two extra shirts can unlock free shipping on most sites.
• Add‑ons – foil, custom tags, or a second print location all add a few dollars per shirt, so tally them before you click.
Does the total feel right? If it’s a little high, try swapping a heavyweight cotton for a lightweight jersey; you’ll shave $1‑$2 off each piece without losing durability.
Shipping – what to expect
Most print‑on‑demand shops, including heartful.gifts, ship within 2‑3 business days once the order clears the proof stage. That quick turnaround is possible because each shirt is cut and printed on demand, meaning no inventory sits idle.
For peace of mind, look for a tracking number in your confirmation email – the company sends a fully tracked parcel so you can watch the journey from the factory to your doorstep.
One happy customer shared that her order of six “first‑day‑of‑school” tees arrived in just four days, still fresh‑folded, and ready for the family breakfast photo.
Packaging that protects the print
The shirts are folded carefully and placed in a poly‑bag that’s sealed to keep moisture out. This simple step prevents the ink from smudging during transit.
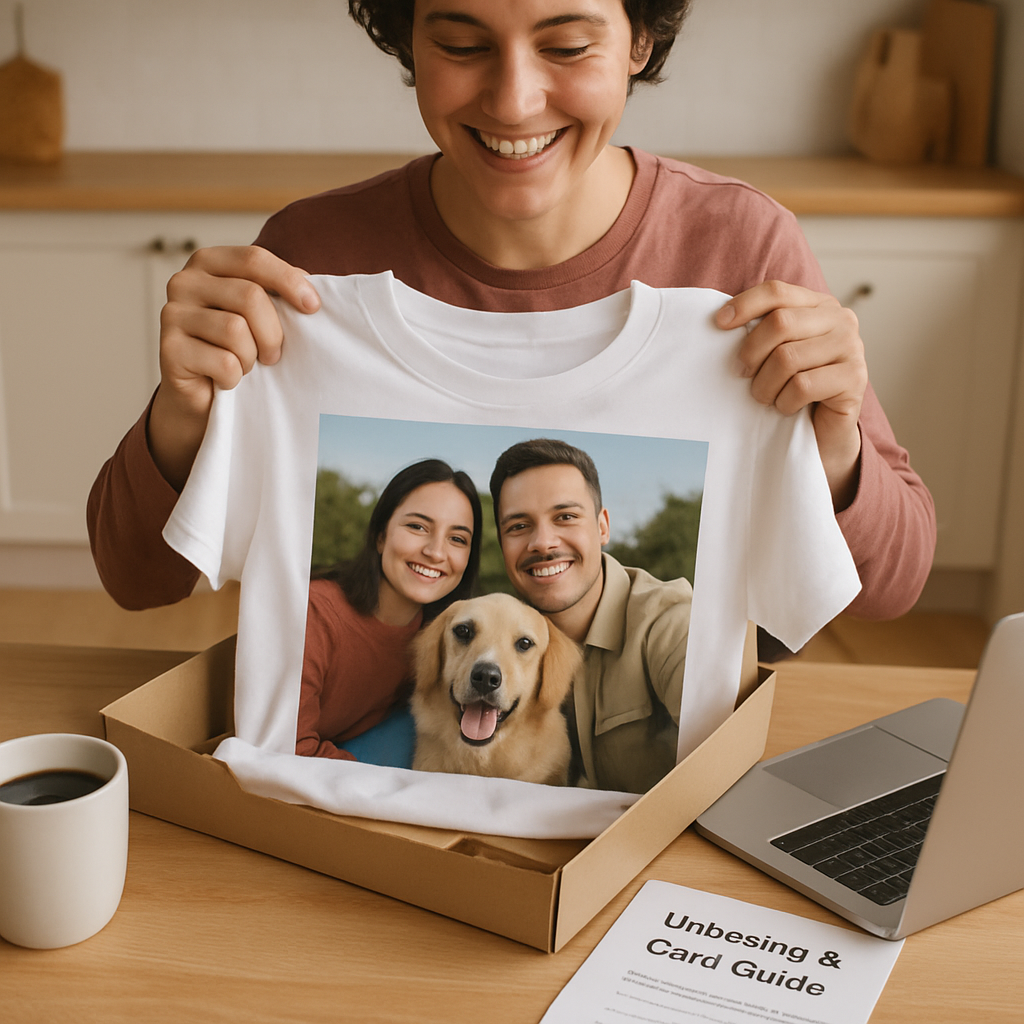
If you’re ordering a gift, consider adding a handwritten note in the checkout notes field. A personal message arrives tucked inside the package and makes the unboxing feel like a mini‑celebration.
Care instructions – keep the memory vivid
Here’s the golden rule: treat the custom photo t shirt like any high‑quality cotton garment, but give the print a little extra love.
- Turn the shirt inside‑out before the first wash. This shields the ink from friction.
- Use cold water and a gentle cycle. Hot water can push pigments deeper into the fibers, causing a faint “bleed” over time.
- Avoid harsh detergents or bleach; a mild, enzyme‑free liquid works best.
- Hang‑dry or tumble on low heat. High dryer temps can cause the fabric to shrink, which in turn may warp the printed image.
- If you notice a tiny fuzz ball on the design after several washes, a quick roll‑on lint roller restores the smooth look.
These steps aren’t just theory – the same care routine is recommended on the Crown & Paw product page, which notes that the shirt “retains shape after multiple washes” and is “preshrunk for a softer feel.”
Real‑world after‑care stories
Mike ordered a custom mountain‑range back print for his cycling club. He followed the cold‑wash rule and, two months later, the shirt still looks as sharp as the day it left the printer, even after 25 rides and a handful of laundries.
Emma sent a birthday tee to her sister with a collage of family vacation snaps. She waited three weeks for the package, then gave it a gentle hand‑wash. The colors stayed vivid, and the sister now wears it to every beach outing – a perfect proof that proper care extends the shirt’s lifespan.
Final quick‑check before you click “Place Order”
- Proof looks perfect at 100 % zoom?
- All add‑ons accounted for?
- Shipping method selected (standard vs. expedited)?
- Care instructions saved for later reference?
- Any gift note added?
When those boxes are ticked, you can breathe easy knowing the custom photo t shirt will arrive on time, look amazing, and stay gorgeous wash after wash.
Now you’re all set – hit that button, track the parcel, and enjoy the moment when the recipient pulls the shirt on and sees their memory come to life.
FAQ
What kind of photo works best for a custom photo t shirt?
Pick a shot that’s crisp, well‑lit, and has a clear focal point. A high‑resolution image (at least 300 PPI at the size you plan to print) will stay sharp after the ink settles into the cotton fibers. Look for photos where the subject isn’t lost in a busy background – think a smiling face, a vibrant landscape, or a simple graphic that tells a story. If the picture feels a bit flat on your screen, bump up the contrast or brightness before you upload; that little tweak can make the print pop on fabric.
How big should I make the design for a front‑center print?
Most print‑on‑demand shops recommend keeping the artwork between 6 inches and 10 inches wide. That range fits comfortably on a standard crew‑neck without spilling over the seams. Measure the space about 3‑3.5 inches below the collar, then size your image to fill that zone. If you go larger than 12 inches, the edges may get trimmed or look cramped, especially on smaller shirt sizes. A good rule of thumb is to preview the design at 100 % zoom; if the edges touch the shirt’s seam, shrink it a bit.
Can I send a custom photo t shirt straight to the gift recipient?
Absolutely. During checkout you can enter a different shipping address and add a handwritten note in the order notes field. Heartful.gifts even lets you mark the package as “gift” so the invoice is omitted, keeping the surprise intact. Just double‑check the address and make sure the recipient’s size is correct – a quick text or email can save you a return later.
How long does it usually take to receive my shirt after I place the order?
Because each tee is printed on demand, most orders ship within 2‑3 business days once the proof is approved. After that, standard shipping typically arrives in 3‑5 days, so you’re looking at a total turnaround of about a week. If you need it sooner, many services offer an expedited option for an extra fee, which can shave a couple of days off the delivery window.
What’s the best way to wash and care for my custom photo t shirt?
Treat it like any high‑quality cotton garment, but give the printed side a little extra love. Turn the shirt inside‑out before the first wash, use cold water on a gentle cycle, and skip bleach or harsh detergents. Hang‑dry or tumble on low heat; high dryer temperatures can cause shrinkage that distorts the image. If lint sticks to the print after a few washes, a quick roll‑on lint roller will restore that fresh‑out‑of‑the‑box look.
Will the photo fade after many washes?
When the file is high‑resolution and you follow the care guidelines, the print should stay vivid for dozens of washes. The ink is infused into the fibers rather than sitting on top, which helps it resist fading. Real‑world users report that even after 20‑30 washes the colors remain bright, especially if they’ve avoided hot water and harsh chemicals. So, with proper care, your memory will stay as sharp as the day it left the printer.
Can I add text or other graphics to my custom photo t shirt?
Yes, the design lab lets you layer fonts, icons, or small logos over or beside your photo. Keep any added text legible by using high‑contrast colors and limiting it to a few words – too much can compete with the image you want to showcase. Many shoppers choose a short tagline, a date, or a tiny heart icon on the sleeve for that extra personal touch without overwhelming the main picture.
Conclusion
We’ve walked through everything from picking the perfect photo resolution to choosing the right shirt cut, and you’re now armed with a clear roadmap.
Remember that tiny moment when you first saw the picture you want to wear? That feeling of nostalgia is exactly what a custom photo t shirt captures – a piece of memory you can actually put on.
So, what’s the next step? Grab the highest‑resolution version of your snap, double‑check the brightness, and head over to heartful.gifts. Upload, position, and preview on both desktop and mobile – it only takes a few minutes.
Don’t forget the care basics: turn it inside‑out, wash cold, and skip the bleach. Those simple habits keep the print looking fresh wash after wash, just like the day it left the printer.
In short, a well‑chosen photo, a thoughtfully selected fabric, and a quick quality‑check turn a simple tee into a heartfelt gift that lasts.
Ready to turn that cherished moment into wearable art? Your custom photo t shirt is waiting – go ahead and make it happen.
And if you’re gifting a whole family, consider ordering a few extra sizes – the bulk discount often covers the extra shipping, and everyone gets a piece of the memory.
Bonus Tips & Resources
Ever wondered how to turn a good idea into a truly unforgettable custom photo t shirt? Here are a few extra tricks that most shoppers miss.
Grab a backup file
Save the original high‑resolution photo in two places – your phone and a cloud folder. If you ever need to reorder or tweak the design, you won’t have to hunt for that perfect shot again.
Play with mock‑ups
Before you click “add to cart,” use a free mock‑up generator or even a simple PowerPoint slide. Seeing the shirt on a virtual model helps you spot awkward spacing or a too‑large image.
Does the design still read well when the model turns sideways? If not, trim a few pixels and preview again.
Leverage themed collections
Heartful.gifts offers ready‑made style bundles – think “family reunion,” “baby milestones,” or “travel memories.” Picking a bundle instantly gives you matching colors, fonts, and placement guides.
Mind the seasonal sales
Sign up for the newsletter; the shop often runs flash discounts around holidays. Adding two extra shirts can unlock free shipping, which pays for itself in saved delivery fees.
Care cheat sheet
Turn the shirt inside‑out for the first wash, use cold water, and skip the dryer if you can. A quick lint‑roller after each wash keeps the print looking fresh.
So, ready to add a little extra polish? Grab those tips, fire up the design lab, and let your memory shine on fabric.