
How to Design a Custom Coordinates Bracelet That Tells Your Story
Ever stared at a map and felt a tiny tug, like the place you first met your partner or where your kids took their first steps is calling your name?
That feeling is exactly why a custom coordinates bracelet can feel like a secret whisper you wear every day.
Imagine sliding a delicate silver band onto your wrist and seeing the latitude and longitude of that special spot engraved right there—tiny numbers that mean the world.
In our experience, gift buyers love the way this tiny piece turns a memory into something tactile, especially when they’re looking for a present that’s both personal and low‑key.
So, why does it work? Because it takes an abstract moment—like a sunrise on a beach vacation—and makes it concrete, right on your skin.
But here’s the thing: not all coordinate bracelets are created equal. Some feel clunky, some have illegible fonts, and a few just don’t capture the vibe you’re after.
What we’ve seen work best is choosing a bracelet that lets you pick the metal finish, the chain style, and even a tiny charm that adds a splash of color or a tiny heart.
Think about the first anniversary with your spouse. You could write a love note, but a bracelet engraved with the exact spot of your first kiss feels like a silent promise you carry wherever you go.
Parents often look for something that celebrates a child's birth location—a subtle way to keep that day close without shouting it from the rooftops.
And for friends who are always on the move, a coordinates bracelet becomes a portable scrapbook of the places that shaped your friendship.
Does this sound like the kind of gift that could make a moment unforgettable? If you’re nodding, keep reading because we’ll dive into how to pick the perfect design, avoid common pitfalls, and care for your bracelet so it stays brilliant for years.
Let’s explore the world of custom coordinates bracelets together and turn those hidden coordinates into a daily reminder of what matters most.
TL;DR
A custom coordinates bracelet transforms a meaningful location—your first kiss, a birth spot, or a favorite travel point—into a truly personal, wearable reminder.
We’ll show you how to choose the right metal, style, and charm, avoid common pitfalls, and care for it so the engraving stays brilliant for years everyday.
Step 1: Choose Your Bracelet Style
Okay, picture this: you’ve decided a custom coordinates bracelet is the perfect way to lock that special place onto your wrist. The next question? Which style actually feels like you.
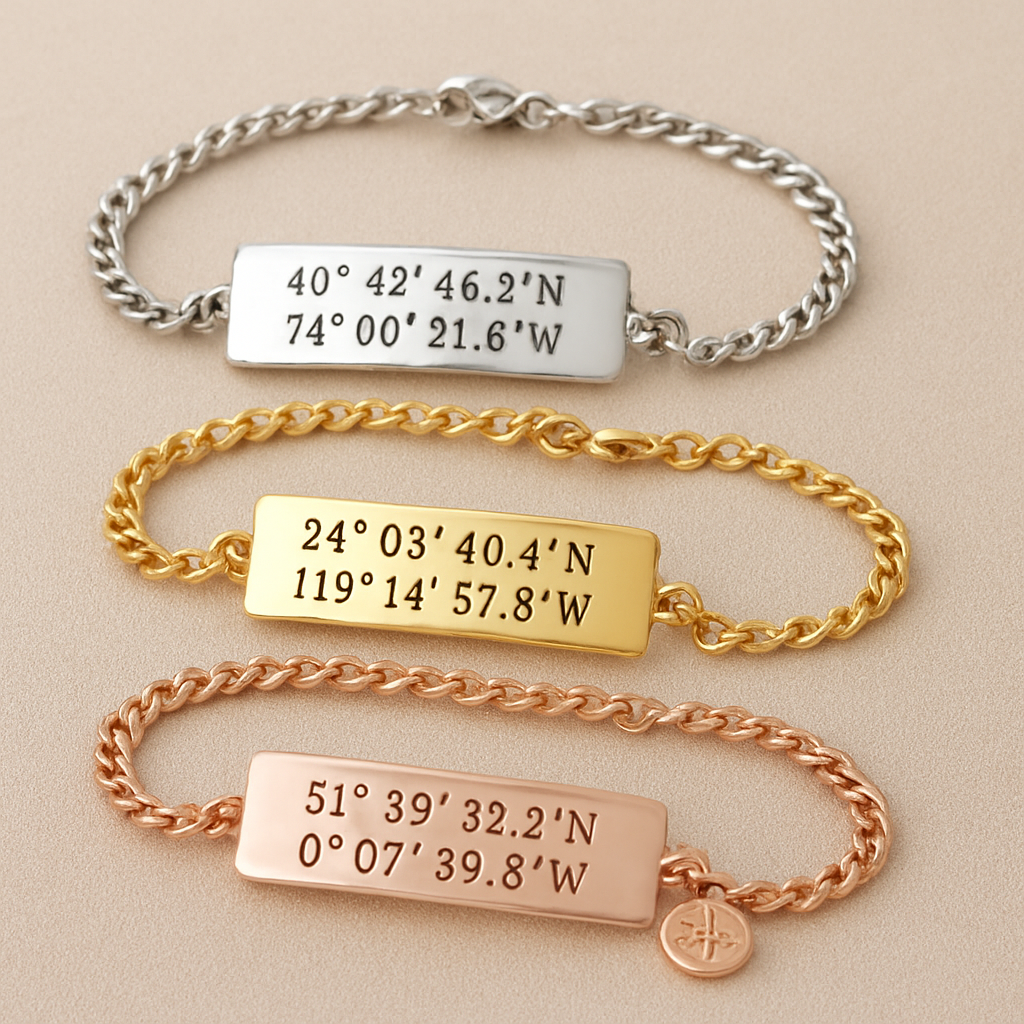
Do you imagine a sleek, polished silver chain that hugs your skin, or maybe a warm, brushed gold that catches the light when you move? Your metal choice sets the tone—silver screams minimalist, gold whispers luxury, while rose gold adds a soft, romantic glow.
And don’t forget the chain type. A classic curb link gives a sturdy feel, a delicate rope link drapes like a whisper, and a tennis‑style bead chain adds a hint of sparkle without stealing the show.
Here’s a quick checklist to keep handy while you browse:
- Metal: silver, yellow gold, rose gold, or mixed‑metal.
- Chain: curb, rope, or bead.
- Width: 2mm for subtle, 4mm for a bolder statement.
- Finish: polished, matte, or hammered.
Now, think about who’s getting the bracelet. A spouse might love a thin, polished band they can wear every day, while a parent could appreciate a slightly wider, matte finish that feels sturdy enough for everyday life.
We’ve seen a lot of gift‑buyers pair a bracelet with a tiny charm—like a heart or a small compass—that adds a personal touch without crowding the coordinates. If you’re into that, make sure the charm’s metal matches the band so everything looks cohesive.
And if you’re still undecided, check out our guide on meaningful custom coordinates necklace ideas. The same design principles apply, and you might spot a style you hadn’t considered for a bracelet.
What about comfort? Try the bracelet on before you order (if you can) or measure your wrist with a simple string and a ruler. A good rule of thumb is to add about a half‑inch to your measurement for a relaxed fit.
So, which metal feels right for the moment you want to capture? Silver for a beach sunrise, gold for a wedding venue, or rose gold for the first home you bought together? Trust your gut—that little instinct is often the best style compass.
Below is a short video that walks through the different chain options and how they sit on the wrist. It’s a handy visual if you’re a visual learner like me.
After watching, you’ll notice how a rope‑link bracelet moves with you, while a curb‑link feels more anchored. That movement can change the whole vibe of the piece.
One more thing: consider the story you want the bracelet to tell. If you’re gifting a sober friend, a subtle silver band paired with a small anchor charm can symbolize stability.
Check out thoughtful gifts for sober friends for more inspiration on how a coordinates bracelet fits into that narrative.
Or, if you’re putting together a family gift bundle, you could pair a child’s wooden toy from Poppa's Wooden Creations with a matching parents’ bracelet—something that says “we’re all in this adventure together.”
Bottom line: pick a metal and chain that feels true to the memory you’re engraving, make sure the fit is comfortable, and add a charm only if it enhances the story. Once you’ve locked down the style, the next step is entering the exact coordinates and choosing the font. Stay tuned, we’ll make sure those numbers look as crisp as the day they were made.
Step 2: Determine the Coordinate Format
Okay, you’ve picked the metal, the chain style, and the width. Now comes the part that can feel a little like decoding a secret message: choosing how the latitude and longitude will actually look on your custom coordinates bracelet.
It’s easy to get stuck on the numbers and wonder, “Do I need all those little minutes and seconds, or can I keep it simple?” The answer depends on three things: the amount of space you have, the visual vibe you want, and how precise the memory is for you.
Three formats you’ll run into
DMS (Degrees ° Minutes ' Seconds ") – This is the classic, most detailed style. Example: 34° 03' 12" N, 118° 14' 30" W. It looks official, almost like a tiny map legend.
DDM (Degrees Decimal Minutes) – A middle ground. Example: 34° 03.200' N, 118° 14.500' W. You keep the degrees and minutes, but the minutes get a decimal point. It trims a few characters while still feeling precise.
DD (Decimal Degrees) – The shortest version. Example: 34.0533° N, -118.2417° W. It drops minutes and seconds entirely, which makes it perfect for a thin 2‑mm band where space is at a premium.
Think of it like picking a font size for a tweet versus a billboard. The tighter the space, the smaller the font—or in our case, the simpler the format.
Step‑by‑step: Pick the right format for your bracelet
- Measure the printable area. If you’ve chosen a 2‑mm curb‑chain, you probably have about 8–10 characters per coordinate before it gets cramped. For a 4‑mm rope‑link, you might have a bit more breathing room.
- Grab the raw GPS numbers from Google Maps. Most people copy the decimal degrees (DD) straight from the “Share” → “Copy coordinates” option.
- Convert if needed. Online tools can turn DD into DMS or DDM in seconds. A quick search for “decimal to DMS converter” will give you a free utility.
- Lay the three versions out on a piece of paper or a mock‑up app. Does the DMS version spill over the edge? Does the DD version feel too sparse?
- Ask yourself how personal the location is. If you’re commemorating a specific table at a restaurant where a proposal happened, the extra precision of DMS can feel more meaningful. If it’s a hometown or a beach you visit every summer, DD is usually enough.
When you’ve visualized each option, pick the one that looks clean and reads easily. Remember, you’ll be looking at it on your wrist, not through a microscope.
Real‑world examples
Emma, a spouse buying for her partner’s anniversary, chose DDM because her bracelet was a 3‑mm rose‑gold rope‑link. The extra half‑character of the decimal gave her the exact spot of their first kiss without crowding the band.
Carlos, a dad ordering for his kids, went with DD on a 2‑mm titanium curb‑chain. The numbers were short enough that his kids could actually recite them, turning the bracelet into a little geography lesson.
And for a friend who lives across the country, a DMS format on a 4‑mm silver box‑chain made the coordinates look like a tiny treasure map—perfect for someone who loves a bit of adventure.
Tips you can actually use right now
- Count characters. Excluding symbols, DD is usually 7–9 characters, DDM 11–13, DMS 15–20. Use that as a quick rule‑of‑thumb.
- Test readability. Write the format on a scrap piece of paper in the same font size you expect on the bracelet. If it feels cramped, go simpler.
- Consider direction letters. Some people prefer the minus sign (‑) for west/south; others like “W” and “S.” The minus sign saves a character.
- Mind the audience. Kids and grandparents usually prefer the clean look of DD. Couples who love details often gravitate toward DMS.
One quick sanity check: take a photo of the mock‑up and zoom in 2×. If you can still read each digit without squinting, you’re good to go.
Final checklist before you hit “order”
- Confirm the exact location on Google Maps.
- Decide on DMS, DDM, or DD based on band width.
- Convert the coordinates if needed and write them out exactly as you want them engraved.
- Do a character‑count test on paper or a design app.
- Ask a friend to read it aloud—if they stumble, simplify.
Once you’ve checked those boxes, you’ll have a custom coordinates bracelet that not only looks great but also tells the story you intended, no matter how big or small the numbers are.
Step 3: Personalize the Engraving Details
Now that you know which format fits your band, it’s time to make those numbers feel like a tiny love‑letter. Personalizing the engraving isn’t just about typing digits; it’s about deciding what little details will turn a bracelet into a story you wear every day.
Pick the right side (or both)
Most custom coordinates bracelets let you engrave on one side, some even let you use the opposite side for a secret note. Think about who will see it most often. If you’re gifting a spouse, the front can hold the coordinates while the back whispers a nickname or date. If it’s for a kid, you might keep the back blank – less to chew on, and the focus stays on the location.
And what about direction letters? A minus sign (‑) saves space, but “N” and “S” feel more familiar to grandparents who grew up with paper maps. Try writing both versions on scrap paper; the one that feels natural to read is usually the best choice.
Choose a font style that matches the vibe
Engraving machines typically offer a few font options: a clean sans‑serif, a classic serif, or a handwritten‑style script. A sleek sans‑serif pairs nicely with a modern stainless‑steel curb‑chain, while a script can add a romantic flourish on a rose‑gold rope‑link. The key is readability – you don’t want the numbers to look like a cryptic code.
Here's a quick test: print the chosen font at the exact size you expect on the bracelet (most design apps let you set the line height). Hold it up to the light; if the strokes blur, switch to a bolder style.
Add a tiny extra – symbols, emojis, or a date
Because you have a few spare characters, consider tucking in a heart ♥, a compass 🧭, or the month‑day of the memory. For example, Emma added a tiny “❤️ 06‑12” after the coordinates on her husband’s bracelet – the date reminded them of their first dance, and the heart gave the piece a personal touch without crowding the numbers.
Just remember: every extra character eats into the limited space. If you’re on a 2‑mm band, you might only have room for one symbol.
Proofread like you’d proof a text message
It sounds simple, but a typo on a bracelet is forever. Here’s a three‑step checklist:
- Read the coordinates out loud. If you stumble, something’s off.
- Ask a second person (maybe the recipient’s sibling) to double‑check the numbers and symbols.
- Take a photo of the mock‑up, zoom 200 %, and make sure every digit is distinct.
In our experience, the “read it aloud” step catches the most errors because our eyes tend to fill in missing digits.
Consider future‑proofing
Will the wearer ever want to add another location? Some customers choose a slightly longer band or leave a small blank space on the back for a future engraving. It’s a tiny foresight that saves a whole new bracelet later.
Also, think about metal allergies. If you know the recipient is sensitive to nickel, opt for titanium or sterling silver – the engraving looks just as crisp, but the wearer stays comfortable.
Final “personalization” checklist
- Decide which side(s) to use.
- Select direction letters (‑ vs N/S/E/W).
- Choose a font that balances style and legibility.
- Add any extra symbols or dates, keeping space limits in mind.
- Run the three‑step proofreading test.
- Confirm metal choice aligns with any sensitivities.
Once you’ve ticked those boxes, you’ve turned a set of numbers into a piece that feels as intimate as a whispered secret. The next step? Ordering the bracelet and watching that tiny map appear on the wrist of someone you love.
Step 4: Place Your Order & Shipping Options
Now that you’ve double‑checked the engraving, it’s time to turn that mock‑up into a real piece you can hold. The checkout process might feel like a tiny hurdle, but with a clear step‑by‑step plan it’s actually pretty painless.
1. Review the final checklist before you click “Add to Cart”
Pull up the personalization checklist you just completed – metal, width, format, any extra symbols – and make sure every detail matches what you see in the cart preview. If you’re ordering for a spouse, you might also add a short note like “First kiss, 06‑12.” That note can be entered in the “order notes” field so we know exactly what to engrave.
2. Enter the coordinates and any special instructions
When you hit “Add to Cart,” a tiny text box appears for order notes. Paste the coordinates exactly as you want them, including direction letters or minus signs. If the recipient has a metal sensitivity, type “titanium, no nickel” here – we’ll flag it for the production team.
3. Choose your shipping speed
We offer three main options:
- Standard (3‑5 business days) – the most economical, and 94% of U.S. orders arrive within this window according to our carrier data.
- Expedited (1‑2 business days) – great for last‑minute birthdays or anniversaries.
- International (5‑10 business days) – we ship to over 30 countries, with customs fees handled on delivery.
Pick the one that matches your timeline. For a surprise gift, we recommend ordering at least a week ahead and choosing standard – it’s reliable and saves a few bucks.
4. Verify the shipping address
Copy‑paste the address from your phone or email to avoid typos. A single digit off can mean the package ends up in the wrong mailbox, and that defeats the whole surprise. If you’re sending the bracelet directly to the gift‑receiver, add a “gift” tag in the notes so the packaging comes without a price tag.
5. Payment and order confirmation
We accept the usual credit cards and PayPal. After you hit “Place Order,” you’ll get an email with a summary and a tracking number once the piece leaves our studio. Keep that email – it’s your proof of purchase and the fastest way to check the delivery status.
6. Real‑world examples
Emma ordered a rose‑gold, 3‑mm rope‑link bracelet for her husband’s anniversary. She chose standard shipping because the event was two weeks away. The bracelet arrived on day four, still in its protective wrap, and she was able to slip it on during dinner – the look on his face was priceless.
Carlos needed a bracelet for his kids’ school‑field‑trip photo day, so he opted for expedited shipping. The package was at his door the next morning, and the kids got to wear their new titanium bands during the shoot. Both stories show how matching the shipping choice to the event timeline makes the whole experience smoother.
7. Pro tip: add a personal touch to the package
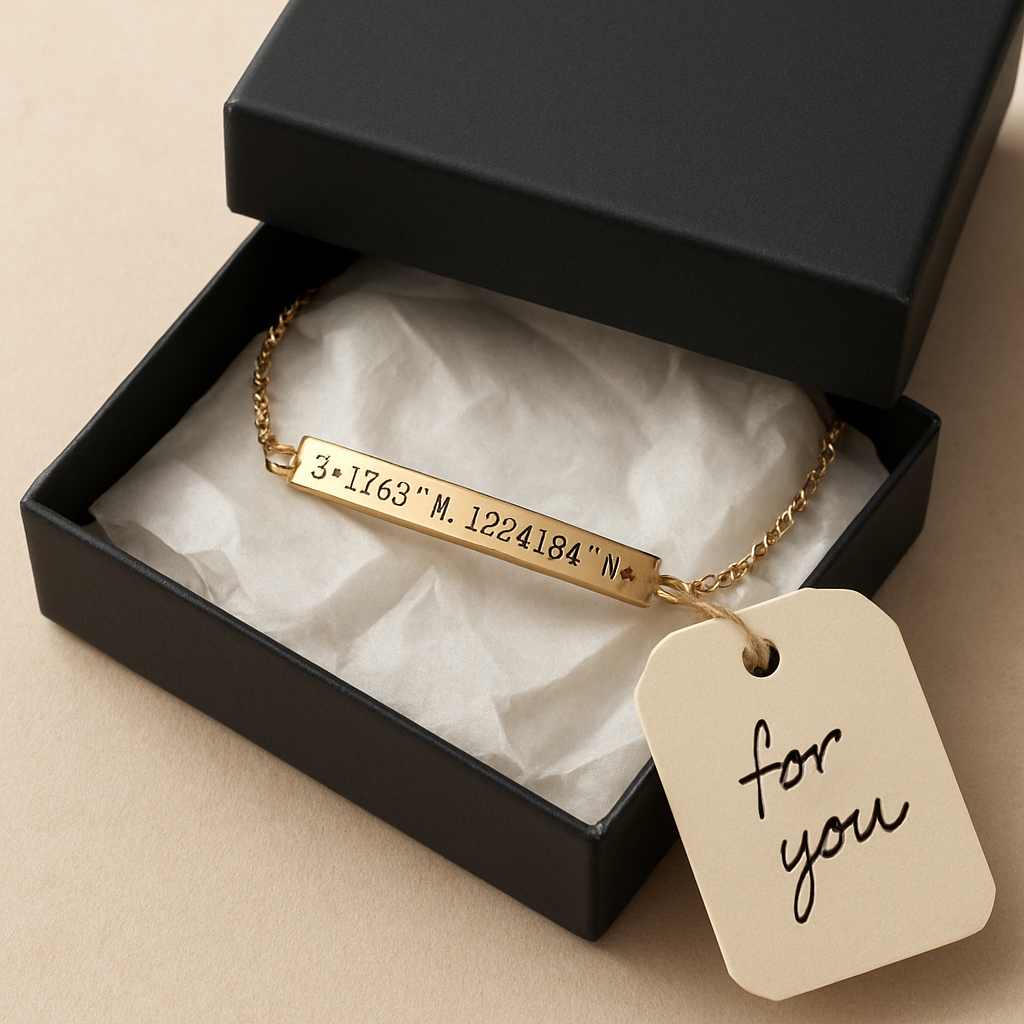
If you’re sending the bracelet as a gift, select our optional gift‑wrap. It adds a soft tissue paper layer, a custom card, and a discreet box that feels like a mini‑treasure chest. Including a handwritten note (we’ll print it on the card) boosts the emotional impact without extra effort on your side.
8. After‑delivery checklist
When the bracelet arrives, open it on a clean surface, check the engraving one more time, and make sure the clasp works smoothly. If anything looks off, contact us within 48 hours – we’ll replace or re‑engrave at no charge.
Take a moment now to walk through these steps before you hit “Place Order.” A few extra seconds in the planning stage save you from surprise delays later, and you’ll end up with a piece that lands exactly where you want it – on the wrist of someone you love.
Step 5: Care and Maintenance Tips
Congratulations – your custom coordinates bracelet is finally in your hands, and you’re already picturing it on the wrist that holds that special memory. Before it starts gathering daily wear‑and‑tear, let’s give it a quick “spa day” so the engraving stays sharp and the metal keeps its glow for years.
Why caring for a bracelet matters
Ever notice how a favorite pair of sneakers lose their color after a few months? Metal works the same way: sweat, perfume, and even a stray splash of dish soap can dull a finish or blur the tiny numbers you spent time perfecting. A little routine now saves you from a pricey re‑engrave later.
Step‑by‑step daily care
1. Wash your hands first. A quick rinse removes oils that would otherwise settle into the engraving.
2. Dry gently. Use a soft, lint‑free cloth – think of the one you use on sunglasses.
3. Avoid harsh chemicals. No bleach, no ammonia, and definitely no abrasive scrubbers. A mild soap and warm water is enough.
4. Store smart. Keep the bracelet in the supplied pouch or a separate compartment of a jewelry box. Separate it from copper or brass pieces that can cause unwanted tarnish.
Does that sound too much? Not really – most of these actions take less than a minute.
Weekly deep‑clean routine
If you wear the bracelet daily, give it a more thorough cleaning once a week. Here’s a simple method that works for silver, gold, titanium, and stainless steel:
- Mix a few drops of dish soap with warm water in a small bowl.
- Submerge the bracelet for 30‑60 seconds.
- Use a soft‑bristled toothbrush to gently brush the engraved area – the bristles reach the tiny valleys without scratching.
- Rinse under lukewarm water and pat dry with the lint‑free cloth.
For a quick polish, a polishing cloth designed for jewelry (the kind that comes with most of our gift boxes) can restore shine without removing the engraving.
Special considerations for different metals
Different metals react differently to sweat and humidity. Below is a cheat‑sheet you can print and stick on your bathroom mirror.
| Metal | Recommended Cleaning Method | Frequency |
|---|---|---|
| Silver (sterling) | Mild soap + soft brush; occasional anti‑tarnish cloth | Weekly deep clean, daily wipe |
| Gold (yellow/rose/white) | Warm soapy water + soft cloth; avoid abrasive pads | Weekly deep clean, daily wipe |
| Titanium / Stainless‑steel | Simple soap rinse; no polishing needed | Weekly deep clean, daily wipe |
Notice how titanium and stainless‑steel barely need polishing? That’s why many parents choose them for kids – they survive playground mud and still look new.
Real‑world examples
Emma, who ordered a rose‑gold rope‑link bracelet for her husband, swears by the weekly soak. She says the numbers stay “crisp as the day they were engraved,” even after a beach vacation where sand got into the clasp.
Carlos, a dad who bought titanium cuffs for his twins, simply rinses them under the tap after the kids come home from soccer. He’s never needed a polish, and the bracelets still look like they just left the factory.
What to do if something goes wrong
If you spot a faint spot on the engraving, stop using any abrasive product immediately. Reach out to our support team within 48 hours – we’ll either re‑engrave or send a replacement at no extra charge. It’s a tiny window, but it’s there to protect you.
Pro tip: protect the back side
Many people only think about the front where the coordinates sit. The back, especially on thinner bands, can collect dirt that eventually rubs against the front. Give the back a quick wipe with the same soft cloth during your daily routine.
So, what’s the easiest habit to start tomorrow? Grab the gift‑box pouch that came with your bracelet, keep it handy, and give your piece a quick dry‑wipe before you head out. In a few weeks you’ll notice the difference – the numbers stay legible, the metal stays bright, and you’ll feel good knowing you’re preserving a memory that matters.
Take a moment now to write down which cleaning method matches your metal, set a reminder for the weekly soak, and enjoy watching your custom coordinates bracelet stay as vivid as the day you first fell in love with the location it represents.
Step 6: Styling Ideas & Gift Presentation
Now that your custom coordinates bracelet is ready, the way you style and present it can turn a simple token into a memory‑making moment.
Do you want the gift to feel like a heartfelt surprise or a sleek, everyday accessory? Both approaches work, it just depends on who’s opening the box.
Here’s a quick checklist you can run through before you wrap anything:
- Confirm the metal, width, and coordinate format match the recipient’s style preferences.
- Pick a packaging option – our soft‑pouch, a matte gift box, or a reusable fabric wrap – that echoes the bracelet’s vibe.
- Add a personal note that references the location; a one‑sentence memory works best.
- Include a small “care card” with the daily wipe tip we covered earlier.
Why does each point matter? Because the little details signal that you’ve thought ahead, not just tossed together a piece of jewelry.
Styling ideas for different recipients
Gift buyers often ask, “How can I make this feel personal without over‑doing it?” For a spouse, pair the bracelet with a soft cash‑mere scarf in the same color family as the metal. The scarf adds texture, and when they wrap it around their neck they’ll see the bracelet’s coordinates reflected in the subtle hue.
Parents tend to appreciate durability and simplicity. Try slipping a tiny leather key‑fob (the same shade as a stainless‑steel band) into the same pouch. When the kids grab the fob for a quick game of “pretend treasure hunt,” the bracelet stays safe and the whole set feels like a mini‑adventure kit.
Friends who love travel get a little extra flair when you nest the bracelet inside a travel‑themed tin – think vintage luggage tag design. Inside the lid, tuck a postcard of the exact spot you’ve engraved. Suddenly the gift tells a story before it’s even worn.
And for the occasional “just because” gift, a minimalist presentation works wonders: a plain white tissue‑paper fold that you hand‑fold yourself. The tactile act of unfolding creates a tiny ritual that makes the moment feel intentional.
Creative gift presentation hacks
1. Layered reveal. Place the bracelet on a small velvet square, then cover it with a translucent vellum sheet printed with a faint map outline of the coordinates. When the recipient lifts the sheet, the map appears underneath – a visual cue that matches the engraving.
2. Sound cue. If you’re sending the gift in the mail, include a QR code that links to a short audio clip of waves crashing, a city skyline, or even a voice memo of you saying, “This is where we first met.” The sound ties the place to the piece.
3. Color‑coded ribbon. Choose a ribbon that mirrors the emotional tone of the location: soft teal for a beach sunrise, deep burgundy for a mountain hike. Tie it loosely so it looks intentional, not stiff.
4. Mini‑photo collage. Print three 2×2 cm photos – the spot, a selfie taken there, and a close‑up of the engraved numbers. Arrange them in a tiny envelope beside the bracelet. It turns a single piece of jewelry into a curated memory board.
Putting it all together – a step‑by‑step routine
Step 1: Lay out all components – bracelet, chosen pouch or box, note, care card, and any extra props (ribbon, photo collage).
Step 2: Write the note on a piece of recycled cardstock. Keep it under 30 words; something like, “Our first kiss at sunset, 06‑12‑2022 – forever on your wrist.”
Step 3: Position the bracelet on the inner surface of the packaging, face‑up so the coordinates are visible. If you’re using a velvet square, place the vellum map on top.
Step 4: Slide the note and care card beneath the bracelet, making sure the note peeks out just enough to be seen when the lid opens.
Step 5: Add any bonus items (photo collage, QR code printout). Secure them with a dab of double‑sided tape if the box is slick.
Step 6: Finish with your chosen ribbon or tie, then give the package a gentle shake – everything should stay snug but not cramped.
When the recipient finally unwraps it, they’ll experience three moments at once: the visual surprise of the map, the tactile pleasure of the soft packaging, and the emotional hit of the note referencing the exact place. That triple‑layered experience is what turns a custom coordinates bracelet from a simple accessory into a cherished keepsake.
And remember, you don’t need a big budget to create a wow factor. Even a single piece of handmade paper and a handwritten line can make the gift feel priceless. The key is aligning the style, the story, and the presentation so they all point back to the same coordinates you just engraved.
Conclusion
We’ve walked through everything from picking the right metal to polishing the perfect engraving, and now the moment has arrived – you’re ready to give a custom coordinates bracelet that feels like a tiny love‑letter on the wrist.
Remember the three‑layer experience we talked about: the visual surprise of the map, the tactile comfort of the packaging, and the emotional punch of the note. When your loved one opens the box, those sensations line up like a mini‑storytelling cascade.
So, what’s the next step? Grab your notes, double‑check the character count, and place the order on heartful.gifts while you still have that fresh excitement. A quick proofread and a short “thank you” card can turn a simple shipment into a memorable moment.
In our experience, the gifts that stick are the ones that feel personal, not perfect. A tiny heart symbol, a date, or even a whispered inside joke can make the bracelet sing for years.
Finally, give yourself a pat on the back. You’ve taken the time to design, care for, and present a piece that will travel with the wearer through countless adventures. Let that feeling guide your next thoughtful gift. And remember, the story lives on each time they glance at it.
FAQ
Got questions after reading the guide? Here are the most common things we hear from gift buyers, parents, and spouses.
How do I choose the right metal for a custom coordinates bracelet?
Pick a metal that matches the wearer’s lifestyle and any skin sensitivities. Stainless‑steel is tough and affordable, perfect for active kids or daily wear. Rose‑gold adds a warm, romantic feel that many spouses love, while titanium is hypoallergenic and lightweight for those who react to nickel. Think about the everyday look – a sleek silver curb‑chain for a minimalist, or a richer rope‑link for a special anniversary.
What coordinate format should I use for a thin 2‑mm band?
For a 2‑mm band you want the shortest, most legible format – usually decimal degrees (DD). A typical DD string looks like “34.0533° N, -118.2417° W” and fits in about 8–9 characters per coordinate, leaving a little breathing room. If you need a touch of direction without the minus sign, you can swap “-118.2417° W” for “118.2417° W”, but keep the total count low to avoid crowding.
Can I add a personal message or symbol to the custom coordinates bracelet?
Yes – most of our bracelets let you use the opposite side for a tiny note, a heart, or a date. Because space is limited, stick to one extra character on a 2‑mm band; a simple “♥” or “06‑12” works nicely. On a 4‑mm rope‑link you have a few more spots, so you could add a short nickname or a tiny compass icon without sacrificing readability.
How long does shipping take and can I track my order?
We ship within the United States in three tiers: standard (3‑5 business days), expedited (1‑2 business days), and international (5‑10 business days). As soon as your bracelet leaves the studio you’ll receive a tracking number by email, so you can watch it move from our workshop to your doorstep. For surprise gifts we usually recommend ordering at least a week ahead and choosing standard to keep costs down.
What should I do if I notice an error in the engraving?
First, double‑check the proof you received – most mistakes happen because of a typo in the notes field. If the error is on our side, contact support within 48 hours and we’ll re‑engrave or replace the piece at no extra charge. If it’s a typo you entered, we can still help you cancel and reorder, but the sooner you act, the easier the fix.
How should I care for a stainless‑steel versus a rose‑gold bracelet?
Stainless‑steel only needs a quick wipe with a lint‑free cloth after each wear – it resists tarnish, so a mild soap rinse once a week is enough. Rose‑gold benefits from a soft polishing cloth to keep its warm glow, and you should avoid harsh chemicals that can wear down the plating. In both cases store the bracelet in the supplied pouch to protect the engraving.
Is a custom coordinates bracelet suitable as a gift for a child?
Absolutely – kids love the secret‑code vibe of a location on their wrist. Choose a hypoallergenic metal like titanium or stainless‑steel, and keep the engraving simple, such as “Home” with the decimal degrees of the family house. Because younger wearers tend to tug at jewelry, a 2‑mm curb‑chain is sturdy enough to survive playground adventures while staying comfortable.