
How to Create a Stunning Square Photo Canvas for Home Décor
You know that feeling when you stare at a blank wall and think, “I wish there was something that actually makes me smile every day”?
We’ve all been there – the fridge door covered in magnets, the coffee table sporting the same old photo book, and that one empty space in the living room that just feels… missing.
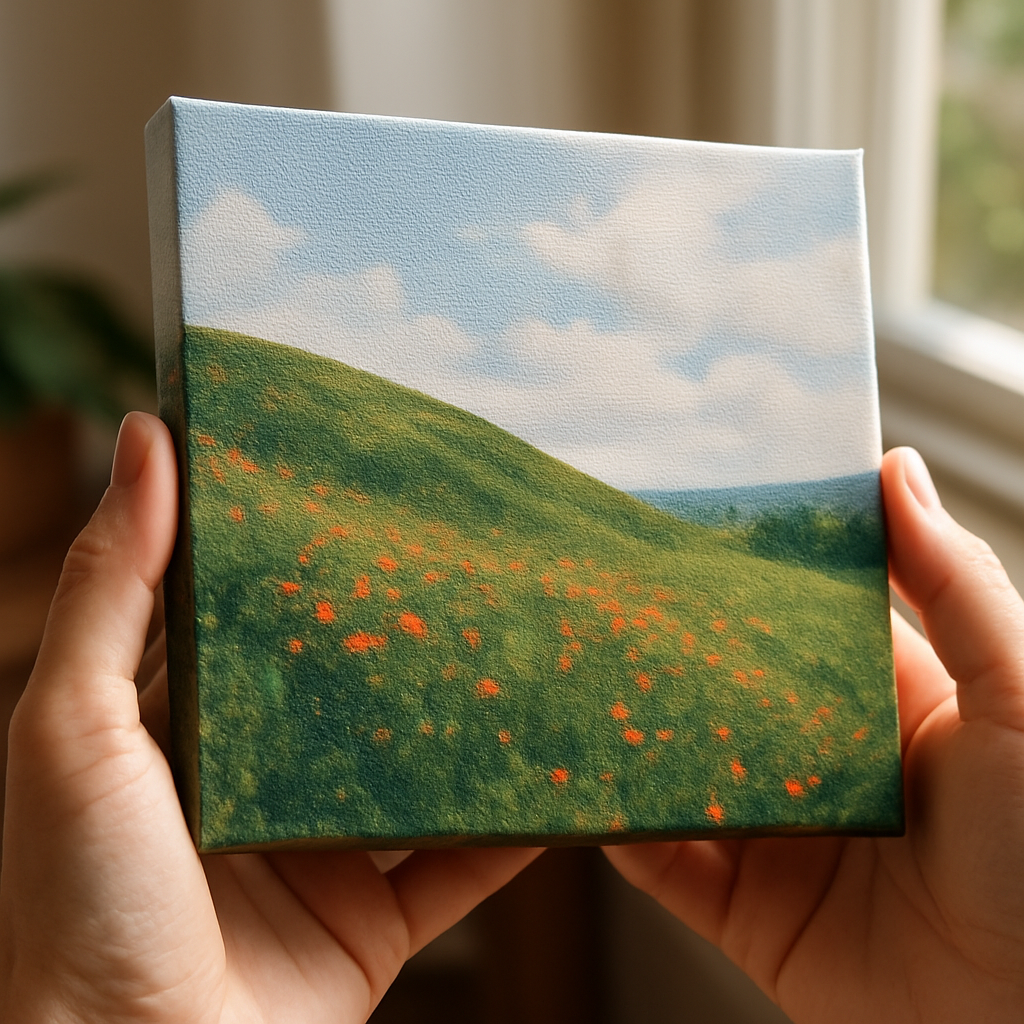
Enter the square photo canvas. It’s not just a piece of art; it’s a personal snapshot turned into a crisp, color‑saturated canvas that fits perfectly into that square‑shaped niche you’ve been ignoring.
Think about the last family gathering where laughter filled the room. Imagine that moment frozen on a fine‑textured white canvas, stretched over a pine frame, and hanging right where you can see it while you brew your morning coffee.
Why a square, you ask? Because squares are simple, balanced, and they play nicely with any décor style – modern, farmhouse, or even that eclectic mix you’ve been curating.
And here’s a little secret: a square canvas lets you showcase more of the image without the distraction of a long‑side border. Your faces, the background, the little details – they all stay in view, creating a fuller story.
So, how do you choose the right photo? Start with an image that has a clear focal point – a smiling child, a pet’s goofy grin, or a breathtaking landscape that makes you want to step inside.
Once you’ve picked it, think about the lighting in the room where you’ll hang it. A bright, sun‑lit space will make the colors pop, while a cozy nook might benefit from a canvas with slightly warmer tones.
And don’t stress about size. A 30 × 30 cm canvas can be a subtle accent, whereas a 60 × 60 cm piece becomes a statement piece that draws the eye instantly.
Ready to turn that favorite memory into a square photo canvas that feels like a hug every time you walk by? Let’s dive in and explore how you can pick, customize, and display your canvas to make your home feel instantly more personal.
TL;DR
A square photo canvas transforms a favorite photo into a ready‑to‑hang, balanced piece that instantly brightens your home wall and matches every décor style, anywhere. Choose a clear focal image, pick a size that fits the space, and let heartful.gifts hand‑stretch it on a pine frame for a gallery hug.
Step 1: Selecting the Perfect Photo for a Square Canvas
Ever stare at your phone gallery and feel that tug of "this would look amazing on my wall"? Yeah, that's the moment we want to lock down – the photo that makes you smile before you even see it stretched over pine.
First thing’s first: pick an image with a clear focal point. Whether it’s a giggling toddler, a golden retriever’s goofy grin, or the sunrise over a misty lake, you need one element that instantly draws the eye. If the picture feels busy, try cropping until that main subject fills the frame.
Next up, resolution. A square canvas still needs enough pixels to stay sharp when it’s blown up to 30 × 30 cm or even 60 × 60 cm. Aim for at least 300 dpi at the final size – that usually means a photo that’s around 3000 × 3000 px for a medium canvas. If you’re unsure, most online tools will tell you whether the file meets the size requirements.
Color and lighting matter more than you think. A photo taken in harsh midday sun can wash out details, while golden‑hour light adds warmth and depth. Look for images where shadows and highlights are balanced; that way the canvas won’t look flat once it’s hung.
Composition is the quiet hero. The rule of thirds works wonders on a square – place the subject off‑center and let the surrounding space breathe. Negative space can become a subtle backdrop that makes the main element pop, especially when the canvas is gallery‑wrapped and you see a thin border on all sides.
Real‑world example: Emma wanted a family portrait for the hallway. She chose a candid shot of her kids mid‑laugh, cropped to a square so the children's faces took up most of the area, and uploaded a 3500 px file. The result? A vibrant canvas that feels like a hug every time you walk past.
Pet lovers, listen up. Jake uploaded a picture of his cat perched on a windowsill, but the original was portrait‑oriented. He rotated it, cropped to square, and added a tiny bit of sky at the top for context. The final canvas captured the cat’s curiosity without looking cramped.
Travel enthusiasts can’t forget landscape shots. Lina had a panoramic beach photo; she used the square crop to focus on the shoreline and the colorful sky, discarding excess sand. The square format turned a wide vista into a striking, balanced piece that works perfectly above her sofa.
Actionable checklist
- Identify the main subject – faces, pets, iconic landmarks.
- Check file size: aim for 300 dpi at your intended canvas dimensions.
- Adjust lighting: avoid harsh shadows, prefer soft, even illumination.
- Crop to square, keeping the focal point off‑center for visual interest.
- Preview the image on a mock‑up to see how it looks framed.
- Save a high‑resolution copy (TIFF or maximum‑quality JPEG).
Need inspiration? Browse the square wall art collection for ideas on how different subjects translate into a perfect square canvas.
And if you’re a visual learner, this quick walkthrough shows the whole process in action:
Finally, remember to test the image on your wall before you order. Print a small 8 × 8 in version on regular paper, tape it up, and live with it for a day. If it still makes you grin, you’ve nailed the perfect photo for your square photo canvas.
Step 2: Preparing Your Image Files
Alright, you’ve picked the perfect shot – now it’s time to get that file ready for a square photo canvas. It sounds simple, but a few technical tweaks can mean the difference between “wow” and “meh” once it’s stretched over a pine frame.
Check the resolution
First thing: make sure your image is at least 300 dpi at the size you want on the wall. For a 30 × 30 cm canvas that’s roughly a 3500 × 3500 px file; for a 60 × 60 cm piece you’ll need around 7000 px on each side. If you’re not sure, most photo editors show the pixel dimensions in the “Image Size” dialog. Upscaling a tiny phone photo will introduce blur, so try to start with the highest‑resolution version you have.
Mind the margins for a gallery‑wrap
Gallery‑wrap, meaning the image wraps around the sides of the frame. Anything crucial should stay at least 1‑2 cm away from the edge, otherwise it might end up on the side where you can’t see it. A quick trick is to add a temporary “safe zone” guide in your editor and keep faces, text, or key details inside it.
Colour profile and file format
Export your file as a maximum‑quality JPEG or, even better, a TIFF if you want lossless detail. Keep the colour profile in sRGB – that’s what most printers, including heartful.gifts, expect and it helps the colours stay true from screen to canvas.
Fine‑tune lighting and contrast
Even a great photo can look flat after it’s printed if the tonal range is too narrow. Boost the mid‑tones just a touch, bring out a little more contrast, and check that no part of the image is blown out in highlights. You don’t need a Photoshop master; most free tools have a “auto‑enhance” button that does a decent job.
Save a backup copy
Before you hit upload, save a copy of the original untouched file. That way you can go back if the canvas looks different than you imagined. It also gives you a version to reuse for future projects – maybe a gift for Mom or a holiday card.
Now, a quick sanity check: does the file meet the size requirement? Is the main subject comfortably inside the safe zone? Are the colours vibrant but not oversaturated? If you can answer “yes” to all three, you’re ready to upload.
Technical tip from the pros
Canvas‑printing services wrap the image over the frame and often duplicate the edge pixels on the sides to create a seamless blur effect. That means any stray speck at the very edge will become a visible band on the side of the canvas. Cropping a hair tighter than the safe zone can avoid that distraction as explained by a leading canvas shop.
And if you ever wonder why you can’t save a “circular” canvas file, remember that image files are inherently rectangular. You can mask out a circle in Photoshop, but the underlying file stays rectangular, which is exactly what the printing pipeline expects according to an Adobe community discussion. Keeping the file rectangular avoids any surprise when the printer wraps it onto the frame.
Finally, give yourself a quick test run: print a cheap 8 × 8 in version on regular paper, tape it to the wall, and live with it for a day. If the composition still makes you smile, you’ve nailed the preparation step and your square photo canvas is ready to become the centerpiece of the room.
Step 3: Choosing Canvas Materials and Finishes
Now that your photo is perfectly prepped, the next question is what the canvas itself should be made of. Do you want a soft, museum‑like feel, or something that can survive a busy family hallway? The material you pick will dictate texture, durability, and even how the colours pop on your wall.
What’s under the surface? Common canvas fabrics
Most square photo canvas providers offer two main fabric families: a 100% cotton weave and a cotton‑polyester blend (often called Oeko‑Tex polycotton). Cotton gives a natural, slightly textured look that mimics traditional paintings – perfect if you love that classic, tactile vibe. The blend, on the other hand, is a bit sturdier, resists wrinkling, and tends to hold colour a touch brighter because the polyester fibers reflect more ink.
Here’s a quick way to feel the difference: ask yourself whether you’d rather run your fingers over a soft, linen‑like surface (cotton) or a smoother, slightly satin feel (blend). Your answer will guide the mood of the final piece.
Finishes that matter
Once the fabric is settled, think about the finish. The three most common options are matte, satin and glossy.
- Matte: Absorbs light, reduces glare, and showcases subtle colour gradations. Ideal for photos with delicate skin tones or for rooms with lots of natural light.
- Satin: A gentle sheen that adds a hint of depth without the full‑on shine of glossy. Works well for family portraits where you want a little pop but still keep the look soft.
- Glossy: Maximises colour vibrancy and contrast, making bright skies and vivid reds really pop. Best for travel shots or art‑style images that thrive on high impact.
Pro tip: if you’re not sure which finish to choose, order a small 8×8 in test print in two finishes. Hang them side‑by‑side for a day and notice which one feels right in the actual lighting of the room.
Durability considerations
Living rooms, kids’ playrooms, and kitchens each have different stressors. For high‑traffic zones, look for a canvas that mentions “UV‑resistant inks” and “fade‑proof coating.” Those extra layers help the image stay vivid for years, even if sunlight kisses the wall each morning.
If you have pets or little hands that love to touch the walls, a polyester blend with a protective coating will resist scratches better than pure cotton.
Actionable checklist for material selection
- Identify the room’s lighting: bright (go matte or satin) vs. dim (glossy can add life).
- Consider foot traffic: high‑traffic → polyester blend + protective coating.
- Touch‑test sample fabrics if you can; cotton feels softer, blend feels smoother.
- Decide on a finish based on photo style: portraits → satin, landscapes → matte, bold art → glossy.
- Check product specs for “Oeko‑Tex certified” – it guarantees the canvas is free from harmful chemicals.
Real‑world examples
Emma, a mom of three, wanted a canvas of her newborn’s first smile for the nursery. She chose a 100% cotton canvas with a matte finish because the room gets a lot of morning light and she didn’t want glare during diaper changes. The soft texture also matched the cozy, plush décor she’d already selected.
Jake, an avid traveler, printed a sunrise over the Grand Canyon. He opted for a polyester‑blend canvas with a glossy finish. The extra shine amplified the fiery oranges and made the canyon’s shadows feel deeper, turning his hallway into a mini‑gallery.
Laura, who runs a home‑office studio, needed something that could survive a few accidental coffee splashes. She went with a satin‑finished Oeko‑Tex polycotton canvas and added a clear acrylic protective spray after it arrived. The result? A sleek, professional look that’s easy to clean.
Quick‑compare table
| Feature | Material | Finish | Best For |
|---|---|---|---|
| Soft texture, classic feel | 100% cotton | Matte | Nursery portraits, low‑glare rooms |
| Sturdy, wrinkle‑resistant | Cotton‑polyester blend (Oeko‑Tex) | Satin | High‑traffic areas, family photos |
| Maximum colour pop | Polyester blend | Glossy | Travel landscapes, bold art prints |
Remember, the perfect square photo canvas isn’t just about size – it’s the material and finish that turn a nice picture into a piece you’ll actually want to stare at every day. Take a few minutes to run through the checklist, test a couple of finishes, and you’ll end up with a canvas that feels as good as it looks.
Step 4: Printing and Quality Checks
Now that you’ve picked the perfect material and finish, the real magic happens when the printer starts laying ink onto the canvas. This is where a square photo canvas can either wow you or fall flat, so let’s walk through the steps that guarantee you get exactly what you imagined.
1. Choose a reputable printer that uses archival‑grade inks
Even a gorgeous photo will look dull if the inks fade after a few months. Look for printers that mention “UV‑resistant” or “archival quality” inks. Those formulations lock in colour for years, even in sunny rooms. If you’re ordering from heartful.gifts, they already use fade‑proof inks, but the principle applies wherever you buy.
2. Verify the file matches the printer’s specifications
Most canvas labs ask for a 300 dpi file at the final size. Upload a TIFF if you can; a maximum‑quality JPEG works too, but avoid heavy compression. Before you hit “submit,” double‑check the pixel dimensions – a 60 × 60 cm canvas needs roughly 7 000 × 7 000 px. A quick “Image → Size” check in any editor saves you a re‑print.
3. Ask for a proof or sample strip
Some services will send a small proof strip (usually 8 × 8 in) of your image. Hang it on the wall where the final canvas will live and look at it under the same lighting. Does the matte finish stay truly matte, or does it pick up a shine? Does the glossy version make the reds pop without looking harsh? This tiny step catches unwanted surprises before you commit to the full size.
4. Inspect the canvas as soon as it arrives
When the box arrives, pull the canvas out gently and lay it flat on a clean surface. Check these items:
- Alignment – the image should be centred and the edges should wrap evenly around the frame.
- Colour consistency – compare the canvas to your screen or printed proof; any major shifts could mean the printer used a different colour profile.
- Surface defects – look for dust specks, ink runs, or uneven gloss.
- Stitching quality – the staples or glue on the back should be tight, not bulging.
If you spot a problem, most reputable printers offer a “re‑print guarantee.” Snap a photo of the issue, email their support within a few days, and they’ll send a replacement at no extra cost.
5. Perform a simple durability test
Place a clean, dry cloth on the canvas and rub lightly. A satin or matte finish should resist smudging, while a glossy finish will show fingerprints more readily. For families with kids, consider a clear acrylic spray (as Laura did) to add an extra protective layer. Just make sure the spray is labeled “non‑yellowing” so it won’t alter the colour over time.
6. Calibrate the hanging environment
Even the best‑printed canvas can look different if the wall colour or lighting changes. Hang the canvas at eye level, about 57 in from the floor, and step back. If the room gets a lot of morning sun, a matte finish reduces glare; in dimmer spaces, a glossy finish can add visual “pop.” Adjust the placement until the image feels balanced with the surrounding décor.
Here’s a quick checklist you can print out and keep beside your workspace:
- File: 300 dpi, correct dimensions, sRGB colour profile.
- Proof: Order an 8 × 8 in sample strip.
- Arrival: Verify centring, colour match, surface clean, tight stitching.
- Protection: Apply acrylic spray if needed.
- Placement: Eye‑level, consider lighting, use level.
Real‑world example: Maya ordered a 45 × 45 cm canvas of her garden sunrise. She requested a proof strip, which revealed a slight warm cast under her kitchen’s LED lights. She asked the printer to adjust the white balance, re‑received the strip, and loved the result. The final canvas arrived defect‑free, and after a quick wipe with a microfiber cloth, it looked ready to brighten her breakfast nook for years.
Another story: Carlos printed a family portrait on a glossy polyester blend. When the box arrived, a tiny speck of dust was visible on the left side. Because the printer’s policy covered re‑prints, he emailed a photo, got a replacement the next day, and now the canvas is flawless on his living‑room wall.
Bottom line: the printing stage is where your vision solidifies, and a few mindful checks can turn a good canvas into a cherished heirloom. Follow the steps, trust the proof process, and you’ll have a square photo canvas that looks as vibrant on the wall as it did on your screen.
Step 5: Hanging and Caring for Your Square Photo Canvas
Now that your canvas has cleared the printing stage, it’s time to treat it like the centerpiece it is. You’ve already spent time picking the perfect photo, prepping the file, and choosing the material. The last two steps—hanging it right and keeping it looking fresh—are what turn a beautiful print into a lasting memory.
Find the sweet spot on the wall
First, ask yourself: where will you see this piece most often? Most designers recommend eye‑level, roughly 57 inches from the floor, because that’s where our gaze naturally rests. If the room has a high ceiling, you can push it a few inches higher; if you have low furniture, bring it a bit lower so it doesn’t disappear behind a sofa.
Grab a level and a measuring tape. Mark the top edge of the frame with a small pencil dot, then step back and picture the whole piece in the space. You’ll notice instantly if the canvas feels “off‑center” or if it competes with nearby art.
And what about lighting? If the room gets strong morning sun, a matte finish will keep glare at bay. In dimmer corners, a glossy surface can add a subtle pop that makes the colors breathe.
Mounting methods that actually work
There are three reliable ways to hang a square photo canvas:
- Picture‑hanging hooks: Use a heavy‑duty hook rated for at least twice the canvas weight. Screw it in at the marked spot, then hang the canvas by its built‑in D‑ring or sawtooth.
- French cleat system: This is the pro‑installer’s favorite. One side of the cleat adheres to the wall, the other to the back of the canvas. It distributes weight evenly and makes removal a breeze.
- Command strips (for renters): Choose the “large” version, press firmly, and wait an hour before hanging. They’re invisible and won’t damage paint.
Which method feels right for you? If you’re a DIY enthusiast, the French cleat gives a museum‑quality look. If you’re short on tools, the picture‑hook is the fastest route.
Step‑by‑step hanging checklist
1. Measure twice, drill once. Use a stud finder to locate a stud for extra security, especially for larger canvases (45 cm × 45 cm or bigger).
2. Attach the hanging hardware. If your canvas didn’t arrive with D‑rings, screw two small eye‑hooks into the back, spaced about 12 cm from the top edge.
3. Level the hook. Place a level on the wall, align the pencil mark, and make sure the hook sits perfectly horizontal.
4. Hang and step back. Gently place the canvas on the hook, then walk around the room. Does it feel balanced? If one side looks heavier, nudge the canvas a millimeter left or right.
5. Secure the bottom. Some canvases have a “bottom strap” that prevents shifting. Snap it into place, especially in high‑traffic zones.
Caring for your canvas long‑term
Even the toughest polyester‑blend canvas can collect dust or lose its luster if ignored. Here’s how to keep it looking gallery‑ready:
- Dust lightly once a week. Use a soft microfiber cloth or a feather duster. Avoid abrasive wipes—they’ll scratch the surface.
- Spot‑clean stains immediately. A barely damp cloth (water only) works for most marks. For stubborn fingerprints on a glossy finish, a mixture of 50 % water and 50 % isopropyl alcohol applied sparingly will do the trick.
- Avoid direct heat. Prolonged exposure to radiators or direct sunlight can cause colour fading, even with UV‑resistant inks.
- Consider a protective spray. If you have kids or pets, a clear, non‑yellowing acrylic sealant adds an extra barrier without altering the hue.
Real‑world example: Maya, who placed her sunrise canvas in a kitchen that gets morning light, noticed a faint glare after a month. She switched the hanging spot a few inches lower and added a matte‑finish protective spray. The canvas now looks as fresh as the day it arrived.
Another story: Carlos hung his family portrait in a hallway where humidity spikes in summer. He started dusting twice a week and used a dehumidifier nearby. Six months later the colors remained vivid, and the canvas still feels “new.”
Quick durability test you can do at home
Take a clean, dry fingertip and lightly run it across a hidden corner of the canvas. If no ink transfers and the surface feels smooth, you’re good. If you see a faint smudge, apply a thin coat of the acrylic sealant and let it dry for 24 hours before touching again.
Finally, give yourself a moment to enjoy the work. Step back, take a sip of coffee, and let the image settle into the room’s rhythm. A well‑hung, well‑cared square photo canvas becomes more than décor—it becomes a daily reminder of the moment you chose to celebrate.
Step 6: Creative Display Ideas
Alright, you’ve got a gorgeous square photo canvas hanging, but what if you could turn that single piece into a whole visual story? That’s what we call a “display idea” – a way to make your canvas work with the rest of the room instead of just sitting there alone.
1. Build a mini‑gallery wall
Think of a gallery wall as a conversation between pictures. Start with your square canvas as the anchor, then add two or three smaller prints – maybe a 12 × 12 cm black‑and‑white portrait or a tiny landscape. Space them 2‑3 cm apart; the gap keeps things breathable.
Step‑by‑step:
- Lay the pieces on the floor first, arranging them until the composition feels balanced.
- Mark the top‑center of each frame with a pencil dot.
- Use a level and a measuring tape to transfer those dots onto the wall.
- Hang each piece, step back, and tweak the spacing as needed.
Pro tip: keep the colour palette consistent – if your canvas is warm‑toned, pick supporting prints with similar hues. That subtle harmony makes the whole wall feel curated rather than random.
Does this sound like a lot of work? Not really – a quick 10‑minute floor test does most of the heavy lifting.
2. Stack canvases vertically
Vertical stacks work especially well in narrow hallways or beside tall furniture. Imagine three square canvases, each showing a different moment from the same family vacation. The eye naturally travels up and down, creating a visual rhythm.
Actionable steps:
- Choose three images that share a common colour or theme.
- Print them in the same size (e.g., 40 × 40 cm) for a clean line.
- Mount a narrow metal rail or picture‑hanging strip at the desired height.
- Hang the canvases using D‑rings, aligning the tops for a straight edge.
When you look at the stack, you’ll feel the story unfold – like flipping through a mini‑album on the wall.
3. Use light as a design element
Lighting can turn a flat canvas into a focal point that glows. A small LED picture light placed a few inches above the top edge adds a soft halo without harsh glare.
Here’s how to do it:
- Pick a plug‑in or battery‑powered picture light with an adjustable arm.
- Attach it to the wall or the back of the canvas frame.
- Angle the beam so it skims the top edge and washes down the surface.
- Dim the light to 30‑40% for a museum‑like ambience.
According to display ideas without frames, subtle illumination not only highlights texture but also reduces eye strain in bright rooms.
4. Create a themed cluster
Pick a theme – think “summer beach days,” “black‑and‑white cityscapes,” or “kids’ artwork.” Gather 4‑6 square canvases that fit the motif and arrange them in a loose grid. The theme ties the pieces together, while the varied subjects keep the viewer’s curiosity alive.
Try this quick exercise:
- Write the theme on a sticky note.
- Lay out all candidate canvases on a coffee table.
- Remove any that break the mood, even if you love the photo.
- Hang the final selection, leaving a small “breathing room” between each.
It’s a low‑stress way to bring personality into a living‑room or hallway.
5. Seasonal swaps – keep it fresh
One of the coolest tricks is to treat your square canvas like a seasonal artwork. Swap it out every few months for a new image that matches the season or holiday. Because the canvas is already stretched and hung, you only need to replace the image file and order a new print.
Practical checklist:
- Pick a “base” frame that works year‑round (neutral matte works best).
- Store a folder of seasonal photos on your computer, labelled “Spring,” “Fall,” etc.
- When the season changes, upload the new file and order a quick 8×8 in proof strip to confirm colours.
- Swap the old canvas with the new one in under an hour.
Mixtiles’ magnetic mounting system shows how easy swapping can be – you can apply the same idea with a simple picture‑hanging hook and a bit of patience magnetic tile inspiration.
6. Play with texture and depth
If you’re feeling adventurous, add a thin, floating shelf a few inches below the canvas and place small decorative objects – a scented candle, a tiny vase, or a stack of favorite books. The shelf creates a “layered” look, making the canvas feel part of a three‑dimensional tableau.
Steps to execute:
- Measure the width of your canvas and cut a shelf board to match (or buy a ready‑made one).
- Mount the shelf using two small brackets at the same height across the wall.
- Place the canvas on the wall, then slide the shelf underneath.
- Curate the objects on the shelf, keeping them minimal to avoid visual clutter.
Now you have a display that not only shows a memory but also invites touch and interaction.
Take a moment, scan your wall, and ask yourself: which of these ideas feels like the next natural step for my space? Whatever you pick, remember the goal is to let the square photo canvas become a living part of your home, not just a static piece.
FAQ
What size square photo canvas should I choose for a living‑room wall?
Choosing the right size is mostly about the wall space you have and how much impact you want. A common sweet spot for a living‑room focal point is 40‑50 cm (16‑20 in) on each side—big enough to draw the eye but not so massive it overwhelms the room. Measure the empty area, leave at least a few inches of breathing room all around, and picture the canvas at eye level. If your wall is huge, go larger; if it’s a cozy nook, a 30 cm square works just fine.
What kind of image works best on a square photo canvas?
Because the canvas is square, you want a composition that feels balanced without relying on long edges. Portraits and close‑ups work surprisingly well – just keep the main subject off‑center so the negative space can breathe. Landscape shots can be cropped to highlight a single horizon line or a striking element like a tree or a wave. Think of the frame as a tiny window; pick photos that tell a story in that tight view.
How do I hang a square photo canvas without damaging the wall?
Hanging a canvas is easier than you think – you just need the right hardware and a little patience. For most homes a sturdy picture‑hanging hook rated for twice the canvas weight does the trick; screw it into a stud or use a wall anchor if you’re on drywall. If you rent, peel‑off Command strips work well, but make sure the surface is clean. Level the hook with a small bubble level, then gently lift the canvas onto the D‑ring or saw‑tooth and step back to check it’s straight.
Can I swap out the image on my square photo canvas later?
Absolutely – most print‑on‑demand services let you order a new print with the same frame and size, so you’re basically just swapping the artwork. All you have to do is upload the new file, double‑check the resolution, and place a fresh order. Because the canvas is already stretched, the turnaround is usually just a few days. It’s a great way to keep your décor fresh for holidays, birthdays, or a change of mood without buying a whole new frame.
How do I clean and care for my square photo canvas over time?
Treat your canvas like a piece of art you’d display in a gallery – a little dusting goes a long way. Use a soft, lint‑free microfiber cloth and gently swipe the surface once a week; avoid harsh chemicals or abrasive sponges. If you spill something, dab it quickly with a barely damp cloth – never rub. For glossy finishes, a light touch of a non‑yellowing acrylic sealant can add protection, especially in homes with kids or pets.
Is a square photo canvas a good gift for different occasions?
Yes – the square format feels modern yet timeless, which makes it a versatile gift for birthdays, anniversaries, baby showers, or even a ‘just because’ surprise. Because you can personalize it with any photo, you turn a simple image into a heartfelt memory that fits any décor style. Pair it with a simple frame or a ready‑to‑hang D‑ring, and you’ve got a ready‑made centerpiece that the recipient can instantly hang and enjoy.
Conclusion
We've taken a quick tour from file prep to hanging, and now the square photo canvas sits proudly on your wall.
Remember the three things that make it click: a clean, properly sized file, the right material and finish for your space, and a careful hanging routine.
Did any step feel like a surprise? Maybe the proof strip saved you from a colour mismatch, or the French cleat gave you that museum‑grade confidence.
Now that you know how easy it is to turn a favorite snap into a lasting piece, why not pick a memory that makes you smile and order it today? A family portrait, a travel sunrise, or a baby's first grin—any moment becomes a focal point when stretched on a square canvas.
Quick checklist before you click “order”:
- File: 300 dpi, sRGB, safe‑zone centered.
- Material: cotton for softness or blend for durability.
- Finish: matte for low‑glare rooms, glossy for bold colours.
- Hang: eye‑level, level the hook, step back.
Give yourself a minute to picture the canvas on the wall, imagine the compliments you'll hear, and then make that memory tangible.
Ready to bring your photos to life? Your next square photo canvas is just a few clicks away.
If you ever feel stuck, revisit this guide or reach out to a friendly print‑on‑demand team—they're happy to help you fine‑tune any detail.