
How to Create a Stunning Custom Canvas Photo Collage Step by Step
Ever stared at a wall full of random photos and thought, 'There’s got to be a better way to show them all together'?
That gut feeling is exactly why custom canvas photo collages have become a go‑to gift for parents, spouses, and anyone who loves to keep memories vivid.
Imagine taking your favorite snapshots—from that goofy family vacation to the candid giggle of your toddler—and weaving them into one striking piece of wall art.
Instead of a cluttered fridge door, you get a sleek canvas that tells a story at a glance, and it’s ready to hang straight out of the box.
And the best part? You don’t need any design skills. Most print‑on‑demand services let you upload, drag, drop, and watch the collage come together.
But you might wonder, 'Will it look cheap or blurry?' Trust me, when you choose high‑resolution images and a reputable provider, the result feels like gallery‑quality.
We’ve seen families turn a birthday slideshow into a single canvas that becomes the centerpiece of their living room, sparking conversation every time someone walks by.
Or think about gifting a collage of travel photos to your partner—each tiny frame is a reminder of the adventures you’ve shared, all in one glance.
If you’re nervous about layout, start simple: choose a theme—like “family moments,” “summer fun,” or “our love story”—and let the canvas guide the flow.
A quick tip: pick photos with similar lighting or color tones; it creates harmony and prevents the collage from feeling chaotic.
And don’t forget the practical side—most canvases come with pre‑installed hooks, so you can hang them in minutes without drilling or fuss.
So, are you ready to transform a pile of photos into a heartfelt masterpiece that your home—and the people you love—will cherish forever?
Let's start creating your unique collage today.
TL;DR
A custom canvas photo collage transforms your favorite snapshots into a ready‑to‑hang, gallery‑quality piece that tells a personal story without any design hassle. Pick a simple theme, use high‑resolution images with matching tones, and let a reputable print‑on‑demand service handle printing and pre‑installed hooks, so you can showcase memories instantly.
Step 1: Choose Your Photos and Theme
First thing’s first: you need a handful of photos that actually want to hang together. It’s tempting to dump every snapshot from the last year onto the canvas, but that quickly turns a beautiful collage into visual noise.
So, grab your phone or camera roll and start a quick “keep” folder. Anything under 150 KB or that looks grainy after a pinch‑zoom is a no‑go – you want at least 300 PPI for a crisp canvas print. If you have a DSLR, export the RAW files as high‑resolution JPEGs; if you’re on a phone, choose the “Original” size option.
Step 1 – Define the emotional thread
Ask yourself what story you want the collage to tell. Is it a summer road‑trip with friends? A year‑long growth journey of your toddler? A celebration of milestones – graduations, birthdays, anniversaries? Pinpointing that thread helps you weed out pictures that, while lovely, don’t serve the narrative.
For example, Jenna & Mark wanted a “first‑year baby” collage. They filtered out blurry bathroom selfies and kept only the moments that showed milestones – the first smile, the first steps, the first birthday cake. The result feels like a timeline rather than a random jumble.
Step 2 – Match lighting and colour palette
Images that share a similar lighting temperature (warm golden hour vs. cool indoor light) instantly look cohesive. If half your photos are sunny beach shots and the other half are dimly lit indoor parties, the canvas will look disjointed.
Quick tip: open the photos in a free editor (like the built‑in phone editor) and check the “temperature” slider. If you spot a few that are way off, either adjust them or swap them out. Consistency in hue and saturation is the secret sauce most people miss.
Step 3 – Choose a layout theme
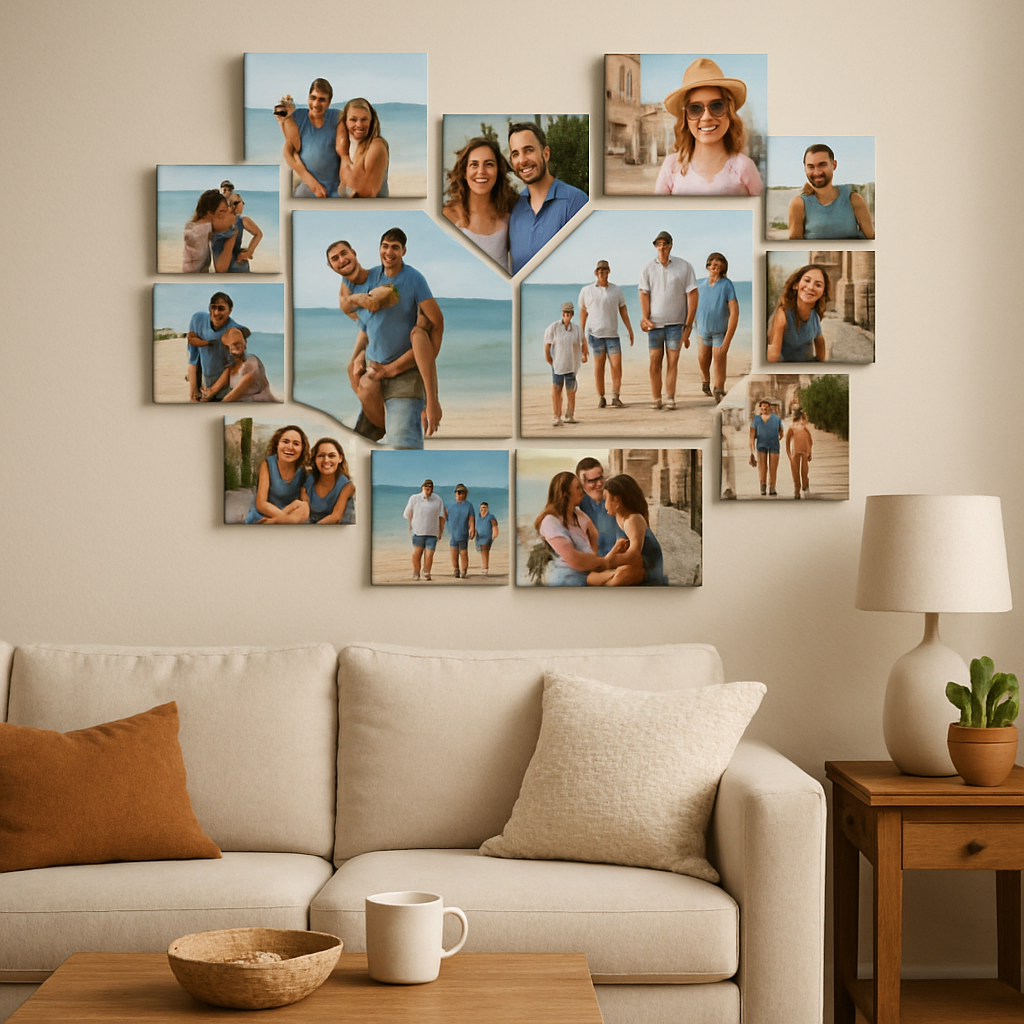
Heartful.gifts offers a handful of layout templates – classic grids, heart shapes, and sweeping panoramas. Pick the one that mirrors your story. A grid works well for a balanced family portrait collection; a heart layout adds romance for a couples’ gift; a panoramic spread shines for a travel itinerary.
When you’ve narrowed your photo pool, experiment with two or three layouts in the design tool. See how the images flow. Do you want a visual “journey” from left to right, or a central focal point surrounded by supporting shots? Let the layout guide the eye, not the other way around.
Step 4 – Crop and orient consistently
Before you upload, decide whether you’ll use portrait‑or‑landscape orientation for each image. Mixing both is fine if the template allows it, but keep the majority in the same orientation to avoid a lopsided feel. If a portrait photo looks better when rotated, do it now – it’s easier than re‑cropping after the canvas is generated.
Crop out distracting backgrounds. A clean subject on a simple backdrop makes the canvas look polished. Think of it like a mini‑photo‑retouch: you don’t need a full‑blown Photoshop job, just a tidy crop.
Step 5 – Add a subtle unifying element
Many of our customers add a faint border or a soft background colour that matches their home décor. It’s a tiny detail that ties everything together without stealing the spotlight. If your wall is navy, a light‑grey canvas background can make the photos pop while still feeling harmonious.
Finally, give yourself a quick sanity check: step back from the screen, imagine the finished canvas on your wall, and ask, “Does this make me smile?” If the answer is yes, you’re ready to hit “order”.
Step 2: Select Canvas Size and Layout
Now that you’ve trimmed your photos and settled on a theme, it’s time to think about the physical space they’ll live in. Choosing the right canvas size and layout is the bridge between “nice pictures” and a show‑stopping wall piece.
First, picture the wall you’re targeting. Is it a wide hallway, a cozy bedroom corner, or a large living‑room feature wall? The size of the canvas should complement that spot, not overwhelm or get lost.
Measure the space, then add breathing room
Grab a tape measure and jot down the width and height of the area. A good rule of thumb is to leave about 5‑10 % of the wall empty around the canvas – that “breathing room” lets the eye rest and makes the collage feel intentional.
For a typical 8‑ft wide living‑room wall, a 40×30 in canvas often works nicely. If the wall is narrower, a 24×18 in piece keeps things balanced. And if you’ve got a grand, open loft, go bold with a 60×40 in landscape.
Landscape, portrait, or square – which shape fits your story?
Landscape formats shine when you have a series of horizon‑heavy shots – think beach sunsets, mountain panoramas, or a timeline that reads from left to right. A panoramic canvas can turn a dozen nature photos into a single, immersive view.
Portrait orientation is perfect for tall subjects: family portraits, baby milestones, or a column of travel souvenirs. It also works well on narrow wall niches.
Square canvases are the “timeless” choice. They let you mix portrait and landscape images without forcing a strict direction, and they sit nicely in grid‑style layouts. Many customers love the square because it feels like a photo album on the wall.
CanvasChamp notes that you can create a personalized collage in landscape, portrait, or square shapes, each offering a different visual impact according to their product guide.
Match the layout to the narrative flow
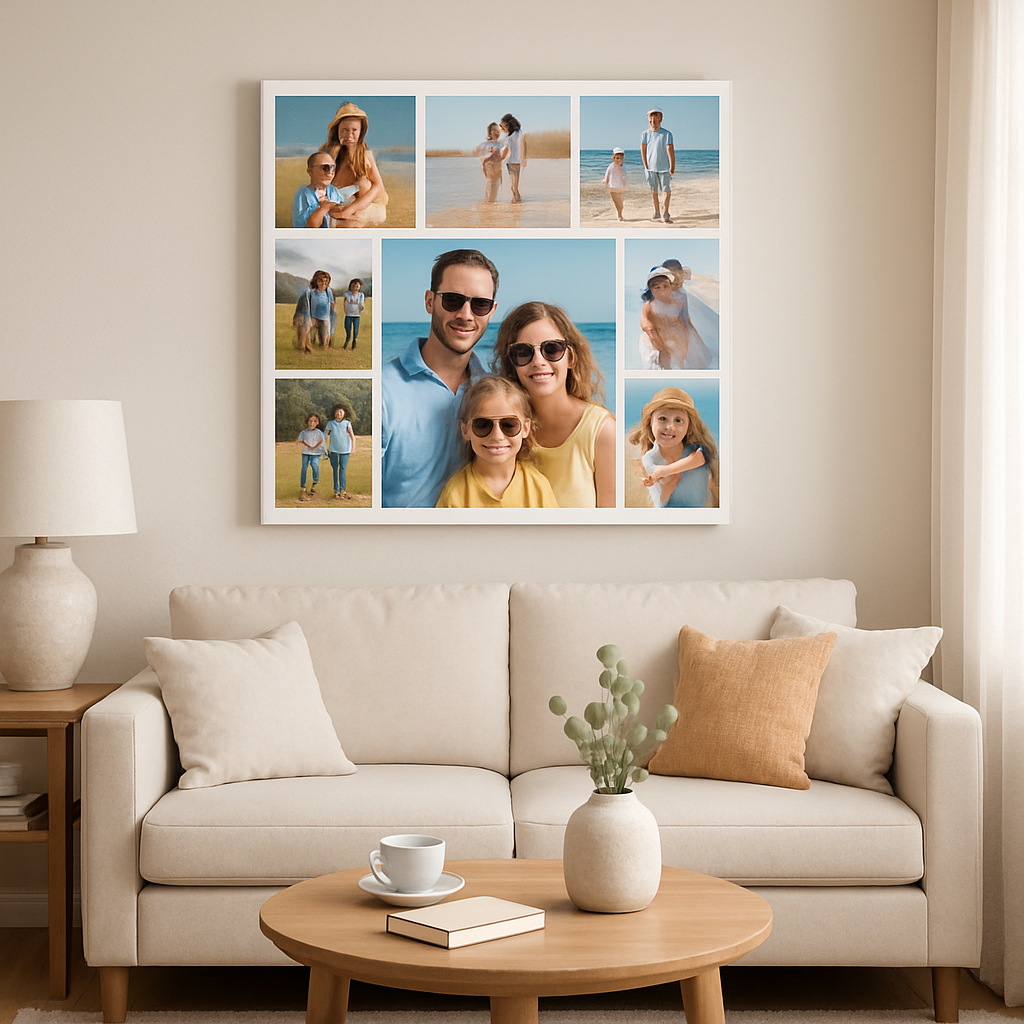
Think of the layout as the storyboard for your memories. A classic grid (3×3 or 4×4) gives equal weight to each image – great for a balanced family story.
If you want a focal point, choose a “central‑focus” layout: place the hero photo in the middle, then surround it with supporting shots. This works beautifully for a wedding collage where the ceremony photo anchors everything.
For a romantic gift, a heart‑shaped layout adds an instant emotional cue. Or go playful with a “cascade” layout where images stagger like falling leaves – perfect for a child’s artwork collection.
Actionable checklist – pick your size and layout in 5 steps
- Measure the wall and note maximum width & height.
- Subtract 5‑10 % to determine the canvas footprint.
- Choose orientation (landscape, portrait, square) based on dominant photo orientation.
- Select a layout template that mirrors your story (grid, central‑focus, shape).
- Preview the mock‑up in the design tool, then step back and ask, “Does this feel right?”
Pro tip: If you’re unsure about orientation, upload two versions of the same collage – one landscape, one square – and compare them side‑by‑side. Most design tools let you toggle instantly, saving you a trip back to the measuring tape.
Another real‑world example: Sarah wanted to showcase her garden photos. She measured her sunroom wall (48 in wide) and chose a 36×24 in landscape canvas. Using a panoramic layout, she arranged ten photos so the viewer’s eye sweeps across the blooms, creating a virtual garden walk.
Meanwhile, Mark and Lily turned their anniversary trip into a square 30×30 in canvas. They mixed portrait shots of city streets with landscape shots of sunsets, letting the square grid harmonize the two perspectives.
Remember, the canvas size isn’t set in stone. Many print‑on‑demand services, including heartful.gifts, let you reorder a different size later if you fall in love with the design but need a new fit.
Bottom line: pick a size that honors the wall, pick an orientation that honors your photos, and pick a layout that tells the story you want to share. Once you’ve locked those in, the next step – adding a unifying element – becomes a breeze.
Step 3: Upload Images and Edit
Alright, now that you've nailed the size and layout, it's time to bring your photos into the digital canvas.
Do you ever feel that moment of hesitation when you click “Upload” and wonder if the file is “good enough”? Trust me, that’s normal – and the good news is you’ve got a few simple tricks to keep the process painless.
Pick the right files first
Start by gathering the highest‑resolution versions you have. Most smartphones let you select “Original” size, which usually means 12 MP or more. If a picture sits at 2 MP, it’ll look soft once it’s blown up to canvas size.
Tip: Drag the files into a single folder and rename them in the order you want them to appear. A clear naming scheme (e.g., “01‑beach‑sunset.jpg”) saves you from endless scrolling later.
Upload with confidence
When you drop the folder into the heartful.gifts design tool, the platform automatically checks resolution and warns you about low‑quality images. If you see a red flag, either swap the file for a better version or let the tool upscale it – the results are usually decent, but a crisp original beats any algorithm.
And don’t worry about file format; JPEG and PNG are both accepted. PNG is handy if you’ve already added a transparent background around a portrait.
Edit just enough to shine
Now the fun part: minor tweaks that make each picture pop without turning you into a Photoshop wizard. Most canvas editors have three built‑in sliders – brightness, contrast, and saturation. A quick nudge of +5 % on brightness can rescue a shadowy sunset, while a subtle boost in contrast adds punch to a flat indoor shot.
Remember the “one‑click rule”: if a single adjustment makes the image look better, go for it. If you find yourself fiddling for ten minutes, you’re probably over‑editing – the collage will look more natural when you step back.
Crop with purpose
Use the crop tool to remove distracting edges – a stray power outlet or a messy background. Keep the aspect ratio consistent with the layout you chose in Step 2. For a grid, square crops work best; for a panoramic spread, stick to the rectangle you selected earlier.
And if you’re mixing portrait and landscape shots, consider a uniform “border” crop (e.g., all images trimmed to 4:5) so the collage feels cohesive.
Add a gentle filter (optional)
Many creators love a light filter that ties the whole piece together. Choose something that mirrors the room’s décor – a warm amber tone for a cozy living room, or a cool teal for a modern office. Apply it to the entire collage rather than individual photos to avoid a patchwork look.
Pro tip: Save a copy of the original upload before you apply any filter. That way you can toggle back if the mood doesn’t feel right.
Preview, tweak, repeat
Hit the preview button and zoom out. Does the collage still tell the story you imagined? Look for gaps where an image feels out of place or a color clash that jars the eye.
It helps to step away for a minute, then come back with fresh eyes – you’ll spot awkward juxtapositions that you missed before. If something feels off, drag‑and‑drop a different photo into that slot; the tool usually lets you swap in seconds.
Final sanity check
Before you click “Order,” ask yourself three quick questions:
- Are all images at least 300 PPI at the final print size?
- Do the colors flow smoothly from one picture to the next?
- Is there a clear focal point that draws the viewer’s gaze?
If the answer is “yes,” you’re ready to lock in your design and let heartful.gifts handle the printing.
And there you have it – uploading and editing your photos is less about perfection and more about preserving the feeling behind each memory. With a few mindful tweaks, your custom canvas photo collage will look polished, personal, and ready to become the centerpiece of any wall.
Step 4: Arrange Photos & Design Layout
Now that your photos are trimmed and the canvas size is set, it’s time to actually place those memories on the digital board. This is where the collage starts feeling like a story rather than a random stack of pictures.
Pick a layout that tells your story
First, ask yourself: what should the eye see first? A classic grid works like a family album – every picture gets equal weight. If you have one hero shot (maybe the birthday cake or the sunset you fell in love with), a central‑focus layout lets that image become the anchor while the surrounding photos act as supporting characters.
Heartful.gifts offers a few ready‑made templates – grid, heart, cascade, or a simple rectangular panorama. Don’t overthink it; choose the shape that matches the wall space you measured earlier. A square canvas pairs naturally with a balanced grid, while a long landscape invites a panoramic flow.
Play with visual hierarchy
Even in a grid, you can nudge certain pictures to stand out. Drag a photo a little higher, or give it a subtle border in the editor – most tools let you add a thin white or black line. That tiny cue says, “Hey, look here,” without shouting.
Think about size, too. If one image is portrait and the rest are landscape, consider enlarging the portrait a notch. The eye will travel from the big picture to the smaller ones, creating a natural rhythm.
Balance colors and spacing
Colour harmony is the secret sauce. Lay out the images and step back – do you see a jarring clash of neon green next to a muted beige? If so, swap them or apply a gentle filter to the whole collage so the palette feels cohesive.
Spacing matters, too. Most editors automatically add a 2–4 px gap; you can tighten it for a tighter story or widen it for a breezier feel. Remember the breathing room rule you used for the canvas size – a little gap lets each memory breathe.
Quick checklist before you lock it in
- Did you place the focal image in the center or at a natural eye‑draw point?
- Are the dominant colours flowing from one photo to the next?
- Is the spacing consistent across rows and columns?
- Do all images meet the 300 PPI requirement at the final print size?
- Have you previewed the collage at full size and at a small thumbnail to catch any awkward juxtapositions?
| Layout Option | Best For | Key Note |
|---|---|---|
| Classic Grid (3×3, 4×4) | Balanced family stories | Even spacing; easy to scan |
| Central‑Focus | One hero image with supporting shots | Place main photo in middle; use borders for emphasis |
| Shape (Heart, Cascade) | Romantic or playful themes | Match shape to wall space; may need extra cropping |
When you’re happy with the arrangement, hit “Save” or “Export”. Most platforms let you download a low‑resolution preview – open it on your phone and imagine it on the wall you measured earlier. If it still makes you smile, you’re ready to move on to the final sanity check in the next step.
And remember, arranging photos is less about rigid rules and more about the feeling you want to evoke. Play around, trust your gut, and let the collage become a visual love letter to the moments you cherish.
Step 5: Print, Finish, and Hang
Alright, you’ve just hit “order” and the magic is already on its way. But before you start picturing the collage hanging above the sofa, there are a few practical steps that turn a digital layout into a piece you actually want to live with.
1. Double‑check the final proof
Open the low‑resolution preview you downloaded in the last step. Zoom in until you can see each photo’s edge. Are the borders clean? Do any faces get cut off at the very edge of the canvas? If something feels off, most services let you swap a photo or tweak the crop before the print batch starts.
Pro tip: view the proof on a device with a different screen size – a phone, a tablet, maybe even a laptop. Your brain will notice mismatches that a single screen might hide.
2. Pick a finish that matches your space
Canvas prints usually come in two flavors: a matte semi‑gloss that reads like a photograph, or a glossy “gallery‑wrap” that makes colors pop. If your wall already has a lot of shine (think metal décor or glossy paint), a matte finish keeps the collage from competing for attention. Conversely, a glossy surface can add a subtle sparkle to a muted living‑room.
Think about the room’s lighting, too. Sun‑filled rooms often benefit from matte because glare can wash out the image, while a dimmer hallway might love a little gloss to catch the eye.
3. Protect those colors
Most reputable printers coat the canvas with a protective laminate that guards against fingerprints, dust, and UV fade. Even if you’re not planning to move the piece around, that extra layer is worth the few extra dollars – it’s the difference between a canvas that looks fresh after five years and one that looks tired after one.
If you’re a DIY‑type, you can add a clear acrylic spray at home, but be sure it’s labeled “water‑based” and safe for canvas. A quick test on a scrap piece will save you a disaster later.
4. Ready to hang – what hardware do you need?
Most custom canvas services, including heartful.gifts, ship the canvas with a saw‑tooth back that slides onto a single nail or picture hook. That works fine for anything under 30 inches wide. For larger pieces, you’ll want a “gallery‑rail” system – basically a thin metal strip that distributes weight across two screws, keeping the canvas level.
Here’s a simple step‑by‑step:
- Measure the exact spot where the top edge of the canvas will sit. Mark the center with a pencil.
- If you’re using a single nail, drive it into the stud at the marked point. If you can’t find a stud, a sturdy wall anchor works fine.
- Hang the canvas by aligning the saw‑tooth edge with the nail. Step back and adjust until it’s perfectly level.
- For a rail system, attach the rail to the wall first, then slide the canvas’s back onto the rail’s lip.
And don’t forget the safety net: a small piece of painter’s tape on the back can keep the canvas from slipping while you fine‑tune the height.
5. Real‑world examples
Emily, a new mom, ordered a 36×24 in landscape collage of her baby’s first year. She chose a matte finish because the nursery already had a glossy mobile. After receiving the canvas, she added a simple picture‑hook kit from the hardware store and hung it at eye level. The protective coating saved the canvas when her curious toddler brushed against it during playtime.
Mark and Lily, celebrating their tenth anniversary, went big with a 60×40 in heart‑shaped collage. They opted for a glossy finish to make the sunset hues pop against their dark‑stone accent wall. Because the piece was heavy, they installed a gallery‑rail system that distributes weight evenly – no wobble, no worries.
6. Quick checklist before you step away
- Proofed the final image at 100 % zoom? Check.
- Selected a finish (matte or gloss) that suits the room’s lighting? Check.
- Added a protective laminate or plan to apply one? Check.
- Chosen the right hanging hardware for canvas size and wall type? Check.
- Measured and marked the hanging spot, then hung and leveled the piece? Check.
Once you’ve ticked those boxes, step back, take a deep breath, and enjoy the feeling of seeing your memories turn into a gallery‑ready artwork. It’s the kind of moment that makes all the cropping, color‑matching, and late‑night decisions feel totally worth it.
And if you ever need to swap out a photo later – maybe a new family milestone – most services let you reorder the same size with a fresh layout, so your wall can evolve with your life.
Step 6: Care, Maintenance, and Sharing
Now that your custom canvas photo collage is hanging and soaking up the room’s vibe, the real work begins – keeping it looking fresh for years to come.
Protect the surface right away
Most print‑on‑demand services, heartful.gifts included, coat the canvas with a clear laminate. That thin film blocks fingerprints, dust, and UV fade. If you opted for a matte finish, the laminate still adds a subtle shield without turning the piece glossy.
But what if your canvas arrived without a coat? A water‑based acrylic spray works fine – just test on a scrap piece first. A quick mist every 12‑18 months will keep colors from dulling.
Spot‑check your images
Before you even think about hanging, zoom in on the proof at 100 % and look for stray objects. A tiny power outlet or a child’s hand can ruin the clean look.
If you need a fast way to erase those distractions, the InCollage app’s AI object‑removal tool does the trick in a tap according to its feature list. Upload the cleaned file to heartful.gifts and you’ll avoid a costly reprint.
And don’t forget the edges – the “gallery‑wrap” style means the image continues around the sides. Make sure no important detail sits right at the border, or it’ll get lost.
Mind the environment
Direct sunlight is the silent killer of canvas pigments. If your living room gets a morning sunburst, consider a UV‑blocking window film or hang the piece a few inches below the direct beam.
Humidity can cause the canvas to sag over time. In kitchens or bathrooms, aim for a wall that stays under 60 % relative humidity. A simple hygrometer on the shelf will tell you if you need a dehumidifier.
Temperature swings – think heating in winter, AC in summer – can also stress the wood frame. Keep the room between 65 °F and 75 °F for optimal longevity.
Sharing without breaking the bank
One of the best parts of a custom canvas photo collage is that it tells a story you want to share. Snap a photo of the finished piece on your phone, then post it with a short anecdote: “Our first year together captured in one canvas – the beach sunrise is where we proposed.”
Use the same collage‑making app to create a digital version for social media. You can crop the canvas image to a square Instagram post or a vertical story – the app even lets you add stickers and a caption without messing with the original print file.
Friends love to receive a digital copy, too. Most services let you download a low‑resolution preview; email it to a relative who lives far away and they can order a smaller version for their own wall.
Quick maintenance checklist
- Dust the surface gently with a microfiber cloth every 1‑2 months.
- Apply a fresh coat of acrylic sealant after 12‑18 months if no factory laminate.
- Check for fading or sagging after any major season change.
- Re‑level the hanging hardware if the canvas shifts – a tiny tilt can become noticeable over time.
- Update the digital file if you add new memories; most print‑on‑demand sites let you reorder the same size with a new layout.
So, what’s the next step? Take a moment to admire your work, then set a reminder on your phone to do a quick visual check every few months. A little attention now means your custom canvas photo collage stays a conversation starter for years.
And remember, caring for your canvas is as personal as the memories it holds – treat it with the same love you gave those moments, and it’ll repay you with endless smiles.
FAQ
Got questions about your custom canvas photo collage? You’re not alone – we’ve heard everything from “Can I swap a photo later?” to “What if the colors look dull on my wall?” Below are the answers you’re looking for, plus a few tips you might not have considered.
Can I reorder the same collage size with new photos later?
Absolutely. Most print‑on‑demand services, including heartful.gifts, let you reuse the exact canvas dimensions you chose the first time. All you need to do is upload the updated image set, hit preview, and place a new order. It’s a cheap way to keep the wall fresh as your family grows or milestones happen.
How do I make sure my custom canvas photo collage won’t fade in sunlight?
Sunlight is the silent killer of canvas pigments. Aim to hang the piece out of direct, harsh midday sun. If that’s impossible, look for a UV‑blocking window film or sheer curtain that softens the rays. Most reputable printers already apply a protective laminate, but adding a matte finish can also reduce glare and slow fading.
What resolution do my images need for a sharp collage?
Think 300 PPI at the final print size. In plain terms, if you’re printing a 40×30 in canvas, each photo should be at least 3600×2700 pixels. Your phone’s “Original” setting usually meets this, but double‑check any screenshots or social‑media‑compressed files – they often drop below the needed quality and can look blurry when blown up.
Is it okay to mix portrait and landscape photos in the same layout?
Yes, as long as the template you pick can accommodate both orientations. A grid works best when most images share the same aspect ratio, but a “cascade” or “heart” shape gives you wiggle room to blend portrait and landscape shots without looking chaotic. Just keep an eye on the visual balance – you don’t want a tall portrait stuck next to a wide landscape that throws the eye off.
Do I need special hardware to hang a large canvas?
For canvases under 30 in wide, the built‑in saw‑tooth backing and a single nail or picture hook usually does the trick. Bigger pieces benefit from a gallery‑rail system – a thin metal strip that distributes weight across two screws, keeping the canvas level and secure. It’s a small extra step that saves you from a wobble later.
How often should I clean my custom canvas photo collage?
Dust it gently with a microfiber cloth every one to two months. Avoid harsh chemicals; a dry or slightly damp cloth is enough. If you notice fingerprints or grime building up, a quick wipe with a water‑based acrylic spray (tested on a hidden corner first) will restore the shine without harming the laminate.
Can I add a personal message or sticker without ruining the original image?
Sure thing. Most design tools let you layer text or stickers on top of the collage before you order, leaving the underlying photos untouched. If you want something that only appears on the printed canvas, add it in the editor and lock the layer before exporting. For a digital‑only version you can share online, keep the original file unchanged so you can swap the message later.
Conclusion
We've walked through everything from picking the perfect size to hanging the finished piece, and now your custom canvas photo collage is ready to become the heart of the room.
Remember, the magic starts with a clear story – choose photos that make you smile, arrange them so the eye flows naturally, and give the canvas a finish that matches your lighting.
And don't forget the practical bits: a matte or glossy laminate protects the colors, the right hardware keeps it level, and a quick dusting with a microfiber cloth keeps it looking fresh.
What’s the best part? You can update the collage whenever life adds another milestone. Most print‑on‑demand services let you reorder the same size with a new layout, so your wall grows with your family.
So, what’s next? Grab your favorite memories, head to heartful.gifts, and turn those moments into a gallery‑ready canvas you’ll be proud to show off.
If you’ve enjoyed this guide, share it with a friend who’s hunting for a thoughtful gift – a custom canvas photo collage makes a personal present for birthdays, anniversaries, or just because.
Take a moment now to picture the finished piece on your wall. Feel that excitement? That’s the reward for a little planning and a lot of love.
Happy creating, and may your home be filled with the stories you choose to display.