
How to Create a Personalized Photo Phone Case That Stands Out
Ever looked at your phone and thought, "This could show something I actually love?"
Maybe you have that favorite vacation snap, your kid's goofy grin, or the pet who never stops stealing the spotlight. A personalized photo phone case turns that moment into something you carry around all day, and honestly, it feels like a tiny hug for your device.
We get it—gift‑giving can be stressful. You want something that says, "I see you," without sounding generic. That's why a personalized photo phone case is the sweet spot between practical and sentimental.
Here's what I mean: instead of a bland black case, you get a piece of art that reflects your style. You pick the photo, the layout, even a subtle filter, and the result is a case that's uniquely yours.
Think about the last time you saw a friend's phone covered in a family portrait. Did you feel a flicker of warmth? Maybe you imagined how cool it would be to have that same personal touch for yourself or a loved one.
So, why does this matter? Because everyday items become conversation starters. A personalized photo phone case can spark a quick "Where did you get that?" and lead to a deeper connection.
And it's not just about looks. Modern print‑on‑demand tech means the image stays vibrant, the grip stays sturdy, and the case protects your phone just as well as any standard one.
But here's a little secret: the best designs are the ones that balance clarity and charm. Too busy, and the photo gets lost; too simple, and it feels flat. A little border, a soft matte finish, or a subtle glossy spot can make all the difference.
Now, picture this: you hand a personalized photo phone case to a parent who just snapped their child's first steps. Their eyes light up, and you’ve just given a memory they’ll see every time they answer a call.
Sounds nice, right? The good news is you don't need design skills or a pricey printer. With a few clicks, you upload your picture, preview the layout, and order a case that ships right to your door.
And if you're wondering about durability, rest assured—most cases are made from shock‑absorbing TPU or polycarbonate, so they handle drops while keeping your photo crisp.
Ready to turn a favorite moment into a daily reminder? Let’s dive in and explore how to create a personalized photo phone case that feels just right for you.
TL;DR
A personalized photo phone case turns a cherished memory into a daily‑wearable keepsake, letting you showcase love while protecting your device.
With a few clicks you upload a picture, choose a simple layout, and order a durable TPU or polycarbonate case that arrives fast, ready to brighten every call today.
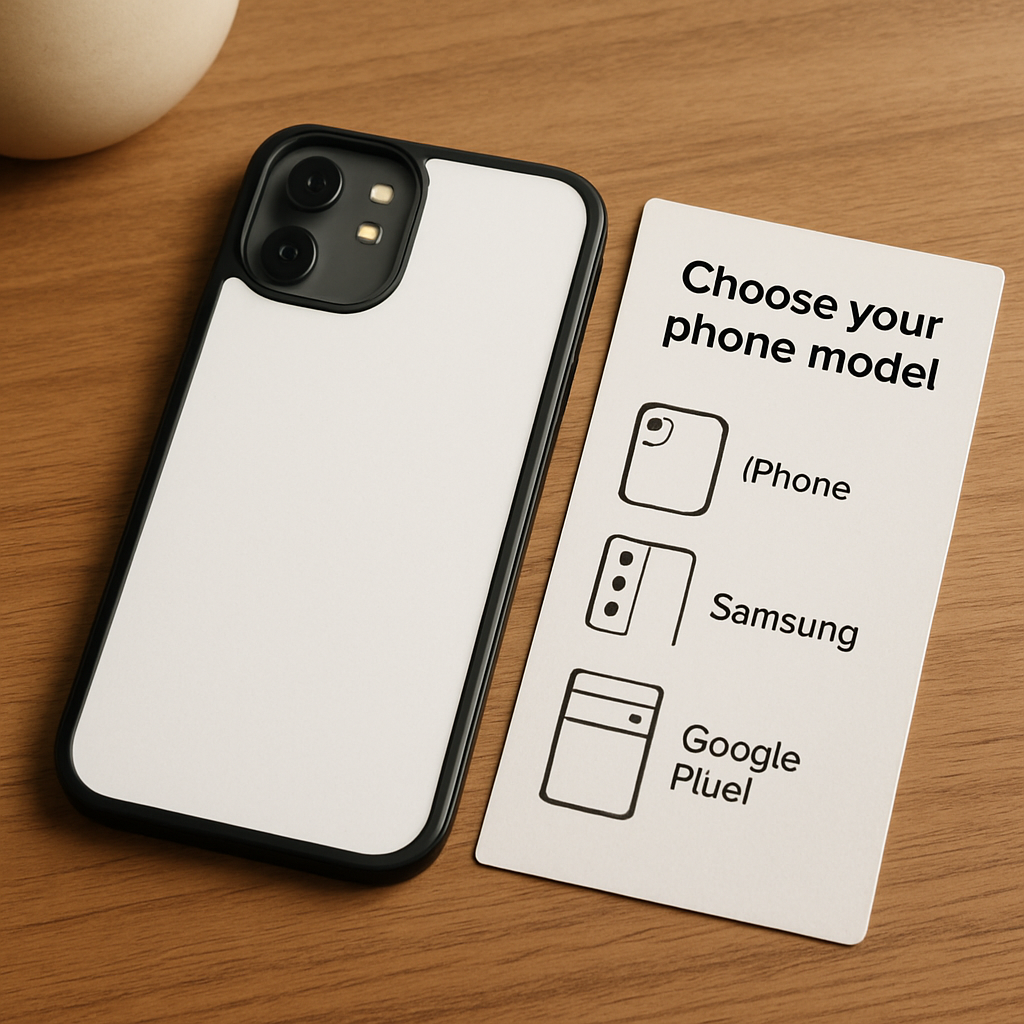
Step 1: Choose Your Phone Model
First thing’s first – you need to know which phone you’re dressing up. It sounds basic, but I’ve seen people try to upload a case design for an iPhone 14 and end up with a Samsung Galaxy silhouette that doesn’t even fit. That moment of mismatch is the kind of hassle we want to avoid right away.
Take a quick inventory of your device’s exact model, including any size variants. For example, Apple splits the iPhone 13 line into Mini, standard, Pro, and Pro Max – each has a slightly different camera bump and button placement. Android manufacturers do the same; a Pixel 8 Pro is not interchangeable with a Pixel 8. Knowing the precise model guarantees the template you pick will line up with the real‑world dimensions.
Why does this matter for a personalized photo phone case? The print‑on‑demand service maps your image onto a digital mock‑up that mirrors the exact cut‑outs for cameras, speakers, and buttons. If you feed it the wrong model, the photo might be obscured by a camera lens or, worse, the case won’t snap on all. A snug fit is key not just for protection but for keeping your picture visible every time you answer a call.
Quick Model Checklist
- Locate the exact model name (e.g., iPhone 13 Pro Max, Samsung Galaxy S24 Ultra).
- Verify the screen size and camera module placement.
- Note any unique features like a raised button or a matte back finish.
- Keep the original packaging handy – the box often prints the full model code.
If you’re unsure, a quick Google search of your phone’s model number (usually printed on the back or in Settings → About phone) will pull up the exact dimensions. Most print‑on‑demand sites, including heartful.gifts, let you filter by brand and model, so you’ll see a drop‑down that matches what you just typed. For a deeper dive on matching your device to the perfect template, check out How to Create a Personalized Photo Phone Case That Reflects Your Style – it walks you through the selection process step by step.
Once you’ve locked in the model, the next decision is material. TPU (thermoplastic polyurethane) feels rubbery, gives a grippy texture, and absorbs drops like a pillow. Polycarbonate is harder, glossy, and shows off photo details with a little extra shine. If you love a matte finish that reduces fingerprints, look for a hybrid blend that combines both. Most providers list the material next to each model, so you can compare without guessing.
Here’s a tip many overlook: consider the case thickness relative to your photo’s detail level. A super‑thin case might showcase vibrant colors but can be prone to warping, while a thicker TPU shell protects the print better and reduces the risk of the image peeling over time. Think about where the case will live – a kid’s backpack calls for extra durability, whereas a sleek office look might favour a slim, glossy polycarbonate.
Finally, double‑check the preview before you hit “order.” Zoom in on the camera cut‑out, make sure the main subject isn’t hidden, and rotate the mock‑up to see how the back looks from every angle. A quick visual audit saves you from receiving a case where the photo is half‑cut or the edges are misaligned.
Actionable step: Grab your phone, write down the exact model name, choose your preferred material, and fire up the design tool. Within minutes you’ll have a virtual prototype that fits your device like a glove and showcases your favorite memory perfectly.
Now that your model is locked in, you’re ready to move on to the fun part – uploading that cherished photo and tweaking the layout. Stay tuned for the next step.
Step 2: Select and Edit Your Photo
Now that you know exactly which phone you’re dressing up, the real fun begins: picking the picture that will become the heart of your personalized photo phone case.
What makes a photo “case‑ready”?
Think about the moments you scroll past on your phone—maybe it’s your kid’s first bike ride, a sunset you chased on a beach, or a goofy pet pose. The best candidates are high‑resolution, well‑lit, and have a clear focal point. If the image looks grainy on a 1080p screen, it will look blurry once printed on the back of a case.
Here’s a quick sanity check: open the photo on your phone, pinch‑zoom to 200 %. If you can still see details—like the texture of a sweater or the sparkle in an eye—then you’re good to go. If it turns into a pixel mush, swap it for a larger file.
Step‑by‑step editing workflow
- 1. Crop to the right aspect. Most cases print a 1:1 square or a slight rectangle. Use the built‑in crop tool and aim for the “phone case” preset if your design tool offers one.
- 2. Adjust exposure and contrast. A little brightness boost and contrast tweak can make colors pop without over‑saturating. PCMag’s phone editing guide walks you through the sliders.
- 3. Remove distractions. Spot‑heal any stray hair, dust, or background clutter. If you’re not comfortable doing it yourself, most online editors have a one‑click “auto‑clean” option.
- 4. Apply a subtle filter. Think of a filter as a light coat of varnish—it should enhance, not dominate. A soft matte finish often reads best on a case because it reduces glare.
- 5. Sharpen the final image. A gentle “unsharp mask” at 25 % strength helps retain detail after the printing process.
And remember: you can always preview the edited photo in the case mock‑up before you hit “order.” If the edges look cut off, go back and tweak the crop.
Real‑world examples
Take Maya’s story from the previous step: she chose a beach photo that was technically high‑resolution, but the horizon line was right at the edge of the frame. When the case printed, the bottom of the sky was sliced off. The fix? Re‑crop so there’s at least a quarter‑inch buffer on every side, then re‑upload.
On the flip side, Alex used a portrait of his dog playing in the snow. He followed the steps above, added a slight cool‑tone filter to match the winter vibe, and the final case looked like a tiny window into that moment. He even noticed that the reinforced corners protected his phone during a desk fall—proof that a well‑chosen photo doesn’t sacrifice durability.
Pro tips from the pros
According to a discussion on the Shopify community, designers recommend using images that are at least 1500 × 1500 px. Anything smaller can cause pixelation, especially on larger phone models like the iPhone 15 Pro Max.
Another insider secret: if you plan to add text or a quote, leave extra “negative space” in the photo where the lettering won’t obscure key details. This is why a simple background—like a blurred sky or a plain wall—works wonders.
Quick checklist before you upload
- Resolution ≥ 1500 px on the shortest side.
- Clear focal point, no heavy background clutter.
- Crop with at least 0.5 in buffer around edges.
- Adjusted exposure, contrast, and a subtle filter.
- Final sharpen and preview in the mock‑up.
Once you’ve ticked those boxes, you’re practically done. The next step will be the actual printing and ordering, but that’s a story for the next section. For now, enjoy the feeling of turning a beloved memory into something you’ll hold in your hand every day.
Step 3: Compare Material Options
Alright, you’ve picked the perfect photo and you know your phone model inside out. The next decision feels a bit like choosing a frame for a painting – it can change the whole vibe. Which material will make your personalized photo phone case look great, feel solid, and survive the inevitable drops?
Silicone – the soft‑touch buddy
Silicone cases are flexible, gripy and give a nice shock‑absorb feel. Think of it as a rubbery hug for your phone. Because they’re stretchy, they slide on and off with almost no effort, which is handy if you swap cases often. The downside? They can attract fingerprints and sometimes feel a little “squishy” under the camera bump.
For a family portrait or a pastel‑toned beach shot, silicone’s matte surface reduces glare, so the image stays true to life even in bright light. Learn more about silicone’s properties.
Polycarbonate (PC) – sleek and sturdy
Polycarbonate is a hard plastic that’s lightweight yet surprisingly tough. It’s the go‑to for many custom‑printed cases because the smooth surface takes ink or UV printing like a champ, delivering crisp colors. If you love a glossy finish that makes your photo pop, PC is the winner.
The trade‑off is a bit of rigidity – you can’t bend it around corners, so installation can feel like a tiny puzzle. Also, PC can feel a little slippery, so you might want a textured back or a grip add‑on.
Check out the material’s durability stats in this overview of polycarbonate.
TPU – the best of both worlds
Thermoplastic polyurethane (TPU) blends the softness of silicone with the strength of hard plastic. It bends enough to snap over your phone, yet it resists scratches and offers decent shock absorption. Many designers label TPU as “flex‑hard” – it’s flexible until you apply pressure, then it stiffens.
If your photo has fine details, like the texture of a woven blanket, TPU’s slight matte finish helps keep those details sharp without extra glare.
Leather and wood – premium vibes
Leather cases give a luxurious feel and develop a patina over time, which can make your photo look like it belongs in a gallery. They’re great for formal gifts, but they’re less resistant to water and can scratch more easily. Wood cases bring an eco‑friendly, natural look. A wooden grain can complement a nature‑themed picture, yet you’ll need to be careful with humidity.
How to choose the right material for your story
Step 1: Think about daily use. If you’re always in a rush, silicone’s grip and easy removal might be a lifesaver. If you want a sleek, showroom‑ready look, PC is your friend.
Step 2: Match the material to the photo’s mood. A bright, high‑contrast selfie shines on glossy PC, while a soft, pastel landscape looks more natural on matte TPU or silicone.
Step 3: Consider protection level. For kids or clumsy hands, go for TPU or a hybrid case that adds a hard back and a soft bumper.
Quick decision checklist
- Do you need maximum grip? → Silicone.
- Do you want vivid, glossy colors? → Polycarbonate.
- Do you crave flexibility plus durability? → TPU.
- Are you gifting a premium, tactile experience? → Leather or wood.
- Will the case see a lot of drops? → Choose TPU or a hybrid with reinforced corners.
| Material | Pros | Cons |
|---|---|---|
| Silicone | Soft grip, easy on/off, good shock absorption | Fingerprints, can feel squishy |
| Polycarbonate | Lightweight, sharp print, glossy finish | Less flexible, can be slippery |
| TPU | Flexible yet sturdy, matte surface, decent protection | May feel slightly thicker |
Now that you’ve scoped the options, pick the material that matches both your style and the way you treat your phone. Once you’ve decided, you’ll be ready to move on to the printing stage, where your chosen image finally meets the case you just selected. Happy customizing!
Step 4: Design Layout and Add Text
Now that you’ve nailed the material, it’s time to turn that blank case into a visual story. Think of the layout as the stage – you want the photo to be the star, but a little supporting text can give it context and personality.
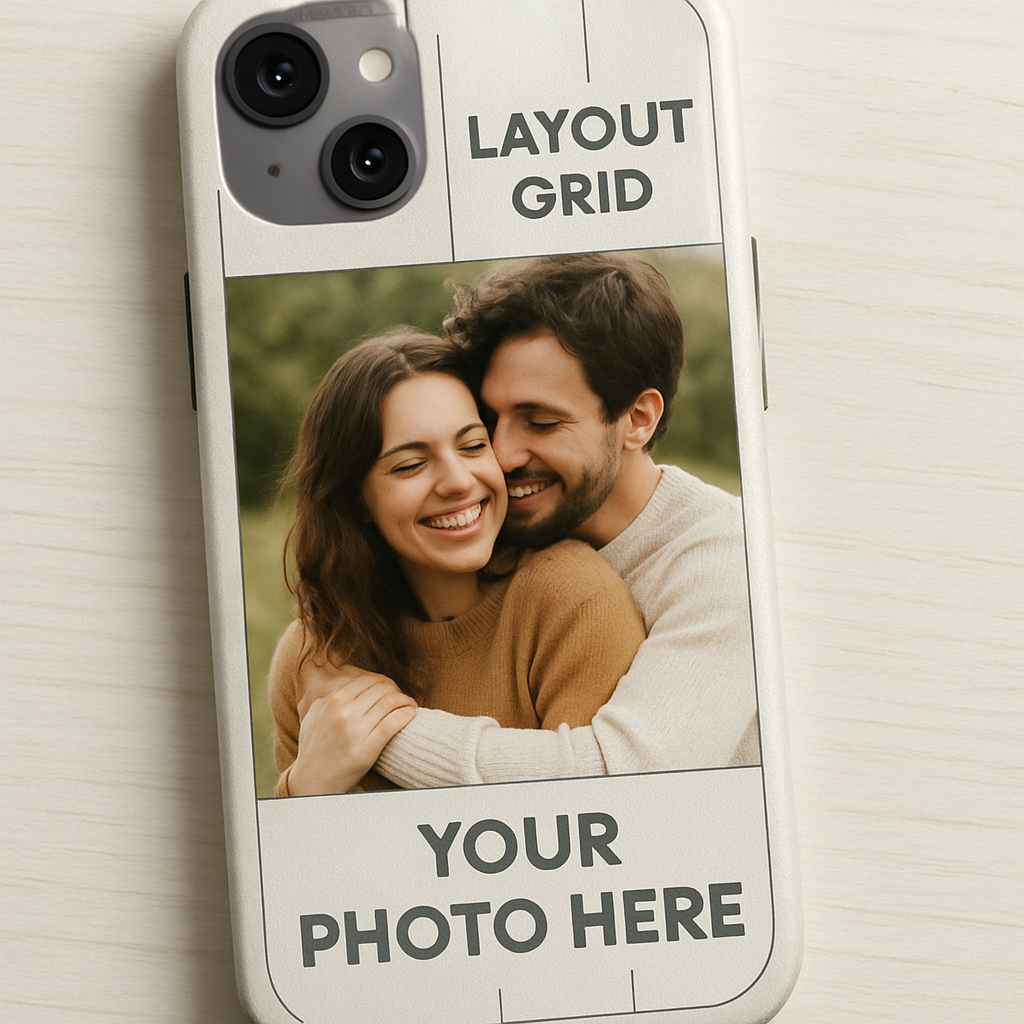
Pick a layout that works with your image
Start by opening your design tool’s canvas. Most platforms give you a square or slightly taller rectangle that matches the back of the case. If you’re feeling fancy, enable a simple grid (3‑by‑3 is a classic).
Place the focal point of your photo in one of the grid’s “power spots” – usually the centre or the upper‑right third. This follows the rule of thirds, which helps the eye flow naturally across the design.
Real‑world example: Maya’s beach photo had the sun low on the horizon. She shifted the image up a notch so the sun landed on the top‑right intersection, leaving room for a short quote at the bottom.
Add text that enhances, not overwhelms
Text can be a name, a date, or a tiny mantra. Keep it short – five words or fewer works best on a case that’s only a few inches wide.
Choose a font that matches the vibe. A handwritten script feels intimate for a family photo, while a clean sans‑serif reads better on a sleek polycarbonate case. Typography basics remind us that contrast is key: light text on a dark background, or vice‑versa.
Actionable steps:
- Type your message, then hit “Enter” to create line breaks instead of cramming everything on one line.
- Set the font size so the text is readable without covering the main subject – roughly 12‑14 pt for a standard case canvas.
- Adjust opacity to 80‑90 % if you want the words to blend softly with the photo.
Pro tip: Use a subtle drop shadow or outline to improve legibility on busy images.
Check readability on a mock‑up
Before you click “order,” preview the design on a 3‑D mock‑up. Rotate the case and zoom in to see if the text stays clear when the phone is held in portrait mode.
If the letters look fuzzy, try these fixes:
- Increase contrast between text and background.
- Move the text to a less detailed area of the photo.
- Swap the font to one with thicker strokes.
Remember, a case sits in the palm of your hand, so the text should be readable at a glance, not only on a computer screen.
Finalize and export
When you’re happy, lock the layers (or flatten the image) and export at 300 dpi PNG. Most printers ask for a file that’s at least 1500 × 1500 px – this keeps your design sharp, even on larger phone models.
Double‑check the file size: under 10 MB is usually safe for most online custom‑case services.
And that’s it – you’ve just turned a cherished photo into a polished, ready‑to‑print personalized photo phone case.
Step 5: Order and Review Production Quality
Alright, you’ve tweaked the layout, picked the material, and hit that glorious "Export" button. Now comes the part that feels a bit like waiting for a pizza delivery—you’ve placed the order, but you still want to make sure it arrives hot and exactly how you imagined.
Double‑check the printer’s specs before you click “Buy”
Every print‑on‑demand service has its own sweet spot for file formats, color profiles, and resolution. Most reputable shops ask for a 300 dpi PNG or a PDF with CMYK colors. If you send an RGB file, the printer will automatically convert it, and that can shift hues by a few points—something you’ll notice when the case lands in your hands.
Pro tip: open the exported file on a different device (maybe a friend's laptop) and zoom in to 100 %. If the edges look crisp and the text isn’t pixelated, you’re good to go.
Pick a shipping method that matches your timeline
Do you need the case for a birthday next week, or is it a “just because” surprise that can wait a month? Most sites give you a choice between standard (5‑7 business days) and express (2‑3 days) shipping. The faster option usually costs a bit more, but it also reduces the chance of the package getting jostled in transit, which can affect a delicate print.
When you’re ordering multiple cases—for a family reunion or a small batch of gifts—look for bulk‑order discounts. Some printers even let you preview a sample before committing to the whole run.
Real‑world example: Maya’s beach‑sun case
Maya chose a silicone case for its soft‑touch feel, uploaded a 3000 × 3000 px sunset photo, and added a short quote in a handwritten script. She ordered one prototype first. The sample arrived in four days, and the colors were vibrant thanks to sublimation printing on the silicone surface. Seeing the quality, she placed an order for 12 more for her friends. The whole process cost her under $15 per case, well within her budget.
Quality‑review checklist (quick scan before you hit “Place Order”)
- File format: PNG or PDF, 300 dpi, CMYK.
- Dimensions: match the printer’s template (usually 1500 × 1500 px minimum).
- Color check: compare on a calibrated monitor vs. a printed swatch.
- Bleed & safe zone: keep text and crucial details at least 3 mm away from edges.
- Proof preview: use the retailer’s 3‑D mock‑up tool if available.
If any of those boxes are unchecked, pause and fix it now—better to spend a few minutes than to receive a case that looks off.
Expert tip: request a pre‑production sample
Even if the service advertises “no‑sample needed,” asking for a single prototype can save you headaches. It’s a cheap way to verify that the material (whether it’s polycarbonate or TPU) holds the ink without smudging and that the finish (glossy vs. matte) matches your vision.
Most printers will charge a nominal fee—often refundable if you proceed with a larger order. Think of it as a quality‑insurance policy.
Final step: place the order and set a reminder to review
When you finally click “Order,” write down the order number, estimated delivery date, and the printer’s return policy. As soon as the case arrives, inspect it under natural light: are the colors true? Is the text readable? Does the case feel solid in your hand?
If something’s off, contact customer support within the return window. Good shops will either reprint or issue a refund, especially when you’ve provided clear screenshots of the issue.
And that’s the last piece of the puzzle—ordering, waiting, and confirming that your personalized photo phone case truly lives up to the story you built around it. Once you’ve got that perfect case in hand, you’ll feel the same pride every time you pull out your phone.
Step 6: Care and Maintenance Tips
Why maintenance matters
Even the most stunning personalized photo phone case can lose its charm if you treat it like a paper napkin. A little routine care keeps the colors vivid, the grip solid, and the case looking like it just left the printer.
So, what should you do the next time you spot a fingerprint or a speck of dust?
Quick‑wipe routine (under 2 minutes)
- Grab a microfiber cloth – the same one you use for glasses. It’s soft enough not to scratch the surface but strong enough to lift oil.
- Lightly dampen the cloth with water or a 50/50 mix of water and isopropyl alcohol (no more than 70%). Avoid soaking the case.
- Wipe in gentle circles, focusing on the back where your photo lives. Don’t forget the edges and the camera cut‑out.
- Let it air‑dry for a minute before slipping the phone back in.
That’s it. A daily swipe can prevent grime from turning into a permanent haze.
Deep‑clean session (once a month)
If you’ve been using the case for a few weeks, give it a deeper clean. Fill a bowl with lukewarm water, add a drop of mild dish soap, and submerge the case for 30 seconds. Gently agitate, then rinse under running water.
For stubborn spots, dip a soft‑bristled toothbrush into the soapy water and scrub the textured corners. Rinse again, pat dry with a lint‑free towel, and let it sit upright to fully dry.
According to CNET's guide to cleaning phone cases, this method works for silicone, TPU, and polycarbonate without damaging the printed image.
Protecting the photo from UV fade
Sunlight loves to bleach colors, especially on glossy finishes. If you know you’ll be outdoors a lot, consider these tricks:
- Store the phone in a shaded pocket when you’re not using it.
- Apply a thin layer of clear UV‑resistant spray (make sure it’s safe for plastics) once every six months.
- Choose a matte finish if you’re prone to glare; matte inks tend to reflect less UV.
One of our customers, Alex, switched from a glossy to a matte TPU case after noticing his beach‑sun photo fading after a summer trip. The matte version kept the hues true for another year.
Dealing with scratches
Minor surface scratches are inevitable, but you can soften them.
Try a tiny dab of toothpaste (non‑gel) on a soft cloth, rub gently in a circular motion, then wipe clean. It acts like a mild polishing compound.
For deeper gouges, you might need to replace the case – but most reputable print‑on‑demand shops, like heartful.gifts, offer a quick reprint discount for loyal customers.
What not to do
Don’t toss your case in the dishwasher. The high heat can warp TPU and melt the ink. Also, steer clear of harsh chemicals like bleach or ammonia; they can dissolve the printed layer.
And, please, never use abrasive pads – they’ll turn a beautiful photo into a scratched canvas.
Checklist before you put your phone back in
- Case is completely dry (no moisture near ports).
- Surface is free of visible fingerprints or smudges.
- Edges are intact – no lifted corners that could catch on keys.
- Camera lens opening is clear; wipe the glass separately with a lens‑safe cloth.
Run through this list each time you clean, and you’ll catch any issues before they become bigger problems.
Real‑world example: Maya’s maintenance loop
Maya, who ordered a silicone case with a sunset photo, set a reminder on her phone calendar: “Clean case – Sunday.” She follows the quick‑wipe routine every weekend and does a deep clean at the start of each month. After six months, the colors still pop, and the case feels as grippy as day one.
Final tip – treat it like a memory capsule
Your personalized photo phone case is more than a protective shell; it’s a tiny gallery you carry everywhere. Treat it with the same care you’d give a photo album: gentle cleaning, occasional UV protection, and a backup plan for wear and tear. Follow these steps, and your case will stay vibrant, functional, and ready for the next selfie‑filled adventure.
Need more ideas on keeping your case pristine? Check out The Spruce's detailed cleaning tips for extra tricks that work across all materials.
Conclusion
You've just walked through everything from picking the right material to keeping your case looking fresh for years.
So, what does it all mean for you? It means a personalized photo phone case can be more than a cute accessory—it becomes a tiny memory capsule you actually enjoy using every day.
Key takeaways
Pick a reliable printer, use a high‑resolution image, and double‑check bleed zones. Then set a simple cleaning reminder—quick‑wipe on weekends, deep‑clean once a month.
Remember Maya’s story? A few minutes of care kept her sunset case vibrant for half a year. That’s the kind of low‑effort payoff we’re after.
And if you ever notice fading or a tiny scratch, a dab of toothpaste or a UV‑resistant spray can buy you extra months before you need a replacement.
Does this sound doable? Absolutely. You’ve got the checklist, the habits, and the confidence to order a case that truly reflects your style.
Ready to turn that favorite photo into a case you’ll show off proudly? Grab your design, follow the steps, and let your phone tell your story every time it buzzes.
And remember, a well‑chosen case isn’t just protection—it’s a conversation starter, a daily reminder of the moments you love today.
FAQ
What exactly is a personalized photo phone case?
It’s a protective shell that’s printed with a picture you upload – a family portrait, a pet snap, or that sunset you love. The image is fused onto the material (usually TPU or polycarbonate) so the case looks and feels like a regular one, but every time you pull out your phone you see your memory front‑and‑center. Think of it as a tiny, everyday gallery.
Can I use any photo, or are there size limits?
Most print‑on‑demand shops, like heartful.gifts, ask for a file that’s at least 300 dpi and roughly 1500 × 1500 pixels. That ensures the picture stays sharp when it’s wrapped around the case. If your image is smaller, you’ll end up with pixelation; if it’s huge, the system will downsize it automatically. A quick check in your photo editor – zoom in to 100 % – will tell you if it’s crisp enough.
How do I make sure the photo doesn’t get cut off?
Every case has a “bleed” area – a few millimetres around the edges where the printer can trim safely. Keep the most important parts of your image (faces, text, key details) at least 3 mm away from the outer edge. Most designers provide a template you can overlay, so you’ll see exactly where the camera cut‑out and button holes sit. It’s a tiny step that saves you a lot of disappointment.
Will the photo fade over time?
Ink on TPU or polycarbonate can fade if it’s constantly exposed to harsh UV light. A matte finish helps because it reflects less sun, but you can also spray a clear UV‑resistant coating every six months – just make sure the spray is safe for plastics. In everyday use, a quick wipe with a microfiber cloth keeps the surface clean, which in turn slows down any colour loss.
How do I clean a personalized photo phone case without ruining the image?
Grab a soft microfiber cloth, dampen it lightly with water or a 50/50 mix of water and isopropyl alcohol (under 70 %). Wipe in gentle circles, focusing on the photo area, then let it air‑dry. For deeper grime, soak the case in lukewarm, soapy water for 30 seconds, brush the creases with a soft toothbrush, rinse, and pat dry. Avoid abrasive pads – they’ll turn your masterpiece into a scratchy canvas.
What if the case arrives damaged or the print looks wrong?
Most reputable shops give you a return window – usually 14 days. Inspect the case under natural light as soon as it arrives; check colour fidelity, edge alignment, and any visible scratches. If anything’s off, snap a photo, contact support, and ask for a reprint or refund. Keeping your order number and delivery date handy speeds up the process.
Is a personalized photo phone case a good gift for anyone?
Absolutely. It works for parents who want a picture of the kids, spouses who love a shared travel shot, or friends who cherish a funny meme. Because it’s both functional and sentimental, it feels thoughtful without being overly flashy. Add a short note about why you chose that particular image, and you’ve turned a simple accessory into a heartfelt keepsake.