
How to Create a Custom Embroidered Hoodie That Looks Professional
Everyone knows that the perfect hoodie can turn a chilly morning into a cozy hug.
But have you ever stared at a plain, blank hoodie and thought, “What if this could say something personal, something that actually reflects who I am?”
That tiny spark of curiosity is exactly why custom embroidered hoodie trends are blowing up across gift‑giving circles.
Imagine slipping on a hoodie stitched with a name, a quirky doodle, or a heartfelt message—suddenly it’s not just clothing, it’s a memory you wear.
In this guide, we’ll walk through why a custom embroidered hoodie makes one of the most thoughtful gifts for parents, spouses, or that friend who loves comfort.
We’ll uncover the simple steps to design your own, the little details that turn a basic garment into a keepsake, and how heartful.gifts makes the whole process feel effortless.
Sound good? You’ll discover how to pick the right fabric, choose thread colors that pop, and avoid common pitfalls that leave embroidery looking cheap.
And because we’re all about real‑world tips, I’ll share a quick checklist you can print out before you hit “order.”
Think about the last time you gave a gift that truly surprised someone—maybe it was a photo book or a hand‑made scarf. The joy came from the personal touch, not the price tag.
With a custom embroidered hoodie, that same magic is amplified: a single stitch can capture a joke, a milestone, or a beloved nickname.
So, whether you’re shopping for a birthday, a holiday, or just because, you’ll leave the store (or the website) feeling confident that you’ve chosen something unforgettable.
Ready to turn a simple hoodie into a story you can wear? Let’s dive in.
TL;DR
A custom embroidered hoodie from heartful.gifts turns a simple piece of clothing into a heartfelt keepsake that captures a joke, a milestone, or a nickname in just one stitch.
Follow our step‑by‑step guide to pick fabric, choose thread colors, avoid cheap‑looking errors, and print a handy checklist so you can order confidently and gift a truly unforgettable, personalized hoodie.
Step 1: Choose the Right Hoodie Base
Ever pulled a hoodie out of the closet and thought, “this could be a perfect canvas for a memory, but it just feels… off?” That moment of hesitation is exactly why picking the right base matters.
First things first: the fabric. Most custom embroidered hoodies start with a blend of cotton and polyester—think soft‑touch, durable, and easy on the embroidery needle. A 50/50 mix gives you the warmth of cotton and the wrinkle‑resistance of polyester, which means the stitches stay crisp even after a wash.
So, which fabric should you actually reach for? If you’re gifting a parent who loves cozy evenings, a heavier fleece (around 350 gsm) feels like a warm hug. If the recipient is a college student who’ll wear it to class, a lighter jersey (around 250 gsm) won’t weigh them down. Industry insights suggest that a balanced blend also reduces pilling, keeping your custom design looking fresh.
But wait—does a higher gram weight always mean better quality? Not necessarily. Too thick and the embroidery needle can struggle, leading to skipped stitches. Too thin and the design might stretch or distort. The sweet spot for most hobbyist and gift‑buyer projects sits between 260 gsm and 320 gsm.
Fit is the next secret sauce. Hoodies come in regular, relaxed, and oversized cuts. For a personal keepsake, a relaxed fit usually works best because it gives the embroidery room to breathe without pulling. If you’re aiming for a sleek, street‑wear vibe, the regular cut adds a modern edge. And if you really want to make a statement—say, a bold family crest—go oversized; the extra fabric acts like a blank canvas.
Now, think about the neckline and cuff style. A ribbed cuff is classic and holds the stitch line neatly, while a double‑layered hood adds extra protection for the thread. When you choose a hoodie with a sturdy ribbed hem, you’re also ensuring that the embroidery won’t snag on loose yarn.
Color selection might feel like a design decision, but it’s actually part of the base choice. Darker shades—charcoal, navy, forest green—make bright thread pop, while light greys and whites give a more subtle, vintage feel. Just remember: high‑contrast colors can reveal any slight mis‑alignment, so double‑check your mockup.
One tip many overlook: pre‑wash the hoodie before you order. A quick tumble removes excess shrinkage and sets the fabric’s finish, so the final product fits exactly as you expect. It also helps the embroidery thread adhere better, reducing the chance of fraying later.
Before you hit “add to cart,” glance at the thread‑to‑fabric compatibility chart on the product page. Some specialty threads (like metallics) need a tighter weave to stay in place. If you’re unsure, the team at creative custom wedding gift ideas page often shares a quick FAQ on thread choices for hoodies.
Want a little extra confidence? Check out how other creators talk about fabric performance on real‑world hoodie reviews. Even though the page is a product listing, the comments highlight the difference between brushed fleece and smooth jersey when it comes to stitch clarity.
And if you’re sending the hoodie across the country, thinking about goods in transit cover can give you peace of mind – read more about it here.
Actionable checklist:
- Choose cotton‑poly blend (50/50) for durability.
- Target weight: 260‑320 gsm for optimal stitch quality.
- Pick relaxed fit for most gifts; go oversized for bold designs.
- Select a ribbed cuff and sturdy hem.
- Decide on high‑contrast color for vivid thread.
- Pre‑wash the hoodie to prevent shrinkage.
- Confirm thread‑to‑fabric compatibility.
Once you’ve nailed the base, the embroidery will shine like the memory it’s meant to capture.
Step 2: Design Your Embroidery Artwork
Okay, you’ve got the perfect hoodie fabric waiting. Now it’s time to turn that blank canvas into a custom embroidered hoodie that feels personal, not generic.
Sketch Your Idea First
Grab a napkin, a sketch app, or just a pencil. What image or phrase lives in your head? Maybe it’s a tiny heart, a goofy family doodle, or the name of a beloved pet.
Don’t worry about perfect lines—just get the shape down. You’ll refine it later, but this first doodle helps you see scale and placement.
So, what are you visualizing? A bold logo across the chest? A subtle monogram on the cuff? Write that down; it guides everything that follows.
Turn Your Sketch Into a Digital File
Now we need a file your embroidery machine can read. Most machines use .DST, .PES, or .EXP formats. If you’re new to this, you’re not alone—many creators start with simple tools.
Choosing Software
For hobbyists, Hatch Embroidery’s digitizing tools are praised for being powerful yet easy to learn. They let you import a bitmap or vector, then automatically convert it into stitches.
If you prefer a more hands‑on approach, dadsewinghouse.com’s embroidery digitizing guide walks you through setting up colors, stitch types, and densities manually.
Both options let you preview the design on screen—so you can see if the stitches look too tight or too sparse before you even load the hoodie.
Fine‑Tune Stitch Details
Here’s where the magic happens. Adjust stitch type (satin, fill, or run stitch) based on the texture you want. Satin works great for lettering because it creates a smooth, shiny edge. Fill stitches give depth for larger graphics.
Think about thread count, too. A higher stitch density makes the design pop but can puckering on a thin fabric. Since we chose a 50/50 cotton‑poly blend, a medium density (around 4‑5 stitches per mm) is usually safe.
Tip: run a quick test on a scrap piece of the same fabric. You’ll see if the design lifts the surface or sits flat.
Placement Planning
Measure where the artwork will sit. A common rule: leave at least 2‑3 cm from seams and edges. For a chest logo, center it horizontally and position it about 7‑10 cm below the neckline.
Use a washable fabric marker or a light‑grid template to sketch the outline on the hoodie. This visual cue prevents mis‑alignment when you finally hoop the garment.
Does this feel overwhelming? Take it one step at a time; you’ll get the hang of it quickly.
Check the Color Palette
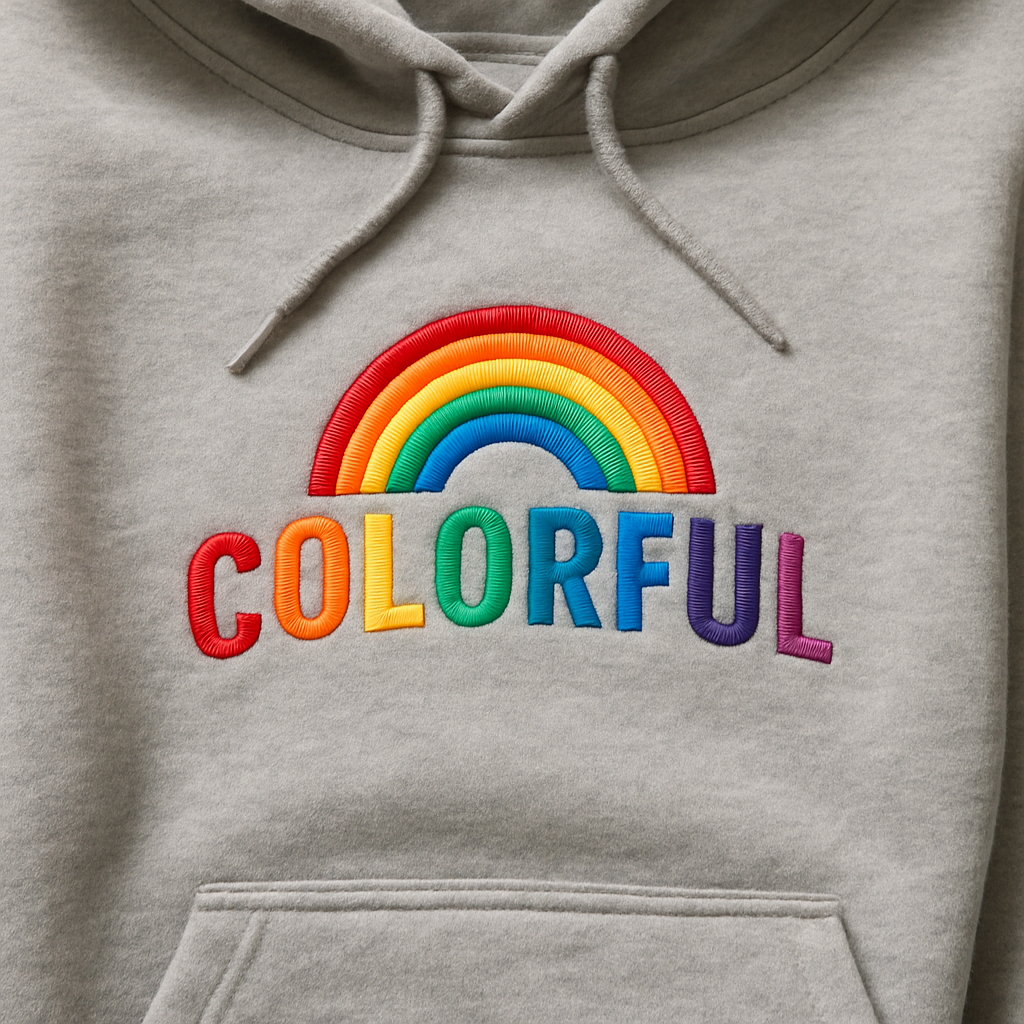
Contrast is king. If your hoodie is dark charcoal, go for bright ivory or neon thread. Light hoodies love deep navy or forest green. Remember, rayon thread gives a glossy finish, while polyester is more durable for wash‑after‑wash wear.
Pro tip: order a small sample swatch of the thread before committing. Seeing the actual shade in daylight avoids nasty surprises later.
Final Checklist Before You Stitch
- Artwork saved in .DST, .PES, or .EXP format.
- Stitch type and density set for the fabric weight.
- Color contrast tested with thread swatches.
- Placement marked on the hoodie.
- Tested a sample on scrap fabric.
Once everything checks out, you’re ready to load the file into your embroidery machine and let it do the work.
Need a visual refresher? Watch the short tutorial below that walks through each step on a real hoodie.
And that’s it—your design is now primed to turn a simple hoodie into a heartfelt keepsake. Ready to hit “stitch” and see your idea come to life?
Step 3: Select Embroidery Techniques & Materials
Now that your design is ready and the hoodie is pre‑hooped, it’s time to pick how you’ll actually stitch it. The choice of technique and thread can make the difference between a “nice” hoodie and a piece that feels truly personal.
What technique fits your design?
If you love crisp, repeatable lines, a basic running stitch or backstitch works great for lettering. For logos with curves, a satin stitch gives that smooth, glossy finish you see on most commercial custom embroidered hoodie prints.
Got a big graphic or a gradient? Fill stitch (also called tatami) lets the machine cover large areas without a patchy look. It’s slower than a simple outline, but the result looks plush and professional.
Prefer a hand‑made vibe? Hand‑embroidery techniques like French knots or split stitch add texture that a machine can’t mimic, especially on a soft fleece.
So, which one feels right for your project?
Choosing the right thread
Thread isn’t just color—its material decides shine, durability, and how it feels against skin. Rayon thread is popular because it catches the light and gives that “high‑end” sheen. Polyester, on the other hand, is tougher for wash‑after‑wash wear, which is crucial for a hoodie you’ll wear often.
A quick look at a recent thread review shows DMC’s rayon floss leads in gloss and color range, while Loops & Threads offers a budget‑friendly alternative that still holds up well after washing according to an independent comparison. If you’re just starting out, you might try the affordable art‑brand floss and upgrade later.
Pro tip: order a small swatch of each color before buying a full skein. Seeing the thread in natural light prevents nasty surprises when you finally stitch.
Machine vs. hand – what’s the trade‑off?
Machine embroidery cranks out designs in minutes, guarantees consistency, and lets you experiment with complex digitized patterns. Hand embroidery, however, is slower, but each stitch carries your personal touch—a subtle selling point for a heartfelt gift.
Read a balanced breakdown of the pros and cons on a craft expert’s site. If you’re gifting a custom embroidered hoodie to a parent or spouse, think about whether they’d value speed or the “hand‑made” story.
Quick material checklist
- Thread type: rayon for shine, polyester for durability.
- Needle size: 75/11 for lightweight cotton, 90/14 for thicker fleece.
- Stabilizer: tear‑away for flat prints, cut‑away for heavy fills.
- Hoop size: just large enough to hold the design without stretching the fabric.
Another factor to weigh is the hoodie’s weight. A lightweight crew feels different than a thick fleece, so you might dial down stitch density for a breezy cotton blend and crank it up for a heavyweight sweatshirt. Adjusting density prevents puckering and keeps the garment comfortable.
Decision table
| Technique | Ideal Thread | Fabric Compatibility | Notes |
|---|---|---|---|
| Running/Backstitch | Polyester | Light cotton, blends | Great for crisp lettering. |
| Satin Stitch | Rayon | Fleece, sweatshirt | Creates smooth, glossy logos. |
| Fill (Tatami) | Rayon or Polyester | Heavy fleece, hoodies | Even coverage for big graphics. |
Take a minute now to match your design’s vibe with the right technique and thread. When you’ve chosen, load the thread, set the stitch type, and you’ll be ready to let the machine (or your own needle) bring that custom embroidered hoodie to life.
Remember, the best results come from a little testing. Stitch a tiny swatch on scrap fabric, check how the thread feels after a wash, then move on to the real hoodie. You’ve got this.
Step 4: Order & Care for Your Custom Embroidered Hoodie
Okay, you’ve picked the perfect thread, set the stitch density, and even tested a swatch. Now it’s time to actually place the order and think about how you’ll keep that hoodie looking fresh for years.
Industry insights note that proper thread choice can extend the garment’s life by months according to equipment providers.
Choosing the right ordering options
First thing’s first: decide whether you want speed or the “hand‑made” story. If the recipient is a busy parent who needs a gift yesterday, many print‑on‑demand shops like Broken Arrow Wear promise an 8‑day turnaround for a custom embroidered hoodie. But if you’ve got a little extra time, you can opt for the slower, cheaper route and maybe even request a sample before the full batch ships.
And don’t forget to double‑check sizing. Hoodies shrink a touch after the first wash, especially fleece. A good rule of thumb is to order one size up if you’re between sizes – you’ll thank yourself when the hoodie fits just right.
Checkout checklist
- Upload a high‑resolution PNG or vector of your design – no blurry logos.
- Select the embroidery placement (chest, sleeve, back) and stitch count.
- Confirm thread type (rayon for shine, polyester for durability) – this matches the advice from the material checklist.
- Pick a delivery speed that suits your timeline.
Does this feel overwhelming? It’s actually a simple list, and most platforms walk you through each step with visual previews.
How to care for your new custom embroidered hoodie
Here’s the part that separates a “nice” hoodie from a “keepsake.” The embroidery itself is pretty tough, but the surrounding fabric can be a bit picky.
1. Turn it inside out. This protects those shiny stitches from rubbing against the washing machine drum.
2. Use a gentle cycle and cold water. Hot water can cause the fabric to shrink and may dull the thread’s sheen.
3. Avoid bleach. Even color‑safe bleach can weaken the fibers over time. If you need to brighten a spot, spot‑clean with a mild detergent.
4. Skip the dryer when possible. Air‑drying flat reduces the risk of puckering. If you must tumble dry, choose a low heat setting and remove the hoodie while it’s still slightly damp.
5. Iron with care. If you need to iron the hoodie, place a thin cloth over the embroidered area and use a low‑heat setting. Direct heat can melt rayon threads.
And one more tip: after the first wash, give the hoodie a quick visual check. If any loose threads appear, snip them with tiny embroidery scissors – it keeps the piece looking crisp.
Long‑term storage tips
When the hoodie isn’t being worn, store it folded rather than hanging. Hanging can stretch the shoulders and pull at the embroidery. A breathable cotton bag works great for keeping dust away without trapping moisture.
If you’re traveling with the hoodie, slip it into a zip‑top bag and avoid packing heavy items on top. This prevents the stitches from getting crushed and keeps the design sharp for the next adventure.
So, what’s the next move? Place your order, follow the care checklist, and you’ll have a custom embroidered hoodie that stays vibrant through countless washes – perfect for gifting a spouse, a proud parent, or even yourself.
FAQ
What’s the difference between a custom embroidered hoodie and a printed one?
When you choose a custom embroidered hoodie, the design is literally stitched into the fabric. It feels a little raised, it doesn’t peel, and it survives endless cycles in the wash. A printed hoodie relies on ink that sits on top of the material – great for vibrant gradients, but that ink can fade, crack, or peel after a few washes. So, if you want something that feels as solid as the hoodie itself, embroidery’s the way to go.
How do I pick the right thread color for my design?
Start by looking at the hoodie’s base color. Light threads pop on dark fabric, and dark threads stand out on light fabric – that simple rule saves a lot of guesswork. Next, think about the mood you want to convey. Warm reds and oranges feel energetic, while cool blues and greens feel calm. And if you’re still stuck, grab a handful of thread swatches from the supplier – holding them up to natural light can be a game‑changer.
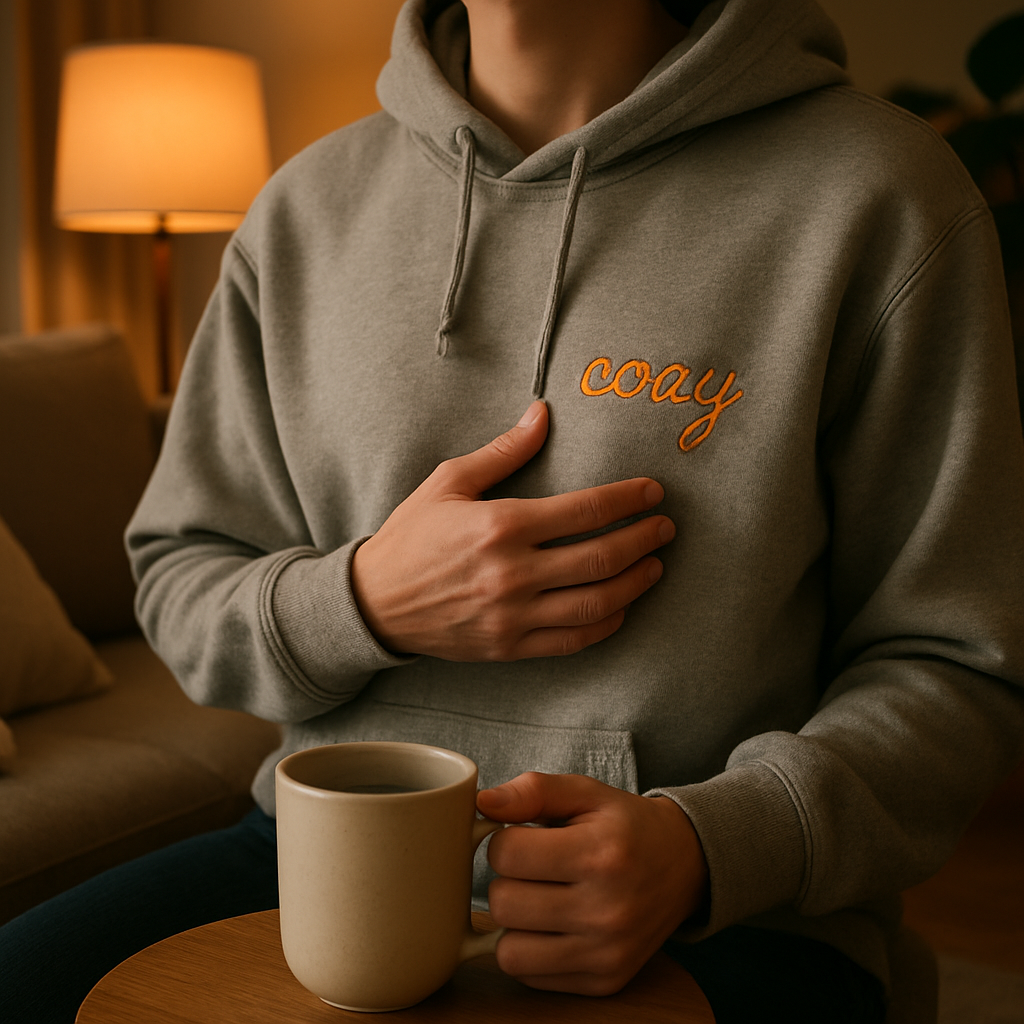
Can I add a personal message inside the hoodie?
Absolutely. Many of us love a little hidden note on the inner chest or along the hem – it’s like a secret handshake just for you. Most print‑on‑demand shops, including heartful.gifts, let you upload a short phrase or even a tiny logo that gets embroidered on the inside. It won’t affect the look on the outside, but it adds a personal touch that makes the hoodie feel truly yours.
What’s the best way to wash a custom embroidered hoodie?
We’ve all had that moment when a new hoodie shrinks in the dryer – avoid that by turning it inside out, using cold water, and selecting a gentle cycle. Toss a thin cloth over the embroidery if you’re worried about friction, and skip the high‑heat setting. Air‑drying is the safest bet; if you must tumble dry, keep it on the lowest heat and pull it out while it’s still a bit damp.
How long does it take to receive a custom embroidered hoodie?
Most print‑on‑demand services need 2‑5 business days to stitch the design, then a day or two for shipping. If you’re ordering for a special occasion, add a buffer – maybe a week total – just in case. And hey, you can always track the order through the confirmation email, so you know exactly where your hoodie is at every step.
Is embroidery safe for kids’ skin?
Yes, most threads used for embroidery are cotton or polyester blends that are hypoallergenic and gentle on skin. The stitches sit on the surface, so there’s no rough edge that could irritate. Just make sure the hoodie is washed before the first wear to remove any residue from the manufacturing process, and you’re good to go.
Conclusion
So there you have it – a custom embroidered hoodie can be both a heartfelt gift and a low‑maintenance wardrobe staple.
We’ve walked through the laundry tricks that keep the stitches crisp, the timeline that tells you when to expect your order, and the skin‑friendly nature of the threads.
Think about the smile on a child’s face when they pull on a hoodie that literally bears their name, or the quiet pride you feel wearing a design you helped create.
And if you’re still wondering whether the effort is worth it, remember: a personalized piece lasts longer in memory than a generic one ever will.
Here’s a quick checklist before you click “order” at heartful.gifts:
- Turn the hoodie inside out, use cold water, gentle cycle.
- Air‑dry or tumble on low heat, pull out while still damp.
- Order 2‑5 business days for stitching, add a buffer for special dates.
- Wash once before first wear to clear any residues.
Ready to turn that idea into fabric? Grab your design, hit the shop, and let us stitch it into something you’ll actually love to wear.
Enjoy the process, enjoy the hoodie, and enjoy the moments it creates.
We can’t wait to see how you make it yours.