
Creating Your Own Simpsons Family Portrait: A Friendly Step‑by‑Step Guide
Ever walked past a living room wall and thought, “What if my family looked like they belong in Springfield?”
That sudden, half‑laughing moment is exactly why a Simpsons family portrait feels so irresistible. It’s not just a quirky novelty; it’s a playful way to capture the chaos, love, and inside jokes that only your crew truly gets.
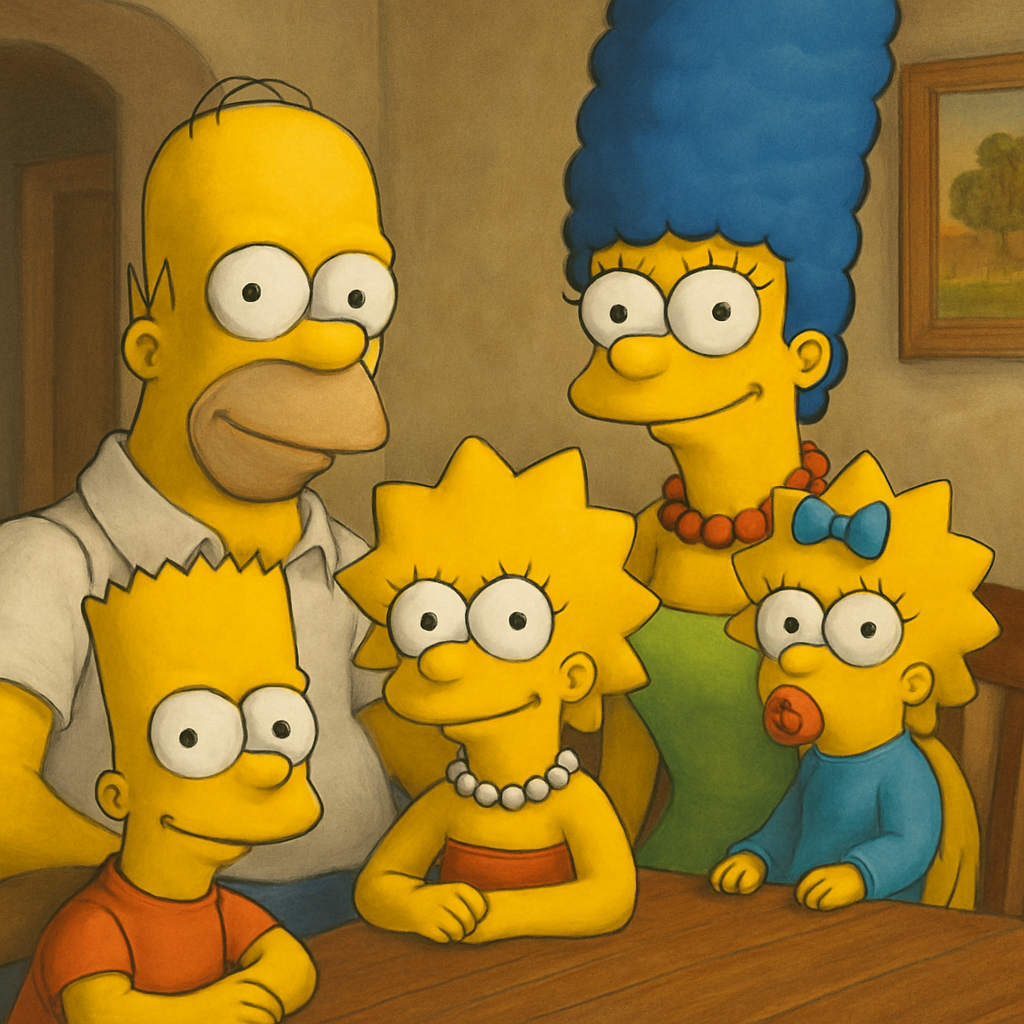
Imagine Homer’s goofy grin, Marge’s towering blue hair, and the kids’ mischievous smirks frozen on a canvas that hangs above the couch. You can picture yourself pointing at it and saying, “Look, that’s us on a Saturday morning” – and instantly, the room lights up with shared memories.
But here’s the thing: turning a regular photo into that iconic yellow‑toned artwork isn’t as hard as you might think. With a few simple steps, you can hand‑craft a custom piece that feels both personal and perfectly animated.
So, what’s the first move? Grab a favorite family photo – maybe the one where everyone’s mid‑laugh or caught mid‑silly pose. Then, think about the style you want: classic Simpsons, a mash‑up with your own color palette, or even a modern twist that still keeps the signature outlines.
And don’t worry about artistic skill. Services like heartful.gifts specialize in taking your snapshot and transforming it into a high‑quality print, ready to hang on any wall. They handle the drawing, color‑matching, and printing, so you just get to enjoy the finished piece.
Feel that flutter of excitement? That’s the same buzz you get when you see a favorite cartoon character come to life – only this time it’s your family stealing the spotlight. It’s a conversation starter, a heartfelt gift, and a reminder that every family has a little bit of cartoon magic.
Ready to bring a bit of Springfield into your home? Let’s dive into how you can create a Simpsons family portrait that feels just right for you and your loved ones.
TL;DR
A simpsons family portrait turns your favorite photo into a bright, yellow‑toned cartoon that instantly sparks smiles and conversation in any room today.
Just upload a snap, choose your style, and let heartful.gifts handle the drawing and printing so you can hang a personalized piece for your family within days.
Step 1: Choose Your Preferred Simpsons Portrait Style
Alright, you’ve already imagined your family strolling down Evergreen Terrace – now it’s time to pick the exact look you want for your Simpsons family portrait. This isn’t just about color; it’s about the vibe you want to capture in your living room.
Do you want that instantly recognizable yellow‑toned canvas that screams classic Springfield, or are you leaning toward a modern twist that still keeps the signature outlines? Let’s break it down so you can decide without second‑guessing.
Classic Yellow Canvas
The original style is the safe bet for most fans. Think bright, flat yellow skin, bold black outlines, and the same cartoon simplicity that made the show a cultural icon. It works great on a square wall‑art piece or a canvas that sits above the couch.
Because the look is so familiar, it instantly sparks conversation – “Hey, is that us on the sofa?” you’ll hear. If you love nostalgia, this is your go‑to.
Custom Color Palette
Maybe you want to keep the Simpsons silhouette but swap the yellow for a hue that matches your home décor. Some services let you choose pastel tones, muted earth colors, or even a full‑color portrait that still respects the line work.
It’s a subtle way to personalize the piece without losing the cartoon charm. Imagine a teal‑skinned family that mirrors your living‑room accent wall – it feels bespoke.
Modern Mixed‑Media Look
For the adventurous, there are hybrid styles that blend watercolor washes, digital shading, or even a comic‑strip layout. These options add depth and texture, making the portrait feel like a piece of contemporary art rather than a flat cartoon.
They’re perfect if you want something that can double as a statement piece and a family keepsake.
So, how do you actually choose? Grab the photo you plan to use, then ask yourself three quick questions:
- What mood am I aiming for? Light‑hearted nostalgia or sleek modern?
- Where will the portrait hang? A bold wall or a subtle nook?
- Do I want the classic yellow that everyone instantly recognises?
If you’re still on the fence, try a side‑by‑side mock‑up. Many services, including heartful.gifts, let you preview each style before you commit. Seeing the classic yellow next to a pastel version can make the decision click.
One tip many customers forget: consider the clothing in your original photo. Bright, solid colors translate best into the cartoon world, while busy patterns can get lost in the outlines.
And remember – you don’t have to lock yourself into one style forever. Some families start with a classic canvas for the living room, then later add a modern, mixed‑media piece for a hallway gallery.
Ready to see all the options laid out? Check out our full step‑by‑step guide for a visual walkthrough of each style, plus tips on how to match your home’s vibe.
Once you’ve picked the style that feels right, the next step is simple: upload your favorite snap and let the artists handle the rest. You’ll end up with a finished piece that feels like it jumped straight out of the TV, yet uniquely yours.
Step 2: Gather Reference Materials and Tools
Now that you’ve zeroed in on the style, the next move is to pull together everything you’ll need before the artist even sees your photo. Think of it as gathering your ingredients before you start cooking – the better the prep, the smoother the final dish.
First up: the source photo. You want a picture that’s sharp, well‑lit, and shows each family member’s face clearly. Natural light from a window works wonders; avoid harsh shadows or flash that can wash out details. If the image is a bit grainy, try the original file or a higher‑resolution version – the AI or illustrator will have more pixels to work with.
Next, decide on a background or color theme that will complement the Simpsons vibe. Some folks love a plain yellow canvas, while others pull colors from their living‑room décor. Grab a swatch or a screenshot of the wall where the portrait will hang; that reference helps the artist match the final print to your space.
Collecting Digital Assets
If you have old printed photos, scan them at 300 dpi or higher. For smartphone snaps, use the “Export‑as‑original” option rather than a compressed version. Save everything as JPG or PNG – PNG preserves transparency if you plan to layer elements later.
While you’re at it, you might want to experiment with an AI‑powered quick mock‑up. The KomikoAI Simpsons Generator lets you upload a photo and instantly see a Simpsons‑style preview. It’s not the final product, but it’s a handy way to test composition and color before you commit to a paid order.
Give each file a clear name, like "family‑laugh‑2024‑highres.png" – that way you won’t waste time hunting for the right image when you upload to heartful.gifts.
Toolbox for the Transformation
Most creators rely on a mix of design software and online services. If you’re comfortable with Photoshop or the free GIMP, you can do minor touch‑ups: crop, adjust brightness, or erase distracting background elements. For those who prefer a no‑install solution, Canva’s background‑removal tool works well enough for a quick clean‑up.
When you’re ready to send your assets to the studio, head over to heartful.gifts and use the preview uploader. The platform will guide you through cropping, adding text, and selecting the exact canvas size. Need a reminder of how the whole workflow fits together? Check out How to Create a Simpsons Family Portrait: Step‑by‑Step Guide for the big picture.
Don’t forget to verify dimensions: most wall‑art prints are offered in standard sizes (30 × 40 cm, 50 × 70 cm, etc.). Aim for a resolution of at least 150 dpi at the final size – that keeps the yellow lines crisp and the facial details sharp.
Finally, create a short checklist before you hit “Submit”:
- High‑resolution source photo (≥300 dpi)
- Clean background or desired backdrop reference
- File saved as JPG/PNG with descriptive name
- Desired canvas dimensions noted
- Quick AI mock‑up for visual sanity check (optional)
Cross‑checking each item will save you a back‑and‑forth with the artist and get your Simpsons family portrait from idea to wall faster than you can say "D’oh!".
Step 3: Sketching and Layout Planning
Now that your photo is cleaned up and you know which Simpsons style you want, it’s time to think about how the characters will actually sit on the canvas.
Sketching isn’t about being an art prodigy – it’s a quick visual cheat‑sheet that tells the illustrator where every head, hand and quirky prop belongs.
Grab a blank sheet of paper or open a simple drawing app (even MS Paint does the trick). Sketch a rough outline of the composition: are you going for a classic family portrait with everyone shoulder‑to‑shoulder, or a playful scene where the kids are mid‑jump?
Here’s a step‑by‑step routine that works for most families:
1. Set up a light grid
Divide the canvas into thirds horizontally and vertically. This gives you a natural “rule of thirds” anchor for eyes and key props.
2. Drop stick‑figure silhouettes
Place a simple shape for each person – big heads, simple torso, a line for the arms. If you have a pet, sketch a tiny paw or tail in the corner.
3. Sketch the background cue
Do you want the iconic living‑room couch, a Springfield street sign, or a custom pastel wall? Draw a box or silhouette where that element will live.
4. Mark special details
Write a tiny note next to the sketch for anything extra – a birthday cake, a favorite hat, that goofy family dog with a bone. The artist will see it right away.
The goal is to give the illustrator a map, not a masterpiece. When you upload your sketch to heartful.gifts, the platform lets you attach a quick comment file, so the artist can see your layout instantly.
Pro tip: if you’re not comfortable drawing, take a photo of the family arranged the way you want and overlay a translucent grid in a free editor like Canva. Then draw simple boxes over each person – you’ve just created a digital sketch without picking up a pencil.
For example, the Johnsons wanted Mom’s garden in the background and the kids holding a soccer ball. They sketched a rectangle for the garden, placed two circles for the kids, and added a small oval for the ball. The final Simpsons portrait captured that exact vibe, and the artist didn’t need to guess where the ball should land.
If you prefer a more formal layout, try a “portrait‑style” orientation: place the parents slightly higher, children below, and keep the eyes at the top third of the canvas. This classic composition works well for wall‑art that hangs above a sofa.
Before you hit submit, run through this quick checklist:
- Sketch with rough shapes
- Identify focal point (usually the eyes)
- Decide on background shape
- Note any props or accessories
- Confirm canvas orientation (portrait vs landscape)
Cross‑checking these items cuts down revision cycles and often trims the turnaround time from a few days to a single day after the artist receives your assets.
Most studios promise a first draft within 2‑3 business days once the sketch is approved, so the faster you clarify the layout, the quicker you’ll see your Simpsons family portrait come to life.
And remember, you’re not locked in – the artist will share a preview. If the placement feels off, just point out the exact box that needs moving. Because you already gave them a roadmap, the fix is usually a quick tweak.
Here’s a quick comparison of the most popular sketching options:
| Sketch Tool | Ease of Use | Best For |
|---|---|---|
| Paper & Pencil | Very easy, no tech needed | Quick brainstorming, low‑tech lovers |
| Free digital app (Canva, MS Paint) | Easy, offers layers & grid | Those who want a tidy, shareable file |
| Pro tablet (iPad Pro + Procreate) | Medium learning curve | Artists who want precise lines and pressure control |
With a clear sketch in hand, you’ve essentially handed the illustrator the blueprint of your Simpsons family portrait. The rest is just letting the artists bring that yellow‑toned magic to life.
Step 4: Digital Rendering and Coloring
Alright, the sketch is on the table and the artist knows where every head and hand belongs – now it’s time for the digital wizardry that turns those pencil lines into the bright, yellow‑toned world of a Simpsons family portrait.
What actually happens behind the screen?
The illustrator opens your layout in Procreate, Photoshop or a vector app and traces clean outlines over your rough shapes. This smooths out jittery strokes and gives each character that signature curve you see on the show.
Next comes the fun part: layering flat colors. Think of it as building a digital cake – a base layer of skin, a second layer for the iconic yellow hue, a third for shadows, and a final glaze for highlights. This keeps the colors vivid even on a large canvas.
Does this sound complicated? Not really. Because the artist follows a repeatable pipeline, you’ll get consistent results whether your portrait is 30 × 40 cm or a massive 100 × 150 cm print.
Choosing the right palette
Most Simpsons portraits stick to the classic palette – bright yellow skin, blue hair for Marge, orange for Bart. If you want a subtle twist, send a swatch or a photo of the wall where the art will hang; the artist can pull a complementary hue and avoid clashing with your décor.
Step‑by‑step: From sketch to final render
1. Vector clean‑up – redraw each outline with crisp, scalable lines so the portrait stays sharp at any size.
2. Base coloring – flat fills are applied: yellow for skin, Marge’s blue hair, Bart’s orange shirt.
3. Shadow and lighting – a soft brush adds subtle shadows under chins, elbows and the couch, giving depth without losing the cartoon feel.
4. Highlights and details – tiny white specks on eyes, a glint on a glass, or a faint texture on clothing. These micro‑details make the portrait pop up close.
5. Background fill – whether you chose a simple gradient or a Springfield street sign, the background is rendered last so it sits neatly behind the characters.
6. Final proof – the artist exports a high‑resolution PNG or TIFF and shares it for a quick sanity check. Minor tweaks (like moving a prop a few pixels) are easy before the file goes to print.
Every step usually wraps up within 1–2 business days after sketch approval, so you won’t be waiting forever to see that yellow‑toned family moment on your wall.
Quick checklist before you give the green light
- Confirm the skin tone matches the classic Simpsons yellow you love.
- Verify the background color or scene you requested is visible.
- Make sure all props (ball, cake, pet) are in the right spot.
- Ask for a low‑resolution preview to catch any glaring mistakes.
- Approve the final high‑resolution file for printing.
And remember, the digital stage is forgiving. If something feels off, just point it out – the artist can adjust layers without redrawing the whole thing.
[IMAGE FAILED TO GENERATE: Error code: 400 - {'error': {'message': 'Your request was rejected by the safety system. If you believe this is an error, contact us at help.openai.com and include the request ID req_616df15d308046b3a08e27dd8997b95a.', 'type': 'image_generation_user_error', 'param': None, 'code': 'moderation_blocked'}}]Once you’ve signed off, heartful.gifts sends the file to their print‑on‑demand partner, who stretches the canvas, adds a pine frame and ships it straight to your door. Before you know it, you’ll be hanging a one‑of‑a‑kind Simpsons family portrait that looks like it leapt straight out of Springfield.
So, what’s the next move? Grab that final proof, give it a quick once‑over, and hit “approve.” Your custom Simpsons family portrait is now just a few days away from becoming the centerpiece of your home.
Step 5: Printing, Framing, and Sharing Your Portrait
From screen to wall
Alright, you’ve just hit “approve” on the high‑resolution file, and now the file is on its way to a print‑on‑demand partner. That’s the moment the yellow‑toned family moment starts to feel real.
Because the art lives on a screen until this point, the first thing you’ll need to decide is what material will hold your Simpsons family portrait. Do you want the soft, gallery‑ready look of stretched canvas, the crisp feel of fine‑art paper, or the ultra‑modern vibe of metal?
Choosing the right print medium
Canvas is a classic choice – it stretches over a wooden frame, hides the edges, and gives the piece a slight texture that makes the flat cartoon pop. If you’re hanging the portrait above a sofa, canvas also absorbs a bit of glare, which is handy in bright living rooms.
Fine‑art paper is thinner, lighter, and works great if you love a sleek, matte finish. Pair it with a simple acrylic or wooden frame and you’ve got a piece that feels more like a traditional photograph, but with that unmistakable Simpsons vibe.
Metal prints are less common for cartoon art, but they offer a glossy, ultra‑sharp look that can make the colors look even more saturated. Just be sure the wall you’re mounting on can support a heavier weight.
Picking the perfect size
Measure the wall space before you click “order.” A quick way to visualise the size is to tape a rectangle on the wall that matches the dimensions you’re considering – you’ll instantly see if it feels too big, too small, or just right.
Most print‑on‑demand services, including heartful.gifts, offer standard sizes like 30×40 cm, 50×70 cm, and larger gallery formats. If you have an oversized wall, go bold – a 100×150 cm canvas can become the centerpiece of a family room.
Framing – not just a box
Even though canvas often comes stretched and pre‑framed with a pine wood edge, you still have options. A simple pine frame adds a warm, natural feel that complements the cartoon’s bright palette.
If you want something a bit more polished, consider a thin black or white acrylic frame. It creates a sleek border without stealing attention from the characters.
For a truly custom touch, ask the printer if they can add a deeper “gallery‑style” frame with a mat board. A white mat will give the portrait breathing room, while a colored mat that matches a wall hue can tie the whole room together.
Shipping and unpacking
Most print‑on‑demand partners ship the piece rolled in a sturdy tube (canvas) or flat in a protective box (paper, metal). When the package arrives, let it sit upright for a few hours – that helps any ink settle and prevents creases.
Unroll the canvas carefully, trim any excess paper, and if you chose a frame, snap the frame onto the edges according to the included instructions. It’s surprisingly easy – think of assembling a flat‑pack bookshelf, but with way fewer screws.
Hanging your new masterpiece
Find a spot at eye level for the main characters – that’s usually around 150 cm from the floor. Use two picture‑hanging hooks instead of a single nail; it distributes weight and keeps the piece level.
And if you’re worried about the wall taking a hit, a small piece of removable command strip can hold the frame while you double‑check placement.
Sharing the joy
Once the portrait is up, don’t keep it to yourself. Snap a quick photo of the hanging piece and share it on Instagram or Facebook with a playful caption like, “Our family finally made it to Springfield!” Tagging @heartful.gifts lets other fans see what’s possible.
Even better, download the original high‑resolution file (if the vendor offers it) and use it as a digital greeting card for birthdays, anniversaries, or just because. A Simpsons family portrait makes a hilarious e‑card that will get more laughs than a typical photo.
Gift‑giving bonus
Because the file is yours once you approve it, you can order additional prints for grandparents, aunts, or even a matching set for your office. A set of mini‑prints on matte paper makes a sweet, coordinated gift bundle.
And if you’re feeling extra generous, include a short note that explains the backstory – “We wanted Mom’s garden in the background, so we sketched a rectangle, and now look at this!” It adds a personal touch that turns a simple wall art piece into a cherished family story.
Quick checklist before you finalize
- Confirm print medium (canvas, paper, or metal) matches your décor.
- Measure wall space and choose a size that feels balanced.
- Select a frame style – pine, acrylic, or gallery mat.
- Check shipping method and allow the piece to rest before hanging.
- Use two hooks or command strips for secure, level placement.
- Snap a photo, share online, and consider extra prints for gifts.
Now you’ve turned a digital sketch into a tangible, laugh‑inducing piece of art that lives on your wall and in your family’s story. Enjoy the reaction when guests spot the yellow‑toned family portrait and realize it’s you, just with a Springfield twist.
Conclusion
So you’ve walked through every step, from sketch to wall, and now the Simpsons family portrait is ready to debut.
Think about the moment guests spot that familiar yellow‑toned family and do a double‑take – that’s the magic we aimed for.
Remember the checklist: pick your medium, measure the space, choose a frame, let the print rest, then hang it level.
If you’re still on the fence, ask: why not turn a simple family photo into a playful pop‑culture piece that sparks conversation?
The truth is, a custom Simpsons portrait isn’t just décor; it’s a story you get to retell every day, and it’s ready in a few clicks.
So go ahead, hit “order” on heartful.gifts, and let the print‑on‑demand team handle the rest – no fuss, no waiting forever.
When it arrives, give it a moment to settle, then find the perfect spot at eye level, and step back to enjoy the grin it brings.
And don’t forget: those extra mini‑prints make thoughtful gifts for grandparents, aunts, or that coworker who loves a good laugh.
Ready to bring Springfield into your living room? Your custom Simpsons family portrait is just a few days away – let’s make it happen.
FAQ
How long does it take to receive a custom Simpsons family portrait?
Most orders are processed within 1–2 business days, then the print‑on‑demand partner ships it out. Depending on where you live, delivery usually lands in 3–7 days for standard shipping, or a bit faster if you upgrade. So you can expect your Simpsons family portrait on your wall in under two weeks from the moment you hit “order.”
Can I customize the background or add personal details?
Yes! When you upload your family photo, the artist can swap the background, add a favorite pet, or even slip in an inside joke like a Springfield landmark. Just jot down the details in the order notes – the more specific you are, the easier it is to bring your vision to life. Most customers find that a tiny personal touch makes the portrait feel truly theirs.
What print materials are best for a Simpsons family portrait?
Canvas, fine‑art paper, and metal each have their vibe. Canvas gives the classic gallery feel and soft texture that makes the cartoon pop without glare – perfect for living rooms. Fine‑art paper offers a sleek, matte finish that’s lighter and easier to frame, great for a hallway or office. Metal prints crank up the color saturation and give a modern shine, but they’re heavier and need a sturdy wall mount.
How do I hang and care for my new portrait?
Start by letting the print rest for a few hours after it arrives – this lets any ink settle and prevents unwanted creases. Then measure the spot, tape a paper outline on the wall, and use two picture‑hanging hooks or command strips for a level fit. Dust the surface regularly with a soft cloth; avoid harsh chemicals, and if it’s canvas, a gentle vacuum brush can lift dust from the back without damaging the fibers.
Is it safe to order multiple copies for gifts?
Absolutely, ordering extra copies is a smart move for birthdays, grandparents, or that coworker who lives for a good laugh. Because the digital file belongs to you once you approve it, you can place additional orders at any time – many customers order a set of mini‑prints on matte paper for a coordinated gift bundle. Just keep the original dimensions in mind so the smaller versions still capture the same detail.
What if I’m not happy with the final artwork?
If the portrait isn’t exactly how you pictured it, don’t panic – most artists offer a few rounds of revisions at no extra charge. Spot any color tweak, character pose, or background detail that feels off, and send a quick note with screenshots or a brief description. Within 24‑48 hours you’ll usually get an updated proof, and you can repeat the process until the Simpsons version of your family feels just right.
Additional Resources
Now that you’ve got the basics down, you might be wondering where to turn for a little extra help or fresh inspiration. Luckily, there’s a handful of places that feel like a friendly neighbor dropping by with a coffee and some ideas.
First, check out fan forums and subreddits dedicated to Simpsons art. People love sharing their own custom portraits, framing tricks, and even DIY mock‑ups you can adapt. It’s a great way to see how others have tackled tricky lighting or quirky background details – and you might pick up a tip you hadn’t thought of.
Inspiration & Ideas
If you’re stuck on a background scene, try browsing the official Simpsons episode galleries. Pick a favorite setting – the couch, the Kwik‑EMart, or the Springfield Nuclear Power Plant – and imagine your family fitting right in. Sketching a quick thumbnail before you order can save you a revision round later.
Need a visual checklist? Pinterest boards titled “Custom Cartoon Portraits” are packed with layout examples, color palettes, and framing styles. Save a few pins, then compare them side‑by‑side when you decide on canvas versus metal or fine‑art paper.
Practical Tools
For those who love a little DIY, free mock‑up generators let you drop your uploaded photo into a pre‑made Simpsons‑style template. You don’t need Photoshop – just upload, tweak the pose, and download a preview to share with family before finalizing.
And don’t forget the power of a simple spreadsheet. List your wall dimensions, preferred frame thickness, and budget range. Seeing everything in one place often reveals the perfect size you hadn’t considered.
Next Steps
When you’ve gathered a few ideas, take a moment to write down the top three details you want the artist to nail – maybe it’s Grandma’s knitting, the family dog’s expression, or a hidden Easter egg. Sending that short note with your order makes the whole process smoother and the final simpsons family portrait feel truly yours.
Finally, keep an eye on seasonal sales or bundle offers on heartful.gifts. A limited‑time discount on extra prints can turn a single portrait into a whole gift set for grandparents, aunts, or coworkers without breaking the bank.