
Creating a Personalized Photo Phone Case: A Step-by-Step Guide
Ever caught yourself scrolling through your phone and thinking, 'I wish my case could actually mean something to me'?
I get that feeling all the time – the bland, generic case feels like a wallflower at a party, while you’re craving something that feels truly yours.
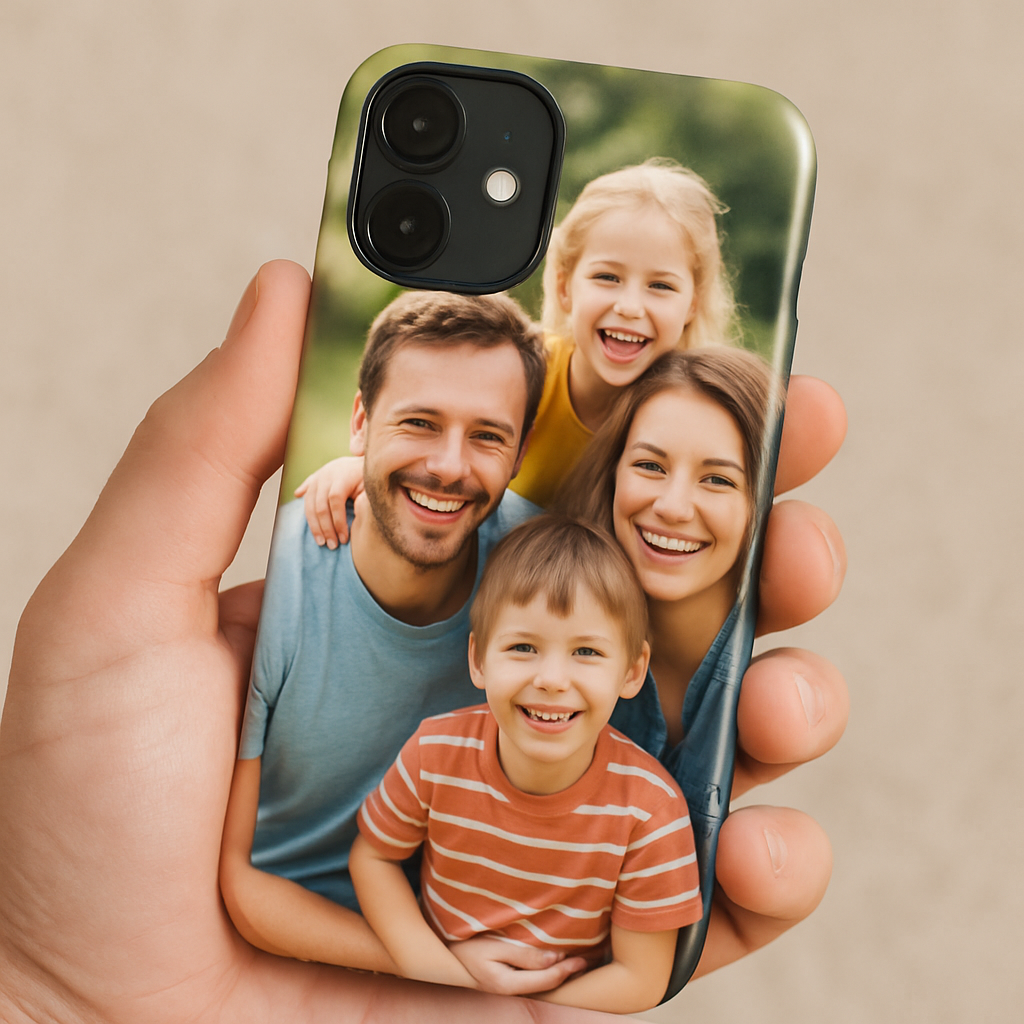
That’s where a personalized photo phone case steps in, turning a simple accessory into a little pocket‑sized memory board.
Imagine snapping a candid of your kids laughing at the beach, then seeing that smile every time you answer a call.
It’s not just about aesthetics; it’s a daily reminder of moments that matter, a conversation starter without saying a word.
But you might wonder, 'Is it really that easy to get a case that looks good and holds up?'
The truth is, modern print‑on‑demand shops make the process as smooth as scrolling through your feed.
You pick your device, upload a favorite photo, choose a material—soft silicone for a gentle grip or hard polycarbonate for sleek durability—and voilà.
The result? A case that feels personal, protects your phone, and sparks joy whenever you glance at it.
And if you’re gifting it, think about the look on a parent’s face when they see their child’s grin right on their phone.
So, whether you’re treating yourself or looking for that heartfelt present, a personalized photo phone case bridges style and sentiment in one tidy package.
Ready to give your phone a story it can wear? Let’s dive into how you can create one that’s uniquely yours.
One trick that many overlook is using a high‑resolution image; the sharper the file, the richer the colors and the less pixelated the final case looks.
And don’t forget to double‑check the placement preview – a tiny shift can turn a perfect smile into a cut‑off ear, so a quick glance before you hit order saves you a re‑print.
TL;DR
A personalized photo phone case turns your favorite memory into a protective, stylish accessory you’ll actually love showing off every day. Pick your device, upload a high‑resolution image, choose silicone or polycarbonate, preview the layout, and order—your phone gets a unique story that feels truly yours and lasting joy everywhere.
Step 1: Choose the Right Phone Model
Before you start hunting for that perfect snapshot, you’ve got to know which phone you’re dressing up. It sounds simple, but it’s the foundation of a flawless personalized photo phone case. If you pick the wrong model, the image could be crooked, the cut‑outs misaligned, or worse—your case won’t fit at all.
So, grab your device and let’s walk through the quick checklist.
Identify Your exact model
First thing’s first: open your Settings > About Phone (or Settings > General > About on iOS). You’ll see the exact model name—something like “iPhone 15 Pro Max” or “Samsung Galaxy S24 Ultra.” Don’t settle for “iPhone 15”; the Pro and Pro Max versions have different dimensions and camera placements.
And if you bought the phone a while back, you can also find the model number on the back of the device or in the original box. A quick Google search of that number will confirm the exact specs.
Does this feel like a hassle? Not really. It only takes a few seconds, and it saves you a costly re‑order later.
Check the case compatibility list
Most print‑on‑demand shops, including heartful.gifts, list the phones they support. Head over to the design a personalized photo phone case that stands out guide—they’ve got a handy table that shows which models are covered.
If your phone isn’t listed, you have two choices: either wait for the shop to add it (many update monthly) or pick a universal snap‑on style that fits a range of sizes. The latter can work, but you’ll lose that snug, precise fit.
Measure the key dimensions
When you’re dealing with a phone that isn’t on the list, measure the height, width, and depth with a ruler or a digital caliper. Write those numbers down.
Then compare them to the case dimensions shown on the vendor’s product page. A difference of more than 0.3 mm on any side usually means a bad fit.
Here’s a pro tip: don’t forget the camera bump. Some cases have a recessed area that needs to match the exact shape of your lenses.
Confirm the material works with your usage
Silicone cases give a soft grip and absorb drops, while polycarbonate offers a sleek, hard feel. If you have a larger phone like the iPhone 15 Pro Max, a silicone case can add a bit of cushioning that the thin polycarbonate might lack.
And if you love that tactile click of a button, make sure the case you choose doesn’t hide the side volume controls—many manufacturers add cut‑outs for this.
External references for specs
When you’re unsure about the exact dimensions, reputable tech sites have detailed spec sheets. For Apple devices, check Apple’s official iPhone 15 Pro specifications. For Samsung, Samsung’s Galaxy S24 spec page breaks down height, width, and camera layout.
These pages are regularly updated, so you’ll always have the latest info.
Quick sanity check before you upload
Once you’ve confirmed the exact model, go back to the case designer and select it from the dropdown. The preview will now snap the photo into the correct outline, showing you where the camera cut‑out and side buttons sit.
Take a moment to zoom in on the preview. Does the smile line up with the top edge? Is any part of the image getting cut off by the camera hole? If you see any red flags, adjust the cropping now—once the case is printed, you can’t move the image.
And that’s it. You’ve nailed the most important step: choosing the right phone model. The rest of the process—uploading your photo, picking a material, and ordering—will flow smoothly because you’ve set a solid foundation.
Ready to move on? The next step is all about selecting the perfect picture that will make your case truly yours.
Step 2: Select Your Photo and Design Layout
Alright, you’ve got the right model locked in – now the fun part begins. Picking the perfect photo is like choosing a memory you want to see every time you swipe, and the layout decides whether that memory feels like a gentle whisper or a bold shout.
1. Feel the moment, then find the file
Think back to the exact instant you want to capture. Is it your kid’s first splash in the pool? A sunset you chased on a road trip? The emotion you feel when you picture that scene will guide you to the best image.
Once you’ve zeroed in, locate the highest‑resolution version. A 300 dpi JPG or PNG is the sweet spot – anything lower will look fuzzy once it wraps around the curve of your case. If your photo lives on your phone, use a cloud backup (Google Photos, iCloud) to download the original file, not a compressed thumbnail.
Pro tip: If you only have a smartphone shot, open it in a free editor like Canva’s photo‑editing guide and bump the resolution up a notch; the tool will keep details intact without making the file huge.
2. Choose a layout that works with the case shape
Phone cases aren’t flat sheets; they curve around the back and have cut‑outs for the camera and buttons. Most print‑on‑demand shops give you a live preview, but you still need a layout that respects those edges.
Here are three go‑to layouts:
- Full‑bleed background: The photo stretches to the edges, and you trust the preview to trim the camera bump. Great for vibrant landscapes.
- Centered portrait: A single subject sits in the middle, leaving a margin around the sides. Perfect for portraits or a single cherished object.
- Collage grid: Combine 2‑4 smaller pics in a clean grid. This works well when you want to showcase a mini‑story (e.g., birthday, vacation, pet).
When you upload, most platforms let you drag the image, zoom in/out, and rotate it. Play with each option for a few seconds – you’ll instantly see which one feels right.
3. Real‑world examples that nail the vibe
Example A – Beach family day: A panoramic shot of the shoreline works beautifully as a full‑bleed. The sand’s texture hides the camera cut‑out, and the horizon stays level because the preview shows a tiny black bar where the lens sits. The result looks like you’re carrying a slice of beach on your phone.
Example B – Baby’s first steps: A close‑up of tiny feet works best centered. The margin around the edges ensures the camera doesn’t obscure the little toes, and the focus stays sharp because the image is high‑resolution.
Example C – Holiday collage: Four square photos (tree lights, gingerbread, family toast, and a goofy pet) arranged in a 2×2 grid give a festive feel without overwhelming the case’s curve. Each square sits safely away from the camera cut‑out.
4. Actionable checklist before you hit “Add to Cart”
Grab a pen or your phone’s notes app and run through this quick list:
- Confirm the file is 300 dpi or higher.
- Choose a layout (full‑bleed, centered, collage) that respects the camera and button cut‑outs.
- Use the live preview to align the key part of the image away from the camera bump.
- Zoom in 150 % on the preview to check for pixelation or unwanted cropping.
- Save the design, then double‑check the tolerance note – most shops allow a ±0.2 mm margin for the cut‑out.
If anything feels off, hit “back” and tweak – it’s way easier than waiting for a printed case that looks half‑done.
5. Expert tip: Sublimation tricks that make colors pop
When you’re using a sublimation‑ready blank (many of our silicone and polycarbonate cases are), the heat press actually embeds the ink into the material. That means you get vibrant, fade‑proof colors. According to a recent HTVRONT walkthrough, setting the press to 275°F for about five minutes and using a “hot peel” ensures the pigments lock in without ghosting.
Even if you order from a print‑on‑demand shop, the same principle applies: a higher‑resolution image and a well‑balanced layout give the sublimation process more ink to work with, which translates to richer hues on your case.
So, what should you do next? Grab that favorite memory, upscale it if needed, pick the layout that makes the photo sing, and follow the preview checklist. In under ten minutes you’ll have a design that feels as personal as a handwritten note – only it’s wrapped around the device you use every day.
Step 3: Pick a Printing Method and Material
Now that your photo is perfectly positioned, the next big question is: how do we actually get that image onto the case? It feels a bit like choosing paint for a canvas, except the canvas is a tiny, curved piece of plastic that lives in your pocket.
Don’t worry – we’ll walk through the most common methods, what each material brings to the table, and how to decide what feels right for you.
Printing methods at a glance
There are four main ways shops print a personalized photo phone case. Each has its own vibe, cost curve, and durability profile.
| Method | Best for | Key pros / cons |
|---|---|---|
| UV digital printing | Full‑color photos, fast turn‑around | Vibrant colors, works on many plastics; ink sits on surface so can scratch over time (see UV printing details) |
| Sublimation (2D/3D) | Photo‑rich designs on light‑colored cases | Ink becomes part of material – excellent fade‑proofing; only works on polyester‑coated blanks (learn about dye‑sublimation) |
| Heat‑transfer printing | One‑off gifts, intricate images | High detail, but each piece needs a separate cut – slower for large runs |
| Screen printing | Simple logos or solid‑color graphics | Great for bulk, limited color gradients; each color needs its own screen |
So, which one should you pick? Think about the photo’s complexity and how long you want the colors to stay bright.
Choosing the right material
Material matters more than you might think. It affects how the print looks, how the case feels in your hand, and even how long the image lasts.
- TPU (soft rubber) – flexible, shock‑absorbent, and holds prints well. The downside? It can yellow after months of sun exposure.
- Polycarbonate (hard plastic) – crisp, glass‑like finish that makes photos pop. It’s slick, so you might add a textured back for grip.
- Hybrid (hard back + soft bumper) – best of both worlds: a rigid surface for sharp printing plus a rubber edge for protection.
When you order from heartful.gifts, you can filter by these materials, then preview how your chosen printing method will interact with them. If you love a matte feel, go TPU; if you want showroom‑shine, polycarbonate is your friend.
And remember: the lighter the case, the less heat it will retain, which can help keep sublimation inks from fading.
Quick decision checklist
- Is your photo high‑resolution (300 dpi +)? If not, boost it before you choose a method.
- Do you need the design to survive daily drops and sunlight? Sublimation gives the toughest bond.
- Are you ordering a single gift or a bulk batch? UV printing is fastest for one‑offs; screen printing shines at volume.
- Which texture do you prefer in your hand? TPU feels rubbery, polycarbonate feels sleek, hybrid feels balanced.
- Check the shop’s tolerance note – most allow a ±0.2 mm cut‑out margin, so your image won’t get sliced off.
If you’re still on the fence, try ordering a sample in each material. Seeing a tiny swatch of UV‑printed polycarbonate next to a sublimated TPU will make the choice obvious.
Bottom line: match the printing method to your photo’s color depth, and pair the material to the way you hold your phone. When they click together, your personalized photo phone case will look as good in the morning as it does after a few weeks of coffee‑spilled commutes.
Step 4: Customize Additional Features
Pick a personality‑boosting add‑on
Now that your photo is snug on the case, you might be wondering – what else can I tack on without turning it into a tech‑gadget Frankenstein?
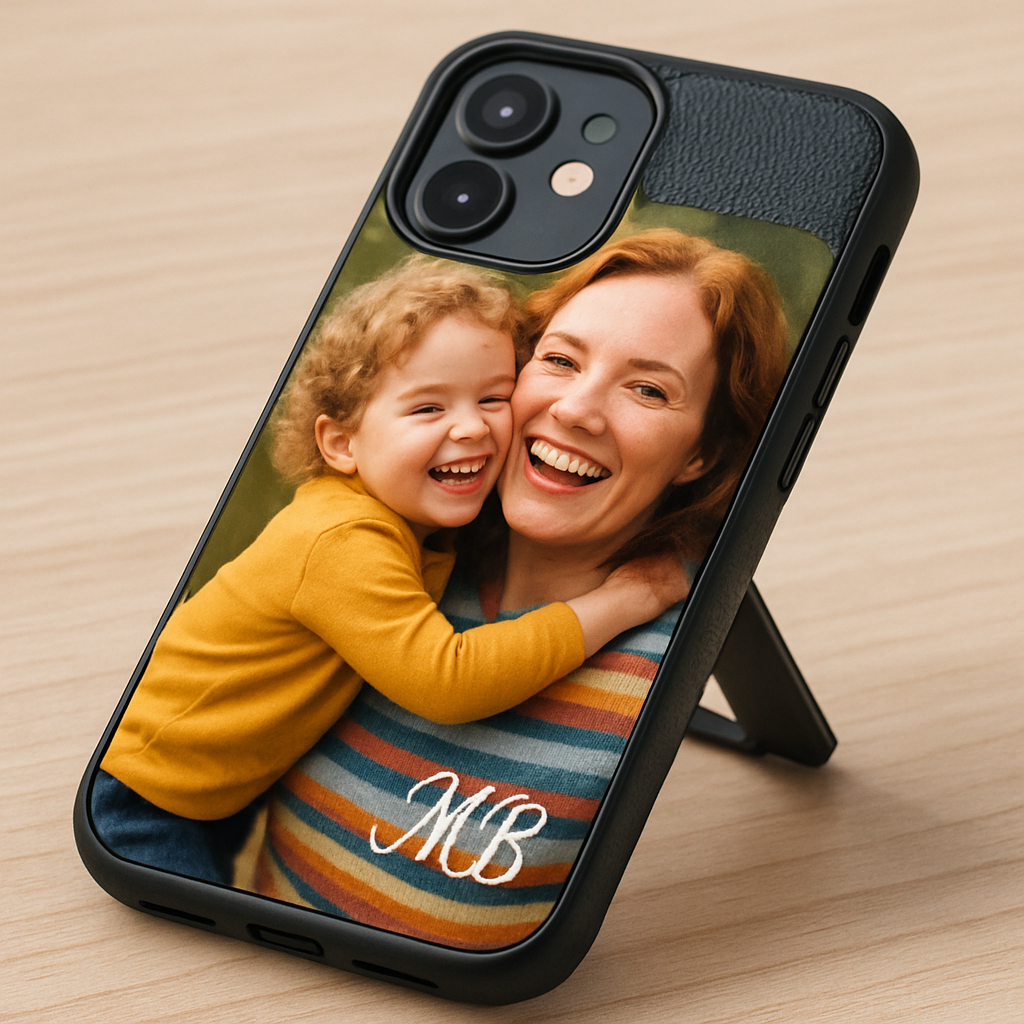
Think of it like adding a splash of seasoning to a favorite dish. A little text, a monogram, or a subtle texture can make the personalized photo phone case feel truly yours.
Do you want your initials in a fancy script? Maybe a tiny heart in the corner? Or perhaps a matte grip that stops your phone from slipping off the coffee table?
Step‑by‑step: Adding text, monograms, and edge accents
1. Open the design tool. Most print‑on‑demand platforms, including heartful.gifts, have a live editor. Drag a text box onto the preview, type your name or a short quote, and choose a font that matches the vibe of your photo.
2. Position with purpose. Keep the text away from the camera cut‑out and button holes. A good trick is to align it with the natural curve of the case – it looks intentional, not an after‑thought.
3. Choose a color that pops. If you used a vibrant beach photo, a muted navy or ivory works better than a neon orange that clashes. Remember, the text sits on top of the print, so contrast matters.
Does that sound like a lot? It isn’t – the preview updates instantly, so you can experiment until it feels right.
Extra features that upgrade the everyday experience
Kickstand. A thin, fold‑out kickstand adds hands‑free video watching. Most TPU or hybrid cases have a built‑in slot; just snap the piece on and you’re good to go.
Wireless‑charging compatibility. If you love the convenience of wireless pads, make sure any added metal plate or thick edge doesn’t interfere. A slim metal ring around the back usually plays nice with Qi chargers.
Grip texture. Some users coat the back with a soft‑touch rubber or a patterned silicone skin. It’s a cheap way to keep the case from sliding off a desk while preserving the photo’s shine on the front.
And what about protecting the photo itself? A clear, anti‑scratch film on the front can guard against fingerprints without dulling the colors.
Checklist before you hit “Add to Cart”
- Is the text readable at a glance? Zoom 150 % in the preview to double‑check.
- Did you keep a safe margin around the camera and buttons?
- Does the kickstand sit flush with the back, or does it wobble?
- Have you confirmed the case still works with your wireless charger?
- Is the edge texture comfortable in your hand during a long commute?
Quick tip: order a single sample with all your extras. Seeing the monogram and grip together on the same case lets you decide if anything feels “off”.
Real‑world example
Emma, a new mom, wanted a case that showed a beach sunrise photo *and* her baby’s name. She added a delicate script at the bottom left, chose a matte TPU back for extra grip, and snapped on a thin kickstand for video‑calls. The result? A case that felt like a mini‑photo album you could actually use while juggling diapers.
Does that spark any ideas for your own design?
Why these extras matter
According to research on UV printing, the ink sits on the surface, so adding a thin protective film won’t affect color vibrancy. Likewise, dye‑sublimation technology embeds pigments deep into the material, meaning edge textures or metal rings won’t cause fading over time.
So, you get both style and durability without compromising the photo’s brilliance.
Ready to make your case truly yours? Follow the steps, run the checklist, and watch your design come alive.
Step 5: Order, Review, and Care for Your Case
1. Place the order with confidence
Now that your photo, text, and any extra features look exactly how you want, it’s time to click that “Add to Cart” button. Before you do, double‑check three things: the device model matches your phone, the resolution is still 300 dpi +, and the preview shows a safe margin around the camera cut‑out.
Most print‑on‑demand shops, including heartful.gifts, let you save a draft. That way you can come back after a coffee break and make sure nothing shifted while you were sipping.
When you’re ready, select your shipping speed (most orders ship within 1‑3 days from the US) and apply any promo code you’ve snagged. Remember, many customers report that choosing the “standard” option still gets their case in 48 hours on average, which is fast enough for a last‑minute gift.
2. Review the proof – your last line of defense
After you submit, you’ll receive an email with a digital proof. This isn’t just a polite copy; it’s the final visual check before the printer starts. Open the image on a full‑screen monitor, zoom to 150 % and look for:
- Any unintended cropping of the photo’s edges.
- Text that becomes blurry or pixelated.
- Color shifts that might happen if the background is too dark for UV printing (learn more about UV printing).
If something feels off, hit the “request change” button. Most services process a revision within a few hours, so you won’t delay delivery.
Real‑world example: Jenna ordered a case with a sunset shot and her dog’s name in script. The initial proof showed the script brushing the side button. She asked for a 2 mm shift, the team updated it, and the final product arrived flawless.
3. Caring for your personalized photo phone case
Once the case is in your hands, a little upkeep keeps the colors popping for years. Here are three proven habits:
- Gentle cleaning. Wipe the front with a micro‑fiber cloth dampened with a tiny amount of mild soap. Avoid abrasive pads – they can scratch the UV‑cured layer.
- Avoid prolonged sun exposure. While dye‑sublimation inks embed deep (see why they resist fading), UV‑printed surfaces can yellow after months of direct sunlight.
- Use a case‑friendly charger. If you’ve added a metal ring for grip, make sure it’s thin enough not to interfere with Qi wireless charging.
Tip: apply a thin, anti‑scratch film on the front if you expect a lot of fingerprints. It’s cheap, removable, and won’t dull the vibrancy.
4. Warranty, returns, and peace of mind
Heartful.gifts backs every case with a lifetime warranty against manufacturing defects. If the print chips or the material cracks under normal use, they’ll replace it free of charge. Keep the order confirmation email – it’s your ticket for any claim.
Because the company plants a tree for each order, you also get a tiny feel‑good bonus: your purchase contributes to reforestation. It’s a subtle reminder that a well‑cared‑for case can last a lifetime, and the planet gets a little greener too.
5. Final checklist before you hit “Place Order”
- Device model matches the case size.
- Image resolution ≥ 300 dpi, no unwanted cropping.
- All added text is readable at 150 % zoom.
- Kickstand or metal ring doesn’t block wireless charging.
- Shipping method selected, promo code applied.
Run through this list once more, and you’ll walk away with a personalized photo phone case that looks great, protects your phone, and tells a story you’ll love showing off.
Need a quick refresher on the whole design journey? Check out our step‑by‑step design guide for extra tips on layout, material choice, and long‑term care.
FAQ
What is a personalized photo phone case and how does it work?
Think of it as your favorite photo turned into a protective shell for your phone. You upload an image, choose any text or monogram, and the printer fuses the picture onto a TPU or hard‑case material. The result is a case that looks exactly like the memory you want to carry around.
Because the print sits on the surface, you still get the original phone’s grip and protection. Most services, like heartful.gifts, let you preview the design in real time before you order.
Can I use any photo for a personalized photo phone case?
Almost any image will work, but a few tricks make it pop. Aim for at least 300 dpi resolution so the details stay crisp, and pick a picture with good lighting – bright, natural light usually translates best.
If the photo has a busy background, consider adding a subtle border or moving the subject away from the camera cut‑out. That way the design doesn’t get lost in the edges.
Will a personalized photo phone case fit my phone’s wireless charger?
Most modern cases are designed to be Qi‑compatible, but there are a couple of things to watch.
Make sure any metal ring or extra grip you add is thin enough not to block the charging coil. And avoid thick metal plates on the back; a lightweight silicone grip usually plays nice with wireless pads.
How durable is the photo on a personalized phone case?
Print‑on‑demand shops typically use UV‑cured ink or dye‑sublimation, both of which are pretty resilient. UV ink sits on top of the case and is sealed with a clear coat, while dye‑sublimation embeds the pigments deep into the material.
In everyday use you’ll notice the image stays vibrant unless you expose the case to prolonged direct sunlight, which can cause slight yellowing over months.
Can I add text or a monogram without ruining the photo?
Absolutely – just treat the text like a design element. Keep it at least 5 mm away from the camera hole and any buttons, and pick a color that contrasts with the background.
Before you finalize, zoom the preview to 150 % and make sure the letters are readable. A short, sweet phrase works better than a long paragraph on a small case surface.
What if the case arrives with a mistake?
Most reputable shops, heartful.gifts included, give you a digital proof before they print. If you spot a cropping issue or blurry text, hit the “request change” button right away.
They usually fix it within a few hours and resend the updated proof. If the final product still has a defect, the lifetime warranty covers a free replacement.
How do I care for my personalized photo phone case so it lasts?
Treat it like any other case: wipe the front with a microfiber cloth dampened with a tiny bit of mild soap. Avoid abrasive pads – they can scratch the protective coating.
Keep the case out of extreme heat and direct sun for long periods, and if you notice fingerprints, a thin anti‑scratch film can be slapped on without dulling the colors. With these simple habits, your case will stay photo‑perfect for years.
Conclusion
So, you’ve made it to the end of our little design adventure, and you’re probably wondering if all that effort really pays off.
Here’s the short version: a personalized photo phone case isn’t just a pretty accessory – it’s a daily reminder of a moment you love, wrapped in protection for the device you can’t live without.
Remember the three checkpoints we walked through? Check the image resolution, keep text clear of the camera cut‑out, and give the proof one last zoomed‑in look. If those boxes are ticked, you’re set for a case that looks crisp and lasts.
And what about care? A quick wipe with a microfiber cloth and steering clear of long‑sun sessions keep the colors vivid for years. Think of it as a tiny habit that protects both your phone and your memories.
Now, what’s the next step? Grab that final design, hit “Place Order,” and let heartful.gifts handle the printing. In a couple of days you’ll have a case that feels like it was made just for you.
Enjoy showing it off, and don’t forget – every case you order also plants a tree, so you’re giving back while you share your story.
Ready to turn your favorite photo into a case? Let’s make it happen.