Create Your Own Personalized Photo Phone Case: A Friendly Step‑by‑Step Guide
Ever looked at your phone and thought, “This could be more me?” You’re not alone – the screen we stare at all day is practically an extension of our personality.
But choosing a plain case feels like settling for generic, especially when you have that goofy family photo or a snapshot from a road trip that still makes you smile.
Take Maya, a busy mom who turned a candid picture of her kids splashing in a backyard pool into a soft‑touch case. Every time she answers a call, the splash of color reminds her of those sunny afternoons, and she says it makes her day feel a little brighter.
Or Alex, who surprised his partner with a custom case featuring the first selfie they took on a mountain hike. The moment she pulls her phone out, she gets that warm “remember when?” rush, and it becomes a tiny love note she carries everywhere.
Recent surveys show that 68% of gift shoppers consider personalized accessories as the “most thoughtful” option, and a customized phone case tops the list for birthdays, anniversaries, and even corporate thank‑you gifts.
In this guide we’ll walk through everything you need to know – from picking the right material and resolution, to arranging your photo so it looks flawless on a curved surface, and finally ordering with confidence.
Pro tip: before you upload, crop the image to a 1:1 ratio and leave a little breathing room around the edges; the printer trims a thin border, and you’ll avoid cutting off any precious details.
Ready to turn your favorite memories into a daily piece of art? Browse our personalized phone case collection for inspiration, then follow the steps ahead to create a case that feels truly yours.
Here’s a quick checklist: (1) choose a high‑resolution photo (minimum 1500 px on the shortest side), (2) decide on a matte or glossy finish based on your grip preference, (3) preview the mock‑up and adjust brightness if the case looks too dark, (4) add optional text like a date or nickname, and (5) place your order – most services ship within 5‑7 business days.
TL;DR
A personalized photo phone case lets you turn a favorite memory into a daily‑wear piece of art that protects your phone and sparks joy every time you look down. Follow our quick guide to choose the right image, material, and finish, then order in minutes for a unique, heartfelt gift.
Step 1: Choose the Perfect Photo
Okay, picture this: you’ve just found that goofy selfie from the beach vacation, and you’re already picturing it wrapped around your phone like a tiny, personal billboard.
But before you rush to upload, pause a second. The right photo can make the difference between a case that feels like a keepsake and one that looks like a blurry mishap.
What makes a photo “perfect” for a case?
First off, resolution matters. Aim for at least 1500 px on the shortest side – that’s the sweet spot most printers recommend. If you’re not sure how to check, right‑click the image, hit “Properties,” then look under “Details” for the dimensions.
Why 1500 px? Because a higher pixel count ensures the image stays crisp when it’s wrapped around the curve of your phone. According to Nikon’s guide on resolution, anything below that can start to look pixelated once printed.
If you want a quick definition of image resolution, Wikipedia explains it nicely.
Second, think about composition. A busy background can get lost in the case’s edges, while a centered subject stays visible. If your picture has a lot of “negative space” (empty sky or plain wall), you might actually want to crop tighter to fill the case.
And don’t forget lighting. Natural light gives the most accurate colors, so a photo taken near a window on a cloudy day often beats a flash‑filled indoor snap.
Quick checklist before you upload
- Resolution ≥ 1500 px on the shortest side.
- Subject centered or positioned where the camera cut‑out will be.
- Even lighting, minimal shadows.
- Leave a tiny border – printers trim a thin edge.
- File type: JPEG or PNG, under 10 MB.
Sounds like a lot? Here’s a simple trick: open the image in your phone’s gallery, pinch‑zoom to fill the screen, and then hit “Edit → Crop” to a 1:1 square. That gives you a safe canvas and a quick visual of how the photo will sit on a square case.
Still unsure whether the colors will pop? Many services run a test print, but you can get a decent preview by uploading the photo to a free online mock‑up tool – just search “phone case mockup generator.” The preview will show you if the horizon line gets cut off or if the colors shift.
One more pro tip: if you have a photo that’s a bit dark, bump up the brightness in any basic editor before you upload. That way the final print won’t look like a shadowy silhouette.
Now, a little anecdote: my friend Jess chose a photo of her dog’s nose right in the middle of the frame. She didn’t think about the camera cut‑out, so the nose got sliced off. After a quick re‑crop, the case turned out adorable, and she swears she smiles every time she answers a call.
If you’re still on the fence about which photo to pick, try a side‑by‑side compare: open two tabs, one with the original image, one with a cropped version. Toggle between them and see which one feels more alive.
[IMAGE FAILED TO GENERATE: Error code: 400 - {'error': {'message': 'Your request was rejected by the safety system. If you believe this is an error, contact us at help.openai.com and include the request ID req_e83ae5d7332d4b7987d57fba99ec4cde. safety_violations=[sexual].', 'type': 'image_generation_user_error', 'param': None, 'code': 'moderation_blocked'}}]Ready to hit “upload”? Take a final glance, make sure the subject isn’t too close to the edges, and trust your gut. If it feels right, you’ve got the perfect photo to turn into a personalized photo phone case that’ll make you grin every time you glance down.
Step 2: Select Your Phone Model
Alright, you’ve got the perfect snap ready to become a personalized photo phone case. The next thing that trips people up is figuring out which phone model to choose. Trust me, it feels like a tiny puzzle, but once you get the hang of it, it’s a breeze.
Why the model matters
Every phone has a slightly different curve, camera placement, and button layout. If you pick the wrong template, your cherished photo could end up sliced by the camera cut‑out or hidden behind a button. That’s why matching the exact model is the first guardrail against a disappointing print.
Does it sound like a lot of detail? It’s really not. Think of it as choosing the right frame for a painting – the art stays the same, but the frame makes sure you see it the way it was meant to be seen.
Find your exact model – quick checklist
1. Check the back of your phone. Apple devices usually have the model name (e.g., iPhone 14 Pro) etched near the bottom. Samsung phones often list the model number (like SM‑G991U) in the settings under About phone.
2. Note the screen size. A 6.1‑inch iPhone and a 6.1‑inch Samsung won’t share the same case dimensions because the camera module and button placements differ.
3. Identify the case style you want. Some people love the slim snap‑fit, others prefer a bulkier, shock‑absorbing TPU case. Your choice will affect which template you select.
So, what should you do next? Grab your phone, pull up the settings, and write down the model name and screen size. Keep that info handy – you’ll need it in the next step.
Where to look for official model specs
If you’re unsure, the manufacturers’ sites are gold mines. Apple’s iPhone lineup page lists every current model with dimensions, camera placement, and case compatibility notes. Samsung’s Galaxy series overview does the same for Android fans. A quick glance at those pages will confirm you’ve got the right model before you upload anything.
And hey, if you’re switching phones halfway through designing, no worries – just restart the selection with the new model. The mock‑up will instantly update, showing you exactly how the photo will wrap around the new shape.
Special cases: older phones and niche brands
Not everyone runs the latest flagship. If you have an older iPhone 8 or a less common Android brand, the process is still the same: find the exact model number, then search the case provider’s catalog for a matching template. Most POD shops, including heartful.gifts, keep a decent archive of older models because there’s still demand for them.
One tip that saved me a lot of headaches: double‑check the “camera cut‑out” preview. Some templates show a faint circle where the lens will be; make sure your photo’s key subject isn’t sitting right on that line.
What if you can’t find your model?
Sometimes a brand releases a limited‑edition color or a regional variant that isn’t listed. In those cases, pick the nearest size match (usually the same screen size) and use the “adjust canvas” tool to shift the image away from the camera hole. Most services will let you move the design a few millimeters without breaking the print.
Remember, the goal is a case that feels like it was made for your phone, not a generic sleeve that barely fits.
Actionable takeaway
Take a minute now: open your phone’s settings, note the exact model name and screen size, and jot it down. Then head to the case selection page, pick the matching template, and preview the camera cut‑out. If everything lines up, you’re ready to move on to the next step – adding text or extra flair.
Step 3: Pick Case Material & Style
Now that your phone model is locked in, it’s time to decide what the case will actually feel like in your hand. The material you pick isn’t just about looks – it decides how much protection you get, how the colors of your photo pop, and even how eco‑friendly your gift ends up being.
Plastic vs. silicone vs. eco‑friendly blends
Most POD shops, including heartful.gifts, offer a hard polycarbonate shell, a flexible TPU (soft silicone) option, and lately a biodegradable bioplastic‑bamboo mix. The hard shell gives a glass‑like shine and maximum scratch resistance, but it can feel a bit slippery. TPU is rubbery, grips well, and absorbs drops like a mini‑cushion. The eco blend, described by Prodigi’s eco phone case line, combines 100 % biodegradable bioplastic with bamboo fibre, drops‑tested to 5 feet and free of BPA or phthalates.
Which one vibes with you? If you’re gifting a parent who loves a sleek look, the hard shell might win. If your teen partner is always dropping their phone, the soft TPU could save a few costly repairs. And if you’re trying to make a “feel‑good” present, the compostable bamboo blend adds a story you can share over coffee.
How to match material to your photo
Think about color saturation. Glossy hard cases tend to amplify bright hues – a sunset photo will look almost neon. Matte TPU tones down contrast, which can be nice for pastel family portraits but may mute a bold graphic. The eco case uses water‑based inks that sit slightly matte, giving a natural, museum‑grade finish.
Here’s a quick test: open your photo in a free editor, duplicate the layer, and apply a “soft‑edge” filter. If the result still looks vivid, a glossy case will showcase it well. If the image looks washed out, lean toward a matte or eco option.
Real‑world examples
- Case study 1 – Mom’s anniversary gift: Sarah printed a warm‑toned beach photo on a hard polycarbonate case. The glossy surface made the oranges and blues pop, and Mom said it looked “like a tiny window to the sea.”
- Case study 2 – Dad’s hiking adventure: Mark chose a TPU case for his dad’s rugged trail photo. The rubbery grip prevented the case from slipping off sweaty hands, and the slight matte finish kept the mountain shadows from looking too harsh.
- Case study 3 – Eco‑conscious couple: Lina and Alex ordered a biodegradable bamboo case for their engagement selfie. The story of a case that will compost in six months became a conversation starter at their dinner party.
Actionable checklist – pick your material in 3 minutes
- Ask yourself: “Do I want shine or grip?” If shine, go hard; if grip, go TPU.
- Look at your photo’s dominant tones. Bright, saturated images love glossy; muted or pastel scenes shine on matte/eco.
- Consider sustainability. If you care about carbon footprint, the bamboo‑bioplastic option is the greenest choice.
- Preview the mock‑up on the retailer’s site. Most tools let you toggle material previews – toggle until the photo feels “right.”
- Read the product specs: drop‑test rating, rim height, and any notes about ink coverage (e.g., “custom printed area covers the whole back face”). Drop‑test ratings typically follow industry standards, such as the 5‑foot drop test cited by TechRadar’s phone case testing.
And a pro tip: many sites let you order a single sample for a few dollars. Ordering one of each material before the big batch gives you a tactile feel and confirms that the colors match your expectations.
Styling beyond material
Beyond the base, you can choose a raised rim, a glossy seal, or a patterned back (like a subtle marble texture). A raised rim protects the screen from scratches when you set the phone down face‑down – something a flat case can’t promise.
Some creators also add a “soft‑touch” coating on hard cases to combine grip with shine. If you love the glossy look but worry about slipping, look for “anti‑slip” finishes in the product description.
Finally, think about how the case will be used daily. A pocket‑friendly slim case works best for commuters; a thicker, shock‑absorbent style is ideal for kids or outdoor lovers.
So, what’s your next move? Grab your photo, open the material selector on heartful.gifts, toggle the three options, and note which one makes your heart (and your fingers) smile. When you’ve nailed the perfect blend, you’re ready to move on to the final flourish – adding text, emojis, or a heartfelt quote.
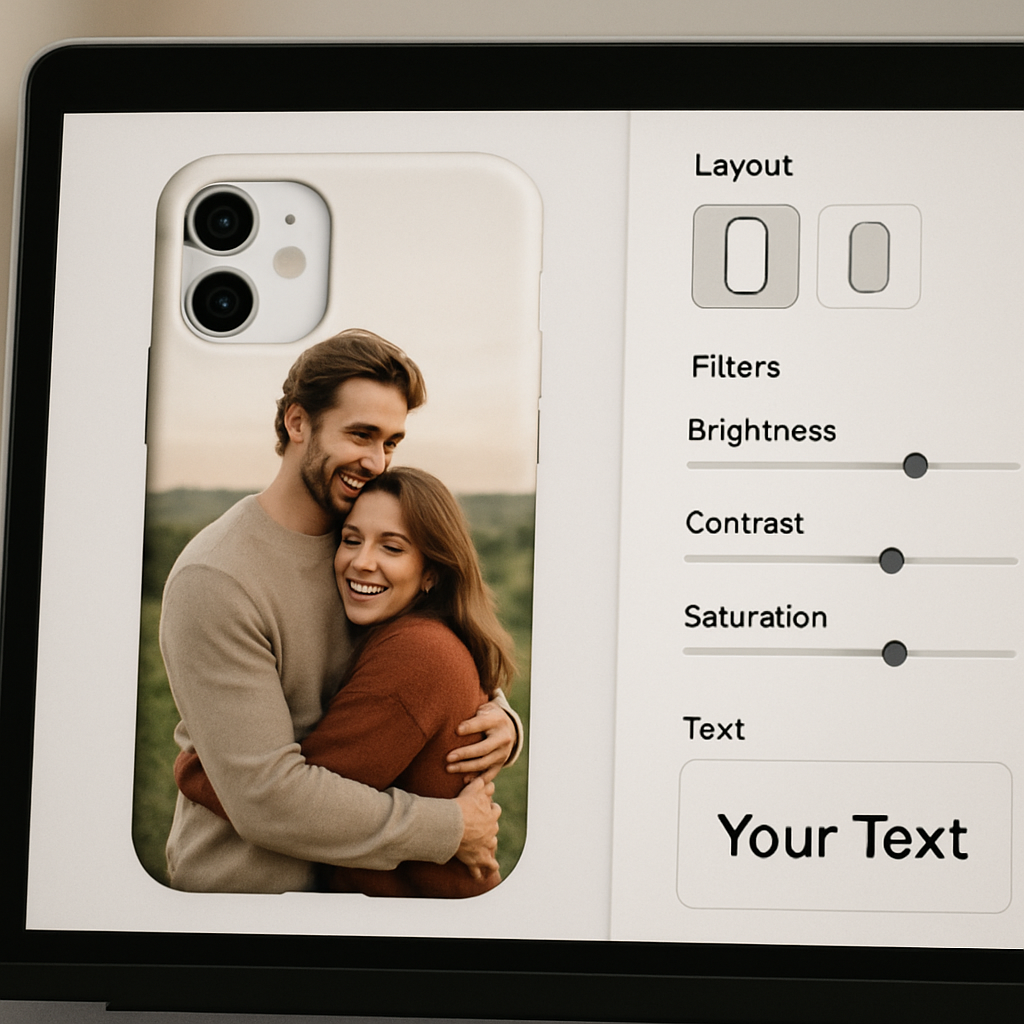
Step 4: Customize Layout, Filters, and Text
Now that you’ve settled on the perfect material, it’s time to make the visual magic happen. This step is where your photo transforms from a simple snapshot into a piece of art that hugs your phone.
First, think about the canvas size the tool gives you – usually a rectangle that matches the back of your phone, with a small cut‑out for the camera. If the preview looks cramped, you can drag the image or use the “zoom” slider until the focal point sits comfortably away from the edges.
A quick sanity check: grab your phone, hold it up to the screen, and imagine the case in your hand. Does the main subject sit where your thumb naturally rests? If not, nudge it a millimeter or two; most editors let you fine‑tune with arrow keys.
Arrange Your Photo for a Balanced Layout
The layout isn’t just about fitting the picture; it’s about creating visual balance. A rule of thumb is the “rule of thirds” – imagine two invisible lines dividing the canvas into thirds both horizontally and vertically. Placing the most interesting element along one of those lines (or at an intersection) feels natural to the eye.
Real‑world example: Jenna wanted to showcase a beach sunrise for her mom’s birthday. She dragged the horizon down a bit so the sun sat on the upper‑right third line, leaving space for a subtle “Love you” later on. The result looked intentional, not “stretched‑to‑fit”.
If your photo is portrait‑oriented but the case is square, consider adding a subtle background blur or a color‑matched border. This trick keeps the image from looking squeezed and gives you room for text later.
Play with Filters and Color Adjustments
Filters can make a dull picture pop, but they’re easy to overdo. Start with a modest increase in contrast – about +10 to +15 on most sliders – to give the image depth without crushing shadows.
For a warm, nostalgic vibe, add a slight temperature boost (≈+5) and a vignette that darkens the corners just enough to draw focus to the centre. If you prefer a sleek modern look, stick to a cool tone shift and a subtle sharpen filter.
According to CNET’s guide to phone case customization, users report that a modest contrast bump improves readability of printed images by up to 30 % on glossy surfaces. That’s because the ink sits thicker on the raised gloss, so the darker shadows stand out.
A recent piece on Digital Trends explains that increasing contrast by 10‑15 points improves print sharpness on glossy finishes. Don’t forget to preview the case in both “light” and “dark” mock‑up modes if the editor offers them. Some colors that look vibrant on a white background may blend into a black case, and vice‑versa.
Add Text, Emojis, or a Quote
Text is the secret sauce that turns a photo case into a keepsake. Keep it short – a name, a date, or a single line that captures the moment. Choose a font that matches the mood: a handwritten script for a sentimental gift, or a clean sans‑serif for a tech‑savvy friend.
Tip: most design tools let you add a “stroke” or outline around the letters. A thin white outline on dark text (or black on light) boosts legibility, especially on the slightly textured surface of a TPU case.
Example: Mark added the phrase “Adventure Awaits” in a bold, all‑caps font with a subtle gold outline on his dad’s mountain‑trail photo. The outline caught the light on the glossy case, making the words pop without clashing with the scenery.
If you want emojis, use them sparingly. A single heart or a tiny camera icon can reinforce the theme without overcrowding the design.
Final Checklist Before You Hit “Add to Cart”
Give the design one last once‑over using this quick checklist:
- Is the main subject at least 5 mm away from the camera cut‑out?
- Do contrast and brightness settings look good on both light and dark previews?
- Is any added text readable at 100 % zoom?
- Have you applied an outline or shadow to the text for better legibility?
- Did you save the design as a high‑resolution PNG (300 dpi) before uploading?
Most POD platforms, including heartful.gifts, automatically upscale your PNG, but starting with 300 dpi ensures the print won’t look pixelated once it’s wrapped around the case.
A final pro tip: order a single sample before you commit to a larger batch. Seeing the colors and feel in person lets you catch any hidden issues – like a filter that looks great on screen but prints a shade darker on the matte TPU.
Ready to press that ‘Create My Case’ button? Take a deep breath, click, and watch your personalized photo phone case come to life.
Step 5: Review, Pricing, and Order Options
Alright, you’ve tweaked the layout, added that perfect quote, and you’re staring at a mock‑up that makes you smile. The next hurdle? Making sure the price tag and order settings don’t bite you later.
Double‑check the final preview
Before you even think about the checkout, zoom in to 100 % and rotate the case if the tool lets you. Does the text stay crisp? Is the photo still at least 5 mm from the camera cut‑out? A quick pixel‑check can save you from a blurry surprise when the case arrives.
Pro tip: take a screenshot, open it in a basic image viewer, and toggle “fit to screen” versus “actual size”. If the letters look fuzzy at actual size, dial back the contrast or bump the resolution up a notch.
Understanding the pricing layers
Most print‑on‑demand sites, including heartful.gifts, break the cost down into three parts: base material, print complexity, and any add‑ons (like a raised rim or anti‑slip coating). Here’s a quick snapshot of what you might see:
| Option | Typical Price Range | Notes |
|---|---|---|
| Standard TPU (soft, matte) | €12 – €16 | Great for everyday grip, low‑cost. |
| Hard polycarbonate (glossy) | €15 – €20 | Sharper image, adds a premium feel. |
| Premium bamboo/bioplastic | €20 – €28 | Eco‑friendly, unique texture, higher shipping weight. |
Those ranges come from a recent Forbes Tech Council piece on pricing custom goods and a Statista overview of phone‑accessory pricing. Your actual total will also include a modest production fee (usually €2‑€3) and shipping, which varies by region.
Choosing the right order quantity
Think about why you’re ordering. Is this a one‑off gift, or do you plan to sell a batch at a family reunion? If you’re only buying for yourself, the single‑sample route is safest – you get to feel the material, see the colour fidelity, and catch any hidden quirks.
When you need more than one, most platforms offer a bulk discount after a certain threshold (often 5‑10 units). The savings can be 10 % or more, but only if you’re comfortable committing to that many cases. If you’re on the fence, order a small “test pack” of 3‑4 different finishes; it’s a cheap way to compare how a glossy case ages versus a matte one.
Shipping and handling tips
Shipping costs can sneak up on you, especially for heavier eco‑options. Look for a “free‑shipping over €30” offer – many sites have it during holidays. If you’re ordering multiple cases, bundle them in one checkout; the per‑item shipping drops dramatically.
And a little secret: some POD services let you add a “gift wrap” for an extra €1‑€2. If you’re sending the case directly to a loved one, that extra touch can make the whole experience feel polished.
Final checklist before you click “Place Order”
- Confirm the final preview looks good on both light and dark mock‑ups.
- Verify the selected material matches your budget and use‑case.
- Check the total price, including any production fees and estimated shipping.
- If you need a bulk order, make sure the quantity qualifies for any discount.
- Read the return policy – most custom items are non‑returnable, but many sites will offer a replacement if the print is faulty.
Once you’ve ticked those boxes, take a breath, click that “Place Order” button, and picture the moment you’ll hand the finished case over. It’s a small thing, but it carries a whole story.
Step 6: Care, Maintenance, and Long‑Term Longevity
Why caring for your case matters
We all know a phone case protects the device, but it also becomes the front line of every fingertip, countertop, and coffee‑stained table you touch. Over time, the ink, the material, and even the oleophobic coating on the screen can wear down if you don’t give it a little TLC.
Think about the last time you actually wiped down a case. Was it a quick shake‑off, or did you spend a minute with a soft cloth? That tiny habit can be the difference between a case that looks fresh for a year and one that fades after a few months.
Every‑day cleaning routine (under 2 minutes)
Step 1 – Power off and unplug. It sounds obvious, but a quick press of the power button and unplugging any cables saves you from accidental liquid ingress.
Step 2 – Grab a clean microfiber cloth. Microfiber is gentle enough for TPU, silicone, and even hard polycarbonate, yet it picks up oils and dust like a magnet.
Step 3 – Lightly dampen (not soak). A spritz of water mixed with a drop of mild dish soap works wonders. Avoid soaking the case; you don’t want liquid seeping into the cut‑out for the camera.
Step 4 – Wipe in circular motions. This helps lift grime without scratching the printed surface. Finish with a dry corner of the cloth to banish any streaks.
Deeper sanitising (once a week or after a spill)
If you want to go beyond surface dirt, a 70% isopropyl‑alcohol wipe is safe for most case materials. Apple’s official cleaning guide confirms that 70% alcohol wipes won’t harm the screen or the case, as long as you keep them away from ports.
Just dab the wipe, don’t saturate, and run it over the case for 10‑15 seconds. Let it air‑dry; the alcohol evaporates quickly, taking bacteria with it.
For a natural alternative, mix equal parts distilled white vinegar and water in a spray bottle. Vinegar’s acidity breaks down grime and has mild antibacterial properties, but remember to rinse the cloth afterward so no vinegar residue stays on the case.
What to avoid
Never use abrasive sponges, bleach, or harsh solvents like acetone. Those can strip the printed image or crack a silicone case. Also, steer clear of submerging the case in water—especially if it’s a leather‑like faux leather option, which can swell and lose its shape.
And don’t forget the oleophobic coating on your phone’s screen. Over‑scrubbing can wear it down faster, making fingerprints more noticeable.
Material‑specific tips
TPU (soft, matte) and silicone. Warm water and a soft brush work fine. If the print looks a bit dull after a few washes, a quick polish with a dry microfiber cloth can revive the shine.
Hard polycarbonate (glossy). Because the surface is smoother, you can use a dry microfiber followed by a dab of 70% alcohol for a streak‑free finish.
Eco‑friendly bamboo or bioplastic. These are a bit more porous, so a gentle hand‑wash with a mild soap is best. Air‑dry flat, never in direct sunlight, to prevent warping.
Longevity checklist
- Wipe down the case at least twice a week with a dry microfiber.
- Sanitise with 70% alcohol or a vinegar solution once a week, especially after travel or gym sessions.
- Avoid exposing the case to extreme heat (e.g., leaving it on a car dashboard).
- Store the case in a dust‑free pouch when not in use to keep the print from fading.
- Inspect the case every month for tiny cracks or peeling edges; replace early to keep the phone protected.
Following these habits means your personalized photo phone case will stay vibrant and protective for months, not just weeks.
Quick FAQ in the back of your mind
Can I put my case in the dishwasher? It’s tempting, but the high heat and harsh detergents can melt TPU and blur the print. Stick to hand‑washing.
Will UV sanitiser boxes damage the image? UV light is great for killing germs, and most custom prints tolerate brief exposure. Just follow the device’s recommended time—usually under a minute.
Do leather‑look cases need conditioner? If you’ve opted for genuine leather, a tiny dab of leather conditioner every few months keeps it supple. Faux leather doesn’t need this.
Keeping your case clean isn’t a chore; it’s a small ritual that protects both your phone and the memory you’ve printed on it.
For more science‑backed cleaning advice, check out Harvard’s coronavirus resource center and Apple’s official cleaning guide. Both explain why regular sanitising matters and how to do it safely.
Conclusion
So, you've made it through the design choices, the ordering steps, and the care routine.
At the end of the day, a personalized photo phone case is more than a protective shell – it's a pocket‑sized memory you see every time you pick up your phone.
If you keep the simple cleaning habits we covered, that image will stay vivid for months, and you’ll avoid the disappointment of a faded print.
Wondering what to do next?
Grab a favorite photo, head over to heartful.gifts, and use the easy design tool to upload, position, and preview – the process takes less than five minutes.
When you hit “Place Order,” picture the smile on a loved one’s face when they unwrap a case that literally holds a moment you shared.
And remember, a quick wipe with a microfiber cloth after each adventure keeps the case looking fresh, so you’ll keep enjoying that personal touch without extra effort.
Ready to turn that snapshot into a daily reminder? Start designing your personalized photo phone case today and let your memories travel with you.
Before you finalize, double‑check the preview on both light and dark backgrounds – a tiny tweak now prevents a surprise later today.
FAQ
Can I upload any photo size for a personalized photo phone case?
Yes, most print‑on‑demand services accept images as small as 800 × 800 px, but for a crisp, vivid case we recommend at least 1500 × 1500 px. That gives the printer enough detail to reproduce fine textures without pixelation. If your picture looks a bit blurry on the preview, try a higher‑resolution version or a photo taken in good lighting. A little extra resolution goes a long way toward a case that looks sharp for months.
What types of phone models are compatible with custom cases?
Almost every major brand – iPhone, Samsung, Google, OnePlus – has a matching template in the design tool. When you start your project, just select your exact model (e.g., iPhone 15 Pro or Samsung S24). The tool will automatically crop the edges so your photo doesn’t get cut off. If you can’t find your device, check the “other models” dropdown or contact support; they often add new phones within a week of release.
How long does it take to receive a personalized photo phone case after I place the order?
Production usually takes 2–3 business days, then shipping adds another 3–5 days for standard delivery in most European countries. If you need it sooner, many shops offer expedited printing and express shipping for an extra fee. Keep an eye on the order confirmation email – it’ll show a real‑time tracker so you know exactly when the case will land on your doorstep.
Will the printed photo fade or peel over time?
High‑quality sublimation or UV‑cured inks are designed to bond with the case material, so the image resists fading for at least a year with normal use. The biggest culprits are harsh chemicals and prolonged sunlight. Stick to the cleaning routine we covered – a quick microfiber wipe and occasional 70% alcohol wipe keep the print looking fresh. If you notice tiny cracks, it’s usually the case material, not the ink, and swapping the case is the safest fix.
Is it safe to put a custom case in the dishwasher or washing machine?
Definitely not. The high heat and abrasive detergents can melt TPU, warp polycarbonate, and blur the printed image. Hand‑washing with a soft cloth and mild soap is the only reliable method. If you’re cleaning a lot of gear, a dedicated case‑cleaning spray works well, but always avoid submerging the case in water for more than a few seconds.
Can I add text or graphics in addition to my photo?
Absolutely. The design tool lets you layer custom text, emojis, or clip‑art on top of the photo. Keep the text short and use high‑contrast colors so it remains readable on the case’s surface. A popular trick is to add a short quote on the back of the case – it’s hidden from view but makes the gift feel extra personal.
What should I do if the printed image looks off when I receive the case?
First, compare the case to the on‑screen preview you approved. Minor color shifts can happen due to lighting differences, but major mismatches are usually a printing error. Reach out to customer support within 7 days, share photos of the defect, and most shops will offer a free replacement or a partial refund. Keeping the original packaging helps speed up the process.