
Create Your Own Custom Watercolor Pet Portrait Printable Download: A Step‑by‑Step Guide
Ever caught yourself scrolling through endless pet photo galleries, thinking there has to be a way to turn that goofy grin of your golden retriever into something you can actually hang on the wall?
That feeling of wanting to capture a moment, but also craving something a little more personal, is what leads a lot of us to explore a custom watercolor pet portrait printable download.
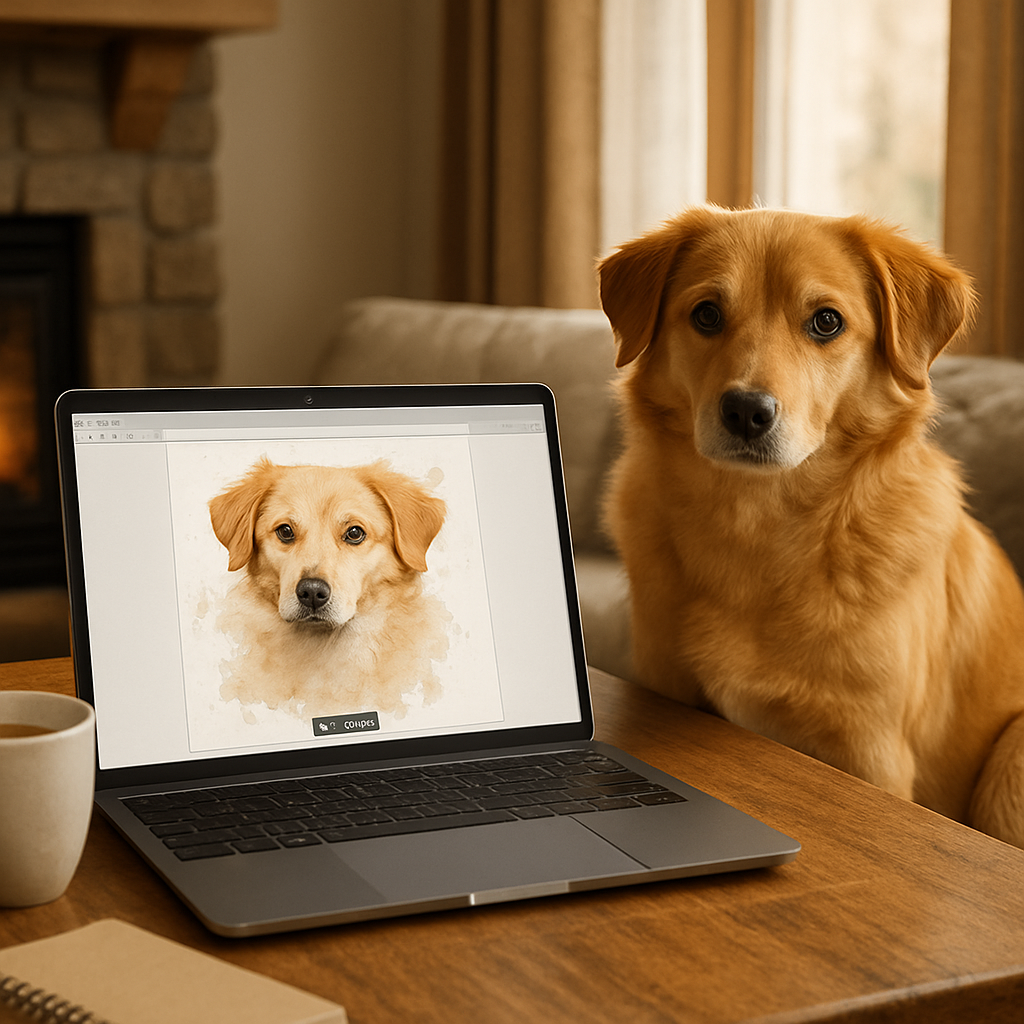
Picture this: you download a high‑resolution file, print it on your favorite paper, frame it, and suddenly your living room feels a bit cozier, a bit more you.
Sounds simple, right? But there’s a subtle art to choosing the right style, resolution, and even the little details that make the portrait feel alive.
So, why does a printable download feel different from ordering a pre‑framed canvas? For one, you get to control the size, the paper texture, and even the moment you decide to display it—no waiting for shipping, no surprise dimensions.
And let’s be honest, there’s something satisfying about printing a piece yourself, watching the colors come to life as you lift the sheet off the printer.
If you’ve ever felt the tug of guilt buying yet another generic mug for a pet lover, a custom watercolor portrait is a heartfelt alternative that says, “I really see you and your furry friend.”
Think about the first time you saw your pup’s eyes in a hand‑drawn watercolor; the soft washes, the playful splashes of pigment—those details turn a simple photo into a memory you can touch.
Now, you might wonder, “Is this too pricey for a download?” The truth is, because you’re only paying for the digital file, the cost stays low while the emotional value stays high.
And if you’re the type who loves to experiment, you can even try different frames, matting styles, or combine multiple portraits into a gallery wall.
Ready to turn that favorite snap into a printable masterpiece? Let’s dive in and discover how to pick the perfect artist, what file specs to look for, and a quick checklist to ensure your final print looks museum‑ready.
TL;DR
A custom watercolor pet portrait printable download transforms your favorite photo into a vibrant, hand‑painted piece you can print at home or a local shop, keeping the cost low and the sentiment high.
It’s the perfect, personal gift for pet lovers—easy to download, simple to frame, and instantly ready to brighten any wall.
Step 1: Choose the Right Photo and Prepare Your Image
Okay, picture this: you’ve just snapped a goofy grin of your golden retriever chasing a squirrel, and you’re already dreaming of that watercolor masterpiece on your wall. But before the artist can turn it into a custom watercolor pet portrait printable download, you need the right base photo.
First thing’s first – pick a shot where your pet’s eyes are in focus. Eyes are the emotional anchor; they draw the viewer in. If the eyes are blurry, the whole portrait feels…off. A quick way to test? Zoom in on the photo on your phone; can you see every whisker and the sparkle in their gaze? If not, keep hunting.
Lighting matters more than the camera
Natural light is your best friend. Aim for early morning or late afternoon when the sun is soft. Avoid harsh midday sun that creates shadows on the face. A fast lens with a wide aperture (f/2.8 or lower) lets more light in, so you can shoot with those gentle shadows and still capture crisp details.
And here's a little secret: if you’re using a phone, tap the screen to lock focus on the eyes and slide the exposure slider up just a notch. Suddenly that flat snap looks like it belongs in a gallery.
Background – keep it simple
Think of the background as the stage. You want your pet to be the star, not the décor. A plain wall, a muted blanket, or a soft outdoor blur works wonders. If the background is too busy, the watercolor conversion can end up looking muddy.
Do you have a favorite spot where your dog loves to nap? Snap them there, but make sure the backdrop isn’t full of toys or laundry. Less is more.
Resolution and file type
Aim for at least 300 DPI (dots per inch) if you can. That usually means a photo size of 2500 × 3500 pixels or bigger. The higher the resolution, the sharper the final print – and the artist can pull more detail from the fur texture.
Save the file as a high‑quality JPEG or PNG. Avoid heavy compression; you don’t want a grainy mess to start with. If you’re unsure, open the image on a computer and check the “Properties” – look for the dimensions and file size.
Quick checklist before you upload
- Eyes in sharp focus.
- Even, natural lighting.
- Simple, uncluttered background.
- Minimum 300 DPI, at least 2500 × 3500 px.
- Saved as JPEG (high quality) or PNG.
Got all that? Great. Now a tiny bit of prep work on your end can save the artist time and keep the price down.
Basic editing – keep it minimal
Open the photo in any free editor (even your phone’s built‑in app works). Crop just enough to frame the face or the whole body, depending on the portrait style you want. Remove any glaring red‑eye or harsh shadows with a simple “brightness/contrast” tweak. Community tips on photo selection often suggest a slight increase in saturation to make the fur pop, but don’t overdo it – the watercolor will add its own color magic.
One more thing: double‑check the orientation. Landscape versus portrait can change how the final print fits your wall. If you plan to hang it above a sofa, a horizontal layout might look cozier; above a mantel, a vertical slice can be striking.
Ready to upload?
When you’re satisfied, head over to the custom watercolor pet portrait gift page and follow the upload steps. The site will usually ask for a brief description – this is your chance to tell the artist about your pet’s personality (“loves to chase balls”, “always snuggles”) so the final artwork feels truly personal.
And there you have it – a solid photo, a few tweaks, and you’re set for a beautiful printable download that captures your furry friend’s spirit forever.
Step 2: Select a Watercolor Style and Set Up Your Workspace
First thing's first – you’ve picked the perfect photo, now it's time to decide how you want it to feel on the page. Do you imagine a soft, dreamy wash that makes your pup look like they’re floating in a sunrise, or a bold, graphic splash that captures that mischievous grin?
Choosing a watercolor style is less about rules and more about the story you want to tell. If you love the look of delicate layers, go for a wet‑on‑wet technique: you load the paper with a light wash, then let colors mingle like clouds. If you prefer crisp edges and vivid detail, try wet‑on‑dry, where the brush meets dry paper and the pigment stays where you place it.
How to pick the right style for your custom watercolor pet portrait printable download
Ask yourself three quick questions:
- What mood does your pet bring into your home? (Calm = soft washes, playful = bright strokes)
- How much detail do you want to keep? (Fine whisker lines need a dry‑paper approach)
- Where will the final printable live? (A large wall piece can handle bolder contrast; a desk‑size print shines with subtle gradients)
And remember, you can always ask the artist at heartful.gifts for a sample swatch before committing – they love collaborating on the vibe.
Once the style is set, let’s talk workspace. A cluttered table is a silent creativity killer. Think of your art station like a coffee table you’d set up for a guest: everything you need is within arm’s reach, and nothing distracts you from the conversation.
Essential layout tips
Place your watercolor paper on a sturdy, flat surface – a light‑colored board works wonders because you can see every stray droplet. Then arrange your tools in a semi‑circle: water jars on one side, palette in the middle, brushes on the other. If you’re left‑handed, flip the arrangement so you don’t constantly bump the water.
Lighting matters more than you think. Natural daylight near a window gives the truest color reading. If you’re stuck with artificial light, choose a cool‑white LED bulb that mimics daylight – the warm yellow tones will make your hues look muddy.
Does this sound like a lot? It’s actually pretty simple once you break it down.
Here’s a quick checklist you can print and stick on your desk:
- Paper (watercolor block or heavyweight 300 gsm)
- Two water jars (one clean, one for rinsing)
- Palette (plastic or ceramic)
- Brushes – a round 2 mm for detail, a flat 6–8 mm for washes
- Paper towels or a lint‑free cloth
- Good lighting (window or daylight LED)
And don’t forget to protect your floor – a cheap drop cloth or old sheet catches any rogue splashes.
Feeling a bit overwhelmed? Let’s pause the checklist and watch a short video that walks you through a real‑world setup. It’s the kind of behind‑the‑scenes tour that makes the whole process click.
After the video, take a minute to arrange your supplies exactly as shown. You’ll notice how your hand naturally reaches for the right brush without thinking – that’s the “muscle memory” magic every watercolorist talks about.
One more pro tip: keep a spare sheet of the same paper on the side for testing colors. As Magic of Creativity suggests, testing helps you gauge pigment intensity before you lay it down on the final piece.
And if you’re curious about how other artists balance style and workflow, check out the journey of Katherine Klimitas, a disabled watercolor pet portrait artist who builds each piece with intention and heart. Her approach to selecting a style that mirrors a pet’s personality is explained on her website.
Now you’ve got a clear style, a tidy workspace, and a mental map of the steps ahead. The next part of the process – actually sending your photo to heartful.gifts – will feel like a natural continuation, not a jump into the unknown.
Step 3: Convert the Photo into a Watercolor Sketch
Okay, you've got your photo ready and your workspace set up. Now it's time to turn that snapshot into a watercolor sketch that feels like it was painted by hand.
First thing's first: look at the image and ask yourself, what’s the most recognizable shape? Is it the curve of a wagging tail or the sparkle in those puppy eyes? Grab a lightbox or just tape the photo to a window and trace the big outlines with a soft HB pencil. Don't worry about details yet—just capture the silhouette.
Does that sound too simple? Trust me, those loose lines are the skeleton that lets the watercolor breathe.
Step‑by‑step conversion
1. Trace the outline. Use a thin pencil, keep the pressure light so you can erase later. If you’re comfortable, skip the tracing and free‑hand the basic shapes; the imperfection adds charm.
2. Block in the main color zones. Pick three to five pigments that match the dominant hues in the pet’s coat. A quick tip from a watercolor conversion chart helps you find exact mixes even if you don’t own the exact shade.
3. Wet‑on‑wet for softness. Lightly wet the paper within each color block, then drop in pigment. Let the edges bleed a little – that’s where the magic happens.
4. Define the eyes and nose. Switch to a dry brush or a fine tip pen for those sharp details. A little white gouache can rescue any over‑darkened area.
5. Step back and assess. Does the sketch still feel like your pet? If something feels off, lift pigment with a damp sponge – it’s easier than you think.
And what about color harmony? A short video I watched with Erin Gleeson shows how a simple avocado sketch can teach you to balance warm and cool tones in a single wash. Her approach works just as well for fur, and you can read more about it in her watercolor feast recap.
Now, before you hit the upload button on heartful.gifts, you’ll want a quick reference to compare your sketch’s options. Below is a handy table that sums up the tools you’ll need, why you use them, and a pro tip for each.
| Tool | Purpose | Pro tip |
|---|---|---|
| Soft HB pencil | Sketch basic outlines | Use light pressure so lines disappear under wash |
| Watercolor pans (3‑5 colors) | Block in main hues | Mix with a little water for translucent layers |
| Wet brush & sponge | Create soft edges | Tap, don’t scrub – it keeps the paper fibers intact |
| Fine tip pen or white gouache | Detail eyes/nose | Add a tiny white dot for extra sparkle |
Notice how each item serves a specific purpose – that’s the secret sauce for a clean, professional‑looking sketch.
So, what’s the next move? Once your sketch looks good, save it as a high‑resolution PNG or PDF. Then head over to the custom watercolor pet portrait printable download page on heartful.gifts, upload the file, and choose your paper size. The platform will handle the printing, and you’ll receive a printable file that looks like a hand‑crafted artwork.
And remember, you don’t have to be a master watercolorist to get a beautiful result. The combination of a solid outline, limited palette, and gentle wet‑on‑wet technique does most of the heavy lifting.
Feeling confident? Great. If you’re still unsure, try a test print on plain cardstock before ordering the final product. That extra step catches any surprises and saves you from a “what‑did‑I‑do?” moment later.
Finally, give yourself a little pat on the back. You’ve just turned a simple photo into a watercolor sketch ready for a custom watercolor pet portrait printable download. That’s a gift anyone will treasure.
Step 4: Add Details and Refine the Sketch
Now that your basic outline is solid, it’s time to treat the sketch like a conversation – add the little asides that make it feel alive.
Zoom in on the eyes
We all know the eyes are the windows, right? Grab a fine‑tip pen or a dab of white gouache and give each pupil a tiny spark. A single white dot can turn a flat stare into a “look, I’m thinking about that squeaky toy you love.”
Tip: If you’re nervous about making a perfect dot, practice on a scrap piece first – the extra step saves a “whoops” later.
Texture your fur
Think of fur like hair on a head – it has direction and depth. Light, quick strokes with a wet brush create soft feathering; a dry brush adds the rougher edge where shadows gather.
And here’s a little secret: a dab of watercolor pigment on a damp sponge can mimic the subtle color shift you see when sunlight hits a dog’s back. Shelley Franklin mentions using directional lighting to bring out texture, so try to mimic that in your sketch.
Define the nose and mouth
The nose is a tiny triangle of shadow, not a solid black blob. Lightly shade the edges and leave a glimmer of the base color for a more natural look. For the mouth, a single curved line with a hint of pink can suggest a smile without over‑detailing.
Sometimes I pause and think, “Does my pet look like they’re about to bark or just chill?” That moment of uncertainty is where personality sneaks in.
Layer the background subtly
You don’t need a full‑blown landscape – a wash of muted pastel behind the pet keeps the focus on them while adding depth. Use a wet‑on‑wet technique: splash a light wash, then, before it dries, drop in a slightly darker shade where you want a gentle shadow.
Pro tip: A test print on plain cardstock will reveal if the background overwhelms the pet. If it does, lighten the wash by adding a splash more water.
Final check before you export
Step back, maybe even walk away for a minute. When you return, ask yourself: “Does this sketch capture the moment I felt when I first saw my pet?” If the answer is a hesitant maybe, add one more line or two – but don’t over‑work.
Once you’re happy, save the file as a high‑resolution PNG. A fellow creator in a Facebook group suggests double‑checking the DPI – 300 dpi is a safe bet for printing.
And that’s it – you’ve turned a simple outline into a polished piece ready for a custom watercolor pet portrait printable download. The next step will be uploading it to heartful.gifts, but for now, give yourself a moment of quiet pride.
Take a deep breath, celebrate the progress, and get ready to share your art with loved ones.
Step 5: Fine‑Tune Colors and Add Personal Touches
Now that your line work is solid, it’s time to breathe life into those fur tones.
Think about the moment you first saw your pet’s coat in the sunlight—maybe a golden glint on a golden retriever’s ears, or a faint silver shimmer on a tuxedo cat’s whiskers. Capturing that exact feeling is what turns a flat sketch into a custom watercolor pet portrait printable download that feels alive.
Pick a palette that matches the memory
Start by pulling a few colors from a reference photo. Don’t be afraid to mix a “wrong” hue; watercolors love happy accidents.
And here’s a quick trick: lay down a light wash of the dominant color, then, while the paper is still damp, drop a cooler tone on the opposite side. The colors will bleed together, creating that soft, natural gradient you see in real fur.
Need proof it works? handcrafted watercolor pet portraits on Etsy often showcase this technique, showing how subtle shifts in hue make a dog’s coat look plush.
Adjust saturation for mood
Do you want a calm, pastel vibe or a bold, vibrant splash? Lower the pigment concentration for a dreamy look, or crank it up for a lively pop.
But remember, a single overly saturated spot can dominate the whole piece. Test a small swatch on a scrap of the same paper before you commit.
For a science‑based approach, check out watercolor color mixing tips that explain how adding a touch of complementary color can mute harshness and keep the portrait harmonious.
Add personal details that tell a story
Now’s the moment to slip in the quirks that make your pet uniquely yours—a scar, a favorite collar, or the way they tilt their head when you call.
Use a fine brush or even a pen for these micro‑elements. A single line of darker ink can define a whisker, while a dab of bright orange can hint at a beloved red bandana.
And if you’re feeling extra playful, sprinkle a few translucent speckles in the background—like sunlight through leaves—just enough to suggest a setting without stealing focus.
Quick checklist before you finalize colors
- Do the primary fur colors match the reference photo?
- Is there a balance between warm and cool tones?
- Have you added at least one personal touch that only you would notice?
- Is the overall saturation appropriate for the emotion you want to convey?
Run through this list, then step back. If something feels off, trust that little voice and tweak a shade.
One final pro tip: once you’re happy, create a duplicate layer (or a second file) that’s purely grayscale. Compare the grayscale version to the colored one—if the composition still reads well, you’ve nailed the tonal balance.
When the colors feel just right, save the file as a high‑resolution PNG at 300 dpi, just as we did in the previous step. Your custom watercolor pet portrait printable download is now ready to be uploaded to heartful.gifts or shared with a loved one.
Take a moment, look at the finished piece, and let yourself feel that warm rush of pride—because you just turned a simple outline into a keepsake that will live on the wall for years to come.
Step 6: Export the Final Artwork as a High‑Resolution Printable PDF
Let’s admit it, after you’ve spent hours mixing watercolor hues on the screen, the last thing you want is a PDF that looks like a blurry postcard. That’s why this step matters.
First, double‑check that your document is set to 300 dpi and in RGB or CMYK depending on your printer. If you’re selling a custom watercolor pet portrait printable download on heartful.gifts, most print‑on‑demand services prefer CMYK for true colors.
So, what’s the easiest way to keep every brushstroke crisp? Export straight from Illustrator using a print‑ready preset instead of the generic “High Quality Print” that can balloon file size.
Preparing the file
• Flatten any unnecessary transparency. Layers with blending modes can trip up the RIP engine and cause ghosting. A quick rasterize of the background (right‑click → Rasterize) does the trick.
Does that sound like a lot? It’s really just a few clicks, and it saves you hours of back‑and‑forth with the printer.
Choosing the right PDF preset
In the Export dialog, pick “PDF‑X‑1a:2001” (or the newer PDF‑X‑4 if your printer supports it). According to Adobe’s guide to exporting PDFs, the PDF‑X preset keeps color profiles intact and limits file size without sacrificing quality.
Set the compression to “Do Not Downsample” for images that are already 300 ppi. If your file is massive, you can safely drop the resolution to 150 ppi – most wall‑mounted prints are viewed from a few feet away, and that level still looks razor‑sharp. A fellow designer reported that lowering to 150 ppi let them export a 5‑panel 1 × 2 m job without errors. Even if your platform uses a custom print widget, the same export principles apply – keeping PDFs simple helps avoid crashes.
Final checks before export
• Verify bleed: add 0.125 in on all sides if you plan to trim the print.
• Include trim marks – they’re tiny but essential for a clean cut.
• Turn on “Create Acrobat Layers” only if you need separate elements for post‑print editing.
Want a safety net? Save a copy of the PDF with “Preserve Illustrator Editing Capabilities” unchecked. That version is leaner and less likely to cause crashes in older RIP software.
Does this feel overwhelming? Take a breath – you’ve already mastered color balancing and composition, so these technical steps are just the final polish.
One last tip: open the exported PDF in Adobe Acrobat and zoom to 100 %. Look for any unexpected white gaps or rasterized edges. If something looks off, go back, adjust the image resolution, and re‑export. A quick visual audit catches problems before you hit “Upload” on heartful.gifts.
And remember, the goal isn’t just a file that meets specs; it’s a custom watercolor pet portrait printable download that will bring a wagging tail or a purr of appreciation to the buyer’s wall.
Ready to hit “Save”? Click “Export”, name the file something clear like “Bella_Watercolor_300dpi.pdf”, and you’re done. Your artwork is now ready to travel from screen to living‑room, all while looking as vibrant as the original brushwork.
If you ever need to tweak the file later, just open the original AI, make the change, and re‑export – the process is repeatable, so you can offer seasonal variations or add a tiny thank‑you note for the buyer.
FAQ
What exactly is a “custom watercolor pet portrait printable download”?
It’s a digital file that captures your furry friend in a hand‑painted watercolor style, ready for you to print at home or at a print shop. No physical canvas is shipped – you get a high‑resolution PDF you can hang on the wall whenever you like.
How do I actually get the file after I place my order?
Once payment clears, heartful.gifts sends you an email with a secure link. Click the link, and the custom watercolor pet portrait printable download drops straight onto your device. You can then open it in Adobe Acrobat, preview at 100 %, and print on your favorite paper.
Does that sound simple enough? If you ever lose the link, just hit “Resend download” in your account dashboard.
Can I choose the size or paper type for my print?
Absolutely. The PDF is set at 300 dpi and comes in a standard 8×10 inch canvas, but you can scale it up to 11×14 or 16×20 without losing detail. Just make sure the printer you use supports that size and a matte or semi‑gloss paper for the best watercolor feel.
How long does it take to receive the digital portrait?
Most orders are processed within 24 hours. If you’ve uploaded a clear reference photo, we usually finish the artwork in 2–3 business days. Then the download link is emailed to you right away. So you can expect your custom watercolor pet portrait printable download within a weekend, even if you order on a Friday.
Is the portrait really printable at home, or do I need a professional service?
It works both ways. If you have a decent inkjet or laser printer, use heavyweight 200 gsm matte paper and set the print quality to “high”. For a museum‑like finish, a local print shop can print on canvas‑ready material, and the colors will stay true because the file is already calibrated for 300 dpi.
Think of it as giving you the freedom to decide – you control the cost and the frame.
What if I’m not happy with the final image?
We want you to love the piece. You get one round of minor tweaks (like adjusting the background color or moving a paw). Just reply to the original email within 7 days, tell us what feels off, and we’ll make the change before sending the final download.
Honestly, most pet owners say the portrait looks even better in person than on screen.
Can I order portraits of multiple pets in one file?
Sure thing. Just let us know you want a “family portrait” in the order notes. We’ll arrange the composition so each pet gets its own spot, and the final PDF will still be a single printable file you can display as a cohesive piece.
Ready to turn that adorable photo into art? Grab your favorite pet picture, hit “Add to cart”, and let the watercolor magic begin.
Conclusion
So there you have it—turning a favorite snap into a custom watercolor pet portrait printable download is easier than you thought.
We’ve walked through choosing the right photo, prepping the file, and even what to do if the first draft feels a little off. The takeaway? A few simple steps can give you a museum‑ready piece that captures your pet’s personality without breaking the bank.
Imagine hanging that soft‑toned portrait on your living‑room wall and hearing a guest say, “Wow, that looks like they jumped right out of a storybook.” That moment of pride? It’s yours, because you took control of the process from start to finish.
Ready to make it happen? Grab your best pet photo, hit “Add to cart” at heartful.gifts, and let the watercolor magic begin. Remember, you get one round of tweaks, so don’t stress if the first version isn’t perfect.
And if you’re still on the fence, think about the joy of gifting a piece that feels both personal and artful—perfect for birthdays, anniversaries, or just because.
Take the leap, press that order button, and watch your furry friend become a timeless work of art.
Enjoy the smiles, the memories, and the lasting charm of your new masterpiece.