
Create a Heart Photo Collage Canvas: Step‑by‑Step Guide for a Memorable Keepsake
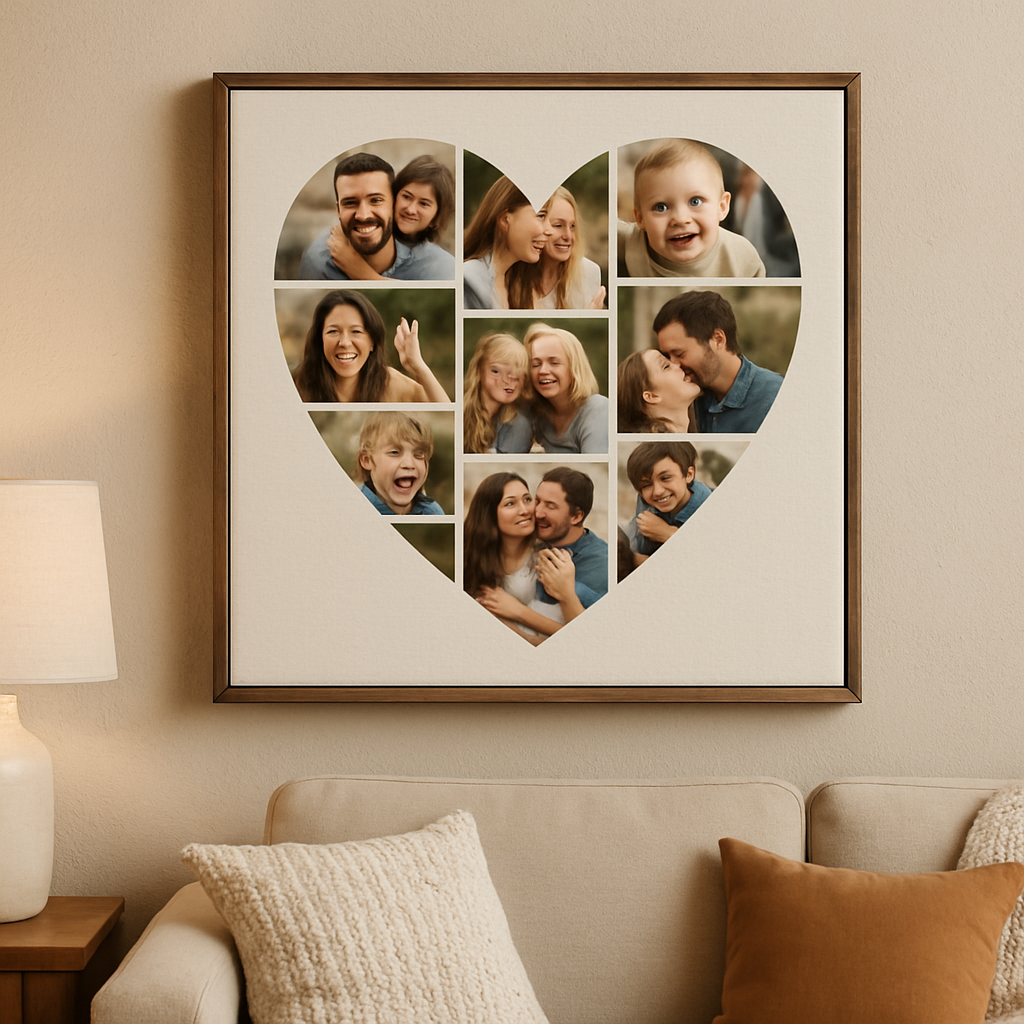
Ever walked into a living room and felt that sudden rush of love when you see a wall full of tiny moments, each one stitched together in the shape of a heart? That feeling is exactly why a heart photo collage canvas works so well.
Imagine you’ve got a stack of family photos – birthday cupcakes, a goofy beach selfie, grandparents’ wedding snap – and you want to turn that chaos into something that hugs the room. A heart‑shaped canvas does that without a single word.
The beauty of a heart photo collage canvas is its personal touch meets instant décor. No need to hire an interior designer; you simply upload your favorite shots, choose the layout, and let the print‑on‑demand magic handle the rest.
And because it’s printed on high‑quality canvas, the colors stay vivid even after years of sun‑light and family gatherings. You’ll notice the texture under your fingertips, a subtle reminder that these moments are meant to be felt, not just seen.
So, how do you get from a phone gallery to a wall‑hugging heart? First, gather the pictures that make your heart skip a beat – think of the ones that always bring a smile. Second, trim any blurry edges; a clean cut keeps the collage crisp. Third, decide whether you want a single large canvas or a set of smaller panels that together form the heart. Finally, order it from a reliable print‑on‑demand shop that specializes in custom canvas art.
What’s the real magic? It’s the way the heart shape pulls every memory into one visual hug, turning a plain wall into a conversation starter. Your guests will pause, point, and ask, “Where did you get that?” – and you’ll get to share the story behind each photo.
Ready to turn those fleeting snaps into a timeless piece that literally frames your love? Let’s dive in and see how easy it is to create a heart photo collage canvas that feels like a warm embrace every day.
TL;DR
A heart photo collage canvas turns your favorite snapshots into a love‑filled wall art that’s easy to design, print, and hang, adding instant personality to any room. Follow our quick steps and you’ll have a lasting, vivid centerpiece that sparks conversation and preserves memories forever for your family gatherings tonight.
Step 1: Choose Your Photos and Heart Template
Alright, imagine you’re scrolling through your phone and a handful of pictures make you grin instantly – that’s the gold we’re after. Those snaps already have the emotional punch, so they become the building blocks of your heart photo collage canvas.
First thing’s first: pull those images into a folder and give each a quick glance. Ask yourself, “Does this photo spark a memory that feels warm, funny, or proud?” If the answer is a solid “yes,” keep it. If it’s a vague “maybe,” set it aside – you’ll thank yourself later when the collage feels tight and meaningful.
Pick the right photos
Look for variety in lighting, color, and composition. A bright beach day, a cozy kitchen birthday cake, a black‑and‑white portrait of grandma – mixing tones adds depth, just like ingredients in a good stew. And don’t be afraid of imperfections; a slightly out‑of‑focus laugh can feel more genuine than a perfectly polished portrait.
Tip: aim for at least 12‑15 images if you’re planning a medium‑sized heart (around 24‑30 inches wide). Fewer than ten can make the shape look sparse, while a massive collection might overwhelm the design.
Find a heart‑shaped template
Now that you have a photo pool, it’s time to choose the silhouette that will hold them together. Most print‑on‑demand platforms offer a few heart outlines – a classic point‑bottom, a rounded “valentine” style, or a modern split‑heart that looks like two halves fitting together.
Think about the vibe of the room where the canvas will live. A sleek, minimal kitchen might love a thin‑line outline, whereas a family living room can handle a bold, thick‑border heart that doubles as a visual anchor.
Here’s a handy shortcut: upload one of your favorite shot to the template preview and see how it snaps into place. If the image gets cut off in an odd way, swap it for another that fits the contour better.
Match style to your space
Consider the existing colour palette of the wall. If your décor leans toward soft neutrals, choose photos with warm tones – think golden hour sunsets or creamy sepia filters. If the room is already a riot of colour, black‑and‑white or muted pastel images can act as a calming counter‑balance.
Don’t forget about orientation. Mixing portrait and landscape photos creates a playful rhythm, but keep the majority in the same direction (either portrait or landscape) so the heart shape stays recognizable from a distance.
Quick checklist before you hit “order”
- All photos are high‑resolution (300 dpi recommended for crisp canvas prints).
- Each image is cropped loosely to remove distracting background clutter.
- You’ve selected a heart template that matches the room’s aesthetic.
- File names are clear – “Mom_2023_Birthday.jpg” makes future edits painless.
If you’re still unsure about layout or need inspiration, How to Create a Stunning Custom Canvas Photo Collage Step by Step walks you through the whole process with screenshots and pro tips.
With your photo stash ready and the perfect heart outline in hand, you’re set for the next phase: arranging the images so they flow like a story. Trust your gut, experiment a little, and remember that the finished canvas is meant to hug the wall – and the hearts of anyone who sees it.
Step 2: Edit and Arrange Images on a Digital Canvas
Prep your files for the edit
First, gather every picture you trimmed in Step 1 and drop them into a single folder on your computer. It sounds boring, but having everything in one place saves you from hunting for that one missing selfie when the clock’s ticking.
Rename each file with a tiny clue – "2023_Beach_Smiles" or "Grandma_Cake_2022" – so you can spot the emotional winners at a glance. This tiny habit keeps the workflow smooth and stops you from accidentally overwriting a favorite shot.
Basic edits: crop, brighten, colour‑balance
Even though the final shape will be a heart, each image still lives inside a square or rectangle tile. Open your favourite editor – the built‑in phone tools work fine, or you can use free software like GIMP.
Do three quick things:
- Crop out any distracting background (think cluttered countertops or stray pets). Aim for a tight frame around the main subject.
- Boost brightness and contrast just enough so the picture doesn’t look washed out next to a sunny beach shot.
- Apply a subtle colour‑balance so the palette feels cohesive – warm tones for family moments, cooler tones for outdoor adventures.
If you have a bit more time, experiment with a tiny vignette to draw the eye toward the centre of each tile. The result? A collage that feels like one continuous story, not a jumble of mismatched snaps.
Arrange on the digital canvas
Now fire up the canvas‑design tool you chose in Step 1. Drag‑and‑drop each edited thumbnail into the heart outline. Here’s a simple, repeatable process:
- Start with the visual anchor – the photo that makes you say, "Wow, that’s the one!" – and drop it dead centre.
- Work outward in concentric rings. On the first ring, place images that share a theme (travel, holidays, pets). On the next ring, sprinkle in the surprise‑factor shots that make people do a double‑take.
- Flip the layout occasionally. Rotate the canvas 90° and see if the heart still reads clearly. If it looks like a random grid, swap a few pieces until the silhouette pops.
Pro tip: use the “snap to grid” feature if your tool has it. It keeps spacing even and prevents accidental gaps that break the heart’s flow.
Tips from a DIY pro
When my kids helped me build a Mother’s‑Day heart collage, we used PowerPoint as a quick‑and‑dirty arranger – yes, the same program we use for presentations. The trick was adding invisible shape objects that acted as placeholders for each photo. We could then snap pictures to those shapes and move them around without losing alignment. The DIY heart arms collage guide walks through that exact workflow, and it works just as well for a polished canvas.
Another real‑world example: a client wanted a 30‑inch heart canvas for a living‑room gallery wall. We started with a landscape‑style collage (the kind CanvasChamp promotes for bold statements) and trimmed it down to a heart silhouette. By grouping all family portraits on the right curve and travel landscapes on the left, the final piece felt balanced and still showcased the full 37‑image capacity.
Final quick checklist before you hit “save”
Before you lock in the design, run through this tiny list:
- All images are at least 1200 px on the longest side.
- Every photo is cropped, brightened, and colour‑balanced.
- The central anchor image is the strongest visual.
- The heart shape is unmistakable from a few feet away.
- You’ve previewed the collage on a dark and light background to ensure contrast.
Once everything feels right, hit “save” and export the file as a high‑quality JPEG or PNG. You’re now ready to upload the masterpiece to heartful.gifts for printing.
Step 3: Pick Canvas Material & Printing Options
Now that your heart shape looks just right, the next decision feels a bit like choosing the right frame for a family portrait – it can make or break the whole vibe.
Understand the basic canvas builds
Most print‑on‑demand shops wrap your image over a wooden stretcher frame. The two most common depths are a standard ¾‑inch pine frame and an “XXL” 1½‑inch frame that gives a gallery‑ready presence.
Because pine is light, even a large 40‑inch heart stays easy to hang – a single nail or two screws do the trick.
The deeper XXL frame adds a little drama; it pushes the image forward and works especially well when you want the collage to feel like a centerpiece.
Choose a border style that matches your room
- White edge – clean, modern, lets the colors pop.
- Black strip – high contrast, great for bold, saturated photos.
- Mirror‑image wrap – the outer edge mirrors the front image, creating a subtle blur that looks like a floating picture.
- Premium “floating” frame – a decorative outer frame that shows the folded canvas edges, perfect for contemporary loft spaces.
Tip: If you’re hanging the heart above a light‑colored wall, a black strip can prevent the canvas from blending into the background.
Real‑world example: The birthday surprise
Sarah ordered a 30″×20″ heart canvas for her husband’s 40th birthday. She chose the standard pine frame, white edge, and added a premium floating frame in brushed walnut. The result? The collage became the focal point of their dining room, and guests keep asking, “Is that a painting or a photo?” The extra frame added just enough depth to look like a gallery piece without a huge price jump.
Step‑by‑step checklist for material & print options
- Decide on canvas size – larger sizes let you fit up to 37 photos, smaller sizes keep the look airy.
- Pick frame depth – ¾‑inch pine for easy hanging, 1½‑inch for a bold statement.
- Select border style – think about wall colour and the overall mood you want.
- Consider premium frames only if the room’s décor leans toward modern or industrial.
- Review the digital proof – most services email a proof within 24 hours; check that no important details sit too close to the edge.
- Confirm shipping speed – many shops ship in 24 hours, but if it’s a last‑minute gift, look for “express” or “buy now, pay later” options.
Quick comparison of the main options
| Option | Frame Type | Thickness | Visual Impact |
|---|---|---|---|
| Standard | ¾‑inch pine stretcher | Lightweight | Clean, easy to hang |
| XXL | 1½‑inch pine stretcher | Heavier, more presence | Gallery‑style focal point |
| Premium Floating | Decorative outer frame | Varies | Modern, “floating” illusion |
Once you’ve locked in the material and border, hit “save” and let the print shop handle the rest. Most providers use HP latex inks that resist UV fading, so your heart photo collage canvas will stay vivid for years.
Bottom line: the right canvas material and border turn a lovely collection of photos into a lasting piece of art that feels as personal as a handwritten letter.
Step 4: Assemble and Add Finishing Touches
Alright, you’ve got the digital layout nailed, the canvas material chosen, and the proof approved. Now it’s time to turn that virtual heart into a real‑world centerpiece you can actually lean on. Think of this as the "final brushstroke" – the part where everything clicks together and you can finally step back and say, "Yep, that’s it!"
1. Unbox and inspect the printed canvas
When the box arrives, don’t rush to hang it. Lay the canvas flat on a clean surface and give it a quick once‑over. Look for any faint smudges, loose fibers, or uneven stretches. Most reputable shops (including ours) use HP latex inks that are UV‑resistant, but a tiny dust speck can still sneak in during packaging.
Check the corners – they should be snug against the stretcher. If you notice a gap, a gentle hand‑press from the back usually smooths it out. A well‑stretched canvas will feel taut, not floppy.
2. Choose the right hanging hardware
Here’s a quick reality check: a 30‑inch heart canvas on a standard ¾‑inch pine frame weighs about 6‑7 lb, while an XXL 1½‑inch frame can tip the scales at 12‑14 lb. That difference matters when you pick hardware.
- Wire and D‑rings: Ideal for heavier pieces. Attach two D‑rings to the back, run a sturdy picture‑wire, and you’ll have a flexible hanging system that distributes weight evenly.
- Sawtooth hanger: Perfect for smaller, lighter hearts (under 20 inches). It’s quick to install but don’t rely on it for a 40‑inch canvas.
- French cleat: The pro‑level option for gallery‑style displays. One half screws to the wall, the other to the canvas back – a lock‑in that’s virtually un‑shakeable.
And a little tip: if your wall is drywall, add a wall anchor or toggle bolt for extra security. You don’t want the moment your guests lean in for a closer look to become a “oops‑that‑fell” scene.
3. Add protective finishes
Even though the inks are designed to resist fading, a clear, matte laminate adds a layer of defense against fingerprints, humidity, and occasional child‑hand smudges. Many print shops offer this as an upgrade; it’s cheap insurance, especially for high‑traffic rooms.
Another subtle touch is a thin dust‑cover that slides over the frame’s back. It keeps dust from gathering in the stretcher’s hollow core, which can affect the canvas’s tension over time.
4. Run a final quality checklist
Before you nail anything to the wall, run this quick 5‑point list:
- Canvas is fully stretched, no sagging edges.
- All hardware is securely screwed in and appropriate for the canvas weight.
- Protective laminate or dust cover is applied (if you chose one).
- Frame color and border style still match the room’s palette – a quick step back in the actual space can reveal a clash you missed online.
- Take a photo of the finished piece from a few feet away; does the heart silhouette read clearly?
If anything feels off, give yourself a minute to adjust. It’s way easier to tweak now than to live with a crooked heart on the wall.
5. Hang and enjoy
Measure twice, nail once. Use a level to make sure the top of the canvas is perfectly horizontal, then step back and admire. You’ll notice how the heart shape naturally draws eyes toward the center – that’s the magic you built with every photo choice.
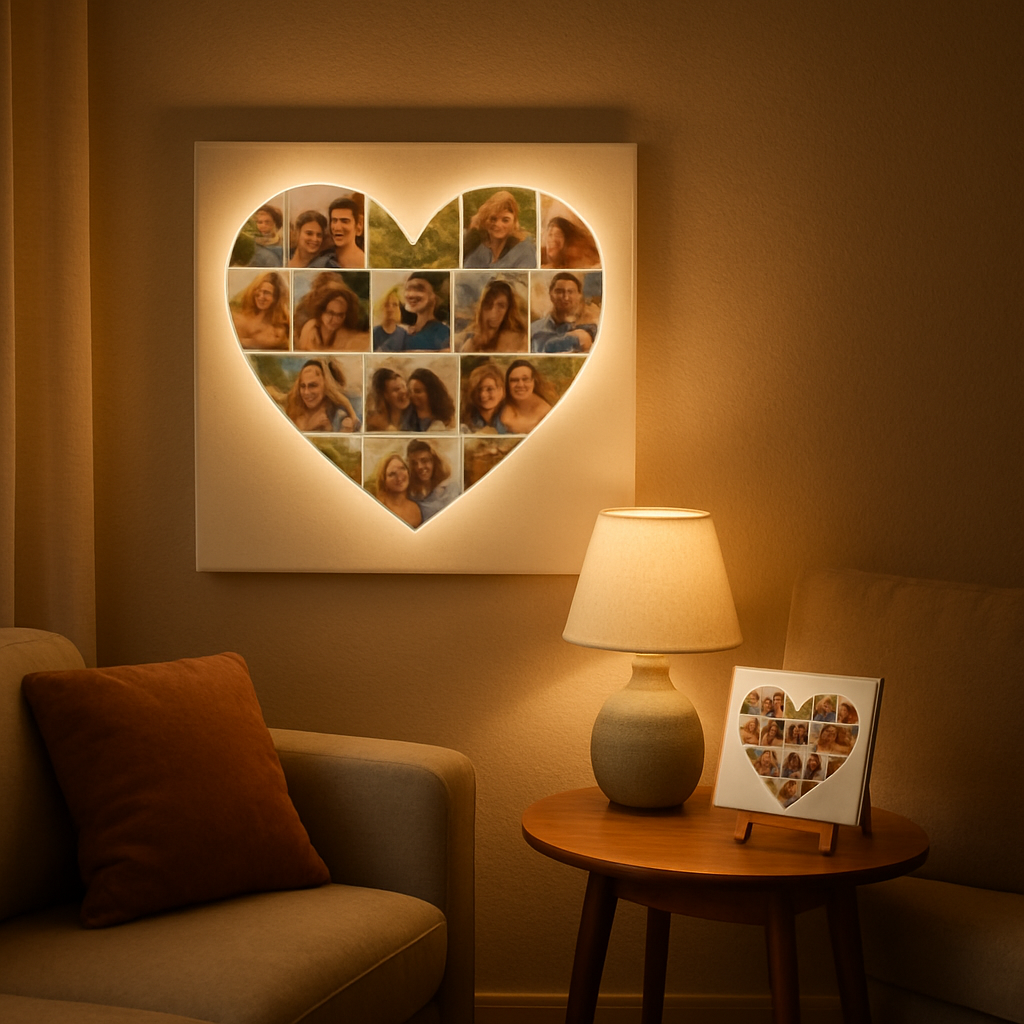
Pro tip: add a low‑profile picture light or a soft LED strip behind the frame. The gentle glow highlights the texture of the canvas and makes the colors pop in the evenings, turning a simple collage into a warm, lived‑in piece of art.
Lastly, treat the wall like a living gallery. Rotate the canvas every few years, swap out a few photos, and the heart will keep feeling fresh – just like the memories it holds.
Step 5: Display, Care, and Gifting Ideas
Now that your heart photo collage canvas is hanging proudly, the real fun begins – figuring out how to keep it looking fresh and how to turn it into a gift that feels personal.
Make it a living piece
Think of your canvas like a favorite playlist. You don’t listen to the same songs forever; you swap a track or two when the mood changes. The same goes for photos. Every few years, pull out a couple of pictures, maybe a new birthday or a recent vacation, and replace them in the collage. Because the heart shape stays the same, the overall vibe remains familiar while the details stay current.
Does that sound intimidating? Not really. Most print‑on‑demand services, including heartful.gifts, let you order a fresh set of prints with the exact dimensions you need. You simply slide the new prints into the existing frame – no glue, no re‑stitching.
Protect the colors
Canvas inks are pretty resilient, but a little care goes a long way. Dust a soft microfiber cloth over the surface once a month; it removes fingerprints without scratching the texture. If your home is sunny, consider a UV‑filtering window film or a low‑profile picture light that adds ambiance without harsh glare.
And if you have kids or pets, a matte, water‑based laminate (often an optional upgrade at checkout) acts like a clear shield. It’s cheap insurance that keeps the collage looking museum‑ready even after an enthusiastic hug from a toddler.
Choosing the right spot
Placement matters more than you think. A heart photo collage canvas works best where eyes naturally pause – above a sofa, behind a console table, or on a hallway wall that leads guests into the room. Use a level and a stud finder; anchoring into a stud prevents the canvas from wobbling over time.
Want a softer feel? Hang the canvas a few inches below eye level and add a subtle LED strip along the top edge. The gentle backlight highlights the texture and makes the colors pop after sunset, turning a simple wall piece into a warm focal point.
Gifting ideas that wow
Because the heart shape already says “love,” it’s a natural gift for anniversaries, birthdays, or “just because.” Here are three ways to make the gift feel extra thoughtful:
- Bundle with a handwritten note. Slip a small card behind the canvas frame that explains why each photo made the cut. It turns a visual gift into a story.
- Pair with a matching mini‑canvas. Order a smaller 8×8‑inch version of the same collage and place it on a side table or bedside. The pair feels like a coordinated set.
- Include a “future photo” slot. Leave one tile blank (or with a simple “Your Next Adventure Here” placeholder). The recipient can later fill it with a new memory, keeping the canvas alive.
What about corporate gifting? A heart photo collage canvas featuring team outings or milestone moments makes a heartfelt thank‑you that stands out from the usual mug or pen.
Quick care checklist
- Dust gently with a microfiber cloth every 30‑45 days.
- Check hanging hardware for looseness before moving the piece.
- Rotate photos every 2‑3 years to keep the story current.
- Consider a matte laminate for high‑traffic areas.
- Add soft LED lighting for evening ambience.
Following these simple steps ensures your heart photo collage canvas stays vibrant, meaningful, and ready to be admired for years to come.
Bonus Ideas: Creative Variations on the Heart Collage
Feeling inspired after you’ve nailed the classic heart photo collage? You’re not alone—many of us start wondering how to push the design a little further without losing that cozy hug feeling.
Season‑by‑Season Storyboard
One fun twist is to turn the heart into a mini‑timeline of the year. Pick four clusters of images—spring blossoms, summer beach days, autumn leaves, winter snowfalls—and arrange them clockwise around the heart. The result reads like a visual calendar you can glance at every morning.
How to do it:
- Gather 8‑10 photos for each season (you’ll need 32‑40 total).
- Use a template that lets you set the number of tiles per segment; many online collage tools let you “auto‑fill by date,” which speeds things up. custom collage templates also let you choose how many images to include.
- Label each quadrant subtly with a small, unobtrusive text tag (e.g., “Spring 2024”).
Real‑world example: Sarah’s family turned their backyard garden’s growth into a heart collage. The spring quadrant showed seedlings, summer captured the first tomatoes, autumn highlighted the harvest, and winter displayed the cozy fire pit. Guests now ask, “What’s the story behind that corner?” and she gets to share the whole season in seconds.
Monochrome Mood Board
Sometimes less is more. Convert all images to black‑and‑white or a single pastel hue for a sophisticated vibe that matches modern décor. The uniform palette makes the heart shape pop, especially on a white or charcoal wall.
Steps:
- Choose a filter in your editing app (most phones have a “mono” or “cool tone” preset).
- Apply the filter to every photo before uploading.
- Preview the collage on a dark background; if the heart fades, boost contrast on the outer tiles.
Tip: Pair the monochrome canvas with a brushed‑metal frame for an industrial look, or with a light‑wood frame for a softer feel.
Mixed‑Media Layering
Why limit yourself to photos? Add scanned drawings, handwritten notes, or even pressed flowers into the tile slots. The collage becomes a tactile memory board, not just a visual one.
Action plan:
- Scan or photograph each non‑photo element at 300 dpi.
- Resize to match the dimensions of your other images.
- Arrange the mixed media so that each type is balanced across the heart (don’t cluster all the sketches on one side).
A newly‑wed couple included their wedding vows handwritten on vellum, a ticket stub from their first concert, and a tiny sprig of lavender from the ceremony. The heart now feels like a love‑letter you can actually touch.
QR‑Code Memory Link
Want the collage to keep growing after it’s hung? Embed a small QR code in one of the tiles that links to a shared online album or a private video message.
How to add it:
- Create a QR code that points to a Google Photos album or a YouTube playlist.
- Download the QR image, keep it under 150 × 150 px, and treat it like any other photo.
- Place it in a less‑busy corner of the heart so it doesn’t dominate the visual flow.
When visitors scan the code, they see the latest updates—new birthdays, recent trips—making the canvas a living archive.
Travel Timeline Heart
If you’re a wander‑lust family, map your journeys onto the heart. Use a world map silhouette as the background layer and overlay destination photos on the corresponding continents.
Steps:
- Pick a faint, grayscale map template (many collage sites offer “background image” options).
- Place each travel photo over the region you visited.
- Add a tiny date stamp beneath each picture for context.
Case study: The Patel family’s heart collage shows a sunrise over Machu Picchu, a street market in Marrakech, and the Northern Lights in Iceland—all arranged so the map reads like a global love‑letter.
Kid‑Art Collage
Kids love seeing their crayon masterpieces on the wall. Scan their drawings, crop them to square tiles, and sprinkle them throughout the heart. It turns a family portrait into a generational gallery.
Quick guide:
- Gather three to five recent drawings.
- Scan at 600 dpi for crispness.
- Mix them with family photos—perhaps one kid‑art piece per quadrant.
Parents report that the collage becomes a conversation starter at playdates, and the kids feel proud seeing their art “officially” displayed.
Mini‑Canvas Pairing
Take the heart’s theme and shrink it into a matching mini‑canvas for a bedside table, mantelpiece, or office desk. The smaller piece can showcase a single favorite photo or a repeat of the central tile.
Actionable tip:
- Order an 8 × 8‑inch version of the same layout.
- Swap the central image for a close‑up portrait that feels intimate up close.
- Use a complementary frame colour to tie the two pieces together.
This duo creates visual rhythm across the room, and you’ll notice people naturally glance between the big heart and its tiny sibling.
DIY Lighting & Frame Tricks
Even the best collage can look flat without the right lighting. A soft LED strip glued to the top edge of the frame adds a warm halo that accentuates the heart’s curves.
Steps:
- Buy a battery‑operated LED strip with a remote dimmer.
- Measure the top perimeter of the canvas frame and cut the strip accordingly.
- Attach with the adhesive backing, then set the brightness to a low‑warm setting (around 2700 K).
For a dramatic effect, choose a “floating” frame style that reveals a thin sliver of the canvas edge—this gives depth and makes the heart appear to hover.
All these ideas prove that a heart photo collage canvas can be more than a static wall piece; it can evolve, tell stories, and even interact with viewers. Pick one variation that resonates with your space, follow the simple steps, and watch your heart‑shaped art become a living, breathing part of your home.
Conclusion
So you’ve walked through picking photos, editing, choosing a canvas, and hanging the finished heart photo collage canvas. By now you can picture that warm hug of memories on your wall, right?
Remember the core idea: each snapshot should pull a feeling, not just fill space. When the central image grabs attention and the surrounding tiles tell a story, the heart shape does the rest – it draws eyes and conversation.
If you’re still on the fence, try this quick test: stand a few feet back and ask yourself whether the silhouette still reads like a heart. If the answer is “yes,” you’ve nailed the layout. If not, swap a couple of tiles until the shape pops.
Here’s a simple checklist to run before you call it done:
- All photos are at least 1200 px on the longest side.
- Colors feel cohesive and the central picture is the strongest.
- Canvas material and frame match the room’s vibe.
- Hardware is secure and level.
- Lighting or a subtle LED strip highlights the curves.
Take a step back, snap a photo of your new piece, and share it with friends – they’ll love the personal touch. And when the next milestone arrives, just swap a few tiles and the heart photo collage canvas will feel fresh again.
Ready to turn those favorite moments into a lasting piece of art? Grab your images, follow the steps, and let your wall tell the story you’ve been waiting to share.
FAQ
What is a heart photo collage canvas and why choose it for home décor?
Think of a heart photo collage canvas as a single piece of art made up of dozens of tiny memories arranged in a heart shape. It instantly adds a personal touch to any room because the silhouette draws the eye and the individual photos tell a story you can’t get from a generic print. Plus, the heart shape feels warm and inviting – perfect for family spaces, a romantic gift, or a cozy corner where you want a conversation starter.
How do I pick the right size heart canvas for my wall space?
First, measure the wall space you have – a quick tape‑measure does the trick. If the area is under 12 × 12 inches, a small 8‑inch heart works nicely on a hallway or bedroom nook. For larger living‑room walls, 30‑inch or even 40‑inch hearts give you room for up to 37 photos and become a real focal point. A good rule of thumb is to leave at least a few inches of breathing room on every side so the shape doesn’t feel cramped.
What image resolution and file format do I need for a crisp heart collage?
You’ll want every image to be at least 1200 px on its longest side – that’s the sweet spot most print‑on‑demand services use to avoid pixelation on a 24‑inch canvas. JPEG works fine if you set the quality to the maximum setting; PNG is great for images with text or sharp edges. Before you upload, double‑check each file in a quick preview; zoom in to make sure the details stay clear, especially for the central photo that will anchor the heart.
Can I customize the layout or add text to my heart photo collage canvas?
Most heart‑shaped canvas tools let you drag‑and‑drop tiles, so you can rearrange until the silhouette looks right. If you want a special message, add a tiny text overlay on a spare tile – keep the font simple and the color contrasting so it doesn’t drown the photos. Some services even let you upload a custom background image, but remember the heart shape will crop it, so choose something subtle. Experiment with a few variations, then lock in the layout before you hit “order.”
How should I hang and secure my heart canvas to avoid damage?
Hanging a heart canvas is easier than you might think, but a solid anchor saves you from a future ‘oops.’ For a 30‑inch piece on a pine frame, two D‑rings with a picture‑wire work well; just make sure the hooks are screwed into a wall stud or a sturdy anchor. Smaller hearts (under 20 inches) can get away with a simple saw‑tooth hanger, but always double‑check it’s level. And remember – a quick wiggle test after you’ve mounted it will tell you if anything’s loose.
How do I keep my heart collage looking fresh over the years?
To keep the colors vibrant, dust the surface with a soft microfiber cloth every few weeks – it lifts fingerprints without scratching the ink. If the canvas sits in direct sunlight, add a UV‑filtering film on the window or tilt the piece a few degrees to reduce glare. A matte laminate upgrade is cheap insurance for homes with kids or pets; it repels smudges and makes cleaning a breeze. Finally, refresh the story every couple of years by swapping out a few tiles with new memories – the heart shape stays the same, the narrative stays fresh.