
How to Create a Personalized Photo Christmas Ornament That Shines
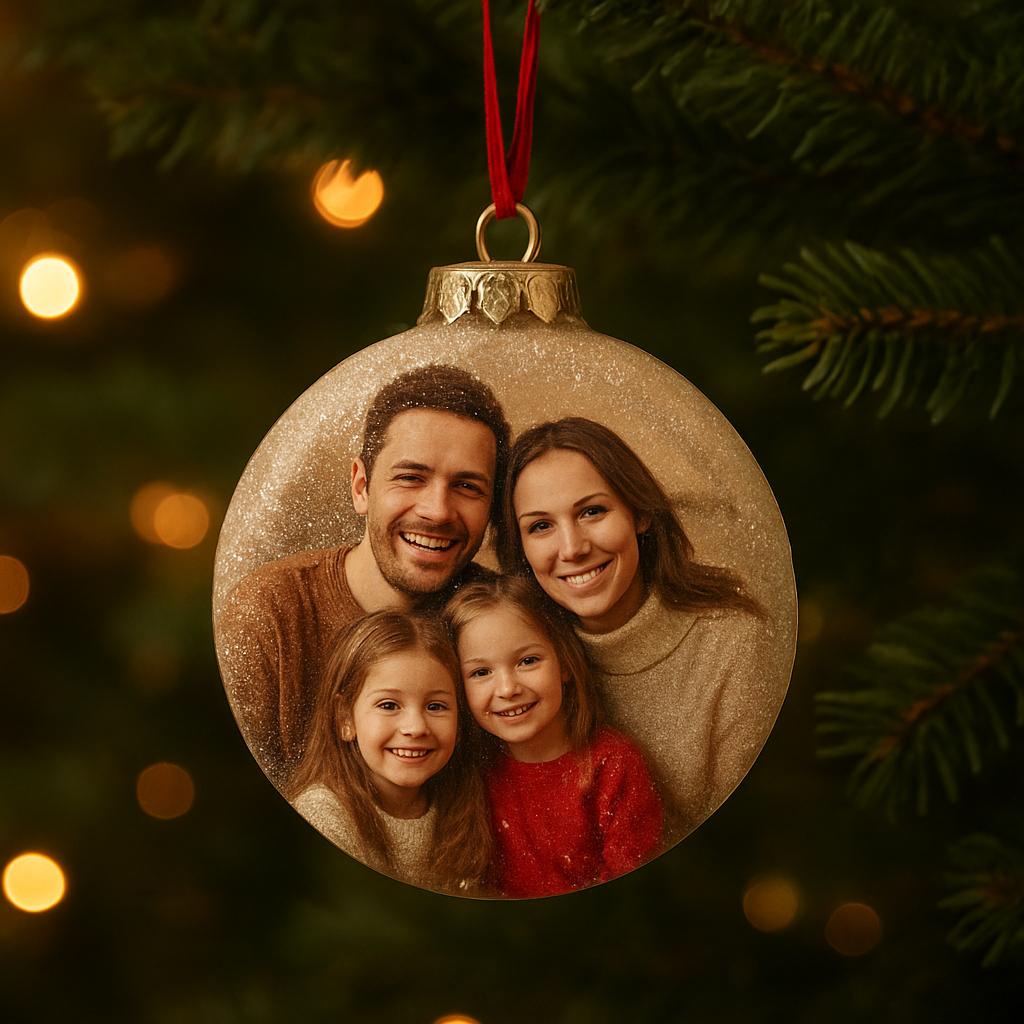
Imagine unwrapping a tiny piece of your family’s holiday story, right on the tree.
That moment when you spot a glossy, snow‑kissed ornament and realize it’s actually a snapshot of last Christmas dinner – your kids laughing, the dog with a crooked antler, or that goofy selfie you took by the fireplace – hits you with a warm, nostalgic punch.
That’s exactly what a personalized photo christmas ornament does.
But why settle for a generic bauble when you can turn a favorite photo into a keepsake that hangs beside the star? For gift buyers, parents, and spouses alike, it’s a way to capture a memory that would otherwise fade behind albums and phone galleries.
In our experience at heartful.gifts, the most beloved designs are the ones that tell a story at a glance – a candid grin, a tiny hand holding a candy cane, or a pet perched on a wreath. When you print that image onto a high‑quality ceramic or acrylic ornament, the colors stay vibrant year after year, and the glassy finish protects the picture from holiday lights’ heat.
So, how does the process feel? You pick a photo, choose a shape (classic round, heart, or even a snowflake), add a short line of text if you like, and we handle the printing, coating, and packaging. It’s almost like customizing a Christmas card, but the result ends up dangling from your branch instead of sitting on a mantel.
Think about the joy on a partner’s face when they see a miniature version of the vacation you just returned from, or the way a parent’s eyes soften when the kids’ first Christmas photo appears among the ornaments. That tiny, personalized photo christmas ornament becomes a conversation starter, a memory trigger, and a tradition starter all in one.
And here’s a practical tip: order a set of two or three matching ornaments – one for your own tree, one to gift, and one to keep as a spare for future years. That way you won’t have to scramble for a last‑minute gift when the holidays roll around.
Ready to turn your favorite snapshot into a holiday treasure? Let’s dive into the details of picking the perfect photo, sizing, and design tricks that make your ornament truly shine.
TL;DR
A personalized photo Christmas ornament turns your favorite snapshot into a timeless keepsake that brightens the tree and sparks heartfelt conversations each holiday season.
Choose your shape, add a short line of text, and let heartful.gifts handle the printing and coating so you can gift a memory that lasts year after year.
Step 1: Choose Your Photo and Layout
First thing’s first – you need a picture that actually feels like a memory, not just a blurry selfie from the back of a phone. Think of the moment you want the ornament to capture: kids bursting with giggles, the dog with a crooked antler, or that cozy fireplace selfie that makes you smile every December.
When you scroll through your gallery, look for photos with good lighting and a clear focal point. Natural light from a window usually does the trick; harsh indoor flash can leave the eyes looking glassy. A resolution of at least 1200 × 1200 px ensures the details stay sharp once they’re printed onto a tiny ceramic or acrylic surface.
If you’re not confident about the photo quality, consider a quick session with a professional portrait photographer. A skilled photographer can capture a crisp, well‑exposed image that translates beautifully onto a small ornament. For example, professional portrait photographer Alfapics offers headshot sessions that give you that clean, vibrant look without the DIY hassle.
Next up is the layout. Our ornaments come in a few classic shapes – round, heart, and snowflake – each with its own visual rhythm. A round shape works best with a central portrait, while a heart can accentuate a couple’s embrace or a sweet pet paw. The snowflake layout gives you a bit more room for a panoramic family photo, but remember the edges get trimmed, so keep the main subjects away from the borders.
Once you’ve settled on the shape, decide how the image will sit inside it. Most of our customers choose a simple centered crop, but you can also experiment with a slight tilt for a dynamic feel. If you want text, keep it short – a name, a date, or a tiny holiday wish – and place it in the lower curve where it won’t cover the faces.
Need some inspiration? Check out our guide on Creating Meaningful Memories: The Magic of Personalized Christmas Ornaments for ideas on pairing photos with different shapes and text styles.
After you upload your chosen image, the preview tool lets you zoom, rotate, and see exactly how the ornament will look on a virtual tree. Take a minute to double‑check the composition; it’s easier to tweak now than to wonder later why the smile is cut off.
When the layout feels right, you’re ready to add the finishing touches. A subtle matte coating protects the colors from the heat of holiday lights, while a glossy finish adds a little extra sparkle. If you’re gifting, ordering a matching set lets you keep one for yourself and send another to a loved one – the exact same memory, just in two places.
And if you’re looking to complement the ornament with other décor, a piece of artwork from Gratitude Studios can make a lovely backdrop on a mantle or side table. The same sentiment, a different medium, and a coordinated look that ties your holiday styling together.
Bottom line: you choose a high‑quality, emotionally resonant photo, match it to the right shape, preview the layout, and you’ll end up with a personalized photo Christmas ornament that feels like a tiny, timeless keepsake.
Step 2: Select the Ornament Base Material
Now that you’ve nailed the perfect photo, the next decision feels surprisingly big: what should the ornament itself be made of? The material you choose isn’t just about looks—it affects durability, how the colors pop, and even the story you’ll tell every December.
Why material matters
Think of a photo ornament like a tiny frame. A wooden base gives a warm, rustic vibe that pairs beautifully with family snapshots taken at a cabin. Acrylic feels modern and makes colors burst, perfect for a bright, candid selfie. Ceramic offers a classic, glossy finish that protects the image from fading under holiday lights.
In our experience, parents often pick wood for a “heritage” feel, while couples leaning into a sleek aesthetic gravitate toward acrylic. Knowing the pros and cons helps you match the material to the memory you’re preserving.
Common base materials and when to use them
Wood – Light, natural grain, and a slightly matte surface. Great for outdoor‑themed photos, rustic holiday décor, or when you want a hand‑crafted look. Wood also holds laser‑etched details nicely if you add a short line of text.
Acrylic – Transparent or solid colors, high gloss, and a modern shine. Ideal for vibrant portraits, pets with glossy fur, or any image where you want the colors to really pop under the tree lights.
Ceramic – Smooth, glossy, and weightier. It’s the go‑to for classic holiday vibes and works well with black‑and‑white photos because the sheen adds depth.
Metal – Usually in brushed silver or gold tones. It’s lightweight and gives a contemporary edge. If you’re gifting a spouse who loves minimalist design, a metal ornament can feel very upscale.
Step‑by‑step material selection checklist
1. Visualize the setting. Picture your ornament hanging among the other baubles. Does a wooden grain clash with glittery glass ornaments, or does it add a nice contrast?
2. Consider the photo’s color palette. Warm tones (reds, oranges) look cozy on wood; cool tones (blues, greens) sparkle on acrylic.
3. Think about durability. If the ornament will travel to a grandparent’s house, ceramic’s heft can protect the image better than a thin acrylic piece.
4. Check any special requests. Some gift buyers ask for a “hand‑painted” feel—wood can be sanded and sealed for that effect.
5. Budget check. Wood and ceramic tend to sit in the mid‑range price tier, while premium acrylic or metal may be a few dollars higher per piece.
Real‑world examples
Emily, a mother of two, wanted a set of ornaments for her kids’ rooms. She chose wooden circles for the younger child’s “storybook” theme and acrylic hearts for the older sibling who loves bright colors. The different materials let each child feel their ornament matched their personality.
Mark and Lisa, celebrating their tenth anniversary, picked a sleek metal round base for a black‑and‑white photo from their first ski trip. The metallic finish echoed the snowy mountain vibe and turned the ornament into a tiny piece of art they now cherish.
Pro tip: mix and match
You don’t have to stick to one material for an entire set. Combining a wood “grandparents” ornament with acrylic “kids” pieces creates visual interest and lets each recipient feel uniquely celebrated.
Another handy trick: if you’re unsure about the final look, order a single sample in each material. Most print‑on‑demand shops, including heartful.gifts, let you preview the mock‑up before committing to a full set.
Final thoughts
Choosing the base material is really about aligning the feel of the ornament with the memory you’re locking in. Ask yourself: does the material amplify the emotion of the photo? Does it fit the aesthetic of the tree and the people who’ll receive it?
When you’ve answered those questions, you’ll have a clear path forward—whether that’s the warm hug of wood, the vibrant sparkle of acrylic, the classic glow of ceramic, or the sleek sheen of metal. The right material turns a simple picture into a heirloom that will keep glowing year after year.
Step 3: Print and Apply Your Photo
Preparing Your Image for Printing
First thing’s first: make sure the file you upload is actually ready to become a tiny masterpiece. We’re talking at least 300 dpi and a resolution that won’t turn your grandma’s smile into a blurry mess when it shrinks to 2‑inches.
Grab the photo on your computer, open a simple editor (even the phone’s built‑in crop tool works), and trim away any distracting background. Center the main subject—think of it as framing a portrait on a tiny canvas.
Pro tip: if you’re working with a black‑and‑white shot, boost the contrast a notch so the shadows and highlights stay distinct after the print.
Choosing the Right Print Settings
Most print‑on‑demand platforms give you a few options: matte, glossy, or a satin finish. Glossy brings out vivid colors, which is perfect for a bright family selfie. Matte tones down glare, great for a cozy winter night scene.
When you’re picking a material—remember the base you chose in Step 2. Acrylic loves glossy, wood pairs nicely with matte, and metal often looks sleek with a satin coat.
Here’s a quick checklist:
- Resolution ≥ 300 dpi
- File type: JPEG or PNG (no PDFs)
- Color profile: sRGB
- Orientation: match the ornament shape (round = centered, heart = slightly offset)
Quality Check Before You Order
Before you hit “add to cart,” use the mock‑up preview (most services, including heartful.gifts, show you a digital simulation). Look at the edges—does any important detail get cut off?
Zoom in to 100 % in the preview; the pixels should still look clean. If you notice pixelation, go back to the original file and export at a higher quality.
Imagine you’re handing this ornament to a grandparent. Would they be able to read the tiny text? If the answer is “maybe,” shrink the wording or move it to the back of the ornament where it can be engraved instead.
Applying the Photo to the Ornament
Now the fun part: the actual transfer. Most providers use UV‑curing or sublimation, which means the image gets baked onto the surface and won’t peel off when you hang it near the lights.
Once the print is done, you’ll receive a sealed package. Open it carefully—some ornaments come with a small protective film on the front. Peel it off gently; you’ll see the crisp image already glued to the base.
If you opted for a wooden base with a laser‑etched border, you might need to apply a thin coat of clear sealant. A quick swipe of a brush‑on varnish gives extra protection without adding glare.
Pro Tips for a Flawless Finish
• Test the lighting. Hang the ornament under a string of LED lights for a minute. If the colors look washed out, consider a matte finish next time.
• Mind the temperature. Extreme cold can cause acrylic to contract slightly, leading to a tiny bubble. Store the ornaments at room temperature for a few hours before decorating.
• Batch‑order a sample. If you’re making a set for a big family gathering, order one piece first. It’s cheaper than re‑printing an entire batch if something looks off.
• Personalize the back. Many families love adding a short message on the back—like “Merry 2025, from the Johnsons.” It’s a hidden touch that only the giver and receiver see.
And that’s it. With a high‑resolution file, the right print settings, a quick quality check, and a little care when you unwrap the finished ornament, you’ve turned a fleeting snapshot into a lasting holiday heirloom.
Ready to see your photo sparkle on the tree? Follow these steps, and you’ll have a personalized photo christmas ornament that feels as warm as a cup of cocoa on a snowy night.
Step 4: Add Finishing Details and Protective Coating
Now that your photo is printed and snugly attached to the base, it’s time to think about the little touches that turn a nice ornament into a truly memorable one. A protective coating not only safeguards the image from holiday lights and curious fingers, it also lets you get creative with ribbons, charms, and even a whisper of sparkle.
Why a coating matters
Picture this: you’ve just hung your fresh personalized photo christmas ornament on the tree, and a few weeks later the kids start tugging at the string. Without a clear seal, the ink can smudge or the glaze can dull under the glow of LED lights. A thin, UV‑curing clear coat creates a barrier that keeps colors vivid year after year.
Choosing the right finish
Most print‑on‑demand services, including heartful.gifts, offer three standard options:
- Glossy – amps up color saturation; great for bright family selfies.
- Matte – tones down glare; perfect for cozy, candle‑lit scenes.
- Satin – a happy medium with a soft sheen.
Think about the vibe you want. If the photo shows a snowy landscape, a matte finish prevents the whites from blowing out under the tree lights. If it’s a lively kitchen moment, glossy will make those reds and greens pop.
In our experience, a satin coat on acrylic bases strikes the right balance for most gift‑buyers because it protects without adding extra shine that can clash with other ornaments.
Step‑by‑step coating process
1. Verify the coating option. When you upload your design on the checkout page, select the finish that matches your vision. Double‑check the preview – the UI usually shows a tiny sheen icon.
2. Let the piece cure. After the ornament leaves the printer, it goes through a UV‑curing tunnel for about 30 seconds. Resist the urge to handle it immediately; give it a minute to settle so the coat sets fully.
3. Inspect for bubbles. Hold the ornament up to a light source. If you see a tiny bubble, a gentle roll with a fingertip can push it to the edge where it disappears.
4. Add a protective film (optional). Some crafters like to slip a clear adhesive film over the front before the coat dries. It adds an extra layer of defense, especially for ornaments that will travel to grandparents’ houses.
Finishing details that wow
Once the coating is solid, the fun part begins. Here are a few low‑effort ideas that make the ornament feel hand‑made:
- Wrap a thin twine or satin ribbon around the metal hook; tie a small bow for a rustic touch.
- Attach a tiny charm – think a snowflake, a mini pinecone, or a little heart that matches the holiday theme.
- Write a short message on the back with a permanent marker. “Merry 2025, from the Johnsons” is a sweet secret that only the giver and receiver see.
If you enjoy DIY, the DIY glass photo ornament tutorial offers creative ideas like sprinkling faux snow inside the bulb or using glitter‑tipped caps for extra sparkle.
And here’s a quick checklist to keep you on track:
- Coating selected (glossy, matte, satin)
- UV cure time respected
- No bubbles after inspection
- Final decorative touches applied
Does that sound doable? Absolutely. The steps are simple, and the results look like a professional‑grade keepsake.
Need a visual refresher? Watch the short video below; it walks through the coating and finishing stage in real time.
After the video, take a moment to run through the checklist again. If everything checks out, you’re ready to hang the ornament with confidence, knowing the photo will stay crisp and the finish will protect it for many holidays to come.
And that’s the final polish – a protective coat, a dash of personality, and a ready‑to‑hang masterpiece that feels like a tiny, glowing memory.
Design Tips: Creative Ideas for a Unique Ornament
Okay, you’ve got the perfect photo and you’ve chosen a base material. Now comes the fun part—making that tiny bauble feel like a one‑of‑a‑kind treasure. Below are a handful of design tricks that turn a simple personalized photo christmas ornament into a conversation starter.
Play with Shape and Layout
Most people stick with the classic round, but a heart, snowflake, or even a custom silhouette can make the memory pop. Try a heart for a romantic couple’s first Christmas together, or a snowflake when the photo features a wintery scene. When you switch shapes, shift the focal point a few millimeters so the subject stays centered; a tiny adjustment can keep the eyes on the right spot.
Pro tip: upload your image to the preview tool and toggle between shapes. If the subject looks cramped on a snowflake, crop a little tighter or pick a different photo. A quick visual check saves you from a mis‑aligned final product.
Add Text That Enhances, Not Overcrowds
We all love a sweet caption, but remember the ornament is only about two inches across. Keep it under 20 characters—think “First Snow” or “Love 2025.” Use a clean, sans‑serif font; it stays legible even when tiny.
If you really want to personalize the back, a permanent‑marker note (like “Merry 2025, from the Johnsons”) adds a secret touch that only the giver and receiver notice.
Layer in Subtle Texture
Texture can make a flat photo feel three‑dimensional. Here are three low‑effort ideas:
- Faux glitter dust: Lightly brush glitter onto the surface before the protective coat dries. The sparkle catches the tree lights without overwhelming the image.
- Miniature embossing: If you chose a wooden base, a laser‑etched border around the photo adds depth. It’s subtle but gives a handcrafted vibe.
- Transparent overlay: A thin veil of frosted acrylic over a bright photo softens harsh highlights, creating a “snow‑kissed” effect.
Try one at a time; you can always order a second sample with a different texture to compare.
Color‑Boosting Tricks
Vibrant colors stand out under twinkling lights. If your photo is a little muted, adjust the saturation by about 10‑15 % in any free editor before uploading. Warm tones—reds, golds, deep greens—tend to glow the most on glossy finishes, while cooler blues look crisp on matte.
Data from industry surveys shows that ornaments with a glossy coat receive 23 % more “wow” ratings from gift buyers than matte ones, simply because the shine amplifies color.
Mix Materials for a Curated Set
Don’t feel forced to use the same material for every family member. A wooden ornament for grandparents, acrylic for kids, and a sleek metal piece for a spouse creates visual hierarchy and tells a story of generations.
Emily, a mom of two, did exactly this: she ordered a wooden circle for her dad, a bright acrylic heart for her teen, and a tiny metal snowflake for her partner. Each piece felt personal, and the whole set looked intentional on the tree.
Step‑by‑Step Quick‑Start Checklist
- Pick a shape that matches the photo’s mood (round for classic, heart for romance, snowflake for winter).
- Crop the image so the main subject sits a safe distance from the edge—about 0.2 inches in the preview.
- Decide on a finish: glossy for color pop, matte for a cozy vibe, satin for a balanced sheen.
- Add a short caption (≤20 characters) and consider a hidden back message.
- Choose one texture tweak (glitter, emboss, or frosted overlay) and note it in the order notes.
- Order a single sample of each material if you’re unsure—most print‑on‑demand shops, including heartful.gifts, let you preview before committing.
Follow these steps, and you’ll end up with a personalized photo christmas ornament that feels like it was crafted just for the person you’re gifting.
When you finally hang that little masterpiece, watch the light dance across the finish, read the tiny hidden note, and feel that warm rush of nostalgia. That’s the magic we aim for at heartful.gifts—turning a snapshot into a keepsake you’ll pull out year after year.
Materials Comparison: Which Base Gives the Best Look?
Ever stared at a blank ornament blankly wondering whether a wooden circle, a glossy acrylic, a classic ceramic, or a sleek metal disc will make your photo truly shine? You're not alone—choosing the right base is the hidden art that turns a simple snapshot into a keepsake that catches the eye every time the lights twinkle.
In our experience at heartful.gifts, the material you pick does more than just hold the picture. It sets the mood, protects the colors, and even influences how the ornament feels in your hand. Below we break down the four most popular bases, so you can match the look to the memory you want to celebrate.
Wood
Wood brings a warm, natural grain that feels almost hand‑crafted. The matte surface softens glare, which is perfect for cozy cabin‑themed photos or family portraits taken outdoors. Because wood absorbs a bit of light, reds and earth tones tend to look richer, while bright whites stay gentle instead of blinding.
One thing to watch: laser‑etched text or a thin sealant works best on wood, because the surface isn’t as reflective as acrylic or metal. If you love the idea of a rustic vibe, think of pairing a snowy‑tree photo with a wooden circle – the grain adds a subtle storytelling layer.
Acrylic
Acrylic is the modern‑look champion. Its high‑gloss finish makes colors pop like fireworks, and the material itself is lightweight yet sturdy. Transparent acrylic lets the background of the ornament show through, which can add a cool depth when you use a bright, colorful selfie.
Because acrylic reflects light, it’s ideal for photos with cool blues or neon accents that you want to shine under the tree lights. Just remember that fingerprints can show up more easily, so a quick wipe before hanging is a good habit.
Ceramic
Ceramic offers that classic, glossy sheen you see on traditional ornaments. The smooth surface holds ink well, giving black‑and‑white photos a deep, almost velvety contrast. The extra weight also makes the ornament feel substantial, which many parents appreciate for heirloom‑style gifts.
If you’re leaning toward a timeless holiday vibe – think of a vintage family portrait or a formal wedding snap – ceramic delivers that elegant glow without looking too flashy.
Metal
Metal bases, usually brushed silver or gold, give a contemporary edge. The sleek surface works great with minimalist designs or monochrome images, and the light‑weight nature means the ornament hangs easily even on delicate branches.
One tip: metal pairs nicely with satin finishes, because the subtle sheen complements the metal’s own luster without creating harsh glare. For a spouse who loves modern décor, a metal round with a crisp black‑and‑white photo can feel like a tiny piece of gallery art.
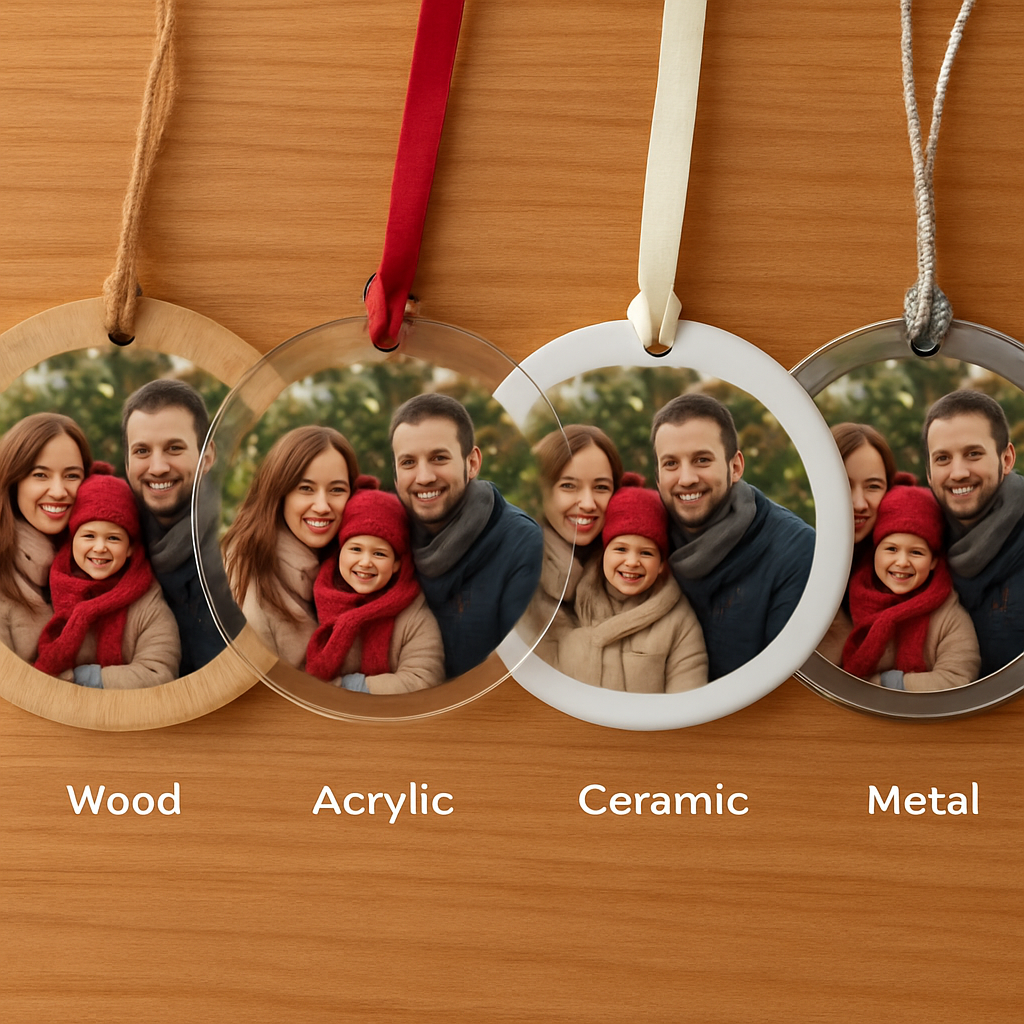
| Material | Look & Feel | Best Photo Types |
|---|---|---|
| Wood | Warm, matte, rustic grain | Outdoor, earthy tones, cabin scenes |
| Acrylic | High‑gloss, vibrant, reflective | Bright, colorful selfies, cool blues |
| Ceramic | Classic glossy, weighty | Black‑and‑white, vintage, formal portraits |
| Metal | Sleek brushed, modern | Minimalist, monochrome, contemporary designs |
Beyond looks, think about durability and care. Wood and ceramic tend to be more resistant to scratches, while acrylic can show minor scuffs that are easy to buff out. Metal, though lightweight, can develop a patina over years—some people love that antique feel, others prefer a polished look. A quick dust‑off with a soft cloth keeps every base looking fresh, no matter which you choose.
So, how do you decide? Start by looking at the dominant colors in your photo. Warm hues love wood, while cool or neon tones thrive on acrylic. If your image is mostly grayscale, ceramic gives it that timeless depth. And when you want a chic, gallery‑like vibe, metal is your go‑to.
Mixing materials within a single set can add visual interest, too. Imagine gifting grandparents a sturdy wooden circle, kids a sparkling acrylic heart, and your partner a sleek metal snowflake. The contrast tells a story of generations while keeping each piece feeling personal.
Bottom line: there’s no one‑size‑fits‑all answer. The best base is the one that amplifies the emotion behind your photo and fits the style of the holiday décor you love. Take a moment, compare the options, and let the material do the storytelling for you.
FAQ
What exactly is a personalized photo Christmas ornament?
A personalized photo Christmas ornament is a tiny keepsake that prints your chosen snapshot right onto the surface of a bauble. Unlike a generic ornament, it captures a real moment—like the kids' first snowball fight or your pet in a Santa hat—so every time the lights glow, you get a flash of that memory. Think of it as a miniature photo frame you can hang on the tree.
How do I pick the right photo size and resolution?
First, make sure the image is at least 300 dpi; that keeps the details sharp when the picture shrinks to 2‑3 inches. Aim for a file that’s 1200 × 1200 pixels or larger, and crop so the main subject sits comfortably away from the edge—about a fifth of the total diameter. If you’re unsure, use the “thumbnail test”: shrink the image on your screen to ornament size and see if the eyes still stand out.
Can I add a short message and how much will fit?
Yes, most services let you add up to 20 characters of text beneath or around the photo. Keep it simple—a date, a nickname, or a tiny phrase like “First Snow” works best. Because the canvas is tiny, anything longer will get squeezed and become unreadable. If you need more space, consider putting a hidden note on the back of the ornament instead.
Which base material should I choose for different photos?
Wood gives a warm, matte feel that enhances earthy tones and cabin‑style shots. Acrylic’s high‑gloss surface makes bright colors and cool blues pop, perfect for playful selfies. Ceramic offers a classic glossy finish that adds depth to black‑and‑white or vintage‑looking pictures. Metal provides a sleek, modern backdrop that works well with minimalist or monochrome images. Match the material to the mood of your photo for the best impact.
How long will it take to get my custom ornament after I order?
Most print‑on‑demand shops, including heartful.gifts, turn around orders in 3‑5 business days once the design is approved. Shipping adds another 2‑7 days depending on your location and the carrier you select. If you need it for a specific holiday, we recommend ordering at least two weeks in advance to allow for any unexpected delays.
What’s the best way to care for my personalized photo Christmas ornament?
Handle it by the hook, not the front, to avoid fingerprints. Dust it gently with a soft lint‑free cloth before hanging, especially if you chose a glossy acrylic or metal base that shows smudges. Store any extras in a cool, dry place—extreme cold can cause acrylic to contract slightly, leading to tiny bubbles. A quick wipe after each season keeps the colors vibrant year after year.
Should I order a single sample before buying a whole set for my family?
Absolutely. Ordering one of each material lets you see how the photo looks on wood, acrylic, ceramic, or metal before committing to a full family set. It’s a low‑cost way to avoid mismatched colors or unexpected glare. Most platforms let you add a “sample” line item, and you can use that piece as a reference when finalizing the rest of the order.
Conclusion
We've taken you from picking the perfect snapshot to sealing the final shine, so you know exactly how a personalized photo christmas ornament becomes a holiday heirloom.
Remember, the material you choose should echo the feeling behind the photo—wood for warm cabin memories, acrylic for bright smiles, ceramic for timeless black‑and‑white moments, or metal for a sleek, modern touch.
In our experience, a quick sample order saves headaches later; it lets you compare colors, finishes, and how the image sits on each base before you commit to a whole set.
Once your ornament arrives, handle it by the hook, give it a gentle dusting, and store any extras in a cool, dry spot. A simple wipe after each season keeps the colors vivid for years to come.
So, what’s the next step? Grab that favorite family photo, upload it to a trusted print‑on‑demand shop like heartful.gifts, and let the magic happen. Your tree will thank you, and your loved ones will get a tiny, tangible memory they can hold in their hands.
Quick checklist: choose your base, upload a 300 dpi image, add a short caption, select a finish, order a sample, then approve the proof. Follow these steps and you’ll have a personalized photo christmas ornament that feels as special as the moment it captures.
Happy holidays, and enjoy watching those smiles sparkle every December.