
How to Hang Canvas Without Nails: A Friendly Step‑by‑Step Guide
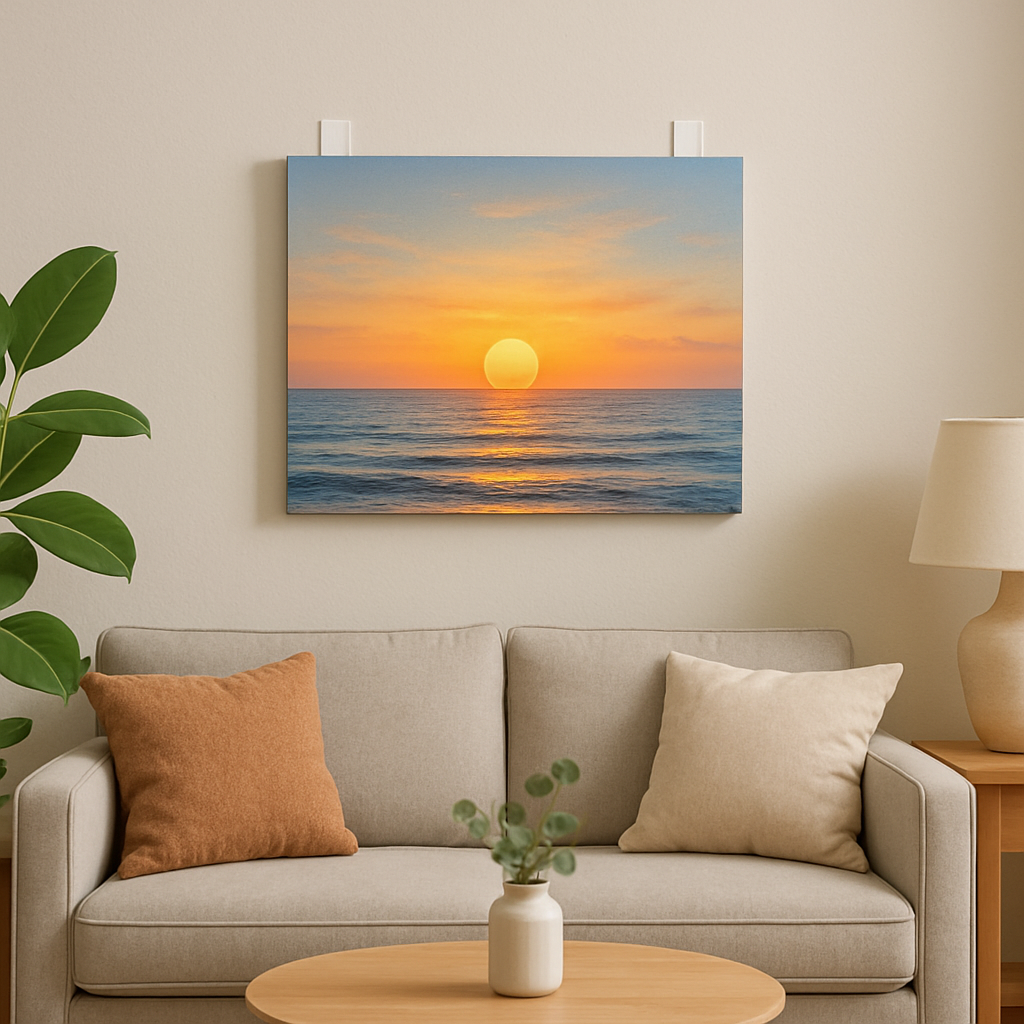
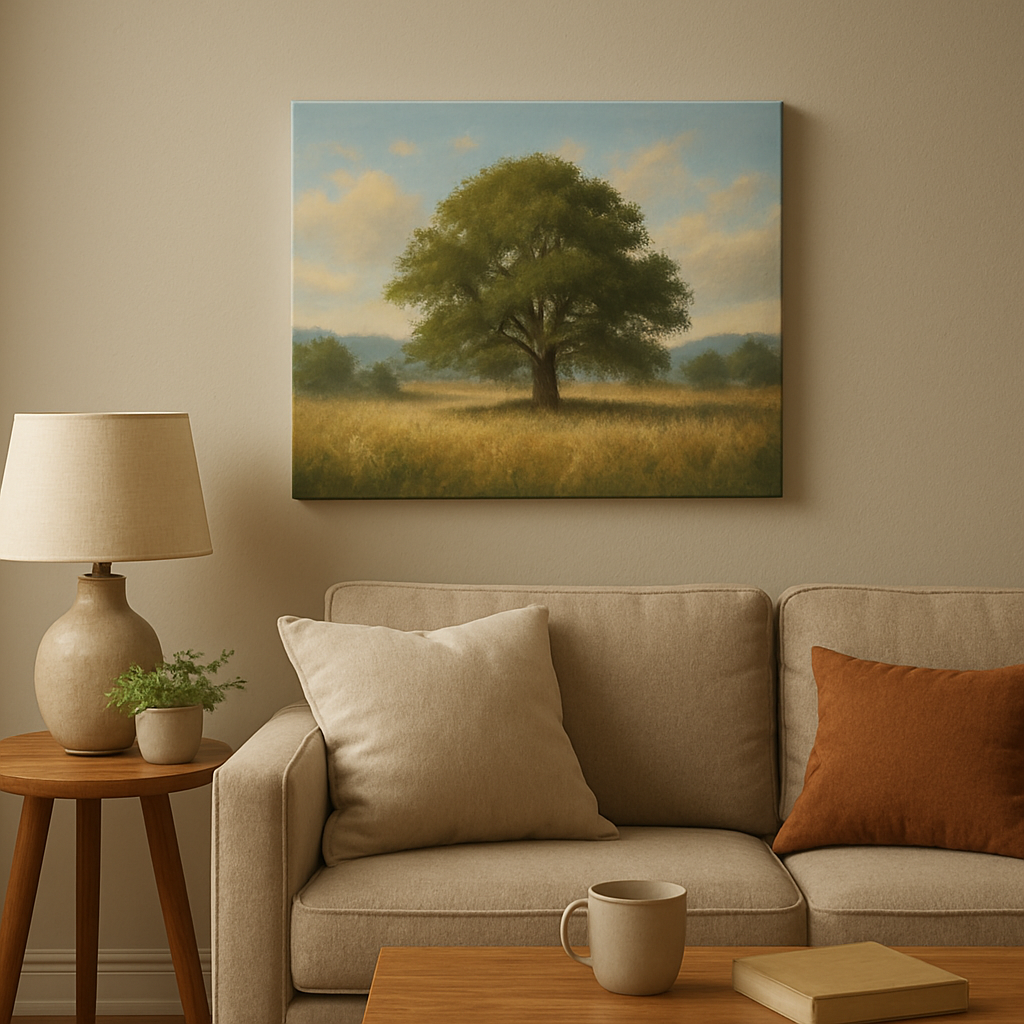
Picture this: you just received a beautiful custom canvas from heartful.gifts, and the moment you step into the living room you want to show it off—right away, but the wall is already full of frames and you’re terrified of leaving a hole.
Does that feeling of “I wish I could hang it without ruining the paint” sound familiar? Trust me, you’re not the only one who’s wrestled with that dilemma.
In this guide we’ll walk through exactly how to hang canvas without nails, using simple tools you probably already have lying around. No drilling, no screaming plaster, just a few clever tricks that keep your walls pristine.
First, let’s acknowledge the fear: a misplaced nail can turn a perfect gift into a cracked surface, and for parents or spouses who are careful about their home, that’s a big no‑no. That’s why we love adhesive solutions that feel like a gentle hug for your artwork.
One of the easiest methods is the command‑strip approach. The strips are designed to hold weight, they’re removable, and they leave no residue. All you need is a clean wall, a ruler, and a little patience to align the canvas perfectly.
Another favorite is the “velcro” style hanging system: a pair of interlocking pads that let you lift the canvas off the wall in seconds. It’s perfect for gift buyers who might want to switch the photo seasonally without a fuss.
If you’re more into a decorative look, consider a decorative tension rod or a magnetic hanging kit. These options add a modern flair while still keeping the wall untouched.
What we’ve seen work best is combining a lightweight mounting rail with a set of removable hooks. The rail distributes weight evenly, and the hooks can be repositioned as often as you like.
So, what’s the next step? Grab a pack of adhesive strips, clean the spot with a damp cloth, and test the hold with a gentle press. In just a few minutes you’ll have your canvas displayed proudly, and you’ll never have to wonder “what if I damage the wall?” again.
Ready to give your space a personal touch without the nail‑pain? Let’s dive in and explore each method in detail.
TL;DR
Want to showcase your custom canvas instantly without leaving a single nail hole? Learn how to hang canvas without nails using simple adhesive strips, velcro pads, or magnetic kits—quick, damage‑free solutions perfect for gift buyers, parents, and spouses who cherish pristine walls.
We’ll walk you through measuring, prepping the surface, applying the fasteners, and testing the hold, so you can display your artwork confidently and swap it out seasonally without any hassle or repair worries.
Step 1: Choose a Nail‑Free Hanging System
Before you even think about where the canvas will live, you need a system that hugs the wall without leaving a single nail hole. It sounds simple, but the right choice saves you a lot of stress, especially if you’re a parent protecting fresh paint or a spouse who’s already juggling a few frames.
There are three fan‑favorites you’ll run into: adhesive strips (like the ones from Command), interlocking velcro pads, and magnetic hanging kits. Each one has its own personality, so the trick is matching that personality to your canvas’s weight, the wall surface, and how often you plan to swap the art out.
First, ask yourself two quick questions: How heavy is the canvas, and what’s the wall made of? A lightweight 8 × 10‑inch print will happily sit on a standard adhesive strip, but a larger 24 × 36‑inch piece needs a stronger backing or a rail system. And a plaster wall will grip a strip differently than a smooth painted drywall.
When you go with adhesive strips, clean the area with a damp cloth, then dry it thoroughly. Press the strip onto the wall for at least 30 seconds, and wait a minute before attaching the canvas. This “let it set” step is the secret most people skip, and it’s why a strip sometimes pulls off paint later on.
Tip: Use two strips per corner for larger canvases – that spreads the load and keeps the canvas level. If you ever need to move the piece, heat the strip gently with a hair‑dryer; the adhesive softens and comes off cleanly.
Velcro pads work like a tiny hook‑and‑loop system. You stick one side to the wall and the matching side to the back of the canvas. The biggest win? You can lift the canvas in one smooth motion, which is perfect for gift‑buyers who love rotating seasonal photos. Just be sure the pad’s weight rating exceeds the canvas’s total weight.
Magnetic kits are a bit flashier. They involve a thin metal strip that you tape behind the canvas and a magnetic strip on the wall. The result is a sleek, almost invisible mount that feels like the canvas is floating. They’re especially handy for metal‑framed canvases or when you want a modern, industrial look.
Here’s a quick visual guide – watch the video below for a step‑by‑step demo of each method in action.
After you’ve applied your chosen system, give it a gentle tug. If the canvas holds firm without wobbling, you’re good to go. If it slides, add another strip or pad and retest. This quick “shake test” saves you from a sudden drop later.
To keep things organized, run through this checklist before you start:
- Measure the canvas dimensions and weight.
- Identify wall material (painted drywall, plaster, tile).
- Choose a hanging system that matches weight and wall type.
- Gather cleaning cloth, strips/pads/magnets, and a ruler.
- Test the hold with a gentle tug after installation.
If you’re looking for inspiration on how the finished piece can tie into a larger décor story, check out our guide on design and hang custom photo canvas wall art. It walks you through color coordination, placement, and even how to create a gallery‑wall feel without ever drilling.
And remember, the same nail‑free methods work beautifully for original artwork, too. For example, the landscape paintings sold by Gratitude Studios can be displayed with any of the systems we just covered, keeping those breathtaking vistas safe and pristine on your wall.
Take a minute now to pick your system, gather the supplies, and you’ll be ready to hang that custom canvas in under ten minutes. No holes, no mess, just a proud moment when you step back and see your art perfectly framed by the wall.
Step 2: Gather Materials and Tools
Alright, before you even think about sticking anything to the wall, pause and make a quick inventory. Having the right tools in hand turns the whole "how to hang canvas without nails" process from a guess‑work experiment into a smooth, confidence‑boosting routine.
First off, pick your hanging system. If you went with adhesive strips in Step 1, grab a pack of Command™ picture hangers (the size that matches your canvas weight). For Velcro‑style pads, you’ll need the interlocking duo—one for the canvas back, one for the wall. And if you’re feeling a bit futuristic, a magnetic kit comes with a thin metal strip or magnetic tape and a matching plate for the canvas.
Basic toolbox essentials
• Ruler or measuring tape – you’ll need exact placement, especially if you’re aligning multiple pieces.
• Pencil – a light mark makes it easy to adjust without leaving a scar.
• Level (spirit level or laser) – nothing kills the vibe like a crooked canvas.
• Cleaner – a soft cloth and a dab of mild dish soap, then dry. Clean surface = strong adhesive.
Does this list feel familiar? Maybe you already have most of it in a drawer labelled “DIY”. If not, a quick trip to the local hardware aisle will cover everything.
Specialty items for each method
For adhesive strips, make sure the package includes the “double‑sided” halves—some brands sell them separately. Velcro pads often come with a small scraper to smooth out air bubbles before pressing. Magnetic kits need a metal strip that can be painted over; a thin, flexible steel tape works best because it conforms to wall texture.
And here’s a tiny tip: keep a spare set of each fastener. We’ve seen parents lose a strip when cleaning the wall later, and a backup saves you a second trip to the store.
Now, think about safety. If you have kids or pets, a small pair of scissors or a utility knife will help you trim excess adhesive without leaving sharp edges that could be a hazard.
So, what should you do next? Lay everything out on a clean surface, check the weight rating on each fastener, and double‑check that your canvas dimensions match the recommended size range.
Take a moment to watch the short video above. It walks you through the exact placement of a Command™ strip, showing the pressure‑time trick that makes the bond last longer—especially useful in humid kitchens or bathrooms.
After the video, grab your ruler and measure the top edge of the canvas. Mark the spot on the wall with a light pencil line—don’t worry, the mark fades with a little cleaning later. Then, using the level, make sure that line is perfectly horizontal. If you’re hanging a series, repeat the measurement for each piece, keeping the spacing consistent (a good rule of thumb is one‑inch gaps for a cohesive gallery).
Quick checklist before you start
☑ Clean the wall area thoroughly.
☑ Verify the weight rating of your chosen fastener.
☑ Measure and mark the exact placement.
☑ Have a spare strip/pad ready.
☑ Keep scissors, a pencil, and a level within arm’s reach.
☑ Watch the video for the pressure technique.
When you’ve ticked all the boxes, you’re set to move on to the next step—applying the hardware and testing the hold. Trust us, a well‑prepared toolbox makes the whole "how to hang canvas without nails" journey feel like a breeze, not a battle.
Step 3: Prepare Your Wall and Canvas
Alright, the moment you’ve measured and marked is finally here – now it’s time to give the wall and your canvas a quick once‑over before any fastener touches.
Grab a lint‑free cloth, a dab of warm soapy water, and wipe the spot where the strip will sit. No fingerprints, no dust, just a dry, oil‑free surface.
Why a spotless wall matters
Even a speck of dust can act like a tiny wedge, weakening the hold and turning a “no‑nail” win into a slow tumble. At heartful.gifts we see this trip up parents who skip the wipe.
If the paint is glossy, lightly sand the spot with 220‑grit sandpaper, then wipe away the dust. That extra tooth helps the adhesive grip in humid rooms.
Think about the room’s climate. In bathrooms or kitchens where steam hangs in the air, wait an extra 15 minutes after cleaning before applying the strip. Warm, dry conditions let the adhesive cure stronger. If you live in a dry climate, a quick press for a full minute gives the glue time to set.
Prep the canvas back
Flip the canvas, check the stretcher bar for splinters or warping, and give the back a gentle dust‑off with the same cloth. A strip of painter’s tape over the adhesive area protects the finish while you press.
Pro tip: a quick swipe of rubbing alcohol on the pad side (not the canvas) can boost stickiness for Velcro‑style pads, but only if the manufacturer says it’s safe.
Test the bond before you commit
Do a quick “stick test”: press one half of the strip on the wall for ten seconds, then peel it off. If it leaves a clean, residue‑free spot and feels firm, you’re good. If not, wipe and try again. Repeat on the canvas side – a brief press should feel secure, not rubbery.
Gather your tools and set up a workspace
Lay out strips or pads, scissors, ruler, level, and a pencil. Keep the canvas upright on a clean table so you can line up the fasteners without constantly flipping it.
Safety tip: keep scissors or a utility knife out of reach of kids while you trim excess adhesive. A small pair of nail‑nippers works well for cutting the backing without leaving jagged edges that could snag clothing.
We know parents juggle kids and chores, so keep a small trash bin nearby for scrap paper and used backing – a tidy zone saves you from stepping on a fresh strip.
If you’re hanging a gallery wall, repeat the prep steps for each piece. Use a laser level or a string line to keep the top edges aligned, and double‑check spacing before any adhesive meets the wall.
Final quick‑check checklist
☑ Wall clean, dry, sanded if glossy
☑ Canvas back dust‑free, frame stable
☑ Adhesive passed stick test
☑ Tools within reach
☑ Level and ruler ready
When every box is ticked you’ll feel that quiet confidence that says, “Yes, I’ve got this.” The next step – attaching the hardware and testing the hold – will flow smoothly, not feel like a gamble.
Now you’re ready to move on to the next step – applying the hardware. Trust the prep you’ve done and enjoy a flawless, nail‑free display.
Step 4: Install the Hanging System – Comparison of Options
Now that you’ve cleaned, measured, and gathered everything, it’s time to actually attach the hardware. This is the part where “how to hang canvas without nails” stops feeling like a theory and becomes a hands‑on win.
Option 1: Adhesive strips (Command™ style)
Adhesive strips are the go‑to for most parents and gift‑buyers because they’re quick, cheap, and leave no residue. You peel the backing, press the strip to the wall for 30 seconds, then repeat on the canvas back. After a minute of firm pressure the bond sets, and you can step back to admire your work.
Tip: give the strips an extra hour before putting any weight on them if you live in a humid kitchen or bathroom. The extra cure time makes the hold feel rock‑solid.
Option 2: Velcro‑style interlocking pads
Velcro pads give you a little more “give” than straight‑up strips. One half sticks to the wall, the other to the canvas, and the two snap together with a satisfying click. They’re ideal when you want to lift the canvas off the wall for a quick wipe‑down or a seasonal swap.
Just make sure both surfaces are spotless and dry – a speck of dust can turn that click into a slip.
Option 3: Command hooks
Command hooks work especially well for heavier frames or when you need a tiny overhang to hang a larger canvas. The hook itself bears the weight, while the strip does the sticking. Hang the canvas on the hook, step back, and adjust until it’s level.
Because the hook protrudes, you can still slide the canvas left‑right for perfect alignment without re‑applying any adhesive.
Option 4: Magnetic kits (for metal‑backed canvases)
If you’ve ordered a canvas with a thin metal strip on the back, magnetic kits turn the wall into a silent, invisible rail. You apply a magnetic tape to the wall, then press the metal side of the canvas onto it. The result feels like a modern art gallery—no visible hardware at all.
Magnetic systems are great for renters who love to change the look weekly, but they do have a lower weight ceiling.
Wondering how these ideas stack up against each other? Below is a quick‑glance table that lets you compare the most common nail‑free methods.
| Method | Typical Max Weight | Pros | Cons |
|---|---|---|---|
| Adhesive strips | 3–5 lb | Easy, invisible, inexpensive | Not great on humid or textured walls |
| Velcro pads | 5–8 lb | Reusable, easy to remove, good for frequent changes | May leave faint marks on delicate paint |
| Command hooks | Up to 8 lb | Provides overhang, strong grip | Hook is visible, needs extra space |
| Magnetic kit | 2–4 lb | Ultra‑clean look, quick reposition | Requires metal backing, lower weight limit |
So, which one feels right for your living‑room canvas? If you’re hanging a 2‑pound family portrait above a sofa, adhesive strips will do the trick in under five minutes. If you love swapping out seasonal art with your kids, Velcro pads save you the hassle of re‑applying strips each time.
And here’s a little extra nugget: the same principles you use for canvas also work for metal wall art, as explained in a guide about hanging metal pieces without drills. The article points out that sticky strips, Velcro, and magnetic solutions all translate well across materials different ways to hang metal wall art without nails. That cross‑compatibility means you can keep a single toolbox for all your gift‑wrapped art.
Before you finish, run through this mini‑checklist:
- Strip or pad is rated for your canvas weight.
- Wall surface is clean, dry, and at room temperature.
- Press each adhesive for at least 30 seconds.
- Wait the recommended cure time (usually 60 seconds to an hour).
- Level the canvas and adjust as needed.
When the checklist is green, step back, admire your handiwork, and enjoy the fact that you didn’t leave a single nail hole. You’ve just turned a potential DIY disaster into a smooth, damage‑free moment—exactly the kind of win we love to celebrate at heartful.gifts.
Step 5: Position and Level Your Canvas
You've got the adhesive or Velcro in place, the wall is clean, and the canvas is finally hugging the surface. The next question everybody asks—"Is it straight?"—is the real make‑or‑break moment. A crooked canvas can feel like a tiny failure, especially when you’ve just avoided a nail hole. Let’s walk through how to get that perfect, gallery‑ready level without breaking a sweat.
Grab a level, then give it a quick sanity check
Even a cheap spirit level works wonders. Place it on top of the canvas and watch the bubble. If it’s dead‑center, you’re good. If not, don’t panic. Most of the time the adhesive gives you a little wiggle room before it hardens. Gently nudge the canvas left or right, up or down, and re‑check. The key is to move in small increments—think of it like adjusting a picture on a fridge door, not shoving a heavy box.
Pro tip: a marble (the kind you use for rolling dough) is an inexpensive alternative. Put it on the top edge; if it rolls toward the center, you’ve got a slope.
Use the “two‑point” method for confidence
Instead of trusting a single level reading, pick two spots on the top edge—one near the left, one near the right. Align the level at each point. If both readings are level, the whole piece is level. If one side is off, you’ve isolated the problem and can correct it without guessing.
Imagine you’re a parent hanging a family portrait above the couch. You’ll probably stand on tip‑toes, look down, and wonder if the kids’ faces are perfectly aligned with the sofa. The two‑point method removes that guesswork, giving you a visual cue you can trust.
What if the canvas is heavy?
When the canvas weighs more than 5 lb, the adhesive’s “give” might be less forgiving. In that case, press each corner for an extra 10 seconds after you think it’s level. The added time lets the glue settle and lock the canvas into the exact spot you’ve chosen.
Data from Tribeca Printworks shows that picture‑hanging strips can support up to 16 lb when properly pressed and allowed to cure for at least an hour in humid environments picture‑hanging strips. That extra strength means you can still fine‑tune the position after the initial press without fear of the strip pulling away.
Quick checklist before you step back
- Place a level (or marble) on the top edge.
- Check both left and right points; adjust in <1 cm increments.
- Press each corner for an additional 10 seconds if the canvas is heavier than 5 lb.
- Step back, view from eye level, and make sure the visual line feels straight.
- If you notice a tiny tilt, re‑apply gentle pressure and let the adhesive cure another 30 seconds.
Does it feel like too many steps? Think of it as a mini‑ritual that turns a simple hanging job into a moment of mindfulness. You’re not just slapping a piece on the wall; you’re curating a focal point that will be seen every day.
Real‑world scenario: a spouse’s anniversary surprise
Mark, a husband, wanted to surprise his wife with a custom canvas of their wedding day. He used Velcro pads because he’d likely move the piece for cleaning. After the pads were stuck, he followed the two‑point level method, nudged the canvas just a hair to the left, and pressed the corners again. The result? A perfectly straight canvas that his wife praised as “exactly where it should be” during the first toast of the night.
Another example: Lisa, a busy mom, hung a 24×36 in. canvas of her kids’ art using large picture‑hanging strips. She let the strips cure for 45 minutes (a bit longer than the standard 60 seconds) because her kitchen tends to get steamy. The extra curing time gave her confidence to fine‑tune the level without the strips slipping.
Final thoughts
Positioning and leveling is the last piece of the puzzle that turns “I hung it” into “I nailed it”—without actually nailing anything. Take a moment to double‑check, use a level or marble, press a little longer on heavier pieces, and you’ll end up with a wall that looks intentional, not improvised. And remember, the same principles work for metal art or any other nail‑free hanging system you might try next.
Now step back, admire the straight line, and enjoy the fact that you’ve kept your walls pristine while showcasing a piece that truly matters.
Step 6: Secure and Finish the Display
Now that your canvas is perfectly level, the last thing to worry about is making sure it stays exactly where you left it – no sneaky slips, no accidental drifts, and definitely no hidden nail holes.
First, give each corner a firm press. If you’re using adhesive strips, hold the corner for about 10‑15 seconds while you feel the strip bite into the paint. For Velcro pads, give a satisfying click and then press a little longer so the tiny teeth settle into the wall texture. This extra pause is like a handshake that says, “We’re in this together.”
Seal the edges
Even the best strips can be a tad shy around the edges, especially on textured paint. Grab a clean fingertip or a soft rubber roller and glide it along the perimeter of the strip. You’ll see any air bubbles disappear and the adhesive flatten out. It only takes a few seconds, but the difference between a wobble‑free display and a canvas that slowly slides downhill is huge.
And if you’re a parent who worries about little hands tugging at the artwork, consider adding a thin line of painter’s tape over the strip’s outer edge. The tape blends in, protects the strip from accidental pulls, and comes off cleanly when you eventually want to move the piece.
Test the hold
Before you step back and admire your handiwork, do a quick “pull test.” Gently tug the canvas upward about an inch. If it resists and stays put, you’re good. If you feel a slight give, re‑press that spot for another 10 seconds. This tiny sanity check saves you from a surprise drop later when someone leans against the wall.
Remember the rule of thumb we’ve learned from countless heartful.gifts customers: a canvas that weighs up to 5 lb usually needs just one strip per corner, but heavier pieces benefit from a second strip placed midway along the top edge. Adding that extra strip distributes the load and keeps the canvas from sagging over time.
Final aesthetic touches
Now that the hardware is locked, think about the visual finish. A clean wall line is more satisfying when there’s no visible adhesive. If you spot a stray strip edge, gently scrape it with a plastic card (like a credit card) to smooth it out. You can also use a cotton swab dipped in a dab of mild soap water to wipe away any residue – just be sure the wall is dry before the canvas settles back onto it.
For a polished look, step back and look at the canvas from eye level. Does the top edge line up with nearby furniture? Does the light hit the surface evenly? Small adjustments now are far easier than trying to nudge a stuck canvas later.
Protecting your display long‑term
Once everything feels solid, give the area a light dusting with a feather duster or a soft microfiber cloth. This keeps dust from collecting on the adhesive, which can weaken the bond over months. If you live in a humid kitchen or bathroom, wait an extra hour before touching the canvas again – the extra curing time lets the glue reach its full strength.
And here’s a tip that many of our gift‑buyer friends swear by: keep a spare set of the same strips or pads in your drawer. A few months down the line, when you want to swap out a seasonal photo, you won’t have to hunt for the exact same product. It’s a tiny habit that pays off in peace of mind.
So, what’s the final checklist?
- Press each corner for 10‑15 seconds.
- Roll along the edges to eliminate bubbles.
- Do a gentle pull test and re‑press if needed.
- Hide any visible strip edges with painter’s tape if desired.
- Wipe away residue and dust the area.
- Allow extra curing time in humid spaces.
- Store spare strips for future swaps.
When you tick all those boxes, you can walk away feeling confident that your canvas is not just hanging – it’s secured, finished, and ready to be the centerpiece of the room for years to come. And the best part? You did it all without a single nail, preserving the pristine look of your walls while showcasing a piece that truly matters.
Conclusion
So there you have it—hanging a canvas without nails isn’t a trick, it’s a tidy little routine you can master in a coffee break.
We’ve walked through cleaning the surface, choosing the right adhesive or pad, pressing each corner, and giving everything a gentle pull test. If you followed those steps, you’ve already earned bragging rights among the other parents swapping out seasonal art.
What’s the biggest win? No holes, no damage, and a piece that looks like it was born on the wall. That means you can swap a birthday photo for a holiday print whenever the mood strikes, without a single screwdriver in sight.
Key takeaways
- Start with a spotless wall; dust is the silent enemy of adhesion.
- Match the fastener to the canvas weight—Command strips for light pieces, Velcro pads for a bit more heft.
- Give the adhesive extra cure time in humid rooms; a little patience pays off.
- Press, level, test, and then step back to admire the straight line you just created.
In our experience at heartful.gifts, the most satisfied gift‑buyers are the ones who keep a spare strip or pad on hand—so the next time you want to surprise a spouse or celebrate a new milestone, you’ll be ready.
Ready to turn another wall into a gallery? Grab the right nail‑free system, follow the checklist, and enjoy a flawless display that’s as gentle on your walls as it is on your budget.
FAQ
Can I really hang a canvas without nails on drywall?
Absolutely. The key is a clean, dry surface and a fastener rated for the canvas weight. Command™ strips, Velcro pads, or magnetic kits work well on smooth drywall. Press the adhesive firmly for at least 30 seconds, let it cure (60 seconds to an hour in humid rooms), then level the piece. You’ll get a secure hold without a single hole.
What if my wall is textured or painted glossy?
Textured or glossy paint can reduce adhesion, but a quick sand‑down with fine‑grit paper creates a micro‑tooth that the strip can bite into. After sanding, wipe away dust and apply the adhesive as usual. For especially tricky finishes, a small dab of rubbing alcohol on the wall (once it’s dry) can help the glue bond better.
How many strips or pads do I need for a larger canvas?
Think of the canvas weight, not just its size. For pieces under 3 lb, two strips—one at each top corner—usually suffice. If you’re up to 5 lb, add a third strip midway along the top edge or use a set of Velcro pads that distribute the load. This extra support prevents sagging and keeps the piece level.
Will the adhesive damage my paint if I remove it later?
When you follow the manufacturer’s removal instructions—pulling the strip straight down at a steady angle—it lifts cleanly without pulling off paint. Test a tiny corner first; if any residue appears, a soft cloth dampened with warm soapy water will usually dissolve it. For delicate walls, keep a spare strip on hand so you can replace any that lose grip over time.
Can I use these nail‑free methods in a humid bathroom?
Humidity does slow the curing process, so give the adhesive extra time—up to an hour before loading the canvas. Choose strips labeled “humidity‑resistant” or use Velcro pads, which tend to tolerate moisture better. A quick fan or open window helps the wall dry faster, ensuring the bond stays strong.
How do I safely remove a canvas if I need to clean the wall behind it?
First, support the canvas with one hand while you gently lift the edge of the strip or pad. Pull straight down, never sideways, to avoid tearing paint. Once the piece is free, wipe the wall with a lint‑free cloth and mild soap, let it dry, and re‑apply fresh adhesive if you plan to rehung it. This routine keeps both your art and wall pristine.