
How to Create a Personalized Custom Photo Phone Case That Stands Out
Ever stare at your phone and feel like the case is just another piece of plastic you’re stuck with?
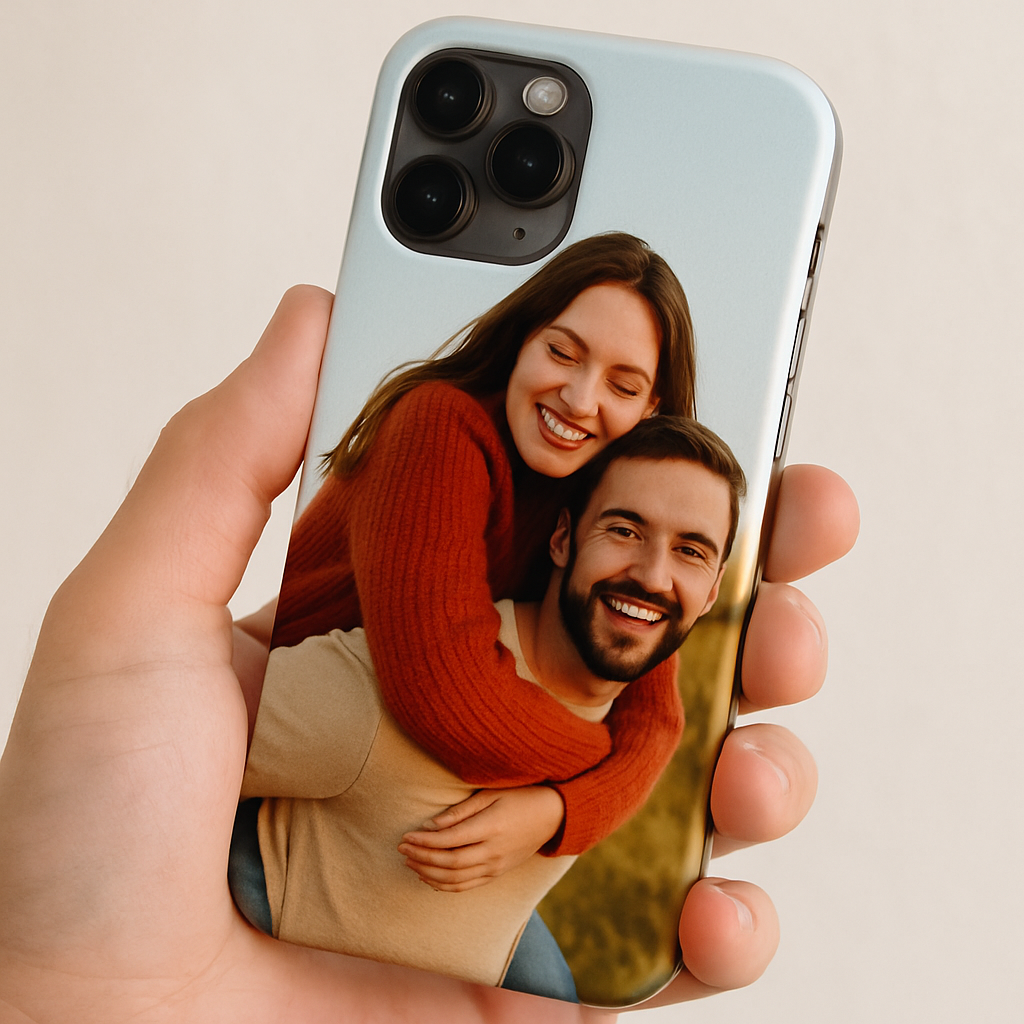
What if you could turn that everyday accessory into a tiny gallery of your favorite memory, like a family vacation snap or your kid’s goofy grin?
That’s exactly what a custom photo phone case gives you – a personal touch that makes your phone feel less like a gadget and more like a little piece of home you carry wherever you go.
And the best part? You don’t need any design skills or expensive equipment; just upload a photo, pick a style, and let a print‑on‑demand shop handle the rest.
I remember the first time I ordered one for my sister’s birthday – I chose a candid shot of her laughing on the beach, and when the package arrived she actually cried, because it felt like I’d captured that sunny moment and tucked it into her pocket.
That instant reaction is exactly why more gift buyers are swapping out bland, mass‑produced cases for something that actually tells a story.
So, if you’ve been scrolling through endless phone‑case catalogs wondering which one will finally feel ‘you’, pause and think about the moments you love most.
A custom photo phone case lets you showcase that memory every day, and it’s surprisingly easy to create – just a few clicks and you’ve got a one‑of‑a‑kind accessory that’s ready to protect your device and spark conversations.
Ready to give your phone a personality boost? Let’s dive into how you can pick the perfect photo, choose the right material, and order a case that feels as good as it looks.
Beyond the sentimental side, a well‑made custom photo phone case also adds a layer of protection – the printed layer sits under a tough, scratch‑resistant coating, so your pictures stay vivid while the phone stays safe from everyday bumps.
Give it a try – you’ll wonder how you ever lived without one.
TL;DR
A custom photo phone case turns your favorite memory into a daily‑wear accessory that protects your device and sparks conversation.
In just a few clicks you can upload a picture, pick a material, and order a one‑of‑a‑kind case that feels personal, durable, and ready to show off wherever you go.
Step 1: Choose Your Phone Model
Before you can turn a cherished memory into a custom photo phone case, you need to know exactly which piece of hardware you’re dressing up. It sounds simple, but we’ve all been there – scrolling through a catalog only to realize the case is for a different generation and ending up with a box that won’t fit.
So, let’s break it down together. Grab your phone, and we’ll walk through the exact steps you need to make sure the case snaps on perfectly the first time.
1. Identify the exact model name
Open your Settings app and look for “About phone” (iPhone) or “System > About phone” (Android). The model number is usually a string like iPhone 13 Pro or Samsung Galaxy S23 Ultra. Write it down – you’ll need it when you browse the PHONE CASE – heartful.gifts collection.
And if you’ve ever borrowed a friend’s phone, double‑check the back of the device; manufacturers often stamp the model number right there.
2. Verify screen size and dimensions
Even within the same model line, screen sizes can differ. For example, the iPhone 12 comes in a 6.1‑inch standard version and a 6.7‑inch “Pro Max.” A case for the smaller version will look like a tight squeeze on the larger one.
Use a quick Google search like “iPhone 12 dimensions” or check Apple’s iPhone model comparison page for exact measurements. Android manufacturers typically list dimensions on the product page – just head to the brand’s official site or Android’s official device list for a reliable reference.
Pro tip: jot down the height, width, and thickness. When you later filter cases by those numbers, you’ll avoid the dreaded “doesn’t fit” surprise.
3. Decide on case style and protection level
Do you want a sleek, thin skin that lets the phone’s original feel shine through, or a rugged, shock‑absorbing shell for a busy family? Your choice influences the model list you’ll see. Some shops separate “soft silicone” from “hard polycarbonate” – each may have its own size tolerance.
Think about your daily routine: if you’re constantly juggling keys and coffee, a reinforced corner case is worth the extra bulk. If you’re a minimalist who loves the feel of glass, a clear soft case works better.
4. Check for carrier‑specific variations
In a few regions, carriers add extra buttons or camera bumps. Those tiny differences can make a case that looks perfect on a generic model sit awkwardly on your actual device. Scan the back of your phone for any carrier logos and note them.
Most online shops let you filter by “carrier” – just select yours and the list will shrink to only the compatible options.
5. Test fit (virtually or physically)
Many print‑on‑demand sites now offer a 3‑D preview that lets you rotate the case and see how the cutouts line up with buttons, speakers, and the camera module. Use that tool before you upload your photo.
If you’re buying from a local retailer, ask if they have a demo unit. A quick “does it snap in?” check can save you a return hassle.
Once you’ve confirmed model, size, style, and carrier, you’re ready to move on to the fun part: picking the photo and customizing the design.
Step 2: Select and Prepare Your Photo
Now that your phone model is locked in, the real fun begins – finding the picture that will turn a plain case into a custom photo phone case you’ll actually want to show off.
Ever looked at a photo and thought, “That would look amazing on my phone, but it’s a little blurry”? You’re not alone. Most of us have that one perfect shot sitting in a camera roll, hidden behind a dozen screenshots and memes.
1. Spot the emotional core
Start by asking yourself what memory you want the case to whisper every time you pull it out. Is it your kid’s first day of school, a sunrise from that road‑trip, or maybe a goofy pet face? The stronger the feeling, the more the image will resonate.
Here’s a quick trick: grab the photo, zoom in, and see if you can still feel the moment. If it makes you smile, grin, or even tear up, you’ve got a winner.
2. Check resolution – the hidden hero
Most print‑on‑demand services recommend at least 1500 × 1500 px for a crisp case. Anything lower, and you risk pixelation, especially on larger phones. For a full‑bleed design on a 6.5‑inch phone, aim for 3000 × 3000 px.
Why does this matter? A study by Adobe on image resolution shows that a 300 dpi source yields a noticeably sharper print than a 72 dpi one, even on glossy finishes.
3. Clean up the background
If the subject is your niece blowing bubbles, you probably don’t need a busy café scene behind her. Use a free editor like Canva or your phone’s built‑in tools to blur or crop out distractions. A clean backdrop lets the main subject pop and avoids “noise” when the image wraps around the case edges.
Pro tip: keep a margin of at least 0.5 inches around the focal point. That safety zone prevents the camera cutout or corners from cutting into the action.
4. Color consistency and lighting
Photos taken in harsh midday sun often have blown‑out highlights. If you notice that the sky is pure white or shadows are lost, pull the image into a simple editor and adjust exposure or add a subtle vignette. The goal is balanced tones so the colors stay true once printed.
According to CNET’s guide to editing for phone cases, a modest 10‑15 % increase in contrast can make the image “pop” without looking over‑processed.
5. Choose the right file format
Most sites accept JPEG or PNG. JPEG keeps file size small but can introduce compression artifacts if you re‑save multiple times. PNG preserves every pixel, which is perfect for graphics or text overlays. If you’re adding a quote, go PNG.
And remember: save the final file at the highest quality setting – you don’t want the platform to re‑compress it again.
6. Test the look before you buy
Many custom case makers provide a 3‑D preview. Upload your edited photo, rotate the model, and make sure the eyes aren’t hidden behind the camera bump. If the preview shows the image bleeding into the side cutouts, go back and shift the composition a bit.
It’s also worth printing a quick 4 × 6 in test on regular paper. Hold it up to your phone – does the composition feel balanced? This cheap “paper mock‑up” can save you a costly re‑order.
Quick checklist
- Emotionally resonant photo selected
- Resolution ≥ 1500 px (preferably 3000 px for larger phones)
- Background cleaned or blurred
- Exposure, contrast, and color balanced
- Saved as high‑quality JPEG or PNG
- Margin of 0.5 in preserved around main subject
| Photo type | Recommended resolution | Prep tip |
|---|---|---|
| Portrait (person) | 3000 × 3000 px | Crop close, keep eye line clear of cutouts |
| Landscape (scenery) | 3000 × 2000 px | Leave extra space at top for camera module |
| Graphic / Text overlay | 2500 × 2500 px PNG | Use transparent background, high contrast |
By following these steps, you’ll turn that favorite snap into a case that not only protects your phone but also carries a story you’ll love to share. Ready to upload? The next step is all about picking the case style that lets your photo shine.
Step 3: Design Your Layout
Okay, you’ve got the perfect photo and you’ve already confirmed that it fits your phone model. Now comes the fun part – turning that image into a layout that looks amazing from every angle. Designing a custom photo phone case isn’t just about slapping a picture onto a rectangle; it’s about thinking like a designer who wants the eye to dance around the camera bump, the buttons, and the edges.
1. Sketch a quick wireframe
Grab a scrap of paper or open a simple drawing app. Sketch the outline of your phone – include the camera module, speaker grill, and side button cut‑outs. Then, place your photo inside that frame. This low‑fi step helps you see where important parts of the image might get hidden.
Pro tip: keep a 5‑mm “safe zone” around the camera and the top edge. Anything crucial – a smiling face, a bold text, a bright sunrise – should stay outside that zone.
2. Choose a layout style that matches the image
There are three go‑to styles most people love:
- Full‑bleed – the picture stretches to the edge. Great for landscape shots or abstract art.
- Centered focal – the main subject sits dead‑center, with a subtle background bleed. Works for portraits.
- Bordered collage – a thin border frames the image, giving a vintage vibe. Perfect for family‑photo grids.
Think about the story you want to tell. If it’s a beach sunset, a full‑bleed will let the horizon hug the sides. If it’s a newborn’s face, a centered focal point makes the tiny details pop.
3. Play with color balance and contrast
Even the best‑resolution photo can look dull on a glossy case if the colors don’t have enough punch. Use a free editor (Canva, Snapseed, or even your phone’s built‑in tools) to boost contrast by about 10‑15 % and add a subtle vignette. This trick draws the eye inward and hides any minor edge‑fade that can happen during printing.
According to design guidelines from Smashing Magazine, a modest increase in contrast improves perceived sharpness on small‑format prints like phone cases.
4. Add text or graphics without crowding
If you want a quote, initials, or a tiny icon, keep it under 10 % of the total case surface. Place it in a corner that doesn’t interfere with the camera or button cut‑outs. Use a high‑contrast color – white text on a dark photo, or black on a light one – so it stays legible after printing.
Walgreens Photo’s design tool recommends using simple, high‑contrast fonts for small‑format prints, because intricate fonts can become unreadable when shrunk.
5. Test the layout in 3‑D (if the site offers it)
Most print‑on‑demand platforms, including heartful.gifts, let you rotate a 3‑D mockup. Load your design, spin the case, and watch how the image wraps around the edges. If any key detail disappears behind the camera bump, go back and shift the composition a few pixels.
And remember: you can always download a quick 4 × 6 in printout, hold it up to your phone, and see if the composition feels balanced. It’s a cheap sanity check before you click “order.”
6. Final checklist before you hit “Save”
- Safe zone of 5 mm around camera, speaker, and side buttons?
- Contrast boosted 10‑15 % and a subtle vignette applied?
- Any added text under 10 % of surface area and high‑contrast?
- Layout style (full‑bleed, centered, or bordered) matches the image’s story?
- 3‑D preview looks good from all angles?
Once you tick those boxes, you’re ready to move on to the final step: ordering your custom photo phone case and showing it off to friends. Trust the process, enjoy the creativity, and remember – a well‑designed layout makes the difference between “nice” and “wow‑worthy.”
Step 4: Choose Materials and Finish
Now that your layout is nailed, the next decision feels a bit like picking the frame for a painting – it can either lift the whole piece or mute it. The material you choose for your custom photo phone case determines how the colors pop, how the case feels in your hand, and how long it will protect your device.
Know your options
Most print‑on‑demand shops offer three main substrates:
- Soft TPU (thermoplastic polyurethane) – flexible, rubbery, and great for shock absorption. It gives a matte finish that softens glare.
- Hard polycarbonate – rigid, glossy, and shows colors at their brightest. It’s the go‑to for a sleek, premium look.
- Hybrid (hard back + soft bumpers) – combines the snap‑fit protection of polycarbonate with the edge‑cushion of TPU.
Which one feels right for you? Think about your daily routine. If you’re the type who drops your phone on concrete, the soft TPU or hybrid will cushion the impact. If you love a glass‑like shine and want the image to look museum‑ready, hard polycarbonate is your friend.
Real‑world examples
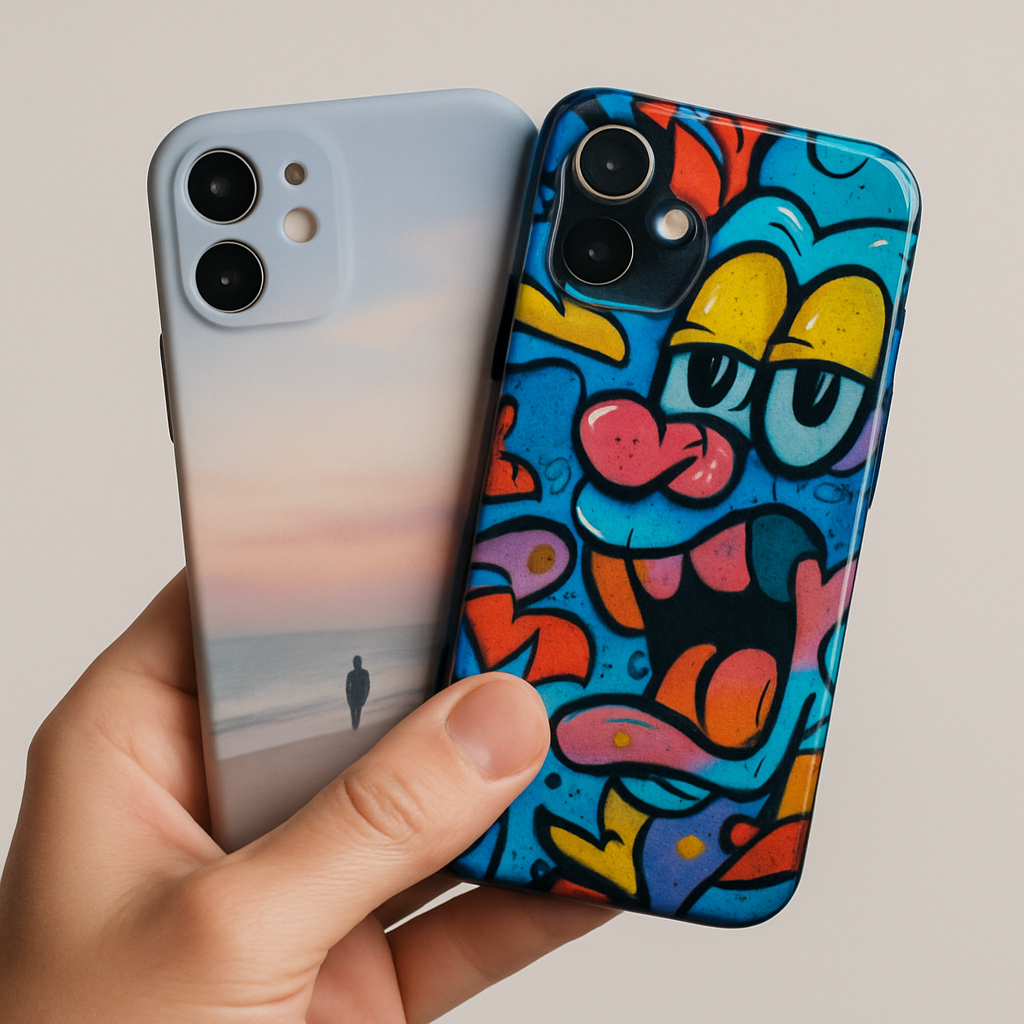
Take Maya, a new mom who wanted a case featuring her baby’s first giggle. She chose a soft TPU case because the rubbery feel reminded her of a baby’s plush blanket, and the matte surface reduced fingerprints on the photo.
Meanwhile, Alex, a graphic designer, printed a vibrant street‑art piece on a hard polycarbonate case. The glossy finish amplified the neon colors, turning his phone into a walking billboard.
Actionable steps to pick the perfect material
1. Match the vibe: If your photo is a calm landscape, a matte TPU adds a soothing texture. For bold, high‑contrast images, go glossy.
2. Check durability specs: Look for cases rated “mil‑drop” or “shock‑absorbent” if you need extra protection. Many vendors list a drop‑test rating in millimeters.
3. Consider thickness: TPU cases usually add 0.8‑1 mm, while polycarbonate adds about 0.5 mm. If your phone already feels bulky, the thinner option may be preferable.
4. Feel it (if possible): Some sites ship sample swatches. Order a tiny strip of TPU and polycarbonate, hold them side by side, and notice the difference in grip and sheen.
5. Think about finish: Matte finishes hide fingerprints, but they can look dull under bright light. Glossy finishes showcase colors but may need a microfiber wipe every day.
6. Read reviews: A quick glance at TechRadar’s guide to phone case materials shows that users rate TPU as the most comfortable, while polycarbonate wins on visual fidelity.
7. Check environmental impact: If sustainability matters, look for cases made from recycled TPU or biodegradable polycarbonate. A recent Digital Trends roundup highlights several eco‑friendly options that still deliver crisp prints.
Finishing touches that matter
Beyond the base material, you can add a few finishing details that elevate the overall feel:
- Edge coating: Some vendors offer a soft silicone ring around the edges, which helps the case slide onto the phone without scratching.
- Anti‑yellowing treatment: UV‑resistant coatings keep white or bright areas from turning yellow over time.
- Textured back: A subtle raised pattern can improve grip and add a tactile element that complements the photo.
When you’re happy with the material, the finish, and the extra details, you’re almost ready to place the order. Just double‑check that the safe zones you set earlier still line up with the case’s cut‑outs – a quick 4 × 6 printout held against the phone works wonders.
And remember, the right material doesn’t just protect your phone; it turns your cherished memory into a piece of everyday art you’ll actually want to show off.
Step 5: Order and Care for Your Custom Photo Phone Case
Confirm your design one last time
Take the printed 4×6 mockup we talked about earlier, hold it up to your phone, and make sure the eyes, text, or any bright spot stays clear of the camera cut‑out. If something looks off, hop back into the design tool, shift it a few pixels, and re‑download. A quick visual check saves you from a pricey re‑print later.
Pro tip: most sites let you preview the case in 3‑D; rotate it, zoom in on the edges, and even view the back under different lighting. If the preview looks fuzzy, that’s a sign the image resolution might be too low.
Choose the right shipping & payment options
Heartful.gifts ships from Europe, so most EU customers see a 2‑3 day standard option. If you’re in the US, expect a 5‑7 day delivery window. When you’re ready, add the case to your cart, pick a payment method you trust, and double‑check the shipping address – a typo can turn a gorgeous case into a “lost in transit” story.
Many shoppers love the “gift wrap” option because it tucks the case in a reusable box that doubles as a mini‑photo album. If you’re buying for a parent or spouse, that little extra feels personal without adding much cost.
Track, receive, and inspect
Once the order is confirmed, you’ll get an email with a tracking number. Keep an eye on it; if the package says “delivered” but you don’t see it at your door, check with neighbours or the building’s front desk.
When the box arrives, open it slowly – the case will be snug around the phone shape. Take a moment to compare the printed image with the original file. Does the color pop? Are the edges crisp? If anything looks off, most vendors have a 30‑day satisfaction guarantee, so snap a photo of the flaw and reach out to customer service.
Everyday care tips that actually work
Cleaning a custom photo phone case isn’t rocket science, but doing it the right way keeps the picture looking fresh. According to iFixit’s guide on phone‑case cleaning, a gentle wipe with a microfiber cloth and a drop of mild dish soap diluted in water removes oil without scratching the print. Rinse the cloth, wipe, then dry with another clean microfiber piece.
Avoid harsh chemicals like ammonia‑based cleaners – they can fade the ink on both TPU and polycarbonate. If you notice a fingerprint on a glossy case, a quick spray of 70% isopropyl alcohol on the cloth (not directly on the case) will evaporate without leaving residue.
Heat is another silent enemy. Leaving your phone on a car dashboard on a sunny day can cause the case material to warp, especially soft TPU. A simple rule: if the surface feels warm to the touch, give it a minute to cool before sliding it back onto the phone.
Store the case in a cool, dry place when you’re not using it. Some users keep a small zip‑lock bag with a silica‑gel packet; that tiny packet absorbs moisture that could otherwise promote yellowing on white backgrounds.
PCMag’s guide on maintaining phone cases notes that wiping your case with a slightly damp cloth every few weeks prevents build‑up and keeps the colors vivid.
Long‑term preservation tricks
If the photo is a once‑in‑a‑lifetime memory – think a wedding vow or a newborn’s first smile – consider an extra layer of protection. A clear, anti‑scratch film (the kind you buy for tablets) can be applied gently over the back. It adds a thin barrier against scratches while staying virtually invisible.
Another trick is rotating the case every few months. Swapping the front and back (if you’ve printed on a clear side) gives the image a break from constant friction with pockets and keys.
Real‑world examples
Jenna ordered a matte TPU case with her wedding photo. She followed the cleaning routine above and, six months later, the image still looks vibrant – the matte finish even hid a few tiny fingerprints that would have been obvious on a glossy case.
Meanwhile, Marco, a graphic designer, chose a glossy polycarbonate case for his city‑scape illustration. He uses a dedicated case‑cleaning spray once a month and stores the phone in a leather sleeve at night. The colors remain as bold as day one, and the UV‑resistant coating he selected keeps the neon blues from fading.
Does any of this feel overwhelming? Not at all. Think of it as a short checklist you run through once a month, and your custom photo phone case will stay a conversation starter for years.
Quick checklist before you finish
- Print and align a mockup; adjust safe zones if needed.
- Select material, finish, and optional gift‑wrap.
- Confirm shipping address and track the order.
- Clean with microfiber + mild soap; avoid harsh chemicals.
- Protect from heat, store dry, consider a clear film.
- Re‑inspect every few months and enjoy the memory.
Now you’ve got the full roadmap – from the moment you click “order” to the day you’re proudly showing off your custom photo phone case. Go ahead, place that order, and let your favorite memory travel with you.
Conclusion
We've walked through every step, from picking the perfect material to protecting your memory for years.
Remember, the magic of a custom photo phone case isn’t just the print – it’s the feeling you get every time you glance at your phone.
Key takeaways
Choose a finish that matches your lifestyle – matte for low‑maintenance, glossy for vivid color.
Check durability specs, add a UV‑resistant coating if your photo is light‑rich, and keep a simple cleaning routine.
Use the quick checklist you just saw to stay on track without overthinking.
What to do next?
Head over to heartful.gifts, pick your favorite photo, and let the design tool do the heavy lifting.
When the case arrives, give it a gentle wipe, slip it on, and watch the memory come alive in daily use.
And if you’re buying as a gift, the optional gift‑wrap turns the moment into a shared experience.
Remember, a case is more than protection; it’s a conversation starter that keeps your loved ones close, even when you’re on the go. Keep it clean, keep it bright, and enjoy the personal touch every day.
So, are you ready to turn that cherished snapshot into a piece of everyday art? Click “add to cart” and let your story travel with you.
FAQ
How do I choose the right photo for my custom photo phone case?
Pick a picture that looks good at a small size. A high‑resolution JPEG (at least 1500 px on the longest side) keeps the details crisp when it’s shrunk to fit your phone.
Choose a subject that’s centered and has a little breathing room around the edges – that way the case’s cut‑outs won’t hide the main action. If the photo has bright highlights, consider a matte finish; glossy will make those spots pop but can show fingerprints.
Will my custom photo phone case fit my phone model perfectly?
First, select your exact phone model in the design tool – heartful.gifts lists every major brand and size. The tool then overlays the safe zones so you can see where the camera, buttons and speaker sit.
A quick trick is to print a 4 × 6 in mock‑up, tape it to your phone and step back; if anything looks off, adjust the image before you order. That extra minute saves a costly re‑print.
How long does it take to receive a custom photo phone case from heartful.gifts?
Production usually takes 1‑2 business days once you hit ‘order’. After that, standard shipping in the EU arrives in 2‑3 days, while U.S. customers see a 5‑7 day window.
If you need it faster, heartful.gifts offers an express option that pushes delivery to 1‑2 days for most European locations. Keep an eye on the tracking email – it’s the easiest way to know when your case will land on your doorstep.
Can I add a gift‑wrap or a personal message when ordering?
Absolutely – the checkout page includes a tick box for gift‑wrap. When you select it, heartful.gifts prints a short, handwritten note on the outside of a reusable box that doubles as a mini‑photo album.
You can type a personal message up to 200 characters, and the team will slip it in before sealing the package. It’s a small extra cost that turns a simple case into a keepsake gift.
How should I care for the printed image to keep colors vibrant?
The best way to keep the image looking fresh is to treat the case like you would a pair of sunglasses. Wipe it with a soft microfiber cloth dampened with a drop of mild dish soap, then dry it with a clean piece.
Avoid alcohol on glossy finishes – a quick spray can leave a haze. And remember, direct sun for long periods can fade bright colors, so store the phone in a shade or use a UV‑resistant coating if you choose a glossy polycarbonate.
What if the print quality isn’t what I expected?
If the print looks blurry, the colors are off, or the image is mis‑aligned, heartful.gifts gives you a 30‑day satisfaction guarantee. Snap a clear photo of the problem, write a brief note explaining what went wrong, and send it to their support team.
Most customers get a replacement or a full refund within a week, and the process is handled entirely online – no need to ship the case back first.
Is it safe to use a custom photo phone case with wireless charging?
Yes – most of the cases we print are made from thin TPU or polycarbonate, both of which let wireless chargers work just like a stock case.
The only thing to watch is a very thick protective film; if you add an extra anti‑scratch layer, make sure it’s under 0.2 mm so the magnetic field isn’t blocked. In practice, I’ve seen friends charge their phones on a pad without any hiccups, even with a glossy photo case on.