
How to Create a Custom Photo Moon Lamp: A Friendly Step‑by‑Step Guide
Ever stared at a blank night‑stand and thought, “I wish I could see a memory glow instead of just a boring lamp?” You’re not alone—parents, spouses, and gift‑buyers alike keep craving something that feels both personal and practical.
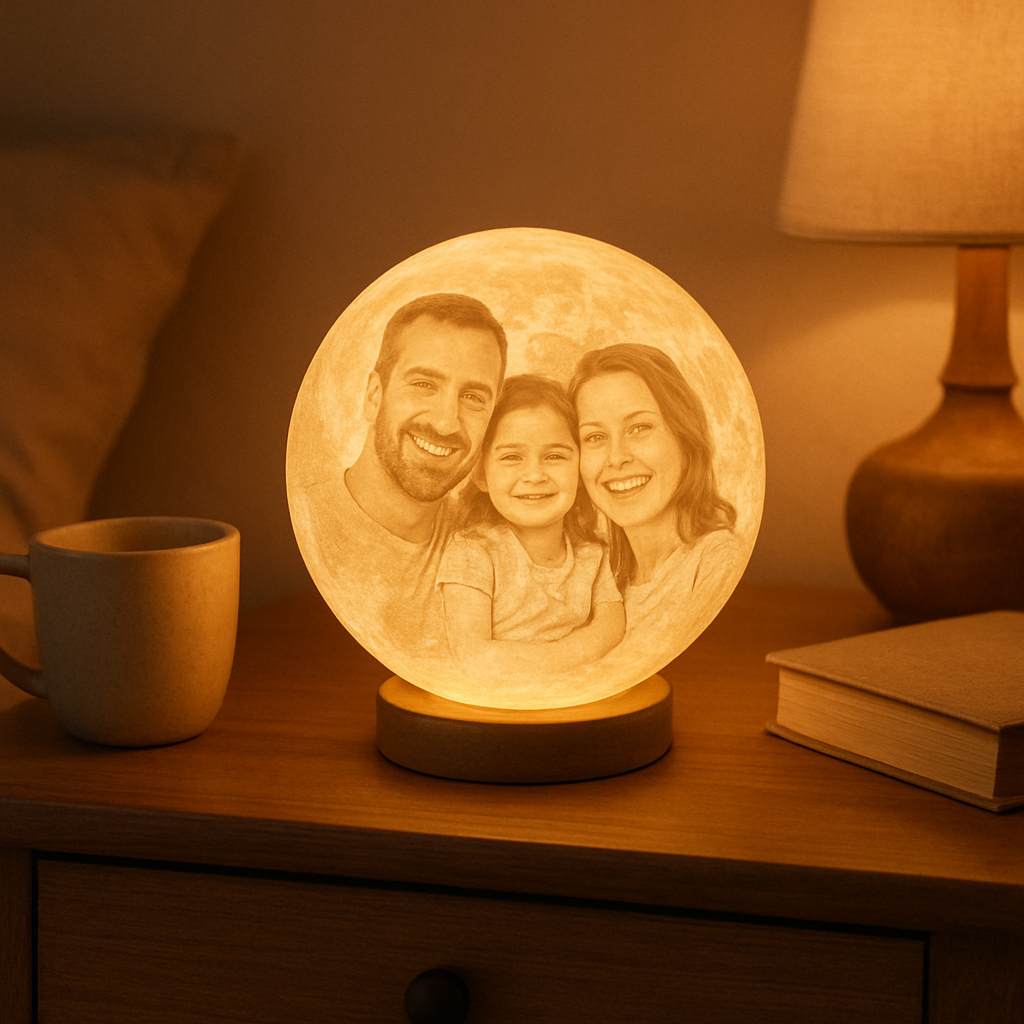
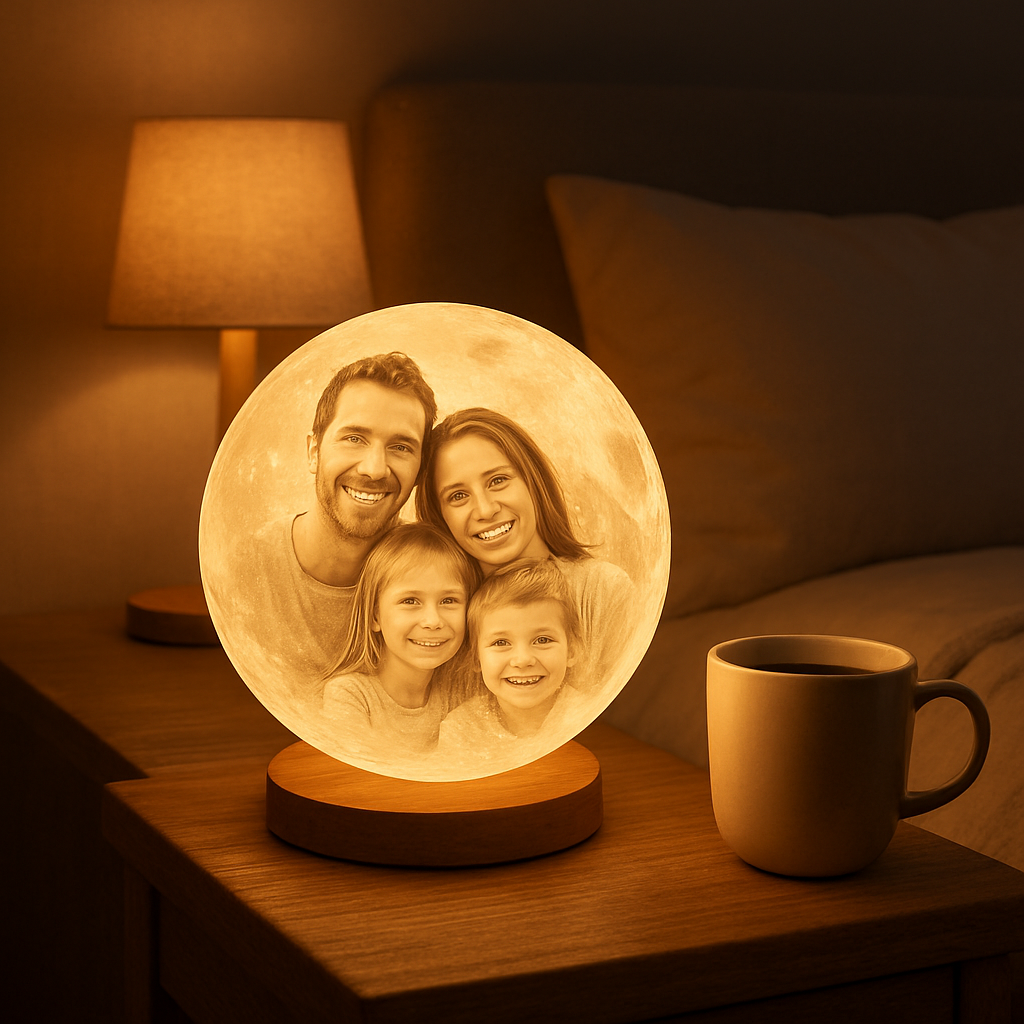
That’s exactly why the custom photo moon lamp has become a go‑to present. Imagine a gentle, spherical night‑light that projects the smile of your toddler or a favorite vacation snapshot onto the ceiling. It’s not just décor; it’s a daily reminder of a moment you cherish.
In our experience at heartful.gifts, the most common hurdle is picking the right photo. A low‑resolution selfie can turn into a blurry galaxy, while a high‑quality portrait brings out crisp lunar craters and vivid colors. A quick tip: use a photo with good lighting and a clear focal point—think a headshot taken by a pro photographer. If you need help, check out Alfapics for portrait services that guarantee the perfect image for your lamp.
Once you’ve got the picture, the design process is surprisingly simple. You upload the image, choose the lamp size, and decide on brightness levels. For inspiration, see Custom Photo LED Lamp Ideas: 5 Creative Ways to Light Up Your Memories where we showcase everything from a romantic “first‑date” moon to a playful pet‑themed glow.
Real‑world example: Sarah, a new mom, turned a photo of her newborn’s tiny hand into a moon lamp. She placed it on the nursery shelf, and the soft glow helped soothe bedtime routines, cutting the need for a separate night‑light. Another story: Mark surprised his partner with a collage of their hiking adventures; the lamp now sits on their bedside table, sparking conversation every night.
Ready to try it yourself? Here’s a quick checklist: 1️⃣ Choose a high‑resolution, well‑lit photo. 2️⃣ Crop to a square so the moon’s surface isn’t distorted. 3️⃣ Pick the size that fits your space (8‑inch works for most night‑stands). 4️⃣ Set the brightness—lower for a calming ambiance, higher for a brighter accent. 5️⃣ Order and let the lamp arrive; you’ll have a ready‑to‑plug piece of art in a few days.
So, if you’re looking for a gift that feels heartfelt and functional, the custom photo moon lamp checks both boxes. Let’s light up those memories together.
TL;DR
A custom photo moon lamp turns your favorite memory into a glowing, personalized night‑light that adds sentimental charm and gentle illumination to any room.
It’s simple to create – choose a square photo, pick the right size and brightness, order from heartful.gifts, and enjoy a unique décor piece in days.
Step 1: Choose Your Photo and Prepare It
First thing’s first – you need a picture that will actually look good when it’s wrapped around a sphere. It’s tempting to grab any snapshot from your camera roll, but a blurry selfie or a photo taken in low light will just turn into a fuzzy moon‑like smudge.
Think about the moment you want to capture. Is it a newborn’s sleepy grin, a wedding dance, or your dog’s tongue‑out grin? Choose a photo where the subject is centered, the background isn’t too busy, and the lighting is even. In our experience, a well‑lit portrait taken outdoors in the golden hour or a nicely exposed studio shot works best.
Here’s a quick sanity check: zoom in on the image on your phone. Do you still see clear details, like eyes, textures, or distinct colors? If you have to squint, pick a different shot. High‑resolution files (at least 1500 × 1500 px) give the lamp enough pixels to render crisp lunar craters and vibrant hues.
Crop it square – no more, no less
Custom photo moon lamps are printed on a perfect sphere, so the design tool will automatically crop your image into a circle. The safest way to avoid distortion is to start with a square canvas. Most photo editors let you set a 1:1 aspect ratio; aim for a composition where the main subject sits roughly in the middle.
Pro tip: leave a little breathing room around the edges. When the lamp glows, the image wraps around, and a tight crop can make the subject look cut off at the poles.
Mind the color palette
Because the lamp uses LED lighting, very dark blacks can disappear into the shadow, while overly saturated reds might bleed. If you notice a photo that’s too dark, brighten it slightly in a free editor or choose a different picture. Subtle contrast boosts help the image pop without looking artificial.
Another thing to watch: reflective surfaces.
A picture with a glossy screen or a lot of water can create unwanted glare once printed. Opt for matte fabrics or natural skin tones for the cleanest result.
File format and size
Save your final square as a JPEG or PNG with a maximum file size of 5 MB. JPEGs keep the file lightweight, while PNGs preserve every detail if you’ve done a lot of editing. Avoid PDFs or RAW files – the upload tool won’t accept them.
Once you’ve got the perfect file, head over to our step‑by‑step design guide for the exact upload process, size options, and brightness settings.
Final checklist before you click “order”
- High‑resolution, well‑lit image (≥1500 px square)
- Centered subject with some breathing room
- Adjusted brightness and contrast for LED lighting
- Saved as JPEG or PNG under 5 MB
- Square aspect ratio (1:1)
Run through that list, and you’ll feel confident that the lamp arriving at your door will look exactly like the memory you imagined. It’s amazing how a small tweak – like brightening a shadow or cropping a little wider – can turn a decent photo into a stunning, glowing keepsake.
Ready to see your favorite moment floating on a moon? Just hit upload, pick your size, and let us handle the rest. In a few days you’ll have a night‑light that’s not just functional, but a personal piece of art that lights up the whole room.
Step 2: Select Moon Lamp Size and Material Options
Why size matters (and how to pick the right one)
Picture the night‑stand in your bedroom. Is it a tiny side table that barely holds a book, or a chunky piece that anchors the whole room? The lamp you choose should feel like it belongs, not like an awkward garnish.
In our experience, an 8‑inch lamp slides perfectly onto most night‑stands – it’s big enough to make the photo pop, yet small enough not to dominate the space. If you have a larger dresser or a mantle, a 10‑inch or even 12‑inch sphere can become a conversation starter.
But what if you’re decorating a nursery or a cramped home office? A 5‑inch mini lamp (think "pocket moon") can add a soft glow without taking up precious real‑estate. Real‑world example: a new‑parent friend of ours chose a 10‑cm mini lamp for the baby’s crib. The gentle white light was just bright enough for nighttime feedings, and the tiny size kept the crib safe.
Material choices – plastic vs. resin vs. wood‑grain finish
Most custom photo moon lamps are printed on a durable plastic shell that mimics the lunar surface. It’s lightweight, shatter‑resistant, and easy to clean – perfect for families with kids or pets. If you crave a more premium feel, some vendors offer a matte resin finish that feels a bit heavier and gives the lamp a slightly more “art‑gallery” vibe.
We’ve also seen a growing trend of wood‑grain coated shells. They add a natural warmth that blends nicely with rustic décor. The downside? They can be a touch pricier and may show fingerprints more readily. A quick tip: keep a microfiber cloth handy and wipe the surface gently every few weeks.
Brightness settings – finding the sweet spot
Most lamps come with three to five preset brightness levels. For a calming bedtime routine, the lowest setting (around 30 lumens) creates a moon‑like hush. If you want the lamp to double as a night‑light for a child’s room, bump it up to medium (≈70 lumens). And for a romantic dinner or a cozy movie night, the highest setting (≈120 lumens) can add just enough sparkle without blinding anyone.
One of our customers, a spouse who set up a home‑theater corner, chose the highest brightness. He reported that the lamp’s glow made the room feel intimate while still showcasing his favorite travel photo on the moon’s surface.
Step‑by‑step checklist for size & material
1️⃣ Measure the surface where the lamp will sit. Add a half‑inch margin to ensure clearance.
2️⃣ Decide on the vibe: modern plastic for a sleek look, resin for a luxe feel, or wood‑grain for rustic charm.
3️⃣ Choose a size that matches the space – 5 cm for tiny spots, 8‑inch for most bedside tables, 10‑inch+ for larger shelves.
4️⃣ Test brightness levels in the room’s actual lighting. Most vendors let you preview the glow on a virtual mock‑up.
5️⃣ Confirm the material’s care instructions – plastic wipes clean, resin may need a gentle polish, wood‑grain benefits from occasional oiling.
Quick comparison table
| Option | Ideal Space | Key Benefits |
|---|---|---|
| 5 cm Mini (plastic) | Nursery, desk corners | Ultra‑compact, safe for kids, low power draw |
| 8‑inch Standard (plastic) | Typical night‑stand, bookshelf | Balanced size, easy to handle, versatile look |
| 10‑inch+ (resin or wood‑grain) | Large dresser, mantle, living‑room shelf | Premium feel, richer texture, stronger visual impact |
Expert tip – combine size with photo composition
When you pick a larger lamp, you have more surface area for detail. That means a group photo or landscape can retain clarity. Conversely, a tiny lamp works best with a single‑subject close‑up – think a baby’s hand or a pet’s face. If you’re unsure, upload a preview and zoom in; most design tools will show you how the image wraps around the sphere.
Finally, remember that the lamp’s material can affect how the photo’s colors appear. Plastic tends to produce a slightly cooler tone, while resin can make warm hues pop a bit more. Play with the preview’s color balance if the vendor offers that option.
Take a breath, measure your space, pick a material that matches your style, and set the brightness you’ll love at night. With those choices locked in, you’re just one click away from turning a memory into a glowing keepsake that fits perfectly into your home.
Step 3: Upload, Position, and Preview Your Design
Alright, you’ve already picked the perfect photo and decided on size. Now comes the part that feels a little like assembling a puzzle – you upload the image, line it up just right, and take a quick peek at how it will look once the lamp glows.
1️⃣ Upload – keep it simple
Most custom photo moon lamp platforms, including ours at heartful.gifts, let you drag‑and‑drop the file straight into the design window. If the file is larger than 10 MB, the tool will usually prompt you to compress it – don’t worry, the quality loss is minimal for a night‑light.
Pro tip: use a PNG if your picture has a lot of subtle gradients or a JPEG if you’re short on file size. The upload screen will often show a thumbnail so you can confirm you chose the right file before you move on.
2️⃣ Position – where does the subject sit?
Here’s where the magic happens. The design interface typically shows a 3‑D sphere that you can rotate with your mouse. Drag the image until the main subject – a smiling face, a tiny paw, a sunrise – lands right in the center of the front hemisphere. If you notice the edges getting cut off, try zooming out a bit or shifting the crop inside the tool.
Think about it like framing a picture on a wall. You wouldn’t want the head cut off, right? A quick way to check is to toggle the preview between a light background (day mode) and a dark background (night mode). The contrast shift often reveals if any part of the image is slipping off the edge.
And don’t forget to experiment with rotation. A slight tilt can make a portrait feel more dynamic, especially if the original photo was taken straight on.
3️⃣ Preview – the sanity check
Before you hit “order,” hit the preview button. The tool will render a realistic rendering of the lamp, complete with the chosen brightness level. Look at it from a distance – does the photo still read clearly? If the details look fuzzy, it’s a sign the resolution isn’t high enough or the image is too busy for the sphere’s curvature.
Imagine you’re holding the lamp in a dim bedroom. Does the face still smile? Does the color balance feel warm or cool? Most platforms let you tweak the hue or brightness of the preview, which can be handy if the lamp material (plastic vs. resin) shifts the tones a bit.
One thing we’ve seen often: people love a vibrant sunset photo, but the preview shows the reds turning pink under the lamp’s LED. In that case, dialing the color temperature a notch down in the preview can bring it back to the original vibe.
When you’re satisfied, take a screenshot of the preview for your own reference – it’s a nice way to compare the final product with your expectations once it arrives.
That video walks you through the exact same steps on our design portal, so you can see the drag‑and‑drop, rotation, and preview in action. If anything looks off after the video, pause and try the adjustment yourself – the interface is forgiving and you can always re‑upload.
Quick checklist before you click “order”
- File type: JPEG or PNG, under 10 MB.
- Resolution: at least 1500 × 1500 px for a crisp sphere.
- Subject centered: rotate the 3‑D preview until the main detail sits front‑and‑center.
- Contrast check: toggle light/dark background in preview.
- Color balance: adjust if the lamp material skews tones.
- Screenshot the final preview for peace of mind.
Once that checklist is green, you’re officially one step away from turning a cherished memory into a glowing keepsake that fits perfectly on a night‑stand, mantle, or baby’s nursery. And because the preview is a true‑to‑life rendering, you can order with confidence, knowing exactly what will light up your space.
Step 4: Order, Shipping, and Care Tips
Now that your design looks exactly how you want it, it’s time to hit that “order” button without a second‑guess. It feels a little like sending a postcard to your future self – you’ve done the creative work, now you just trust the process.
Placing your order
When you’re ready, double‑check the checkout page for two things: the correct lamp size and the brightness level you settled on in the previous step. If you’re a gift buyer, add a short note in the “gift message” field – we’ve seen spouses write “For the night you stole my heart” and it makes the unboxing feel personal.
Don’t forget to review the shipping address. A tiny typo can send your moon lamp to the wrong doorstep, and nobody wants that surprise. If you’re ordering for a parent’s house, consider using a saved address if the site offers one – it speeds things up and cuts down on errors.
Shipping options and timing
Most of our customers choose the standard 3‑5 day delivery because the lamp is printed and assembled in‑house, so it usually ships the same day you order. If you’re racing against a birthday or anniversary, we also offer an express upgrade that gets the package to you in 1‑2 days for a small extra fee.
Shipping is free for orders over a certain amount (check the banner at checkout). That’s a nice little perk for larger gifts, like a set of three different photo moons for a family’s living room.
Once the package leaves the warehouse, you’ll receive a tracking number via email. I always recommend keeping an eye on the status, especially if the delivery window falls on a weekend – sometimes carriers hold the parcel at a local hub until Monday.
Unpacking & first light
When the box arrives, open it carefully – the lamp is nestled in a molded foam insert to protect the delicate print. You’ll find the lamp, a USB‑C power cable, and a brief care card. Plug the lamp into any USB‑C charger (your phone charger works fine) and watch the image come alive.
Take a moment to rotate the lamp in dim light. Does the photo read clearly? If the brightness feels too harsh, most models have a button that cycles through the preset levels. You can also adjust the color temperature on some versions – a warmer tone is perfect for bedtime, while a cooler hue works well as a night‑stand accent.
Care & maintenance
Because the surface is a smooth plastic or resin shell, cleaning is a breeze. Grab a soft, lint‑free cloth and wipe gently; avoid abrasive cleaners or rough sponges, which can scratch the finish. If you notice dust buildup in the crevices, a quick puff of compressed air does the trick.
For parents with little hands, the lamp’s low power draw (under 3 W) means you can leave it on safely for hours. Just make sure the cord isn’t tucked under a rug where a pet might chew it – a short cord length reduces that risk.
Seasonal tip: during the holidays, store the lamp in its original box if you’re not using it daily. The foam insert keeps the print from rubbing against anything, preserving the vibrant colors for next year’s celebrations.
And if you ever need a replacement part – say the USB‑C port gets a little loose – our support team is just an email away. We’ve shipped replacement cables dozens of times and it’s usually resolved in a day.
So, you’ve ordered, the lamp’s on its way, and you know how to keep it looking fresh. That’s the whole journey from a memory on your phone to a glowing keepsake on your night‑stand.
Enjoy the soft glow, and remember: every time you turn it on, you’re lighting up a moment that matters.
FAQ
What size custom photo moon lamp should I choose for a night‑stand?
Most gift‑buyers find an 8‑inch lamp fits a typical night‑stand perfectly – it’s big enough to showcase the photo but not so bulky that it overwhelms the space. If you’re working with a tiny bedside table or a nursery shelf, the 5‑inch mini version does the trick. For larger surfaces like a mantle or a living‑room console, step up to 10‑inch or bigger for a real visual impact.
How do I clean a custom photo moon lamp without damaging the image?
Because the shell is usually smooth plastic or resin, a soft lint‑free cloth does the job. Just wipe gently; avoid paper towels or abrasive cleaners that could scratch the printed surface. If dust settles in the crevices, a quick puff of compressed air works wonders. For resin finishes, a dab of mild soap on the cloth can restore shine, but rinse with a dry cloth right after.
Can I use any photo, or are there restrictions for the custom photo moon lamp?
You can upload most common formats – JPEG or PNG – as long as the file is at least 1500 × 1500 px. Low‑resolution selfies tend to look blurry once wrapped around the sphere, so pick a well‑lit, high‑resolution shot. Keep the subject centered and avoid busy backgrounds; simple scenes let the carving process capture details without ghostly edges.
Is the custom photo moon lamp safe to leave on overnight?
Absolutely. The LED draws under 3 W, which means it stays cool and uses minimal electricity. That low power draw lets you run it for hours without worrying about overheating. Just make sure the USB‑C cable isn’t hidden under a rug where a pet could chew it, and place the lamp on a stable surface away from flammable materials.
What if the USB‑C port gets loose or the lamp stops working?
Our support team at heartful.gifts is just an email away. In our experience, a loose port is usually fixed with a replacement cable, which we ship out the same day. Keep the original packaging – the foam insert protects the lamp during transit, and it makes it easy to send the unit back if you need a deeper repair.
Do custom photo moon lamps work with standard phone chargers?
Yes, the USB‑C port is universal. Any modern phone charger, power bank, or laptop USB‑C outlet will power the lamp. If you prefer a permanent setup, you can plug it into a USB wall adapter – just choose one that supplies at least 1 A for reliable brightness. The lamp’s built‑in controller handles the voltage, so you won’t notice any flicker.
How long does it take to receive a custom photo moon lamp after ordering?
Most orders ship the same day we receive the design, and delivery takes 3‑5 business days with standard shipping. If you’re racing against a birthday or anniversary, we offer an express option that gets the lamp to you in 1‑2 days for a small extra fee. Tracking info lands in your inbox, so you can watch the journey from our studio to your doorstep.
Conclusion
So, you’ve trekked from the first blurry selfie to a glowing memory perched on your night‑stand. In our experience, the moment you switch that custom photo moon lamp on is the tiny celebration we all need after a long day.
Remember the three things that made it click: a high‑resolution, well‑lit photo; the right size and material for your space; and a quick preview that lets you tweak the placement before you hit order. If any of those steps felt shaky, go back and fine‑tune – a few extra seconds now save you a fuzzy lamp later.
What’s next? Grab that favorite snapshot you’ve been scrolling past, follow the checklist, and place your order with confidence. The lamp will arrive in a few days, ready to become the backdrop for bedtime stories, anniversary whispers, or just a quiet moment for yourself.
And here’s a quick tip: keep the original foam insert and packaging. It’s the safest way to ship a replacement if the USB‑C port ever gets loose, and it preserves the lamp for future moves or gifting.
We’re excited to see how you’ll light up your memories. When the soft glow fills the room, know that you’ve turned a simple photo into a lasting piece of heart‑felt décor.